Hello, welcome to the Stampin’ Pretty Pals’ Blog Hop! This month our Design Team created projects showing “My Favorite Things” from any of the two current catalogs or the upcoming catalog in January. We hope you enjoy and will be inspired by them! Don’t forget to leave comments! We love hearing from you. At the end of my post, you will find the full line-up to help you “hop” along from Pal to Pal.
Have a Hoot Christmas Owls
First, let me start by saying that I love these owls! I’ve made many Halloween cards with them and am enjoying making Christmas cards as well. Add the new way to make easy-peasy shaker cards (you can see Monday’s card here), and I am in heaven right now. This card actually is from the just closed Freshly Made Sketches, and Color Throwdown challenges. However, I can still make the Tic-Tac-Toe Challenge # 092. I liked the card so much that I decided to hold off on it for this Blog Hop.
Here’s my card:
Here are the challenge banners:
Measurements and Such
The Merry Merlot base measures 4-1/4 by 11 inches, scored at 5-1/2 inches to create a tent card.
I started with two pieces of 5-1/2 by 4-1/4 inches of Whisper White. After I ran one piece through the Big Shot in the Woodland embossing folder, I trimmed it to 4-1/8 inches by 5-3/8 inches for the front. As always, I trimmed the inside piece to 5-1/4 inches by 4 inches.
While I had the white out, I cropped a piece using the largest square from the Stitched Shapes die set. I also grabbed a scrap piece of white for the sentiment.
The DSP for the bottom square and the envelope flap comes from the gorgeous 6 x 6 Classic Christmas DSP. I trimmed the piece for the envelope flap to 6 inches by 2-1/2 inches. I cropped the piece for the front of the card using the same die I used for the white square.
Now that I had all my pieces ready, it was time to start assembling.
Assembly Required, but Still Easy-Peasy
Following the Freshly Made Sketches challenge, my sentiment needed to be a strip. I chose the Merry Christmas sentiment from Snowman Season and needed to use my Stamp-aratus. After using my embossing buddy on the scrap of white cardstock, then stamped the sentiment using Merry Merlot ink. Next, I cleaned the stamp and restamped the sentiment using VersaMark. Then, I covered it in clear embossing powder and heat set the sentiment.
I trimmed the sentiment strip to 7/8 inch by 4 inches. Then, I could use the Banners Pick a Punch for the chevron end of the strip. I used the Label Me Fancy punch for the ribbon end of the sentiment strip and added a piece of Snowflake Splendor ribbon.
Then it was time for the easy peasy shaker. I stamped the owl family on my white square of cardstock. I stamped another on a scrap piece of white. Following the Color Throwdown colors, I used Soft Suede blends for the branch right on the square. I colored the owls on the scrap paper using Crumb Cake light blend. Their hats are light Cherry Cobbler for the bottom band and dark Cherry Cobbler for the top part of the hat.
I used the clear medium envelopes to make the shaker part of the card. I tried to make (my first posted) video of how to make this easy-peasy shaker card, but it wasn’t good at all. So, please see this post for written directions and Connie Stewart’s video. So easy!
Back to the Pals’ Blog Hop!
More inspiration awaits! Use the Blog Hop Line-up below to visit the rest of this month’s Design Team. My fellow Pals are excited to show you what they’ve created! Mark your calendars for our next blog hop on January 13th when our theme will be Time to Sale-A-Brate. Participants will showcase tags or 3D items that will be great for gifts for any occasion. Don’t miss the fun! Until then, please stay safe and have fun in your craft room.
Hello, welcome to the Stampin’ Pretty Pals’ Blog Hop! This month our Design Team’s theme is “Tag, You’re It” – tags or 3D projects to get you inspired for the upcoming gift season. We hope you enjoy and will be inspired by them! Don’t forget to leave comments! We love hearing from you. At the end of my post, you will find the full line-up to help you “hop” along from Pal to Pal.
I created a set of five Playful Pets cards, with envelopes, and a gift box to hold them. I’ve already mailed this boxed set to an animal rescue in North Dakota to use as part of their fundraising silent auction.
Here’s the gift box, which is made from DSP:
I used the Playful Alphabet die set with two layers of the adhesive sheets to create the eclipse part of the card.
Here are the five cards stored inside the box:
The Gift Box
I’ve got the whole set-up to start filming videos and I really need to do that ASAP. For this blog, however, I took pictures of measurements and each step for creating the box. I figured a picture is worth a 1,000 words, so enough of them would be much better than trying to explain in words.
I used a piece of Crumb Cake and Pool Party for this sample box so the measurements, lines, etc. would be easier to see.
Here’s the gift box, step-by-step:
BOX TOP
For some strange and unknown reason, I didn’t take a picture after I put the tear and tape strips on the box. However, the bottom of the box is put together the same way as the top. The difference is that the bottom has an angled side, aAs you can see below.
BOTTOM OF THE BOX
I hope these pictures are truly worth a thousand words. Try it! If you are following the blog hop, you can trim, score, use adhesive, and fold. Simple as that. Truly.
Back to the Pals Blog Hop
More inspiration awaits! Use the Blog Hop Line-up below to visit the rest of this month’s Design Team. My fellow Pals are excited to show you what they’ve created! Mark your calendars for our next blog hop on November 11th when our theme is “Pile It On!” Participants will showcase projects with lots of layers, embellishments and/or texture. Don’t miss the fun! Until then, please stay safe and have fun in your craft space.
Hello, welcome to the Stampin’ Pretty Pals’ Blog Hop! This month our Design Team is showcasing “My Happiest Season.” We hope you enjoy and will be inspired by them! Don’t forget to leave comments! We love hearing from you. At the end of my post, you will find the full line-up to help you “hop” along from Pal to Pal.
Here’s my card for the hop:
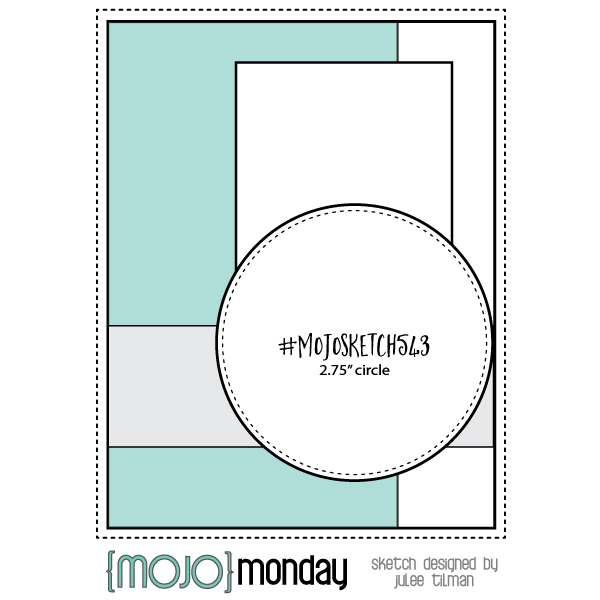
Mojo Monday gave me the layout for this card. Here’s the challenge banner:
My Happiest Season
Just what is my happiest season? I’ve been thinking about this for a couple of weeks and I am still not sure which season makes me the happiest. However, when I saw the August to December mini-catalog, I immediately knew which stamp set, out of all the beautiful stamps sets, made me happiest. You see, I love the Grinch, always have, and have a whole Grinch thing going on for Christmas. I know how long it took Dr. Seuss to write it (45 minutes), that he wrote it poolside on vacation in Africa, and that he’d thought of doing that book for years. He was up against a deadline and needed a book. How the Grinch Stole Christmas became that book.
I do need to say that I had to take a kiddie lit class for my master’s degree. Dr. Seuss was the topic of my major paper for that class. I can give you more information about him than you would ever want to know.
All that to say that the Christmas Means More stamp set makes me very, very happy. Not only does it include a Grinch sentiment, there’s also three other classic Christmas movies in the set: Miracle on 34th Street, Elf, and It’s a Wonderful Life.
What I Decided
#MojoSketch543 really turned out to be the perfect sketch for this card. I chose Grinch colors of Garden Green, Granny Apple Green, and Real Red. My DSP choices all came from either the Regal 6″ x 6″ DSP or the Brights 6″ x 6″ DSP.
The sentiment circle was cropped from the largest circle Stitched Shape die. This circle perfectly fit the Grinch sentiment. Originally, I stamped the sentiment in Real Read and embossed it with clear embossing powder. That did not work at all. Then I decided I would try the Garden Green ink. However, I didn’t want the holly berries to be green. It was actually much easier to get the two colors since I used my Stamparatus. Looking back, I probably did it the hardest way possible. I inked up the sentiment in Garden Green. Then, I very carefully wiped off the green ink from the berries then carefully colored them using the Real Red Stampin’ Write Marker. I repeated that process two more times to get the depth of color I wanted. Then I used the brush end of my Real Red marker to color the border of the circle.
Measurements:
The card base is Real Red. I cut the cardstock to 4-1/4 inches by 11 inches, scored at 5-1/2 inches.
The white cardstock background measures 4 inches by 5-1/4 inches. I ran it through my BigShot using the Subtle embossing folder.
I cut the Granny Apple Green DSP to 2-1/4 inches by 3-1/2 inches.
The Real Red DSP was cut to 3 inches by 4-1/8 inches.
I thought I needed something to border each piece but I didn’t want to add more paper. Therefore, I tapped each edge onto my StazOn Cotton White ink pad.
Next, I wrapped a length of the Polka Dot Tulle ribbon around the Garden Green DSP and tied it in a square knot.
Even though I usually don’t have much luck with the bunny ear method, I used it to tie a small bow using the Playful Pets Real Red ribbon. I used a glue dot to attach the bow to the Polka Dot Tulle square knot.
When I had all my pieces, I simply used the multipurpose liquid adhesive to attach everything except the sentiment. I used dimensionals to pop up the sentiment circle.
Inside and Envelope
Since the Garden Green ink worked so well on the front of the card, I used it on the sentiment on the inside of the card and the “Merry Christmas” stamp on the front, bottom, left-hand corner. Both of these sentiments can be found in the Perfectly Plaid stamp set.
Next, I cut the Whisper White cardstock to 4 inches by 5-1/4 inches.
The DSP strip at the bottom of the inside measures 1/2 inch by 5-1/4 inches.
Finally, I used the Real Red DSP for the envelope flap, which measures 6 inches by 2-9/16 inches. However, I just measure out one tick line from the 2-1/2 inch mark.
With that, I’d finished this Christmas card/envelope set. I see creating many more of these in the near future!
Back to the Pals Blog Hop Information:
More inspiration awaits! Use the Blog Hop Line-up below to visit the rest of this month’s Design Team. My fellow Pals are excited to show you what they’ve created! Mark your calendars for our next blog hop on September 9th when our theme is “It’s the Sentiment that Counts.” The Design Team will showcase a sentiment as the focal point of their project. Don’t miss the fun! Until then, please stay safe and have fun in your craft room.
There’s a bundle I really, really want and have decided I am going to use my bonus day coupons toward the purchase of this Blossoms in Bloom bundle! It’s so gorgeous, and the cards I’ve seen using it are all stunning. Check this out:
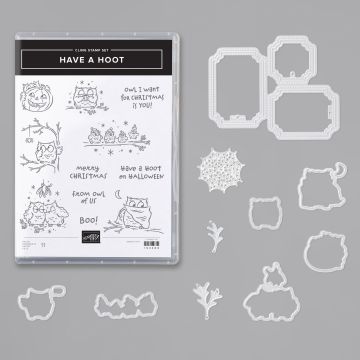
Have a Hoot Cling Stamp Set and Dies
Just look at all this adorableness!
How in heaven’s name did I miss the die set when I ordered the stamp set? An order will be placed ASAP!!!!
Take a sneak peek at the September Paper Pumpkin, available to order now!
This looks like a super cute and fun all inclusive Halloween kit!
Again, thank you for stopping by my blog today! I appreciate your time, and enjoy reading, and responding to, comments.
Hello, welcome to the Stampin’ Pretty Pals’ Blog Hop! This month our Design Team is showcasing “Gifts From the Garden.” We hope you enjoy and will be inspired by them! Don’t forget to leave comments! We love hearing from you. At the end of my post, you will find the full line-up to help you “hop” along from Pal to Pal.
A Fun Fold with Flowers for Every Season
This 6 x 6 inch DSP pack contains 12 double-sided pages for a total of 24 different patterns. I have a strong suspicion that I will be buying another pack of this DSP soon.
Here’s my fun fold card:
The first picture is the outside of the card, and the second is the first layer. The third is the sentiment inside, and the fourth shows the gift card pocket on the inside of the card.
Here’s the challenge banner for the Paper Players Challenge # 498:
Fun and Fancy Fold
When layering mats on the outside of cards, I like to step down the measurements by 1/8 inch on the length and width of each layer. For the inside panels of a card, I usually step down by 1/4 inch on the length and width.
I first saw this fun fold in a video by Lisa Curcio and loved it. I’d already created two different cards for this blog hop, but when I saw this one, I realized I would be creating a third, and final, card.
Measurements, and a Bit More
I’ve included the measurements and cuts needed for each piece of the card.
Just Jade base of the card: 6-1/4 inches by 5-1/2 inches. Score at 4-1/4 inches.
Whisper White inside of the card: 8 inches by 5-1/4 inches. Score at 4 inches.
Just Jade cardstock panels: 2-3/4 inches by 3-1/2 inches. Cut 2.
Poppy Parade cardstock panel piece for front: 1-7/8 inches by 5-3/8 inches. Cut 1.
Poppy Parade cardstock pieces for sentiment blocks: 2-1/2 inches by 3-3/8 inches. Cut 2.
DSP panel for front: 1-5/8 inches by 5-1/4 inches. Cut 1.
DSP for sentiment blocks: 2-5/8 inches by 3-1/8 inches. Cut 2.
DSP for inside flap of Just Jade base: 1-7/8 inches by 5-3/8 inches.
Just Jade for the gift card pocket: 5-1/4 inches by 3 inches. Score at 2-5/8 inches.
DSP for envelope flap: 2-3/4 inches by 6 inches.
Whisper White scraps for sentiment blocks.
Putting It Together
I may not have put the card together the easiest way, but I learned a couple of things along the way.
Here are the steps I took:
Attached the white inner card to the inside of the Just Jade base. Make sure not to put the scored white fold directly on top of the base fold. I only moved the white base over by 1/16 inch. Therefore, it’s very, very close but not on the base fold.
Next, I layered the DSP on the Poppy Parade pieces, then adhered those layers to the corresponding Just Jade layer.
Attached the DSP to the back flap for the front of the Just Jade base.
At this point, I realized I wanted some bling on the DSP without adding any rhinestones. So, I grabbed my clear Wink of Stella pen and colored just the Poppy Parade flowers on all the DSP pieces. Luckily, the sentiment blocks create a sense of a border on both DSP pieces.
Back to putting the card together.
The next steps need to be done in order or you might have a problem lining up both DSP/sentiment blocks.
Figure out where you want the inside DSP panel to live on your card. I tried to get my panel centered as much as possible.
Close the front Just Jade flap over the front of the white cardstock. Carefully line up the top sentiment block right over the inside sentiment block. I used tear-and-tape to adhere just the left side of the top block to the card flap. DON’T put adhesive on the whole piece or your card won’t open properly.
Now it’s time to stamp. YEAH!
One Card, Three Stamp Sets
After deciding to stamp sentiments in Poppy Parade, I used the Peaceful Moments cling stamp set for the front “Happy Birthday” and inside “Wishing you every happiness this special day will bring”. The rectangle stitched die cropped the birthday sentiment. Happily, I found that the inside sentiment fit perfectly inside the Stitched So Sweetly die. The inside sentiment was adhered using the multipurpose liquid adhesive. I used dimensionals for the birthday sentiment.
I picked the other two sentiments from the Special Someone stamp set. The Classic Label Punch framed these two sentiments. These two sentiment parts allowed me to stagger them on the DSP between the sparkly Poppy Parade flowers. Both of these pieces are popped up on mini-dimensionals. In hindsight, I probably shouldn’t have popped them up. However, I’m happy, so I left it alone.
The Ornate Style stamp set provided the corner decorations for which I was looking. Since I’d used Poppy Parade for the sentiments, I used Just Jade for the corner flourishes. The result of these flourishes is exactly what I thought would be finishing touches.
Finishing Up
I really enjoy using ribbon on cards, and this one needed a ribbon as well. The Just Jade ribbon is thin enough to fit right on the front flap, especially since I tied it in a square knot.
Then, all I needed to do was adhere the DSP to the envelope flap and trim it down. With that, I’d finished this fun fold card/envelope set.
Back to the Pals Blog Hop
More inspiration awaits! Use the Blog Hop Line-up below to visit the rest of this month’s Design Team. My fellow Pals are excited to show you what they’ve created! Mark your calendars for our next blog hop, which will be August 12th when our theme is “My Happiest Season.” The Design Team will showcase projects inspired by their favorite seasonal time of the year.Don’t miss the fun! Until then, please stay safe and have fun in your craft room.
Hello, welcome to the Stampin’ Pretty Pals’ Blog Hop! This month our theme is the “new 2020-2022 In Colors.” The Design Team is showcasing the new family of In Colors from the new catalog. We know you will love them as much as we do! At the end of my post, you will find the full line-up below to help you “hop” along from Pal to Pal.
Celebrate Sunflowers!
I ordered this bundle during the demonstrator pre-order time period and wanted to use it for this blog hop. However, I don’t have the new In Color inks yet (but they are on the way) so I have been trying to figure out what to do with the bundle. I’ve already posted sunflower cards, and you can see those links here, and here, and here.
Both these cards incorporate four of the five new In Colors: Bumblebee, Cinnamon Cider, Just Jade, and Moonlight Madness, which is my favorite right now.
First, here’s my “regular” card:
For this sunflower, I used the Momento Tuxedo Black to stamp on Bumblebee cardstock. Then I added some white embossing powder to the black and used my heat tool to set the embossing powder. I still thought the flower looked unfinished, so I cropped the detailed sunflower out of vellum. Lining up the die cut on the sunflower can be interesting, so be patient; the results are so worth it. I cropped and adhered the flower center from a piece of Cinnamon Cider DSP.
Card # 2
The next card is a fun fold using basically the same elements, but with a pretty big difference in the sunflower.
Here’s that card:
On this version, I stamped the sunflower in Crumb Cake on the Bumblebee cardstock. I didn’t emobss anything, just simply added a sunflower cropped from vellum. Then I added another cropped Cinnamon Cider center to this flower as well. I’m getting my inks, markers, and blends on my next SU! order. They should be arriving early next week. Then I will be able to play some more with the sunflowers. I saw a picture of a Chocolate Cherry sunflower on Pinterest and am really looking forward to trying that out!
The rest of the elements on the front of the cards are the same.
What’s the Same?
Both cards use Cinnamon Cider for the base of the cards. I used the new Tasteful Textile 3D embossing folder for the Whisper White background.
Both cards also have Moonlight Madness DSP across the bottom. I knew I needed to do something across that blue DSP to tie the card together, but ribbon didn’t work. That’s when I grabbed this Bumblebee piece of DSP from the Flowers for Everything DSP 6 x 6 stack. The result of that strip of DSP worked better than the ribbon, in my humble opinion.
I used Crumb Cake to stamp the leaves on Just Jade, then used the dies to crop them out. Each card has six leaves in two groups: one large and two small per group.
Forever Fern
This sentiment is from the new Forever Fern stamp set. It’s very versatile, so this card can be for a new job, leaving an old job, going to college, fighting a medical condition, etc. I stamped the sentiment in Crumb Cake on Whisper White and then used the stitched rectangle dies to crop it out. Since I knew I wanted the sentiment to overlap the flower, I needed a larger label. Enter the Stitched So Sweetly dies. This size label fit the space thought I needed to fill.
What’s Different?
The fun fold! If I remember correctly, this fold is a kind of Dutch door fold. After scoring the 4-1/4 x 11 at 5-1/2 inches, I very carefully trimmed off the top 1-3/4 inches to create the flap. Because of the original layout, the front of both cards look just about identical. But when you open the card…
The back of the front of the card is very different! I didn’t want cardstock showing on the inside, so I used more DSP from the Flowers for Everything stack. I love that the four colors on the front of the card are the same as the four on the inside of the card. One big tip to share —— be careful which side is up when you use the dies! Since I wanted these sides of the two DSP patterns to show, I had to place the reverse side DOWN when cropping. After I took care of the backs of the flowers and leaves, I thought I couldn’t leave the inside flap of Cinnamon Cider plain cardstock either. Therefore, I grabbed another piece of the In Color 2020 – 2022 DSP. I wanted the DSP to be subtle on the inside, so I chose this Cinnamon Cider DSP pattern.
Different Inside as Well
In order to leave room for a note on the inside, I only dry embossed the top part of the Whisper White for the fun fold version. I wanted something on the bottom half of the card, so I stamped off Crumb Cake and stamped part of the sunflower on the white cardstock. Even after I stamped it off, the Crumb Cake was still too dark. Therefore, I grabbed my Tombow sand eraser for ink. If you don’t have one of this little wonders, you need to get one. I got mine on Amazon. Love! I was able to very, very carefully and lightly sand off enough of the ink to create this light sunflower image.
After finishing both cards, I only needed to add Moonlight Madness DSP to each of the envelope flaps. I also stamped some Crumb Cake partial sunflowers on the bottom of the front of the envelope. With that, the two card/envelope sets were complete.
Back to the Pals’ Blog Hop Information:
More inspiration awaits! Use the Blog Hop Line-up below to visit the rest of this month’s Design Team. My fellow Pals are excited to show you what they’ve created! Mark your calendars for July 8th – Gifts from the Garden when the design team will showcase cards or gift ideas from treasures found in the garden.
Don’t miss the fun! Until then, please stay safe and have fun in your craft room.
Just look at this joining incentive offered by Stampin” Up!
As always, you can choose $125 worth of product for $99, get free shipping, and now you can add a FREE BUNDLE! A FREE BUNDLE, as in the most expensive bundle in the 2020 – 2022 catalog! That’s up to a $60 bonus just for joining! Basically, that’s $85 of free product, plus no shipping costs!
I’d love to discuss this opportunity with you!
Again, thank you for stopping by my blog today! I appreciate your time.
Hello, welcome to the Pals Blog Hop! This month our theme is “Goodbye to January-June Mini and 2019-2020 Annual Catalogs and Hello to 2020-2021 Annual Catalog” where the Design Team is showcasing their favorites from the retiring catalogs or products in the new catalog! You’ll find the full line-up below to help you “hop” along from Pal to Pal.
The Inspiration and Sunday Stamps 230
A co-worker has been asking me to make cards for all of his needs for the past year or so. In May, 2019, I made a Mother’s Day, anniversary card for his parents, and birthday card for his mom. We were texting on Friday, and I said I could make his mother a birthday card and mail it to him. His mom’s favorite color is blue, so I chose Seaside Spray for this year’s card.
I’d been trying to figure out a card for the Sunday Stamps 230 card challenge and decided this would work. For this card, I would simply create a mirror image of the sketch.
Here’s the sketch challenge banner:
Here’s my card for the Pals Blog Hop, Sunday Stamps, and my colleague’s mother:
I used the new to me (because of a backorder) Poppy Moments die set for something new. Something old is the retiring In Color 6 x 6 DSP. Happily, the poppy dies and sentiments stamps will both carryover. I specifically used the Seaside Spray Metallic Ribbon from the holiday catalog. Demos knew that this beautiful ribbon would be carrying over. However, imagine my surprise to find it in the 2020 – 2021 catalog! I really thought it would show up again in the 2020 holiday catalog. Obviously, something blue is the Seaside Spray.
This Fun Fold is So Much Easier Than It Looks
Once again, I first saw this fun fold on Mary Deatherage’s Saturday night fb live, and you can find the link here. Truly, it is easy. It is simply a notecard attached to an A2 card. The best part is that it will fit in a medium Stampin’ Up! envelope.
I started by cutting and scoring all my paper.
The notecard base is 3 in. x 7 in. and scored at 3.5. For the top mat and inside mats, I cut white cardstock at 2.75 in. x 3.25 inches. Here’s another look at the top of the notecard:
The body of the card is 5.5 inches by 10 inches and scored at 4.25 inches and 8.5 inches. I stepped down a quarter inch for the length and width of the front white cardstock mat, and again for the DSP background. Here’s another look at that part of the card:
The foldover part of the card measures 1.5 inches by 5.5 inches. I stepped down a quarter of an inch for the white mat, making it 1.25 inches by 5.25 inches. The DSP top piece stepped down another quarter inch making it 1.00 inch by 5 inches.
I cut the inside of the card base at 4 inches by 5.25 inches. Then I used the outline die from the Poppy Moments die set in the bottom corner. Here’s another look at that part of the card:
Putting It Together!
After I adhered all the DSP pieces to the card base, I started working from the outside of the notecard. First, I dry fit the poppy and leaves to find the best position, at least for me. Then, I stamped the sentiment on the outside and inside. Next, I stamped the flowers on the inside and colored them with a Stampin’ Write Marker.
That’s when I got to the trickiest part of this card, and a step I forgot the first time I made used this fold. You can see that card here,. It kind of jumps right out that I forgot the ribbon. Ribbon? Tricky? Not really, but since I forgot it the first time, I needed to make sure I included it the second time. I cut about 20 inches of this gorgeous ribbon to start. Then I popped up the white top on dimensionals. Using tear-and-tape, adhered the ribbon to the notcard and then place the white cardstock over it. When you finish, you should have the majority of the length of the ribbon going behind the card so it ties on the left of the notecard.
Since I’d already cut out and stamped the inside white mat, I just had to crop the poppies in the corner. I’ve tried to use this die before as a border and it didn’t work at all, but I’m very pleased with the way it really accents the corner of the card.
After all of this, I thought my final step was going to be adhering the notecard to the flap, for which I used tear-and-tape. Make sure you only adhere the notecard to the flap, or nothing will open, which would be very disappointing.
I Thought I was Done….
I really did think I had completed the card once I finished putting it together. However, when I flipped the notecard back, the cardstock on the card cover looked very bare. When I started this whole process, I wasn’t sure where I was going with it. Therefore, I just kept cropping pieces of Whisper White, Basic Black, and Seaside Spray cardstock along with vellum cardstock. I actually had enough left for another whole card, so I grabbed some of those pieces and put together a large poppy, the long leaves for the top and the short wider leaves for the bottom. The vellum leaves that combination light and open, at least I think so.
Then, I really was done. I stamped and colored half of the border stamp of poppies on the front of my envelope and used adhered a piece of DSP to the envelope flap. Poof! I’d completed another card set. My co-worker is thrilled with the result, so it will be mailed to him pronto.
Back to the Pals Blog Hop Info
More inspiration awaits! Use the Blog Hop Line-up below to visit the rest of this month’s Design Team. My fellow Pals are excited to show you what they’ve created! Mark your calendars for June 10th, with our theme “New 2020-2022 In Colors.” We can’t wait to show you the newest In Colors in the Stampin’ Up! color family. Don’t miss the fun! Until then, please stay safe and have fun in your craft room.
I love to read and reply to comments. If you are so inclined, please feel free to leave a comment. If you’ve created a card based off this fun fold, color combination, or bundle, I’d love to see what you created!
Get last-chance, retiring, and discounted products from the January–June 2020 Mini Catalog. Retiring items sell fast. Get your favorites before they’re gone!
Again, thank you for stopping by my blog today! I appreciate your time.
Welcome to Just Peachy Stamping by Sue Jackson: an independent Stampin' Up demonstrator.
Through Stampin' Up!, I happily share my love of papercrafting through sales, classes, small stamping group meet-ups and workshops. I think that being a teacher in my "real life", I have a unique approach to sharing my fantastic hobby. I look forward to connecting with you!