Welcome to the Stampin’ Pretty Pals’ Blog Hop! This month, the theme is “Wonderful Cards/Projects from the Garden” where our design team showcase projects from things found in a garden, such as flowers, vegetables, fruits, or even a garden scene. We really hope that you enjoy and will be inspired by them! As you hop from blog to blog, don’t forget to leave comments because we love hearing from you. Once you finish here, you will find the lineup at the end of my post to help you “hop” along from Pal to Pal.
An Explosion of Pinwheel Tower Cards
I’m fairly certain you have seen either pictures or videos of pinwheel tower cards because they have exploded onto the cardmaking scene. The first time I saw one, I thought that it’s cool, I love a good fun fold, so I was onboard. When I saw the video tutorial for it, I couldn’t believe this card falls into an easy-peasy category.
Here’s my card:
Front of the card
In order, the second, third, and fourth “pages” of the card. The final picture is the view from the top.
Creating the Pinwheel Tower Card
I used a video tutorial posted on YouTube by Kristina Rees with Creating with Kristina for this card. Since watching her video, I’ve seen a number of different videos for the same card. Don’t worry, this card will fit in a standard medium Stampin’ Up! envelope when you are finished.
Measurements:
The papers I used were the Hand Penned DSP, Garden Green cardstock, white cardstock, and some Cinnamon Cider 6 x 6 inch DSP. The sentiments came from different stamp sets because of the panel restrictions. I also used the Hand Penned bundle for stamping and die cutting the florals.
The Garden Green base measures 5-3/4 inches by 4-1/4 inches. Score the base along the long side at 3/4, 1-1/2, 2-1/4, and 3 inches.
You need 3 panels for the arms, for a lack of a better word, of the card. Each panel measures 2-3/4 inches by 4-1/4 inches. You can choose a complimentary color if you’d like. I used Garden Green for these panels.
in her video, Kristina used different DSP (Designer Series Paper) patterns for her panel arms. I chose to use the same DSP patterns for each arm. You will need to trim down 3 sets of DSP to each of the following measurements:
2-3/4 inches by 4-1/4 inches AND
2 inches by 4-1/4 inches.
Pre-planning is Essential
HINT: The first time I made one of these cards I didn’t pay attention to the planning step for my sentiments. The resulting card didn’t work, but I saved it as an example of what NOT to do.
Here’s a picture of the DON’T DO THIS card:
See how the second sentiment peeks out when the card is open to the first page. This didn’t make me happy.
I did a much better job of planning sentiments and the placement of the coordinating die cut elements for the Garden Green card.
After wrapping the ribbon around one of the panels, you will need a piece of coordinating cardstock to cover it on the backside. The backside of the front panel is actually the panel for you to use for writing your note, as pictured below:
I haven’t finished using up the In Color 2020 – 2022 6 x 6 inch DSP yet, so I used that for the white panels of the card. My pieces measure 1 inch by 4-1/4 inches for the ribbon side. The opposite piece measures 1/2 inch by 4-1/4 inches.
HINT: Whenever I am working on a card that has a number of pieces, I use removable tape so I can move things back and forth and around. This tape allowed me to dry fit all my panels and die cut pieces to make sure I didn’t have all kinds of things peeking out unnecessarily.
I cut the white cardstock pieces for the final sentiment panel before I knew what I was doing with it. When I decided to stamp the floral spray, I needed to line my two white cardstock pieces up and stamp across both pieces. The Stamparatus made this process much easier! I’m pretty stinking pleased with the result!
Back to the Pals’ Blog Hop Information:
More inspiration awaits, so use the lineup below to visit the rest of the Design Team, because the Pals are excited to show you what they’ve created! Then, please mark your calendars for our next blog hop on August 11th. Our theme will be “My Happiest Season” when our Design Team creates a project showcase projects inspired by their favorite season of the year. Until then, have fun in your craft space.
BEAUTY OF THE EARTH 12″ X 12″ (30.5 X 30.5 CM) DESIGNER SERIES PAPER
$11.50 USD | 15.75 $ CAD $9.78 USD | 13.39 $ CAD
155696
131
BLOOM WHERE YOU’RE PLANTED 12″ X 12″ (30.5 X 30.5 CM) DESIGNER SERIES PAPER
$11.50 USD | 15.75 $ CAD $9.78 USD | 13.39 $ CAD
155499
131
HAND-PENNED 12″ X 12″ (30.5 X 30.5 CM) DESIGNER SERIES PAPER
$11.50 USD | 15.75 $ CAD $9.78 USD | 13.39 $ CAD
152494
132
IN GOOD TASTE 12″ X 12″ (30.5 X 30.5 CM) DESIGNER SERIES PAPER
$21.00 USD | 29.00 $ CAD $17.85 USD | 24.65 $ CAD
155817
132
IN THE WILD 12″ X 12″ (30.5 X 30.5 CM) DESIGNER SERIES PAPER
$11.50 USD | 15.75 $ CAD $9.78 USD | 13.39 $ CAD
155807
132
PANSY PETALS 12″ X 12″ (30.5 X 30.5 CM) DESIGNER SERIES PAPER
$11.50 USD | 15.75 $ CAD $9.78 USD | 13.39 $ CAD
155605
133
SWEET SYMMETRY 12″ X 12″ (30.5 X 30.5 CM) DESIGNER SERIES PAPER
$11.50 USD | 15.75 $ CAD $9.78 USD | 13.39 $ CAD
155718
133
TIDINGS OF CHRISTMAS 6″ X 6″ (15.2 X 15.2 CM) DESIGNER SERIES PAPER
$11.50 USD | 15.75 $ CAD $9.78 USD | 13.39 $ CAD
155686
134
YOU’RE A PEACH 12″ X 12″ (30.5 X 30.5 CM) DESIGNER SERIES PAPER
$11.50 USD | 15.75 $ CAD $9.78 USD | 13.39 $ CAD
What’s Your Favorite DSP?
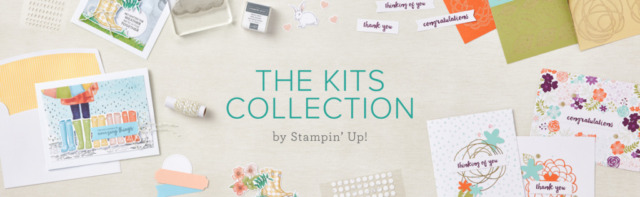
The KITS COLLECTION is still available as well!
Take a look at this video explaining what you get with your kit! Remember, the kits are all inclusive! Just add some of your own crafting basic tools, and you are good to go!
Again, thank you for stopping by my blog today! I appreciate your comments and your time.
Hello, welcome to the Stampin’ Pretty Pals’ Blog Hop! This month our Design Team’s theme is “Fun Ways to Use Your Stampin’ Up! Products” where we show our favorite product tips. We hope you enjoy and will be inspired by them! Don’t forget to leave comments! We love hearing from you. At the end of my post, you will find the full line-up to help you “hop” along from Pal to Pal.
Pull Out Flap Card
First things first. Here’s my card:
I used Jan B’s video tutorial to create this card. Her videos seem very real and down-to-earth, and those demos seem to be the ones to whom I gravitate.
I want the bulk of this post to contain tips for you. You may know some, or all, of the things I am sharing, but I hope you find something new. Therefore, the measurements for the papers I used follow:
Calypso Coral cardstock for the base measures 8-1/2 inches by 5-1/2 inches, scored at 4-1/4 inches.
I used two larger scrap pieces of Calypso Coral cardstock for the scalloped frame and the circle mat.
Basic White cardstock for the inside measures 7-7/8 inches by 5-3/8 inches. I scored the cardstock at 4 inches and 5-7/8 inches to create the inside flap.
I used scrap pieces of Basic White for the center image and the sentiment.
The DSP for the front measures 4-1/8 inches by 5-3/8 inches. I also trimmed a piece of DSP to 2-1/2 inches by 6 inches for the envelope flap.
I haven’t finished up my Brights 6 x 6 inch DSP from 2020 – 2021. Therefore, I used the typed DSP for the two flaps. Each strip measures 1-3/4 inches by 5-1/4 inches.
Basically, that’s it.
Tips and Tricks
The directions on Jan B’s video tutorial are much clearer than anything I could begin to write in a blog. However, there are some tips, and mistakes I made, that I do want to share with you.
TIP 1: Measuring the Easy Way, For Me At Least
When I measure paper to trim it, I work backwards. It may be because I’m left-handed and paper trimmers are basically for right-handed people. It might have to do with being lazy , um, looking for an easier way. Whatever it is, it works for me.
For example, on this card, I used the You’re a Peach DSP for the front. I knew the card front measures 4-1/4 inches by 5-1/2 inches. I also knew that I wanted a narrow frame of Calypso Coral around the DSP.
The finished DSP piece needed to be 1/4 inch shorter leaving me with 4-1/8 inches by 5-3/8 inches.
Working backwards, I counted back 2 ticks from the 4-1/4 mark and cut the paper. Then, I counted back 2 ticks from the 5-1/2 inch mark and trimmed the paper.
Hopefully, the following pictures make everything I just said more comprehensible:
First picture – 4-14 inches Second picture – backed up two tick marks to 4-1/8 inches
TIP 2: Many Thanks to Jan B!
I know I should’ve known this tip before, but for some strange and unknown reason I hadn’t worked it out. Jan B’s video gave me an “AH-HA” moment for using acrylic blocks when stamping.
I’m sure you’ve heard that you will have more control of your stamping if you use the acrylic block that best fits your stamp. After all, that’s why Stampin’ Up! shares the blocks you will need for each stamp.
Jan B’s tip: when two-step stamping, use a bigger block than necessary. When using the larger stamp, it becomes much easier to line up the stamps for two-step stamping. The sides of the stamp don’t interfere with the placement of the image. Score!
I did that when I stamped the leaves and flowers for the front circle and on the inside white cardstock. So much easier! AH-HA!!
TIP 3: Reading the Small Print is Essential!
My family motto seems to be “when in doubt, read the directions”. So, I read the directions in the 2021 – 2022 catalog on page 62 61 in the top right-hand corner. While I’ve known, and done this technique before, a reminder was very much appreciated!
“Add shading to your image by inking a stamp, then adding ink in a darker color with a sponge dauber on the edges.”
Since the Sweet as a Peach stamp set is photolymer, restamping is a breeze, especially when using the Stamparatus!
I stamped the leaves using a stamped off Granny Apple Green first. Then, I used a dauber for Pear Pizazz and just a couple of quick pops of Early Espresso on the stamp. Then I stamped again.
I used TIP 2 from above for the flowers. Using a much larger stamp than necessary, I first stamped off Calypso Coral before stamping where they belonged on the leaves. Then, I used daubers to sponge one pop of Mango Melody and one pop of Early Espresso on each flower. After I stamped again over the Calypso Coral ink, I used an Early Espresso marker to add dots for the centers.
TIP 4: Outlining the Sentiment Block
Many times , and for a variety of reasons, I don’t want to mat a sentiment. However, I do want it to stand out.
If I have a non-traditional shape, as in this sentiment, I use the brush end of a Stampin’ Write Marker to outline the sentiment.
If the shape is a traditional one (circle, rectangle, etc), it’s also possible to use an ink pad. However, I tend to smudge ink, so the marker is my go-to choice.
Another option that I have done many, many times, would be to use the blunt end of a marker and outline the stitches in the ditch. Go super slowly when using this technique so you don’t make a mess. Not that I’ve done that……….
TIP 5: Sealing the Envelope
When the pandemic first started, I became extremely sensitive to making sure card recipients knew I didn’t use saliva to seal the envelopes.
Therefore, I wrote “No saliva was used to seal this envelope” on the back of every envelope. Believe me, that got old very fast and I figured there had to be a better way to get my point across.
Somewhere in the back of my brain, a lightbulb went off, creating another “AH-HA” moment. I grabbed my 1 inch circle punch and punched a circle of coordinating DSP. Then, I ran it through my XYRON create a sticker tool. Instant seals. The 1 inch circle punch has retired, but you could use any punch you wanted to create a seal. I just had the XYRON that would be perfect for the circle punch.
Learn From My BIG Mistake
I’ll just quickly say this: do not try to add ribbon to the front of the pull out flap card. Just take my word for it. You do not want to do that. Chaos ensues, additional steps are required. It’s really not worth the massive amount of trouble. A bow placed on the front after you’ve finished all the cropping would be nice.
Back to the Pals’ Blog Hop
More inspiration awaits! Use the Blog Hop Line-up below to visit the rest of this month’s Design Team. My fellow Pals are excited to show you what they’ve created! Mark your calendars for our next blog hop on July 14th for “Wonderful Cards from the Garden” when our Design Team creates a project with flowers or scenes from the garden. Don’t miss the fun! Until then, have fun in your craft space.
Hello, welcome to the Stampin’ Pretty Pals’ Blog Hop! This month our Design Team’s theme is “Great Family Occasions.” We hope you enjoy and will be inspired by them! Don’t forget to leave comments! We love hearing from you. At the end of my post, you will find the full line-up to help you “hop” along from Pal to Pal.
Here’s my card:
Since I made this card with the no longer available Butterfly Bijou paper, I thought I needed to create another card. For the second card, I used the Floral Art Gallery DSP from the Mini-Catalog. At first, I wasn’t sure about this suite. Then I started seeing projects made with the paper and fell in love with it.
Here’s my second card:
Measurements (based on the first card)
The Just Jade card base measures 5-1/2 inches by 8-1/2 inches, scored at 4-1/4 inches.
The flap part of the card measures 3 inches by 5 inches, and I scored it at 2 inches on the long side.
The black mat for the front of the card measures 4-1/8 inches by 5-3/8 inches. I did crop the 3 inch square for the card flap from the black mat using the Stitched Shapes die set. No one will see the missing square and it saves a bit of cardstock.
The gorgeous DSP for the front of the card is from the Butterfly Bijou DSP. At this point, I also cropped two of the Just Jade butterflies. Thankfully, they are symmetrical so I could place them on the corner of the flap back-to-back.
I also trimmed a piece of the Just Jade DSP to 6 inches by 2-1/2 inches for the envelope flap.
The Flap Parts
The flap parts consist of Just Jade 6 x 6 inch DSP, black cardstock, and white cardstock.
The black cardstock on the top flap was created by
I cropped the white cardstock sentiment panel using the stitched shapes dies.
I simply used a piece of the Just Jade DSP for the underside of the top flap. It measures 2-7/8 inches by 2-7/8 inches.
The black square mat for inside flap measures 2-3/4 inches by 2-3/4 inches.
I stamped the sentiment on white cardstock and then cropped it using the stitched rectangle dies.
The Inside of the Card
I trimmed a piece of white cardstock to 4 inches by 5-1/4 inches for the very inside of the card.
What I Did
Since I already had everything cut out, I just had to put all the pieces together. There’s already enough layers on this card, so I just used multipurpose glue to adhere everything together, one layer at a time.
The flap was adhered first. I applied a generous amount of multipurpose adhesive to the 2 inch part of the flap and adhered it to the inside of the card. Be careful here because you need the score line to be just ever-so-slightly beyond the base of the card. If you don’t leave that tiny bit of space, the flap won’t lay down properly.
The most important thing I can tell you when putting all the layers together is don’t forget the ribbon! The card won’t lay flat, so I used Just Jade ribbon to tie it shut.
I used tear-and-tape to adhere the ribbon to the cardstock. I’ve found that using tear-and-tape works best to adhere ribbon that will be tied and untied a number of times.
I placed a 2 inch piece of tear-and-tape on the top of the Just Jade cardstock flap. Then, I placed a 9 inch length of ribbon on the tape.
Next, I repeated the step on the left-hand side of the front of the card, making sure I had the ribbon coming out from the fold side of the card.
I did work from the front, to the middle, to the front when adhering all the layers down. This way I was able to make sure all the flap pieces lined up properly.
After adhering and trimming the DSP on the envelope flap, I’d finished this card/envelope/sealing sticker coordinated set.
Back to the Blog Hop!
More inspiration awaits! Use the Blog Hop Line-up below to visit the rest of this month’s Design Team. My fellow Pals are excited to show you what they’ve created! Mark your calendars for our next blog hop on May 12th when our theme is “2021-2023 New In Colors” when our Design Team creates a project with the new family of In Colors for any occasion. Don’t miss the fun! Until then, please stay safe and have fun in your craft space.
So far, I’ve only gotten the new In-Color basic supplies. However, I will be putting in another pre-order. There are two suites at the top of my wish list, and as soon as I can order them, I will. There’s a sneak peak of the first suite on the cover of the 2021 – 2022 Annual Catalog:
That DSP is absolutely, stunningly gorgeous! I can not wait to order this on May 4th!
Again, thank you for stopping by my blog today! I appreciate your comments and your time.
Hello, welcome to the Stampin’ Pretty Pals’ Blog Hop! This month our Design Team’s theme is “Cute Critters” – showcasing their card/project with adorable animals, birds, or insects for any occasion. We hope you enjoy and will be inspired by them! Don’t forget to leave comments! We love hearing from you. At the end of my post, you will find the full line-up to help you “hop” along from Pal to Pal.
Here’s my slimline Cute Critter card:
What I Did:
First things first so I trimmed the Pear Pizzaz cardstock to 7 inches by 8-1/2 inches, and scored it at 3-1/2 inches.
Then I trimmed the white cardstock for the front measures 3-3/8 inches by 8-3/8 inches. Finally, I trimmed the white cardstock for the inside panel to 3-1/8 inches by 8-3/8 inches.
That’s it for trimmer work!
Now for the Stamping!
Here’s a tip for you when you start stamping: very lightly and carefully, draw a pencil line that will become one border of the tree pieces. Trust me. I couldn’t get the tree straight to save my soul and I tried four times before I gave up and drew a pencil line.
I probably should have started from the bottom, but for some strange and unknown reason I started at the top. The Momento Tuxedo Black ink let me stamp everything. I also didn’t have to worry about having everything smear when erasing that very light pencil line.
Then I started adding all the other stamps to the front of the card. I really like the how the So Saffron sentiment banner just fits down in the bottom corner.
In order to get the grass to go from side-to-side, I needed to mask off most of the bottom of the tree stamp. I used the light Old Olive and dark Granny Apple Green blend for the grass.
Time to Color!
Coloring the butterflies caused me a little bit of concern because I thought the blends might bleed too much. Therefore, I used the Calypso Coral and So Saffron Stampin’ Write Markers for the butterflies on the outside and inside of the card.
Everything else was colored with the blends combos.
Starting with the tree, I used the light and dark Soft Suede blends. I thought Early Espresso would weigh the card down.
I just outlined the the clouds with the light Pool Party blend. Since I didn’t want the clouds to be obviously outlined in blue, I used the color lifter to kind of blend the Pool Party color.
Next, I colored the leaves using the Old Olive light and dark blends.
Both birds have Balmy Blue light and dark bodies, dark Pumpkin Pie beaks, and I highlighted them with the light Flirty Flamingo blend.
I colored the squirrel with the light Soft Suede blend and the dark Crumb Cake blend, and Smoky Slate for the owl and the bunny. Once again, I used light Flirty Flamingo for cheek accents and bunny ears.
The adorable owl on the bottom is colored in Crumb Cake light and dark blends.
Happiness abounds in the Daffodil Delight balloon. In hindsight, I probably should’ve used a subtle color instead of the bright Daffodil Delight.
Then, I used the same coloring on the inside.
No capitals on the inside sentiments bothers the teacher in me somewhat but not enough to leave them out of the card
Thankfully, slimline cards can be mailed in a regular legal sized envelope.
I thoroughly enjoyed all the coloring and I hope you try this set out for yourself!
Back to the Pals’ Blog Hop!
More inspiration awaits! Use the Blog Hop Line-up below to visit the rest of this month’s Design Team. My fellow Pals are excited to show you what they’ve created! Mark your calendars for our next blog hop on April 14th when our theme is “Great Family Occasions” when our Design Team creates a project for any special occasion. Don’t miss the fun! Until then, please stay safe and have fun in your craft space.
Hello, welcome to the Stampin’ Pretty Pals’ Blog Hop! This month our Design Team created “Birthday Bonanza” projects to inspire you to make for all of your family and friends. We hope you enjoy and are inspired by them! Don’t forget to leave comments because we all love hearing from you! At the end of my post, you will find the full line-up to help you “hop” along from Pal to Pal.
Fine Art Floral Suite
For this hop, I created two cards, mainly because I am in love with the whole Fine Art Floral Suite! One of my favorite colors is Blackberry Bliss, so that played a part in my choice as well.
Here are my cards:
I’ve seen so many gorgeous cards with the Dandy Laser Cut Paper, shown in the first card, that I just had to get it! I know this set of gorgeous pre-cut dies comes from the Dandy Garden Suite, but it works wonderfully with this suite as well. Of course, that’s just my humble opinion.
Just a Bit of Information
Both cards have a Blackberry Bliss base trimmed to 8-1/2 inches by 5-1/2 inches, scored at 4-1/4 inches.
Both cards also have a piece of the Bumblebee 6 x 6 inch DSP for the first layer on the card front.
I used the Blackberry Bliss ribbon on both cards, and three of the Bumblebee 2020 – 2022 In Color Enamel Dots on each as well.
The inside of both cards, and the envelopes, are the same. I used the floral DSP for each of the envelope flaps. Then, I used Bumblebee ink and stamped off the floral spray stamp. Because of post office regulations, I only stamped a partial spray down in the front, lower left corner of the envelope.
Here’s a look at the inside:
I used the floral spray from the Art Gallery stamp set and the Bumblebee ink pad. Since I didn’t really want a deep Bumblebee color, I stamped the image off once before stamping on the white cardstock.
The inside sentiment can be found in the Happy Thoughts cling stamp set. Gorgeous fonts and sentiments in that set!
The birthday sentiment on the front of the floral DSP card is also from Happy Thoughts. I used the happy birthday sentiment found in the Art Gallery stamp set for the laser die-cut card.
Bow Challenges
Turns out that my difficulty tying bows has returned, so the laser cut card simply has a square knot. I somehow managed to get a decent bow on the floral DSP card. I’ve decided that I really need to practice and get proficient at tying bows then make a how-to video specifically for lefties. If you are left-handed, you know what I mean. Finding videos of lefties tying bows in a tad difficult. Contrary to what I always heard in grammar school, it’s not the same thing as tying a bow with your right-hand. But, that how-to video really needs to happen, and soon I hope.
Back to the Pals’ Blog Hop!
More inspiration awaits! Use the Blog Hop Line-up below to visit the rest of this month’s Design Team. My fellow Pals are excited to show you what they’ve created! Mark your calendars for our next blog hop on March 10th when our theme will be “Cute Critters” where the design team will be sharing projects that will feature critters of all sorts to inspire you. Don’t miss the fun! Until then, please stay safe and have fun in your craft room.
Hello, welcome to the Stampin’ Pretty Pals’ Blog Hop! This month our Design Team created projects featuring “Sale-A-Bration Products.” We hope you enjoy and will be inspired by them! Don’t forget to leave comments. We love hearing from you! At the end of my post, you will find the full line-up to help you “hop” along from Pal to Pal.
My Choice to Highlight: Flower and Field DSP
The Paper Blooms and Flower and Field DSP packs, both available as a Sale-a-Bration (SAB) freebie with a qualifying order, are gorgeous! I’ve already made 6 cards from the Paper Blooms DSP and created five from Flower and Field for this blog hop. Gorgeous, I tell you!
I made the first card for a longtime friend who is struggling right now. Then I decided that I would add four more cards from the One Sheet Wonder for this hop.
Here are my cards:
Here’s the One Sheet Wonder (OSW) I found from Pinterest:
Truly, these cards went together so quickly, even with my current bow-challenge issues.
Measurements and Steps:
I’d already created the first card and that’s when I decided to use this DSP pattern. Then I trimmed it down to four – 6 x 6 inch pieces and then got started.
All the OSW cards have Basic Black bases trimmed to 4-1/4 by 11 inches, scored at 5-1/2 inches.
I decided to highlight each of the three major colors in the DSP for the first layer. I trimmed each piece of Just Jade, Bumblebee, or Flirty Flamingo cardstock to 4-1/8 inches by 5-3/8 inches.
The top Whisper White layers measure 4 inches by 5-1/4 inches. Then I ran them through the textiles embossing folder so the white space wouldn’t be so plain.
While I had the white cardstock at the trimmer, I trimmed down white cardstock for the insides to 4 inches by 5-1/4 inches.
The OSW envelope flaps each needed a strip of DSP trimmed to 6 inches by 2-1/2 inches. The pattern on the flaps is also from Flower and Field DSP.
Before I put away the DSP, I grabbed a scrap and punched out a 1 inch circle for the envelope seals. For many months I’d been using liquid adhesive to seal the envelopes and then writing “No saliva was used to seal this envelope” on every card. One day it dawned on me to punch little circles for seals. I ran the circles through my little Xyron sticker maker. Once the top layer of the Xyron film is removed, I can cut the line of stickers down to individual ones. I’ve been putting one seal inside each of the coordinating envelopes for safekeeping.
Adding Color Accents and Embellishments
I continued to add black accents to the card with the oval mats for each sentiment. Then I added a scalloped oval piece of the color family DSP to coordinate with the card mat. Finally, I used scraps of Whisper White for the sentiments. Thankfully, I had some brick and mortar embossed scraps, and I stamped right on the texture. One of the birthday cards is simply white cardstock, and that works just as nicely.
I used Just Jade and Bumblebee ribbon to create a bow for each OSW card. Honestly, I am quite bow-challenged, and my strong left-handedness only adds to the problem. I keep thinking that I’ve been able to tie my shoes since kindergarten. Why, in heaven’s name, can’t I tie an acceptable bow for a card???
My recent solution to my bow-challenges, for the time being, meant learning how to tie a bunny-ears bow. It’s still awkward for me, but it actually worked for these OSW cards.
I’d wrapped the bow around the DSP for the first pictured card. For these situations, I’ve found that I need to wrap the ribbon around, tie a bunny-ears bow, remove the ribbon and turn it upside down. Then I can slip the DSP back through the ribbon and all is well with the world. Craziness!
Touches of Basic Black
My cards now had a black base and a black oval under the sentiments. However, the card felt out-of-balance to me. After some trial and error, I decided to use the rope die from the Smooth Sailing die set to border the DSP panels on the four OSW cards. I needed to piece together two rope pieces on the diagonal cards, but I hid the connection under the sentiment ovals.
I wanted to add a little bit of something on the black centers of the flowers on the DSP but my matte black dots from the January – June mini-catalog hadn’t arrived yet. Therefore, I pulled out the fine-tip glue pen and dropped a dot on either the pink centers or the white centers. Just make sure you let the dots dry completely before touching or moving the card. Patience is the key here.
Here’s a close-up of the end results:
Finishing Up
I glued the sentiment oval directly on the scalloped DSP oval. Then I put dimensionals under the scalloped oval and attached them to the black ovals.
Finally, I just needed to adhere the DSP to the envelope flaps and trim them down.
With that, I’d completed this set of four coordinating cards/envelopes.
Back to the Pals’ Blog Hop
More inspiration awaits! Use the Blog Hop Line-up below to visit the rest of this month’s Design Team. My fellow Pals are excited to show you what they’ve created! Mark your calendars for our next blog hop on February 10th when our theme will be “Birthday Bonanza” where the design team will be sharing birthday projects that celebrate our family and friends. Don’t miss the fun! Until then, please stay safe and have fun in your craft room.
Welcome to Just Peachy Stamping by Sue Jackson: an independent Stampin' Up demonstrator.
Through Stampin' Up!, I happily share my love of papercrafting through sales, classes, small stamping group meet-ups and workshops. I think that being a teacher in my "real life", I have a unique approach to sharing my fantastic hobby. I look forward to connecting with you!