Welcome to the newest two week challenge for Make My Monday! Our host for challenge #178, Billie A., chose the theme of using splatters. What fun! When you finish here, I hope you will visit the challenge page to check out the fabulous projects from the rest of the design team. I hope you are inspired to play along with us!
Here’s my splatter card:
Here’s the challenge banner from Try Stamping on Tuesday # 562, which I used for inspiration. My three stripes turned out wider than the inspiration sketch, but I wanted to showcase the splatters.
Measurements:
The Starry Sky base measures 5-1/2 by 8-1/2 inches, scored at 4-1/4 inches.
Next, the white cardstock layer measures 4-1/8 by 5-3/8 inches. I also trimmed a piece of white cardstock to 4 by 5-1/4 inches for the inside.
The Real Red cardstock on the front measures 4 by 5-1/4 inches.
I trimmed a piece of the Starry Sky 6 x 6 inch DSP (designer series paper) to 6 inches by 2-1/2 inches for the envelope flap.
After I stamped the splatters, I trimmed the splattered white cardstock to 3-1/2 by 1-1/2 inches.
Stamping and Embossing:
I started with a white piece of cardstock and used Real Red and Starry Sky ink pads for the splatters. I used the two different splatters from the Gorgeous Leaves stamp set. First, I stamped the larger one in Starry Sky. Then I filled in with the smaller stamp in Real Red.
It’s difficult to see, but I stamped the splatter from Painted Poppies in VersaMark randomly around the white cardstock. Then, I covered all those splatters with white embossing powder and heat set it all with my heat tool.
Since I didn’t really get the effect I wanted with the white embossed splatters, I decided to add embossed white splatters on the Starry Sky splatters.
Then, I trimmed the white splattered cardstock down to the size I wanted.
Next, I used the Happy Birthday stamp from the Special Moments stamp set. I masked off the birthday part, and just stamped happy in Real Red ink on vellum cardstock. Then, I quickly added clear embossing powder and heat set it.
I used the Starry Sky 6 x 6 inch DSP to crop out TH using the Playful Alphabet dies. The 4 comes from the retired large numbers die set.
After cropping both circles using the Stylish Shapes dies, I adhered the 4th using multipurpose liquid adhesive. These letters/number allowed me to add liquid glue behind them to adhere the vellum to the front of the card.
For the happy circle, I needed to adhere it in a different way since the adhesive wouldn’t be hidden. So, I grabbed a make-up sponge and my silicone mat. I added liquid glue to the back of the vellum and used the sponge to spread it out evenly on the circle. An even layer of adhesive won’t show through the vellum cardstock.
Finishing Up:
The final touch on the front was to place nine red dots on the white cardstock panels. The ones on the outside of the 4th vellum circle help to anchor the edges to the front of the card.
Then, I punch a 1 inch circle out of some of the leftover splatter paper for the envelope seal. With that, I’d finished this coordinated card, envelope, and envelope seal set.
It’s July, 2022 ~ do you know what that means? The new Holiday Mini-Catalog and Sale-a-Bration are in full swing!!
Sale-a-Bration runs from July 1 to August 31, 2022. This means you can earn FREE products for two months! Take a look at these Sale-a-Bration products!!
Here’s a link to the new Holiday Mini-Catalog, which runs through January 4, 2023. Click on the following image to open the catalog:
Do You Want to Place an Order?
Of course you do, especially since you can earn FREE products with a qualifying purchase!
If you are ordering less than $150.00, please use the host code shown. If you are ordering more than $150.00, please contact me first so you an get your stamping rewards! Any order over $50 will earn a little surprise from me.
The HOST CODE through July 31, 2022 is UKDVYZSG.
Again, thank you for stopping by my blog today! I appreciate your comments and your time.
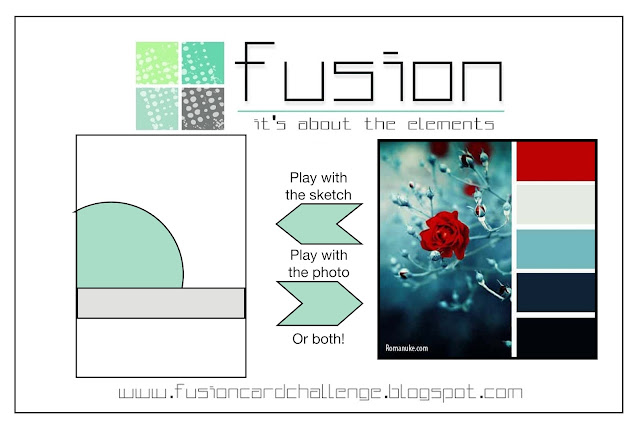
Welcome to the newest Cardz 4 Guyz Challenge! Our host for C4G #299, Pamela, chose summer for the theme. Both the Cardz 4 Guyz #299 and the June Pals Fun Fold Blog Hop go live on the same day, so I knew I needed to combine the two. Then I saw the layout for Try Stampin on Tuesday #561 and knew I wanted to incorporate that layout. The color palette inspiration comes from the Fusion card challenge. Score!
When you are finished here, I hope you will visit the Cardz 4 Guyz challenge and the Pals Fun Fold Blog Hop, the links for which follow my blog post for the card.
Here’s my card:
I do need to thank the design team at Try Stampin on Tuesday. They chose my card as one of the Top 3 for TSOT559. You can see that card here, which was a three-fer by combining TSOT #599, Color Throwdown #696, and the Double Trouble challenge. Thank you very much!!! Once again, I feel completely honored.
Here are the Fusion and TSOT challenge banners:
The Hippest Hippos stamp set and coordinating dies make this card too stinking cute! You can earn each of these FREE, with a qualifying purchase, starting July 1, 2022 with Sale-a-Bration!
Measurements:
The Poppy Parade base measures 4-1/4 by 11 inches, scored at 2-3/4 and 5-1/2 inches.
I used Gray Granite following the Fusion colors, for the mat, which measures 4-1/8 by 5-3/8 inches.
The white panel for the inside of the card also measures 4-1/8 by 5-3/8 inches.
After doing all the math for the layout pieces on the front of the card, I created a template, which will save so much time for the next time I want to use this layout. Here’s the template:
I had enough leftovers to stamp, color, and crop all the elements on the front of the card and the birds on the inside.
I used a piece of Basic Gray 6 x 6 DSP trimmed to 6 by 2-1/2 inches for the envelope flap. Then, I punched a 1 inch circle from Pool Party DSP to create the envelope seal.
What I Did:
I started this card with my blending brush and Pool Party ink on white cardstock. The hippo dies have one for waves. Since I wasn’t happy with the waves I created for the first card I made with this set (you can see that card here), I needed to figure out something else to do. I grabbed a piece of a window sheet and cropped out a stencil of the waves. I used the stencil and worked my way up the white cardstock.
HINT: Make sure you move the stencil placement so that the waves form a very random pattern. Do the same thing for the clouds.
By working my way up the white cardstock, I was able to create darker waves at the bottom and lighter ones at the top.
I repeated the process for the clouds again using Pool Party ink and my blending brush.
Of course, I couldn’t leave the inside white piece of cardstock plain, so I added waves at the bottom and clouds at the top.
Here’s a picture of the well-loved stencils I created by cropping window sheets with the dies:
Hippos:
Next, I worked on the hippos, which I stamped using Momento Tuxedo Black ink and colored with the Smoky Slate light and dark blends combo. The hippo in the tub is actually a tutu wearing ballet hippo. However, since the challenge is to make a card for a guy (of any age), I simply cut off the tutu. I used another blending brush and Night of Navy ink to create a base on which the tub could sit.
Both the tub and the boat dies come with the hippo die set. I cropped each in Basic Gray cardstock. Then, I added dimension using my gray ink tones blending brush and Basic Gray ink. The effect is subtle, but I think it works.
Then, I used Poppy Parade cardstock and cropped the googles, breather tube, life saver and sunglasses. So stinking cute!!
If you use the multipurpose glue carefully and sparingly, you can easily adhere these cropped pieces to the hippos.
The hippo in the boat and in the tub got popped up on dimensionals.
The water droplets for each hippo needed some height, but not by using dimensionals. I cropped enough droplet sets to layer three droplets on top of each other. Since the Pool Party cardstock blended in with the background, I added Wink of Stella to each of the droplets.
Finishing Up:
The bottom horizontal panel really had me stumped. A quick perusal of my stamp sets led me to the school of fish stamp from the Whale Done stamp set. I stamped it in Pacific Point ink going across the bottom panel. Then, I added some to the waves on the inside panel as well.
This bottom panel also needed some sort of dimension. Therefore, I stamped the fish from Seas the Day four times using Pacific Point ink on Pool Party cardstock. I didn’t want to use dimensionals under these fish, so I adhered two fish together and then adhered them to the bottom panel.
The Waves of Inspiration stamp set contains a small bird, which I stamped three times across the top using Gray Granite ink.
The outside sentiment comes from the Catch You Later stamp set and the inside sentiment comes from Happy and Heartfelt. I stamped both using Night of Navy Ink.
I still needed something to hold the easel upright and settled on the birds from the Waves die set. The birds would need to be high enough to hold the easel, but I didn’t want to even begin to try to add dimensionals or foam adhesive behind the birds. Therefore, I cropped enough birds from Gray Granite cardstock to adhere five birds on top of each other. Five layers of cardstock turned out to be enough to hold up the easel.
Finally, I trimmed the DSP on the envelope flap and ran the 1 inch circle envelope seal through my XYRON create-a-sticker. With that, I’d finished this coordinated easel card, envelope, and seal set.
From now until June 30, 2022, all kits are buy one, get one 50% off! Just look at some of the kits available!
Do You Want to Place an Order?
Of course you do!
If you are ordering less than $150.00, please use the host code shown. If you are ordering more than $150.00, please contact me first so you can get your stamping rewards! Any order over $50 will earn a little surprise from me.
The HOST CODE through June 30, 2022 is 6YTD44QQ.
Again, thank you for stopping by my blog today! I appreciate your comments and your time.
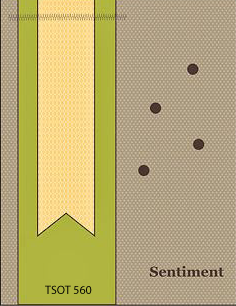
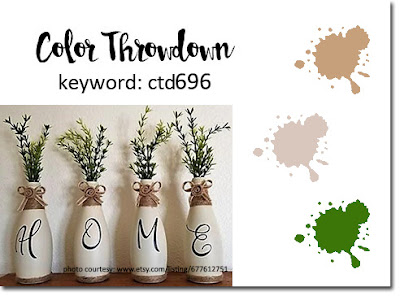
Hello, and welcome to my card for the Color Throwdown Challenge # 698. I missed the deadline for the layout, CASe’d from the Try Stampin on Tuesday #560 challenge while I was at our annual family beach week.
Here’s my all-occasion card:
Here are the challenge banners from which I drew my inspiration:
I used Poppy Parade, Petal Pink, Crushed Curry, and Old Olive to play along with the #ctd698 challenge.
What I Did:
For this short and sweet blog post, here’s how I put it together:
The Poppy Parade base measures 8-1/2 by 5-1/2 inches, scored at 4-1/4 inches.
I already had an embossed piece of white cardstock. All I had to do was trim it down to 4-1/8 by 5-3/8 inches.
All three DSP patterns come from the Flowering Fields DSP, which retires on June 30,2022 at midnight. It’s a gorgeous DSP pack and well worth looking at it in the January – June mini-catalog on page 15. It’s actually on sale for $8.05. Here’s a look at this gorgeous paper:
The background DSP measures 4 by 5-1/4 inches. In order to have this DSP pop off the white embossed background, I used the Poppy Parade Stamping Write Marker to outline it.
The Old Olive checked DSP strip measures 5-1/4 by 1-3/4 inches.
The tulip banner measures 1-5/8 inches wide.
The sentiment comes from the Special Moments stamp set. I stamped it in black and quickly added clear embossing powder to the wet ink. Then, I heat embossed it using my heat tool. I didn’t want to cover any of the DSP and I thought the heat embossing would help the sentiment stand out.
I used multipurpose liquid glue to adhere the layers, except for the banner. That’s popped up on dimensionals.
Finally, I added five Crushed Curry dots to the front surrounding the sentiment.
That’s it. Actually, working out the measurements took longer than putting the card together.
Without further ado, I need to get this post closed out and published so I make the ctd#698 deadline. Come back tomorrow morning to check out my four-fer card using the Sale-a-Bration Hippest Hippos stamps and dies!
It took me a couple of days, and a couple of trials and errors, but I figured out how to combine Try Stampin’ on Tuesday #559, Double Trouble #113, and Color Throwdown #696.
Without further ado, here’s my card:
Here are the three challenge banners:
Measurements:
The Mossy Meadow base measures 4-1/4 by 11 inches, scored at 5-1/2 inches.
AFTER I embossed the Very Vanilla cardstock with the Fern 3D embossing folder, I trimmed it to 4-1/4 by 5-3/8 inches.
The Very Vanilla for the inside of the card measures 4 by 5-1/4 inches.
The In Good Taste wood striped DSP (designer series paper) measures 4-1/4 by 2 inches. I also trimmed a piece to 2-1/2 by 6 inches for the envelope flap.
Finally, the Mossy Meadow DSP strip measures 5-3/8 by 1/2 inches. I used this DSP to punch a 1 inch circle for the envelope seal. Then I ran it through my XYRON create-a-sticker.
That’s it for the measurements, and all of these pieces were adhered with multipurpose liquid glue..
Leftovers:
One of the great things about saving leftover cardstock is that I have plenty of pieces to use on other projects. In this case, I used leftovers for all the stamped and cropped elements on the front of the card. I took me a while to find a system that works for me, and one day I should share how I store my papers.
Stamping and Such:
All the stamped elements come from the Nature’s Prints bundle. If you haven’t gotten it yet, I highly recommend adding it to your wish list.
I stamped the two different sprays in Mossy Meadow on either Crumb Cake or Very Vanilla.
Next, I stamped the sentiment on Very Vanilla using Soft Suede ink.
After cropping all four pieces, I used markers to outline the Very Vanilla pieces so they would stand out from the Very Vanilla embossed background. I used my Mossy Meadow marker for the sentiment banner, and Crumb Cake for the spray of leaves.
The Crumb Cake/Mossy Meadow sprays are adhered using multipurpose liquid glue.
I added dimensionals under the Very Vanilla/Mossy Meadow leave spray. Once I had that adhered where I wanted it, I carefully placed dimensionals on the back of the sentiment. Basically, those dimensionals adhere the left side and the top right corner. I added multipurpose liquid adhesive for the middle of the sentiment banner where it lays on the Very Vanilla spray.
Finally, in keeping with the sketch, I added two matte dots on the top left next to the Mossy Meadow DSP. Since odd numbers of elements please the eye, I added a tiny one to the bottom right of the sentiment banner.
I didn’t do anything yet to the inside because of the versatility of the outside sentiment. When I’m ready to use this card, I’ll add a sentiment.
With that, I’d finished this coordinated card, envelope, and envelope seal set.
Here are just a few of my favorite new things, and about half of which arrived Monday! I’ve already been playing with my new goodies. I’m also working on a pre-order from the upcoming July – December mini-catalog. Fun times!!
Do You Want to Place an Order?
Of course you do!
If you are ordering less than $150.00, please use the host code shown. If you are ordering more than $150.00, please contact me first so you can get your stamping rewards! Any order over $50 will earn a little surprise from me.
The HOST CODE through June 30, 2022 is 6YTD44QQ.
Again, thank you for stopping by my blog today! I appreciate your comments and your time.
Before I start on this card, I want to thank the design team at TSOT for choosing my card as one of the top 3 for challenge #555. You can see my bee obsession card here. Again, I am honored!
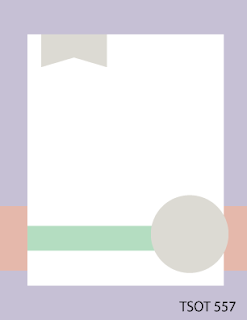
The clean and simple Try Stampin’ on Tuesday #557 challenge seemed perfect for the Waves of Inspiration stamp set and DSP. I chose to use a more muted DSP (designer series paper) pattern for this card.
Here’s my card:
Here’s the challenge banner:
Measurements:
The Coastal Cabana base measures 8-1/2 by 5-1/2 inches, scored at 4-1/4 inches.
This stunning DSP measures 4-1/8 by 5-3/8 inches and I put dimensionals under it to accommodate the Gray Granite ribbon. I outlined it with my Gray Granite marker to create a border without using a cardstock layer.
I trimmed another piece of the DSP to 6 by 2-1/2 inches for the envelope flap. After punching out a 1 inch circle of Coastal Cabana cardstock, I ran it through my XYRON and had my envelope seal.
I wrapped a length of Gray Granite ribbon around the DSP. Tear and tape works wonders to hold the ribbon ends in place.
Stamping:
I stamped the sentiment in VersaMark on Gray Granite cardstock. Then, I covered it with white embossing powder, which I heat set with my heat tool. I trimmed down the cardstock and measured horizontally to find the center. This really helped me snip the chevron into the sentiment banner.
I stamped the pelican on white cardstock in Gray Granite ink. Then, I cropped it using the coordinating die set. Next, I stamped a Gray Granite pelican on the bottom right-hand side of the envelope.
I thought that I could use the Fine-tip glue pen to outline the rope on the pilings. After I used the glue to go over the rope. Then, I left the glue to dry. When I came back, I found that the glue had absorbed the ink and I kind of like the effect. There are dimensionals under the pelican partly to accommodate the ribbon and partly because I wanted to add height to the pelican.
The sentiment I used for the outside enables this card to be an all-occasion card. Therefore, I didn’t stamp an inside sentiment on the 4 x 5-1/2 inch piece of white cardstock.
With that, I had completed this coordinated card, envelope, and envelope seal set.
Here are just a few of my favorite new things, all of which arrive on Monday!
Do You Want to Place an Order?
Of course you do!
If you are ordering less than $150.00, please use the host code shown. If you are ordering more than $150.00, please contact me first so you can get your stamping rewards! Any order over $50 will earn a little surprise from me.
The HOST CODE through June 30, 2022 is 6YTD44QQ.
Again, thank you for stopping by my blog today! I appreciate your comments and your time.
Welcome to the June Sparkles Christmas Buddies Challenge # 137. Our host this month, Debbie, chose Cute Christmas Critters for the theme. When you finish here, I hope you will head over to the challenge site to see all the cards from the rest of the design team members. There’s so much inspiration to be found there. I hope you will be inspired to play along!
Here’s my card:
I’ve been using a bunch of these self-adhesive googly eyes lately, mainly because I purchased 1200 of them from Amazon. I originally needed ten, but went all out when I saw these and the organizational box in which they are packaged.
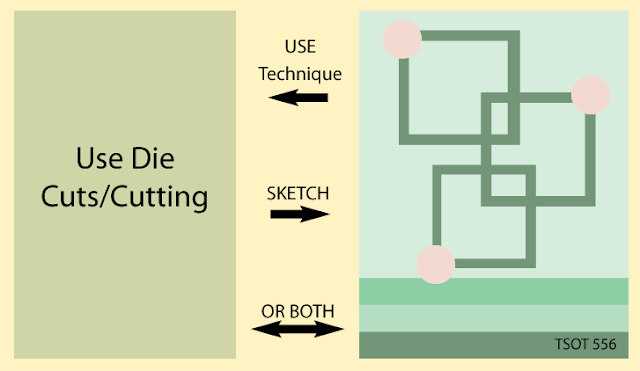
I used the Try Stamping on Tuesday challenge #556 as inspiration. The challenge ended on May 29th, but it’s still worth giving the challenge credit. Here’s the challenge banner:
Easy Peasy Card:
The Real Red base measures 11 x 4-1/4 inches, scored at 5-1/2 inches to create a tent fold card.
I used the snowflakes from the Wintry 3D embossing folder set for the white cardstock base. Since this folder fits in the mini cut and emboss machine, I did need to run it through the full size machine twice. After I finished embossing the cardstock, I trimmed it down to 4-1/8 by 5-3/8 inches.
The white cardstock panel for the inside measures 4 inches by 5-1/4 inches.
I also used the snowflakes embossing folder on the envelope flap. I punched a 1 inch circle from Real Red cardstock and embossed that as well for the envelope seal.
Using two of the stylish shapes square dies, I cropped three frames from Real Red cardstock. I arranged them on the front of the card using multipurpose liquid glue.
Then I punched the penguin pieces from leftover black and white cardstock.
Stamping:
Before adhering the white body parts to the black penguin base, I stamped the Real Red scarf, the noses, and the eyes. All of these stamps come from the Penguin Place stamp set.
Since I stamped the eyes, I had reference points for the placement of the googly eyes. Cuteness overload!
Then, I adhered the white to the black cardstock bodies using multipurpose liquid glue.
Next, I added dimensionals to the penguins’ feet and under the black cardstock part of the penguins. The penguins fit inside the Real Red frames perfectly!
The sentiment comes from the Best Year cling stamp set. I stamped it in Momento Tuxedo Black ink. Then, I cropped it using one of the banner dies from the stylish shapes die set. In order for the sentiment to stand out, I outlined it using my Real Red marker.
HINT: I absolutely loved the now retired stitched shapes die set and thought I’d never get rid of them. However, the new stylish shapes die set has replaced the retired set and I can now sell them. The new dies are awesome!
Amazingly, I tied a pretty decent bunny ears bow and attached it using a glue dot.
After stamping a sentiment from the retired Perfectly Plaid Christmas stamp set on the white cardstock for the inside, I adhered it to the base.
With that, I’d finished this coordinated card, envelope, and envelope seal set.
Thank you very much for stopping by my blog today!
Here are just a few of my favorite new things and I can not wait for my order to arrive! Then, I will just have to pick out some new favorite things to purchase!
The 2022 – 2023 Catalog is Now Live!!
Here are just a few of my favorite new things. I can not wait for this order to arrive!
Do You Want to Place an Order?
Of course you do!
If you are ordering less than $150.00, please use the host code shown. If you are ordering more than $150.00, please contact me first so you can get your stamping rewards! Any order over $50 will earn a little surprise from me.
The HOST CODE through June 30, 2022 is 6YTD44QQ.
Again, thank you for stopping by my blog today! I appreciate your comments and your time.
Welcome to Just Peachy Stamping by Sue Jackson: an independent Stampin' Up demonstrator.
Through Stampin' Up!, I happily share my love of papercrafting through sales, classes, small stamping group meet-ups and workshops. I think that being a teacher in my "real life", I have a unique approach to sharing my fantastic hobby. I look forward to connecting with you!