Welcome to the June Sparkles Christmas Buddies Challenge # 137. Our host this month, Debbie, chose Cute Christmas Critters for the theme. When you finish here, I hope you will head over to the challenge site to see all the cards from the rest of the design team members. There’s so much inspiration to be found there. I hope you will be inspired to play along!
Here’s my card:
I’ve been using a bunch of these self-adhesive googly eyes lately, mainly because I purchased 1200 of them from Amazon. I originally needed ten, but went all out when I saw these and the organizational box in which they are packaged.
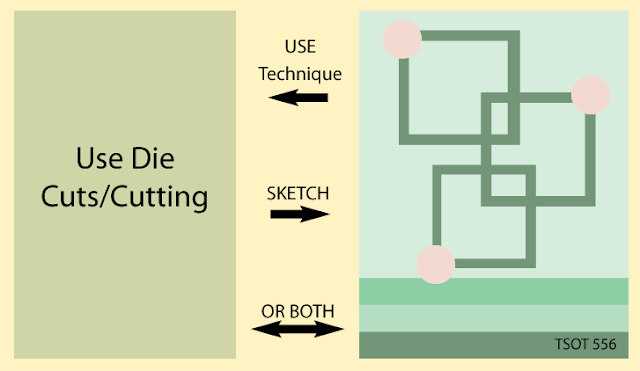
I used the Try Stamping on Tuesday challenge #556 as inspiration. The challenge ended on May 29th, but it’s still worth giving the challenge credit. Here’s the challenge banner:
Easy Peasy Card:
The Real Red base measures 11 x 4-1/4 inches, scored at 5-1/2 inches to create a tent fold card.
I used the snowflakes from the Wintry 3D embossing folder set for the white cardstock base. Since this folder fits in the mini cut and emboss machine, I did need to run it through the full size machine twice. After I finished embossing the cardstock, I trimmed it down to 4-1/8 by 5-3/8 inches.
The white cardstock panel for the inside measures 4 inches by 5-1/4 inches.
I also used the snowflakes embossing folder on the envelope flap. I punched a 1 inch circle from Real Red cardstock and embossed that as well for the envelope seal.
Using two of the stylish shapes square dies, I cropped three frames from Real Red cardstock. I arranged them on the front of the card using multipurpose liquid glue.
Then I punched the penguin pieces from leftover black and white cardstock.
Stamping:
Before adhering the white body parts to the black penguin base, I stamped the Real Red scarf, the noses, and the eyes. All of these stamps come from the Penguin Place stamp set.
Since I stamped the eyes, I had reference points for the placement of the googly eyes. Cuteness overload!
Then, I adhered the white to the black cardstock bodies using multipurpose liquid glue.
Next, I added dimensionals to the penguins’ feet and under the black cardstock part of the penguins. The penguins fit inside the Real Red frames perfectly!
The sentiment comes from the Best Year cling stamp set. I stamped it in Momento Tuxedo Black ink. Then, I cropped it using one of the banner dies from the stylish shapes die set. In order for the sentiment to stand out, I outlined it using my Real Red marker.
HINT: I absolutely loved the now retired stitched shapes die set and thought I’d never get rid of them. However, the new stylish shapes die set has replaced the retired set and I can now sell them. The new dies are awesome!
Amazingly, I tied a pretty decent bunny ears bow and attached it using a glue dot.
After stamping a sentiment from the retired Perfectly Plaid Christmas stamp set on the white cardstock for the inside, I adhered it to the base.
With that, I’d finished this coordinated card, envelope, and envelope seal set.
Thank you very much for stopping by my blog today!
Here are just a few of my favorite new things and I can not wait for my order to arrive! Then, I will just have to pick out some new favorite things to purchase!
The 2022 – 2023 Catalog is Now Live!!
Here are just a few of my favorite new things. I can not wait for this order to arrive!
Do You Want to Place an Order?
Of course you do!
If you are ordering less than $150.00, please use the host code shown. If you are ordering more than $150.00, please contact me first so you can get your stamping rewards! Any order over $50 will earn a little surprise from me.
The HOST CODE through June 30, 2022 is 6YTD44QQ.
Again, thank you for stopping by my blog today! I appreciate your comments and your time.
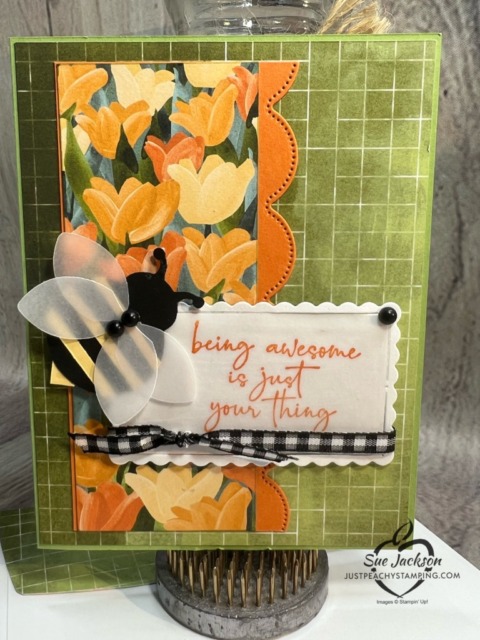
Welcome to InKing Royalty’s May Blog Hop! Spring is just around the corner, so we are sharing Spring projects with bees and birds. We are excited to share our creations and hope you love them! After you read my post, I hope you’ll hop over to the next person on the list at the base of this post.
Here’s my card:
I used the Try Stampin’ on Tuesday sketch #555 for my layout. Here’s their challenge banner:
Measurements:
The Pear Pizazz base measures 5-1/2 inches by 8-1/2 inches, scored at 4-1/4 inches.
Both DSP (designer series paper) patterns come from the Flowering Fields 12 x 12 DSP pack. The green piece measures 4-1/8 inches by 5-3/8 inches. The floral DSP measures 2 inches by 5 inches and I outlined it with a Pear Pizazz marker.
I trimmed another piece of green DSP to 6 inches by 2-1/2 inches for the envelope flap. While I had the DSP handy, I punched out a 1 inch circle from the floral DSP for the envelope seal.
Next, I trimmed a Pumpkin Pie mat for the floral DSP. I started with a piece that measured 2-3/4 inches by 6 inches. After cropping the scalloped trim using a die from the Scalloped Contour die set, I figured out how to get the scallops basically even on the top and bottom.
All of the pieces so far were adhered with multipurpose liquid glue.
The sentiment panel consists of a piece of white cardstock cropped with another die from the scalloped contours die set. The vellum panel fits right inside the scalloped contour outline. Then, I used dimensionals under the sentiment panel.
I trimmed a piece of white cardstock to to 4 inches by 5-1/4 inches for the inside of the card. I left it blank so the card can be used as an all-occasion card
Putting It Together:
This adorable bee was punched using the ladybug builder punch. I punched the body from black cardstock.
Then I trimmed 1/8 inch stripes from So Saffron cardstock. I simply cut off a corner of So Saffron to make the stinger.
Many thanks to a good friend who helped me figure out the wings. I knew I needed to use vellum cardstock for the wings. I punched two sets of vellum wings. Then, I cut one set apart to create the top horizontal set of wings. There’s little dots of liquid glue holding the wings together.
Finally, I added the two matte black dots to the wings. Cuteness overload! Finally, I added dimensionals under the bee.
The sentiment comes from the Happy and Heartfelt stamp set. If you like sentiments, this stamp set is for you! I stamped it on vellum cardstock using Pumpkin Pie ink. Then, I quickly covered the ink with clear embossing powder and set it with my heat tool.
Adhering vellum can be tricky. To adhere this whole vellum piece to the white cardstock mat, I spread liquid glue very thinly to the back of the vellum.
Next, I wrapped a piece of black and white gingham ribbon around the sentiment and simply tied it in a square knot.
With that, I’d finished this coordinated card, envelope, and envelope seal set.
Back to the InKing Royalty Blog Hop Information:
Thank you for stopping by today. I hope you’ll hop along to the next stop on the blog hop, Candy Ford at Stamp Candy. There’s lots of inspiration to be found in this group – and you don’t want to miss it!
Thank you for hopping along with us. If you get stuck during the Blog Hop, please use this line-up as a guide:
Along with the new catalog, there’s a really fabulous joining bonus! As always, your starter kit is just $99 for $125 of your choice of products. The bonus? Over $66 of the new 2022 – 2024 In Color supplies! You get the following at no extra cost to you:
In Color Ink Pad Collection
and In Color Grid Paper
plus In Color Cardstock Collection
and the 6 x 6 inch In Color Designer Series Paper Assortments
Do You Want to Place an Order?
Of course you do!
If you are ordering less than $150.00, please use the host code shown. If you are ordering more than $150.00, please contact me first so you can get your stamping rewards! Any order over $50 will earn a little surprise from me.
The HOST CODE through May 31, 2022 is E3W722BD.
Again, thank you for stopping by my blog today! I appreciate your comments and your time.
Welcome to the Make My Monday challenge # 173. Debbie chose happy birthday for this two-week challenge theme. When you are finished here, I hope you will pop over to the Make My Monday challenge site to see what the rest of the design team created.
When I started thinking about this theme, I decided that I would only use “scraps” from my Pool Party, Basic White, and Basic Black stash. I keep my cardstock sheets in letter sized file folders in alphabetical order. Each color’s file folder has an 8 x 8 inch page protector for “scraps”. I’m a teacher and a crafter, so I don’t stand a chance when it comes to keeping things I might use some day. This card is proof I can and will use my leftovers. A bit more on that in just a minute.
First, here’s the sketch I used for inspiration:
I hope you can see the sketch in the front panel of my fun fold Z-card.
Measurements and Leftovers:
As I said, just about everything came from my leftovers in the 8 x 8 inch page protectors. I did need to use a piece of white cardstock for the inside panel, a black dot, and 4 1/2 inch circles for the center of the daisy.
I already had the Pool Party base leftover and scored just the way I needed it. The base measures 8-1/2 inches by 5-1/2 inches. It was already scored at 4-1/4 inches and 2-1/8 inches to create the z-fold.
The two daisy pieces were punched already, and the white layer was already dry embossed
I had the black frame leftover from cropping out the center for another project. The black cardstock for the sentiment also came from leftovers.
All I needed to do for all the DSP pieces was trim them down to size. Like I said, I keep all kinds of pieces, and the black cardstock leftovers finally came in handy. Even the 4-1/8 inch by 5-3/8 inch black cardstock for the bottom layer is a leftover from a previous project. You can’t see it now, but there’s a rectangle cropped from the middle that I’d used on a previous project.
Even the Pool Party for the front framed area used to live in my leftover page protector. However, I did need to run it through my cut and emboss machine using the Subtle embossing folder.
Try Stampin’ on Tuesday
In order to be in line with the TSOT sketch challenge, I used white baker’s twine at the top of the front panel. I folded the twine three times, wrapped it around the frame and tied it in a bow. So much easier than trying to wrap it around three times and tie off a tiny bow. I used a glue dot to keep the bow in place.
The sentiment, from the Hello Ladybug cling stamp set, was stamped in VersaMark then heat set using white embossing powder.
The inside sentiment comes from the Biggest Wish photopolymer stamp set.
I did have to scrounge to find a leftover piece of DSP for the envelope flap. The basic gray DSP does come from a leftover piece of DSP. Once I found it, I trimmed it to 2-1/2 inches by 6 inches for the envelope flap.
I used mini-dimensionals under each white petal of the daisy. I used multipurpose liquid glue to adhere everything else.
After double-checking the inspiration sketch, I realized I needed something in the lower, right-hand corner. I grabbed my matte black dots, and finished the card.
With that, I’d finished this coordinated card and envelope set. I stayed true to the challenge I gave myself in that I used all but two leftovers.
Thankyou very much for stopping by my blog today!
Have a Peachy Day!
Sue
Do you live in the U.S. and need a demonstrator? If so, I’d love to talk to you!
Do You Want to Place an Order?
Of course you do!
If you are ordering less than $150.00, please use the host code shown. If you are ordering more than $150.00, please contact me first so you can get your stamping rewards! Any order over $50 will earn a little surprise from me.
The HOST CODE through April 30, 2022 is VRBF62NN.
Again, thank you for stopping by my blog today! I appreciate your comments and your time.
As a demonstrator, I’ve already seen the new 2022 – 2023 catalog and it’s fabulous! I am thrilled to be able to pre-order products on Friday, April 1st (no fooling!). While I can’t show you the inside pages of the catalog, I can share the new 2022 – 2024 In Colors with you! Get ready!
Do you live in the U.S. and need a demonstrator? If so, I’d love to talk to you!
Do You Want to Place an Order?
Of course you do!
If you are ordering less than $150.00, please use the host code shown. If you are ordering more than $150.00, please contact me first so you can get your stamping rewards! Any order over $50 will earn a little surprise from me.
The HOST CODE through April 30, 2022 is VRBF62NN.
Again, thank you for stopping by my blog today! I appreciate your comments and your time.
The Hello Ladybug bundle, found in the January – June mini-catalog, consists of a photopolymer stamp set and a ladybug builder punch. This bundle is so stinking cute! I used pretty much the same materials to create two cards, each of which is based on a challenge. I’ve loved the black, red, and white color combination since I was a teenager, and it just fits these ladybugs to a tee!
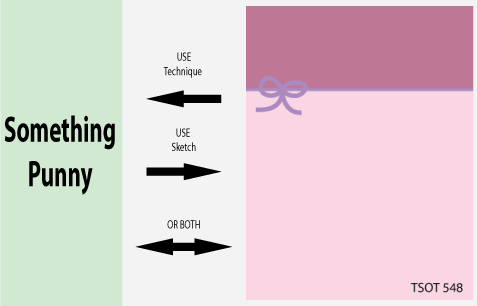
Here’s my Try Stamping on Tuesday #548 card and the challenge banner:
Here’s the card using the Fusion Bookshelf challenge and the accompanying banner:
The inside of the cards are very similiar:
Measurements:
Both cards start with a Real Red base measuring 5-1/2 inches by 8-1/2 inches, scored at 4-1/4 inches.
The striped DSP (designer series paper) is just one of the many black and white patterns from the host DSP pack of 48 – 12×12 inch papers. If you love black and white patterns, don’t miss this one! Each piece measures 4-1/8 inches by 5-3/8 inches. I also trimmed two pieces of DSP to 6 inches by 2-1/2 inches for the envelope flaps.
I trimmed 2 pieces of white cardstock to my usual 4 inches by 5-1/4 inches for the inside of the cards.
That’s it for the measurements.
Putting It Together:
Next, I used scraps of Basic Black and Real Red cardstock to punch out all the ladybugs.
I also needed 3 two inch circles punched from cardstock vellum to go under the ladybugs, which I popped up on dimensionals..
Then I cropped the scallop design from the Scallop Contours die set for the TSOT card. I used a scalloped frame from the same die set for the sentiment. In addition to the white frame, I cropped two red ones to frame the sentiment panel. Since I wanted the Fusion card to be clean and simple, I stamped the sentiment onto the embossed strip. It would’ve been easier if I had done that before using the embossing folder. However, the Stamparatus made it relatively easy.
While I was using the cut and emboss machine, I embossed a strip of white for the Fusion Bookshelf card using the bark 3D embossing folder.
Then I wrapped Real Red sheer ribbon around each of the white panels and tied a bow for each. I used a mini-glue dot under each bow to hold it in place.
My favorite adhesive is the multipurpose liquid glue, and I used that to adhere everything except the ladybugs. I even used it to adhere the vellum to the DSP, making sure that I only placed the glue where it would be covered by a ladybug.
I finished the fronts off with three red dots on each white panel.
After stamping the sentiment on the inside panels, I stamped that adorable ladybug in the bottom corner. Since the stamp set is photopolymer, the two-stamp process for this cute critter was a breeze.
Finishing Up:
I also stamped a ladybug on the bottom right-hand corner of the front of the envelope.
I wanted something red for the envelope seals, so I stamped a bunch of the dots used for the ladybug wings on a scrap of Real Red. Then, I punched out two one-inch circles and ran them through my XYRON create-a-sticker machine.
Finally, I trimmed the DSP on the envelope flaps.
With that, I’d finished two coordinated card, envelope, and seal sets of cute critters. Adorable!
As a demonstrator, I’ve already seen the new 2022 – 2023 catalog and it’s fabulous! I am thrilled to be able to pre-order products on Friday, April 1st (no fooling!). While I can’t show you the inside pages of the catalog, I can share the new 2022 – 2024 In Colors with you! Get ready!
This Mini Stampin’ Cut and Emboss machine WILL be on my next order! The special is available as long as supplies last, so don’t miss out on the machine or the select bundles! 20% off?!?! Yes, please!!
Do you live in the U.S. and need a demonstrator? If so, I’d love to talk to you!
Do You Want to Place an Order?
Of course you do!
If you are ordering less than $150.00, please use the host code shown. If you are ordering more than $150.00, please contact me first so you can get your stamping rewards! Any order over $50 will earn a little surprise from me.
The HOST CODE through March 31, 2022 is KNS7N3KP.
Again, thank you for stopping by my blog today! I appreciate your comments and your time.
Leave a Reply
As a demonstrator, I’ve already seen the new 2022 – 2023 catalog and it’s fabulous! I will be able to pre-order select products starting on Friday, April 1st (no fooling!). While I can’t show you the inside pages of the catalog, I can share the new 2022 – 2024 In-Colors with you!
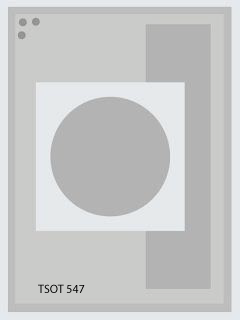
Welcome to this three-for post! Jolanda chose the equinox as the theme for the Cardz 4 Guyz challenge # 292. I used the sunflower to represent the equinox, but you will see it stands for so much more. Since today is the fourth Tuesday of the month, it’s also the Pals Fun Fold Blog Hop, and I learned a number of new fun folds over Spring Break last week. Some went really well, a couple others not so much. The layout comes from the Try Stamping on Tuesday challenge # 547. Score!
Here’s. my fun fold card:
Here’s the challenge banner from TSOT #547
Finally, here’s one of the fun folds I made that didn’t turn out the way I thought it would, but I found a new-to-me fold through the process. Originally, I intended to create a double easel card. It didn’t work out that way.
Measurements for the First Challenge Card:
The Pacific Point base measures 11 inches by 4-1/4 inches, scored at 5-1/2 inches.
The top Basic Black base measures 4-1/8 inches by 10-3/4 inches, scored at 5-3/8 inches. Then, I simply adhered this black card to the front of the Pacific Point base.
I used white cardstock trimmed to 4 inches by 5-1/4 inches for the inside of the Pacific Point card.
Starting from the front, both the Daffodil Delight and the Pacific Point DSP is from the Brights 6 x 6 DSP (designer series paper) collection. I trimmed the Daffodil Delight to 5-1/4 inches by 4 inches. The Pacific Point DSP measures 1-3/8 inches by 3-5/8 inches.
Next, I trimmed the DSP for the second layer to 5-1/4 inches by 4 inches. I also trimmed a piece of this DSP to 6 inches by 2-1/2 inches for the envelope flap.This fabulous black and white pattern comes from the host DSP Pattern Party pack. If you like black and white patterns, this host DSP pack is for you!
I cropped the open square using two of the square dies found in the Stitched Shapes die set.
Stamping and Coloring:
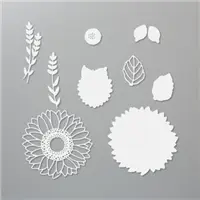
Now for the fun, aka stamping and coloring, part. These sunflower stamps come from the Celebrate Sunflowers stamp set. Love! The Momento Tuxedo Black ink pad is a must when coloring with blends because it won’t run. I stamped two sunflowers and cropped them out with the sunflower die. Then, I made two sunflower masks out of copy paper to create the middle layer of the card.
HINT: Don’t use cardstock for a masking layer because it’s two thick. Copy paper works wonderfully. Just remember to take a tiny step back from the edge of the image you are masking. That way, your new image will line up right next to the first image. Does that make sense?
Finally, I stamped a sunflower on the corner of the inside of the card and on the front, bottom corner of the envelope.
HINT: When using blends on an envelope, make sure you have a scrap of cardstock inside the envelope so the blends don’t bleed to the back of the envelope. Trust me – don’t forget the scrap.
I used the dark and light Daffodil blend for the sunflower petals. Next, I used the Old Olive blends combo for the leaves. Finally, I used the Crumb Cake blends combo for the centers of the sunflowers.
Both the front and middle sentiments come from the Flowing Flowers stamp set, found in the current January – June 2022 mini catalog.
The inside sentiment comes from the Celebrate Sunflowers stamp set.
Finishing Up:
At this point, I decided the front needed a little something, so I cropped the Crumb Cake stalks using the sunflower die set.
The middle part definitely needed something behind the sunflowers. Therefore, I used the scalloped contour dies to crop a Daffodil Delight layer from the cardstock. Then, I trimmed the sunflower layer to size.
In order to echo the TSOT challenge sketch, I added 3 matte black dots in the top left-hand corner of the outside layer.
After adhering everything with multipurpose adhesive, I popped the two front sunflowers up on dimensionals.
Finally, I trimmed the DSP on the envelope flap and punched a 1 inch circle from the Daffodil Delight DSP for the envelope seal.
With that, I’d finished this coordinated fun fold card, envelope, and envelope seal set.
Pals Fun Fold Blog Hop:
After finishing here, the other Pals and I would greatly appreciate you hopping along with us for the fun folds. Thanks!
This Mini Stampin’ Cut and Emboss machine WILL be on my next order! The special is available as long as supplies last, so don’t miss out on the machine or the select bundles! 20% off?!?! Yes, please!!
Do you live in the U.S. and need a demonstrator? If so, I’d love to talk to you!
Do You Want to Place an Order?
Of course you do!
If you are ordering less than $150.00, please use the host code shown. If you are ordering more than $150.00, please contact me first so you can get your stamping rewards! Any order over $50 will earn a little surprise from me.
The HOST CODE through March 31, 2022 is KNS7N3KP.
Again, thank you for stopping by my blog today! I appreciate your comments and your time.
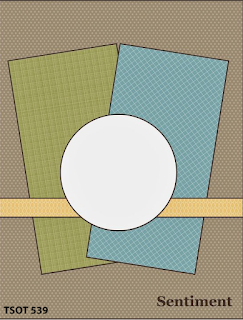
Welcome to the current Cardz 4 Guyz biweekly challenge. Caz picked the theme of “something with a P” for C4G #288. When you are finished here, I hope you hope over to the challenge site to see the inspiration from the rest of the design team.
TSOT has partnered with the Double Trouble Challenge as an option. The Double Trouble challenge is to use three different patterns of paper. Here’s that challenge banner:
Measurements:
My goal for the card was to have a monochromatic card with three pops of one color added. Red, grey, and white really fit the goal.
I used a Real Red base for the card. It measures 8-1/2 inches by 5-1/2 inches, scored at 4-1/4 inches.
The three DSP (designer series paper patterns come from the Peaceful Place DSP pack from the previous mini catalog. However, any three patterns would work. .
The background DSP measures 4-1/8 by 5-3/8 inches.
The smaller panels each measure 4 inches by 2 inches.
While I had the DSP out, I trimmed a piece to 2-1/2 inches by 6 inches for the envelope flap.
I cropped both the sentiment circle and the scalloped circle border using the layering circle dies.
I stamped the pair of partridges on a piece of scrap white cardstock. Next, I colored them with the Smokey Slate blends combo, which kept the partridges in the shades of grey like the rest of the card.
The white inside panel measures 4 inches by 5-1/4 inches.
What I Did:
I really didn’t know what I wanted to do with the shape in the middle of the card, so I went on Pinterest for inspiration. I found a partridge card by Tina Wardell at Tina’s Crafty Ink Spot and CASE’d her center circle and placement of the partridges. Her coloring of the partridges is stunning, mine is plain to keep with the color scheme.
Both the inside and outside sentiments come from the Catch You Later stamp set found in the current mini-catalog.
I didn’t want to add another DSP pattern for the horizontal line on the challenge banner. Therefore, I attached a 4-1/4 inch piece of Read Red sheer ribbon to the card using some tear-and-tape. Then, I used glue dots to attach the black and white gingham ribbon.
I only popped the sentiment circle and partridges up on dimensionals. . Everything else was adhered using multipurpose glue.
Finally, I added 5 red dots to the border of the circle.
Welcome to Just Peachy Stamping by Sue Jackson: an independent Stampin' Up demonstrator.
Through Stampin' Up!, I happily share my love of papercrafting through sales, classes, small stamping group meet-ups and workshops. I think that being a teacher in my "real life", I have a unique approach to sharing my fantastic hobby. I look forward to connecting with you!