This month, the theme is Focus on the Sentiment. Our Design Team are showcasing a sentiment as the focal point of their project. We really hope that you will be inspired by all the amazing creations the Pals share with you! As you hop from blog to blog, we would love for you to leave a comment. You will find the lineup at the end of my post to help you “hop” along from Pal to Pal.
I chose a monochromatic color combination of Evening Evergreen and Soft Succulent for my card. I paired the colors with the fabulous Fond of Autumn bundle from the July-December mini catalog, which contains a die with which I have quickly fallen in love!
Here’s my card:
The card is simple, but I framed the sentiment, which draws attention to the center of the card.
Focusing on the Sentiment:
The Evening Evergreen base measures 5-1/2 by 8-1/2 inches, scored at 4-1/4 inches to create a tent card.
Next, I used a piece of the Soft Succulent 6 x 6 inch DSP for the first layer. It measures 4-1/8 by 5-3/8 inches. I also cut a piece of this DSP to 6 inches by 2-1/2 inches for the envelope flap. I grabbed a piece of Evening Evergreen DSP and punched a 1 inch circle to use for the envelope seal.
The Basic White panel for the inside of the card measures 4 by 5-1/4 inches.
Then I used a 4-1/4 by 5 inch piece of white cardstock for the stamping for the front of the card.
Stamping and Cropping:
Using the large stamp from Fond of Autumn, I stamped it on white cardstock using Tuxedo Black Momento ink.
Next, I used the embossing buddy on the white cardstock.
Then, I cleaned the stamp and then stamped it on the other half of the white piece of cardstock using Versamark, after which I covered it in black embossing powder and heat set it.
I stamped the sentiment, again using Versamark, on a scrap piece of Evening Evergreen cardstock. Then, I covered the sentiment in white embossing powder and heat set that. The curved banner die comes from the coordinating die set.
I added iridescent basic pearl jewels to the four corners of the banner and put dimensionals under just the end of the banner.
Here’s why this die set has quickly become one of my all-time favorites. I cropped the large stamp done in the Tuxedo Black using the large, outline die. Using mutipurpose liquid glue, I adhered the cropped piece to the Soft Succulent DSP. This allowed me to be more precise when placing the the heat embossed pieces.
The next step kicks this die set up to one of my all time favorites: I used the die that will crop the whole thing into four (!!) separate pieces! Brilliant!!!
Here’s some photos of this brilliance:
I adhered four of the cropped pieces to the already adhered whole die cut using multipurpose liquid glue.
Finishing Up:
Next, I colored the three oak leaves using the Evening Evergreen blends combo markers. Then, I added dimensionals under this piece only and adhered it in place.
The dimensionals hold the banner up on the ends, and I added glue in the middle over the center of the oak leaves.
My whole goal was to bring all the attention to the center of the card by framing the sentiment, which I think I accomplished.
Back to the Pals’ Blog Hop:
More inspiration awaits, so use the lineup below to visit the rest of the Design Team. The Pals are excited to show you what they’ve created! Then, please mark your calendars for our next blog hop on October 12th when our theme will be a color challenge!
More inspiration awaits, so use the lineup below to visit the rest of the Design Team. The Pals are excited to show you what they’ve created! Then, please mark your calendars for our next blog hop on October 12th when our theme will be a color challenge!
This month, the theme is Create Your Own Background. We really hope that you will be inspired by all the amazing creations the Pals are sharing with you! As you hop from blog to blog, we would love for you to leave a comment. You will find the lineup at the end of my post to help you “hop” along from Pal to Pal.
Here’s my card:
I’ve already posted a few cards using this particular gnome, but I think this guy’s the happiest. He reminds me of one of Snow White’s dwarfs.
Measurements:
The Calypso Coral base measures 5-1/2 by 8-1/2 inches, scored at 4-1/4 inches to form a tent card.
Both the inside and the outside white cardstock panels measure 4 by 5-1/4 inches.
I trimmed a piece of Soft Succulent DSP to 6 inches by 2-1/2 inches for the envelope flap.
Then I punched a one inch circle from Calypso Coral DSP for the envelope seal, which I ran through my XYRON create-a-sticker.
That’s it for the measurements.
Creating the Background:
For some strange and unknown reason, I didn’t take pictures of the process of creating the Balmy Blue clouds. However, I’ve used this technique before using Bermuda Bay ink and did take pictures for that.
I used a piece of window sheet film and cropped it with the cloud looking die from the basic borders die set. Then, I used the window sheet clouds as a stencil. Here are photos of this process using the stencil, a blender brush, and Bermuda Bay ink:
I did move the “clouds” as I worked my way up the white cardstock. I also blended very light areas using the dry blender brush. This way, only the bottom layer of clouds appear stark white.
Stamping and Coloring:
First, I stamped the mushroom, gnome, butterflies, and the sentiment in Momento Tuxedo Black ink on white cardstock. The butterflies come from the Elephant Parade stamp set, while the rest come from the Kindest Gnomes stamp set.
I used the Daffodil Delight blends combo to color the sleeves of the gnome and the two windows in the mushroom.
Then, I colored the mushroom using the blends combos for Calypso Coral and Soft Suede.
I also used Soft Suede for the soles of the gnome’s shoes and outlined them with a black marker and added black lines on the soles.
Next, I colored the rest of the gnome’s clothes using the Balmy Blue blends combo. I only used the light blend on the pants and underside of his hat.
My new favorite skin tone color, SU 500 in the medium blends, comes from the Natural Tones Stampin’ Blends. After I colored the hands, nose, and face, I used the color lifter on a small spot of the nose.
I just used the light Smoky Slate to just outline the stamping on the beard.
As long as I was coloring gnomes, I colored one for the inside of the card and one for the front of the envelope.
Finally, I colored the butterflies using my Daffodil Delight and Calypso Coral Stampin’ Write markers.
I used a stitched rectangle die for the sentiment and the butterfly die from the Elephant Parade’s coordinating dies.
Everything else was cropped using the Gnomes dies.
I added dimensionals under one of the mushrooms, one of the grass pieces, the mushroom, gnome, and the sentiment. The dimensionals necessary under the butterflies are mini-dimensionals cut into quarters. Talk about tiny!!
Everything else was adhered with multipurpose liquid glue.
With that, I’d finished this coordinated card, envelope, and envelope seal.
Back to the Pal’s Blog Hop:
More inspiration awaits, so use the lineup below to visit the rest of the Design Team. The Pals are excited to show you what they’ve created! Then, please mark your calendars for our next blog hop on August 10th. Our theme will be Seasons’ Greetings, where we will showcase projects inspired by our favorite seasonal time of the year.
It’s July, 2022 ~ do you know what that means? The new Holiday Mini-Catalog and Sale-a-Bration are in full swing!!
Sale-a-Bration runs from July 1 to August 31, 2022. This means you can earn FREE products for two months! Take a look at these Sale-a-Bration products!!
Here’s a link to the new Holiday Mini-Catalog, which runs through January 4, 2023. Click on the following image to open the catalog:
Again, thank you for stopping by my blog today! I appreciate your comments and your time.
This month, the theme is “CASE the Catalog” so the Design Team chose a card from the new Annual Catalog and has CASEd it with their own creative twist. We really hope that you are inspired by all the amazing creations the Pals are sharing with you! As you hop from blog to blog, we would love for you to leave a comment. You will find the lineup at the end of my post to help you “hop” along from Pal to Pal.
I chose a card using the Sun Prints suite featured on page 90 of the catalog. I CASE’d my chosen card with just one small exception. Then, I went back and changed it just a bit more to make it an easel card. I just love to create fun folds!
Here’s the original CASE and the easel fun fold:
The changes I made to the original CASE were minimal. I added a white cardstock mat under the DSP. For the easel card, I moved the leave spray on top of the DSP strips instead of underneath them. These colors are so incredibly gorgeous! I just love the Starry Sky color, and Gray Granite is stunning in this DSP.
Measurements:
The measurements for the front of the cards are the same. Since there’s a bit more to the easel card, I’ll go with those measurements and such.
The Night of Navy base measures 8-1/2 by 5-1/2, scored at 4-1/4 and 2-1/8 inches creating a landscape card orientation.
Both the white mat on the front and the white cardstock on the inside measure 4-1/8 inches by 5-3/8 inches. I usually use 4 inches by 5-1/4 inches for the inside panel, but I wanted the sizes to be the same on the front and inside because of the easel.
The Sun Prints DSP pattern for the background measures 4 inches by 5-1/4 inches.
I trimmed down a coordinating piece of DSP for the envelope flap to 6 by 2-1/2 inches. At the same time, I punched a 1 inch circle of the Gray Granite DSP for the envelope seal.
After I dry embossed a piece of white cardstock using the Fern 3D embossing folder, I trimmed it down. I needed two pieces measuring 4-3/4 by 1-1/2 inches.
REMEMBER: if you trim your paper before using any 3D embossing folder, you will wind up with a piece that’s smaller than you wanted because of the deep impression.
The Starry Sky DSP pattern paper measures 4 inches by 1-3/8 inches.
What I Did:
Using the Nature Prints stamp set, I stamped the spray of leaves in Starry Night in the same ink on white cardstock. In addition, I stamped partial leave sprays on the inside white cardstock and on the front of the envelope.
Next, I stamped the sentiment in Starry Sky ink on Gray Granite cardstock.
Then, I colored the basic pearl jewels I needed using the dark Daffodil Delight marker. It’s important to let the mutual layers of ink completely dry before adding another layer. I used 4 or 5 layers of ink on these pearl jewels.
This card features a die from the Nature’s Prints dies to crop the Starry Sky spray. I added dimensionals underneath the spray.
The new Stylish Shapes dies are fabulous, especially if you loved the now retired Stitched Shapes die set. I used one of the circles to perfectly crop the sentiment. There are dimensionals under the sentiment circle. I did have to make sure to add them only where the circle doesn’t touch the spray of leaves.
Figuring out what to use to hold the folded easel card open took some creative thought time. I finally decided to punch a 1 inch circle from coordinating DSP. I trimmed this circle in half and added mini-dimensionals under each semi-circle and attached them to the inside panel.
For good measure, I added two smaller colored basic pearl jewels to help hold up the easel.
If I didn’t put dimensionals under an element, I used multipurpose liquid glue to adhere it together.
With that, I’d finished this coordinated card, envelope, and envelope seal set.
Here are just a few of my favorite new things, and about half of which arrived Monday! I’ve already been playing with my new goodies. I’m also working on a pre-order from the upcoming July – December mini-catalog. Fun times!!
Do You Want to Place an Order?
Of course you do!
If you are ordering less than $150.00, please use the host code shown. If you are ordering more than $150.00, please contact me first so you can get your stamping rewards! Any order over $50 will earn a little surprise from me.
The HOST CODE through June 30, 2022 is 6YTD44QQ.
Again, thank you for stopping by my blog today! I appreciate your comments and your time.
This month, the theme is New 2022-2024 In Colors. We really hope that you will be inspired by all the amazing creations the Pals are sharing with you! As you hop from blog to blog, we would love for you to leave a comment. You will find the lineup at the end of my post to help you “hop” along from Pal to Pal.
I can not get enough of the Hello Ladybug stamp set and punch! The ladybugs themselves are so cute, but I’ve been adding googly eyes and they are just so stinking adorable! I decided to keep the front of the card relatively simple so I could show off all five new In Colors for 2022 – 2024. I just love these bright colors, and they look fabulous together, as the In Colors always do!
Here’s my slimline ladybug card:
I have no idea why the googly eyes on the Parakeet Party ladybug look so funny. Here’s a horizontal view of the card:
What I Did:
The Starry Sky base measures 7 inches by 8-1/2 inches, scored at 3-1/2 inches.
I trimmed the front white cardstock panel to 3-3/8 inches by 6-7/8 inches. The inside white cardstock measures 8-1/4 inches by 3-1/4 inches.
I used tuxedo black ink to stamp the sentiment and matted it on Starry Sky cardstock.
In order to get all the leaves on the front of the card, I needed a mask of the leave. Masks work much better if you use copy paper rather than cardstock. After stamping and fussy cutting the leave, I started stamping on the front of the card. I started with Parakeet Party on the bottom, and then Tahitian Tide, Orchid Oasis, and ended with Sweet Sorbet on the top.
I punched out the ladybug bodies from black cardstock.
Next, I used the same four leaf colors to stamp the dots on the wings on vellum cardstock. Make sure you give the ink on the vellum time to dry before punching the wings out. While I liked the subtle look on the vellum, the wings faded into the background leaf. Therefore, I punched four white wings and adhered the vellum to the wings. I almost cheated and put tiny dots of multipurpose adhesive on the back of each dot on the vellum. Finally, I adhered the the white cardstock wings to the black cardstock bodies.
These googly eyes are the perfect size for the ladybugs, and I think they just make the ladybugs that much cuter.
I used Sweet Sorbet ink to stamp the trio of flowers on the diagonal corners of the inside white cardstock. To add interest, I used the tiny three dot stamp to each trio of flowers.
Then, in order to tie the front to the inside, I stamped the trio of dots five times around the leaves.
Finally, I stamped the trio of flowers and black dots on the front, bottom left-hand corner of the envelope.
Back to the Pals’ Blog Hop!
More inspiration awaits, so use the lineup below to visit the rest of the Design Team. The Pals are excited to show you what they’ve created! Then, please mark your calendars for our next blog hop on June 8th. Our theme will be “CASE the Catalog” when our Design Team creates a project found in the new Annual Catalog and CASE it with their own creative twist.
Along with the new catalog, there’s a really fabulous joining bonus! As always, your starter kit is just $99 for $125 of your choice of products. The bonus? Over $66 of the new 2022 – 2024 In Color supplies! You get the following at no extra cost to you:
In Color Ink Pad Collection
and In Color Grid Paper
plus In Color Cardstock Collection
and the 6 x 6 inch In Color Designer Series Paper Assortments
Do You Want to Place an Order?
Of course you do!
If you are ordering less than $150.00, please use the host code shown. If you are ordering more than $150.00, please contact me first so you can get your stamping rewards! Any order over $50 will earn a little surprise from me.
The HOST CODE through May 31, 2022 is E3W722BD.
Again, thank you for stopping by my blog today! I appreciate your comments and your time.
This month, the theme is Fabulous Flowers. We really hope that you will be inspired by all the amazing creations the Pals are sharing with you! As you hop from blog to blog, we would love for you to leave a comment. You will find the lineup at the end of my post to help you “hop” along from Pal to Pal.
Here’s my fabulous flowers card:
The inspiration for this card came from the Try Stampin’ on Tuesday sketch #549. I’m too late to submit it to that challenge, but I really liked the layout.
I also need to say how honored and thankful I am to have been chosen as one of the top three for the TSOT #548 challenge! You can see the card I submitted here. I am so honored!
Measurements:
The Polished Pink base measures 8-1/2 inches by 5-1/2 inches, scored at 4-1/4 to form a tent card.
I really think this gorgeous DSP (designer series paper) pops fabulously off a black background. Therefore, I trimmed a piece of black cardstock to 4-1/8 inches by 5-3/8 inches. I trimmed a piece of the DSP to 6 inches by 2-1/2 inches for the envelope flap.
The white cardstock layer measures 4 inches by 5-1/4 inches, as does the cardstock for the inside panel of the card.. In order to add interest to the white cardstock on the front, I ran it through the Cut and Emboss Machine using the Painted Texture 3D embossing folder.
I used three patterns of this Expressions in Ink DSP. Each strip measures 3/4 inch by 4-1/2 inches. I used the Banners Pick a Punch on each strip. Since I’d trimmed the DSP to 3/4 inch wide, it fit snuggly in the punch. Therefore, each punch came out uniformly.
Putting the Card Together:
Next, I trimmed the opposite ends so that the green and pink strips are shorter than the flowered pattern. Then, I outlined each strip using the black marker. I used my favorite adhesive, multipurpose liquid glue, to adhere the strips to the embossed white cardstock.
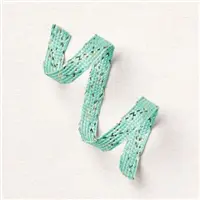
Then, I wrapped a length of the Just Jade and gold braided ribbon around the white cardstock and tied it in a bow. This just about perfect bow happened magically on my first try. A glue dot holds this bow in place.
Next, I adhered the white cardstock to the black layer, and then adhered the black to the Polished Pink cardstock.
I’ve been using embossing powder so often lately and just love the look of the gold embossed sentiment. I cropped the sentiment using a die from the stitched rectangles die set. Then I cropped a piece of the brushed gold cardstock using the Painted Labels die. Both the sentiment and gold mat are popped up on dimensionals.
Finally, I trimmed the DSP on the envelope flap and punched a 1 inch circle of coordinating DSP to make the envelope seal.
With that, I’d finished this coordinated card, envelope, and envelope seal set.
Back to the Pals’ Blog Hop:
More inspiration awaits, so use the lineup below to visit the rest of the Design Team. The Pals are excited to show you what they’ve created! Then, please mark your calendars for our next blog hop on May 11th. Our theme will be New 2022-2024 In Colors, with the Pals showcasing the brand new In Colors in the new Annual Catalog.
As a demonstrator, I’ve already seen the new 2022 – 2023 catalog and it’s fabulous! I am thrilled to be able to pre-order products on Friday, April 1st (no fooling!). While I can’t show you the inside pages of the catalog, I can share the new 2022 – 2024 In Colors with you! Get ready!
This month, the theme is Cute Critters. We really hope that you will be inspired by all the amazing creations the Pals are sharing with you! As you hop from blog to blog, we would love for you to leave a comment. You will find the lineup at the end of my post to help you “hop” along from Pal to Pal.
Stampin’ Up! has so many cute critters in the current January – June mini catalog! For this blog hop, I chose Easter Friends, and each one of the critters in that stamp set is absolutely cute!
Here’s my Cute Critters card:
But wait – there’s more!
I made this card by following along with JanB’s video #523 on her YouTube channel. I really enjoy her videos and have used them a number of times for fun fold cards. Truly, if you can trim and score cardstock, you can do this card. I copied her measurements exactly and didn’t have any issues. One of the wonderful things about JanB’s videos is that she includes American and metric measurements. Score!
HINT: I’ve copied down measurements and labeled them with the name of the fun fold, but I figured something out this past weekend. I might be late to the game with this, but I actually wrote the number of the video with these measurements. This way I can go back and actually recreate the card without searching for the original video.
I also created a simpler version using the same stamp set, cardstock, ribbon, DSP, and embossing folder. Here’s that card:
Measurements for the Second Card:
Since JanB did such a fabulous job with the measurements for her fun fold card, I’ll include measurements for the second card.
Once again, I started with a Misty Moonlight base which measures 5-1/2 inches by 8-1/2 inches, scored at 4-1/4 inches.
The white mat layer measures 4-1/8 inches by 5-3/8 inches. As usual, I cropped out the center of the white layer so I could stamp both ducklings and the sentiment. It looks ugly, but no one will know. Here’s what that ugly layer looks like:
I used Pale Papaya for the embossed layer. HINT: Since this is a 3D embossing folder, emboss the cardstock, then trim it to size. The embossing is deep, and if you trim the cardstock and then emboss, your measurements will be off. After embossing and trimming, this layer measures 4 inches by 5-1/4 inches.
The DSP, from the Pattern Party host DSP pack measures 4 inches by 1-3/4 inches.
I like the way the duckling on the fun fold card pops off the white cardstock background, so I cropped a panel using the scalloped contour dies.
I cropped a second scalloped piece out of scrap cardstock. Then I stamped it in Granny Apple Green with the grass stamp in the Easter Wishes stamp set.
The grass scalloped cardstock is glued to the back of the DSP so just the stamp scallops show.
Details:
After using the So Saffron blends combo and the Pale Papaya dark blend to color the ducklings, I fussy cut them out. A benefit of using the white scalloped panel is that the fussy cutting isn’t as noticeable.
I decided to stamp the clouds after I adhered the panel to the Pale Payapa cardstock. I used the clouds from the After the Storm stamp set, stamped off Pool Party ink, and a piece of scrap paper to stamp the clouds. The scrap allowed me to stamp off the sides of the scalloped panel. Here’s a picture of how I did it:
I popped the sentiment and ducklings up using black mini-dimensionals. Everything else was adhered with, my favorite, multipurpose liquid glue. The square knot for the ribbon is attached using a glue dot.
Back to the Pals’ Blog Hop:
More inspiration awaits, so use the lineup below to visit the rest of the Design Team. The Pals are excited to show you what they’ve created! Then, please mark your calendars for our next blog hop on April 13th. Our theme will be Fabulous Flowers when our Design Team creates a project using any of the many beautiful flowers in our catalogs.
Welcome to Just Peachy Stamping by Sue Jackson: an independent Stampin' Up demonstrator.
Through Stampin' Up!, I happily share my love of papercrafting through sales, classes, small stamping group meet-ups and workshops. I think that being a teacher in my "real life", I have a unique approach to sharing my fantastic hobby. I look forward to connecting with you!