Welcome to the bi-weekly Make My Monday challenge #209. Our host for this challenge, Heather, chose In the City for the theme. When you finish here, I hope you will visit the challenge website to see the creations from the rest of the design team. Part of what I love about this challenge is that the options are unlimited regarding interpretation of the challenge theme. We’d enjoy seeing your creations in our gallery and thank you for playing along with us.
There are times that a challenge theme really requires me to think outside the box. This was one of those themes. I realized that I don’t really have anything for a city themed card, except for the Les Shoppes 6 x 12 inch DSP from a paper share.
Here’s the card I created:
Measurements:
The Basic Black card base measures 8-1/2 by 5-1/2 inches, scored at 4-1/4 inches.
The Balmy Blue and white background DSP (designer series paper) measures 4-1/8 by 5-3/8 inches.
I used one of the Scalloped Contour dies for the mat under the shoppe, which I outlined in Calypso Coral.
The DSP for the envelope flap is another pattern from Les Shoppes. I trimmed it to 6 by 2-1/2 inches. I also trimmed a piece to 1/2 by 4 inches for the bottom of the inside of the card.
I punched a 1-inch circle from the Balmy Blue DSP for the envelope seal and ran it through my XYRON create-a-sticker.
The shoppe itself is from another piece of the DSP set, which I had to fussy cut, along with the plant on the corner of the shoppe.
I used scraps of Balmy Blue and Calypso Coral for the sentiment.
The inside of the card is a piece of white cardstock trimmed to 4 by 5-1/4 inches.
What I Did:
I used multipurpose liquid glue to adhere the DSP to the black base and the white scalloped mat to the DSP.
If you don’t mind getting covered in ink, pull a piece of white baker’s twine over the Calypso Coral ink pad. You need to roll it while you are pulling it. Let it dry completely before you try using it on your card. I may or may not have done that and may have messed up the first piece of background DSP. Ok, I did mess it up. Let the baker’s twine dry completley.
After it had dried, I wrapped it around the top of the canopy of the shoppe because I wanted to create a ledge of sorts.
I added dimensionsals under the shoppe and the plant and adhered them to the scalloped contour mat.
The clear embossed sentiment comes from the Charming Sentiments die set. I’ve always liked the look of cropped sentiments but mine never seemed to turn out as planned. Therefore, I am thrilled that this set of fabulous sentiments has a coordinating die set, the Sentiment Silhouette dies.
In order to create the Calypso Coral mat, which allows the sentiment to pop against all the Balmy Blue, I cropped one of the what’s new sentiment dies. I simply cut it in half and used liquid glue to attach the piece to the back of the sentiment.
I added 3 small Calypso Coral ombre dots to finish off the front of the card..
I stamped another Charming Sentiment in Balmy Blue on the inside panel of the card and adhered it using liquid glue.
With that, I ‘d finished this coordinated card, envelope, and envelope seal set.
You can download the following catalog, or find the link on the Stampin’ UP! website. Not surprisingly, some items have already gone on backorder. Now is the time to order your Halloween and Autumn supplies. Tomorrow, I’ll be sharing a pair of cards I made with the Autumn Suite of products.
There’s also going to be a release of ONLINE EXCLUSIVE DSP! I’m especially thrilled with the Tartan DSP! You can see previews below:
If you live in the U.S. and don’t already have a SU! demo from whom you order, I would be honored to work with you.
When prompted, please enter September’s HOST CODE:
FZTABBN
Again, thank you for stopping by! I’d love to hear your comments or thoughts. Sue
Welcome to the Cardz 4 Guyz challenge #327! The host for this bw-weekly challenge, Dawn, picked On the Water for the theme. When you are finished here, I hope you will visit the challenge site to see what the rest of the design team members created.
For this theme, I chose to use the Waves of Inspiration stamp set and coordinating Waves dies.
Here’s my On the Water easel card:
Since this is a card for a guy, I tried to keep it as clean as possible.
Measurements and More:
The Pacific Point base measures 4-1/4 by 11 inches. Score the base at 2-3/4 and 5-1/2 inches.
I used retired DSP (designer series paper) for this card because I love the colors and swirl patterns. The DSP for the front measures 4-1/8 by 5-3/8 inches.
Trim another piece of DSP to 1/2 by 4-1/8 inches for the bottom of the inside of the card.
Next, trim a piece of DSP to 6 by 2-1/2 inches for the envelope flap.
Punch a 1 inch circle of a coordinating pattern for the envelope seal. Run it through your XYRON createasticker.
Trim a piece of white cardstock to 4-1/8 inches by 5-3/8 inches for the inside.
Stamp the seagull and pilings using Basic Gray ink.
Figure out how steep you want your easel to stand. It’s really up to what you want to do and based on the stamping and inside elements.
Stamp the inside sentiment on the white cardstock. again using the Basic Gray ink.
Stamp the outside sentiment on a scrap piece of white cardstock.
Time to crop using the Waves dies:
Crop the seagull and pilings, the outside sentiment, and the clouds using the Waves dies.
I added dimensionals under the clouds so I could stand up the easel.
HINT: You might need to use two layers of dimensionals, depending on the steepness of your easel. I’ve found two layers of dimensionals tends to work better for a steep easel.
Crop the wave from white cardstock.
HINT: The wave die is longer than the 4-1/8 inch DSP. Therefore, I cropped the wave, and trimmed off the end of it. Then, I trimmed the end down and used liquid glue to attach the vertical edge back on the wave. I thought the wave looked incomplete without the short vertical end piece.
Add a couple of sma;ll pieces of tear & tape to the back of the sentiment banner for the front.
Using some silver braided trim, form a circle using the tear & tape to hold the trim in place.
Add dimensionals on the back of the sentiment banner and adhere to the front of the card.
Adhere the clouds to the top of the inside white cardstock.
The front sentiment banner and the clouds were the only place where I used dimensionals. All the other elements were adhered with multipurpose liquid adhesive.
With that, I’d finished this coordinated card, envelope, and envelope seal set.
Welcome to the Cardz 4 Guyz challenge #320. This challenge is a two-week challenge, as always. Our host for #320, Billie A., chose wet or dry embossing for the theme. When you are done here, I hope you will visit the challenge site to see the inspirational pieces by the rest of the design team members.
My posted challenge card is below:
I did emboss the background DSP using the retired subtle embossing folder. That’s one of my favorite folders and I just can’t let it go yet.
However, while driving home from work today (Monday evening) I thought I’d create a quick clean and simple guyz sympathy card. I’ve been seeing a lot of cards created using the New Horizons (retired) DSP (designer series paper) and thought I could make use of both dry and wet embossing. This card literally took me 15 minutes to make, and that’s including hunting for a sympathy sentiment I thought would fit with this card.
Here’s my favorite, quick, clean and simple card for challenge #320:
Measurements and Assembly:
The Blackberry Bliss base measures 5-1/2 inches by 8-1/2 inches, scored at 4-1/4 inches.
After I embossed a piece of white cardstock to Painted Texture 3D embossing folder, I trimmed the cardstock to 4-1/8 by 5-3/8 inches.
HINT: Trim your cardstock after dry embossing it. If you trim it before, especially with a 3D embossing folder, you might have a problem getting the size you want.
The New Horizons DSP measures 4-3/4 by 2-1/2 inches.
I matted the DSP with a piece of Blackberry Bliss cardstock measuring 4-7/8 by 2-5/8 inches.
After rubbing a scrap piece of Blackberry Bliss with my embossing buddy, I stamped the sentiment, From Special Moments, using VersaMark.
Then, I covered it in white embossing powder and heat set the powder with my heat tool.
Next, I cropped the sentiment using a banner die from the Stylish Shapes die set.
I used multipurpose liquid glue to adhere the white cardstock and the DSP panel to the card base.
After adding dimensionals to the back of the sentiment banner, I added it to the front of the card.
Since I made this card literally right before I sat down to type, I didn’t get the envelope or envelope seal done yet. But, I did get the card done in time to write this post.
Thank you for stopping by my short and sweet blog post today.
Welcome to the two-week Make My Monday challenge! Our host for #198, Billie A, chose Frame It! as the theme. The variations on this theme are demonstrated by the various members of the design team. When you are finished here, I hope you will hop over to the challenge site for some inspiration. We’d love to have you play along and add your creation to our gallery!
Here’s my card:
I created this for a special friend who loves getting my cards and has been having a tough time lately and I hope this will give her a lift in her day.
For this card, I really let this piece of Fancy Flora DSP (designer series paper) do all the work. While each sheet of this DSP is spectacular, this one is my favorite.
Measurements:
The Evening Evergreen base measures 5-1/2 by 8-1/2 inches, scored at 4-1/4 inches to create a tent fold.
I cropped the frame from a piece of Evening Evergreen measuring 5-1/2 by 4-1/4 inches.
The DSP also measures 5-1/2 by 4-1/4 inches.
I trimmed a 5 by 3/4 inch strip of the DSP for the inside panel of the card.
As for the vast majority of the inside panels for my cards, I trimmed a piece of white cardstock to 5-1/4 by 4 inches.
Then, I trimmed a piece of the Evening Evergreen 6 x 6 inch DSP to 6 by 2-1/2 inches for the envelope flap. I punched a 1-inch circle from the Flora DSP for the envelope seal to finish off the measurements.
Assembly:
Adhere the Flora DSP directly to the card base using multipurpose liquid glue.
Wrap a length of Soft Succulent open weave ribbon around the bottom of the frame. Attach it to the back of the card using small pieces of tear and tape.
Add dimensionals to the back of the frame, and adhere to the Flora DSP;
Tie a double loop bow from twine around the ribbon on the front of the card. Add a glue dot behind the bow to keep it in place on the frame.
Use an embossing buddy on a piece of cardstock vellum.
I used the Charming Sentiments stamp set, and stamped the sentiment using Versamark.
Add gold embossing powder to the sentiment and heat set.
Then, I cropped the sentiment using the Stylish Shapes die set and trimmed the bottom part of the circle.
I’ve found one of the easiest ways to adhere vellum is to use a foam brush and add a light layer of liquid glue to the back of the entire piece of vellum cardstock.
Adhere the vellum to the front of the card, tucking it under the frame.
Add three gold jewels to the front of the card.
I also embossed the inside sentiment using gold powder.
Then, I adhered the strip of DSP to the bottom of the white cardstock.
Finally, I adhered the white cardstock to the inside base of the card.
With that, I’d finished this coordinated card, envelope, and envelope seal set.
There are new and returning colors coming with the new catalog! Sadly, there are also colors that will be retiring. One that makes me sad is Mango Melody, mainly because I’ve recently started really playing with it.
Take a look at this SU! video with the new, returning, and retiring colors:
\
LAST CHANCE up to 60% OFF ITEMS from the CURRENT and MINI Catalogs
Just take a look at these LAST CHANCE lists! I know they are small, but click on the images to download or enlarge them. I’m always sad to see what’s retiring, but then I think of all I can sell when the current catalog ends so I can get new goodies!
Do you live in the U.S. and want to place an order?
Of course you do! Who can resist items up to 60% off?
I would be honored to help you with your stamping and papercrafting journey. It’s so easy to get started, and I can show you how.
If you are placing an order for more than $150.00, please contact me at justpeachystamping@gmail.com so you can take advantage of the available Stamping Rewards.
If you are placing less than a $150.00 order, please enter the host code shown below when prompted to do so.
HOST CODE FOR APRIL, 2023:
7DX93FFA
Once again, thank you for stopping by!
I’d love to hear from you, which you can do by clicking the “Leave a Reply” button below.
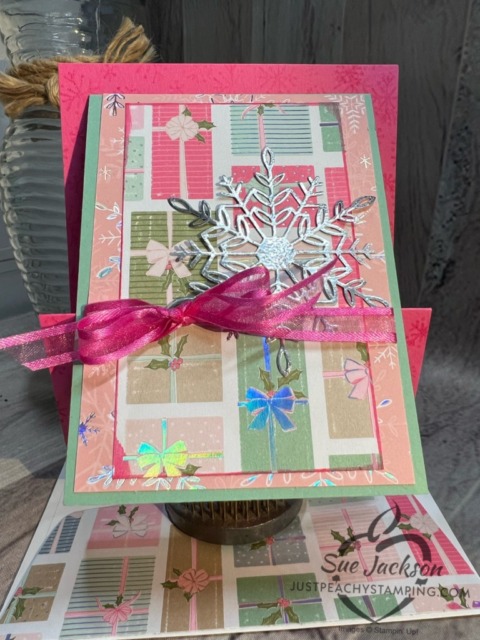
Welcome to the Sparkles Christmas Buddies Challenge #147 for the month of April. Our host this month, Caz, chose the theme of Christmas Packages. I went back to one of my favorite Christmas DSP (designer series paper) sets from two Christmases ago for my packages.
Here’s my card:
This whole post is going to have to be very short. I had some pretty major oral surgery yesterday and I am still pretty loopy. That being said, I was inspired by a Connie Stewart Simply Simple Stamping video to create this card. The best thing about her videos is that the directions are simple and so easy to follow along. You can find her video here. Another fabulous thing about this card is that it starts with a z-fold card. I’ll be creating a number of these cards for Christmas this year!
Thank you for stopping by this very short blog post. I hope you enjoy following along with Connie Stewart’s video. She’s wonderful!
This month, our blog hop theme is Party Time! We hope you will be inspired by all the beautiful creations the Pals made for you! As you hop from blog to blog, we would love for you to leave a comment. You will find the lineup at the end of my post to help you “hop” along from Pal to Pal.
Here’s my party time card:
Since I’ve used the book binding easel fold, this card also qualifies for the Creative Creases Challenge. If you love fun folds, this challenge is for you because that’s the only requirement!
I’ve already posted two of these bookbinding easel fun fold cards. You can see them here and here. The second link has directions and step-by-step pictures for creating this fun fold card.
For today’s card, instead of using a full front panel, I used two diagonal panels.
For today’s card, I used two diagonal panels instead of the whole panel for the front.
To create the diagonal panels, trim a piece of DSP to 1/8 inch less than your width and height of the front part of the card.
Then, trim the DSP in half diagonally from the top right side down to the bottom left side.
If the panels don’t fit the way you want, you can trim down the sides down.
HINT: Don’t trim on the diagonal line because the pattern won’t line back up properly.
For this card, I used the scalloped border die from the Scalloped Contours die set and a piece of an adhesive foam sheet to create the stop for the easel part of the card.
I’m kind of stinking pleased the way the inside Scalloped Contour white cardstock sits under the scalloped stop for the easel.
These cards are super cute and fun to make! I hope you try one out soon!
Back to the Pals’ Blog Hop:
More inspiration awaits, so use the lineup below to visit the rest of the Design Team. The Pals are excited to show you what they’ve created! Then, please mark your calendars for our next blog hop on April 12, 2023, when our theme will be Flowers in the Garden, showcasing cards/projects that use flowers as the focal point of the project.
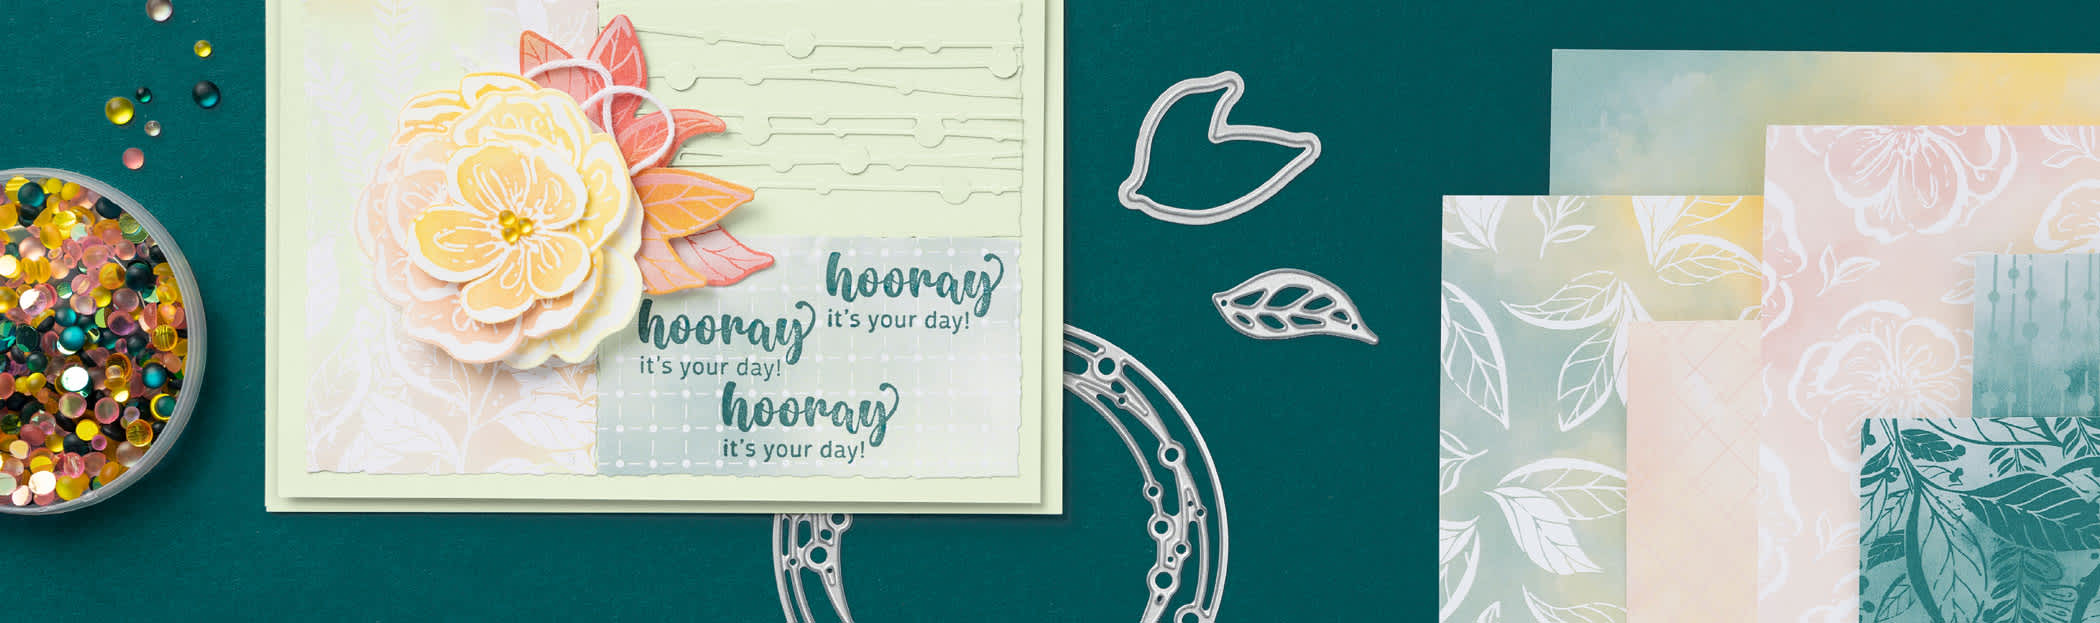
Starting on March 1, 2023, Stampin’ Up! released an ONLINE EXCLUSIVE line of products! I’ve already gotten my Irresistible Blooms bundle, and the DSP will be joining my stash of DSP next week!
Just Look at These Exclusive Products!
Even though the two circle punches are at the end of the following product line, they are well worth getting! I use my circle punches very often and they are worth the investment!
Do you live in the United States? Do you want to place an order? Of course you do!
If you are placing an order under $150, please use the host code below.
If you are placing an order over $150, please contact me first so you can take advantage of the Stampin’ Rewards for your order!
HOST CODE for MARCH, 2023 is N46V3KNP
Again, thank you for stopping by today! Please take another moment and leave a comment.
Welcome to Just Peachy Stamping by Sue Jackson: an independent Stampin' Up demonstrator.
Through Stampin' Up!, I happily share my love of papercrafting through sales, classes, small stamping group meet-ups and workshops. I think that being a teacher in my "real life", I have a unique approach to sharing my fantastic hobby. I look forward to connecting with you!


 \
\