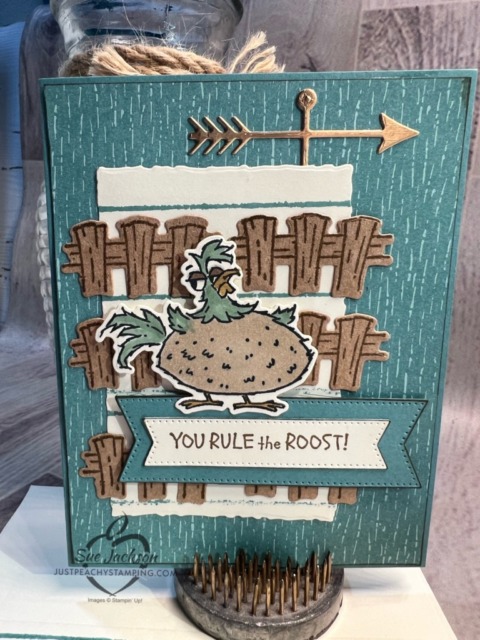
Welcome to Just Peachy Stamping! I feel like it’s been forever since I’ve participated in a challenge for which I am not on the design team. I just got this truly funny stamp and die bundle the other day and HAD to start playing with it right away! I am so stinking thrilled that I was able to combine these two challenges and come up with one card.
Here’s my Hey Chuck card:
Here are the two challenge banners:
Measurements:
Trim a piece of Lost Lagoon cardstock to 5-1/2 by 8-1/2 inches. Score it at 4-1/4 inches.
The background DSP comes from the Inked Botanicals 6 x 6″ DSP pack. Trim it to 4-1/8 by 5-3/8 inches.
Trim another piece to 1/2 by 4 inches for the inside of the card.
Punch a 1-inch circle for the envelope seal and run it through your XYRON createasticker.
Trim a piece of Very Vanilla to 4 by 5-1/4 inches for the inside of the card.
I cropped the two sentiment banners from Very Vanilla and Lost Lagoon leftovers (read: scraps).
Crop a piece of Very Vanilla cardstock using one of the Deckled Rectangle dies. Mine measures 3-7/8 by 2-1/2 inches.
Stamping and Assembly:
Stamp Chuck onto Very Vanilla cardstock using Momento Tuxedo Black ink. This ink will allow you to color using the blends marker combos.
Stamp the fence piece 6 times onto Crumb Cake cardstock using Sort Suede ink.
Outline the background DSP using a Soft Suede marker.
Stamp the sentiment onto a piece of leftover Very Vanilla cardstock using Soft Suede ink.
Using the same ink, stamp the inside sentiment on the inside piece of Very Vanilla cardstock.
The ink for Chuck should be completely dry by now, so he can be colored. I used the Crumb Cake and Lost Lagoon blends combo sets.
Chuck needed his eyelids to stand out, so I used a Soft Suede marker to color them.
Next, I used a gold Wink of Stella pen to color Chuck’s beak and feet.
I cropped all the pieces at the same time, including the gold foil weather vane.
Outline both banners for the sentiment using the Soft Suede marker.
For the Lost Lagoon lines, I used the long edge of the “H” acrylic block. I stamped the edge in the Lost Lagoon ink and then stamped the double lines in rows on the cropped Very Vanilla. Jackie Beers of Blue Line Stamping first posted a card using this technique and I just fell in love with the idea. Thank you, Jackie! Please visit her site because she is an amazingly inspiring artist!
I added dimensionals under Chuck and the Lost Lagoon piece of the sentiment banner. Everything else was adhered using multipurpose liquid glue.
Add the 1/2 by 4-1/8 inch strip of DSP to the bottom of the inside card panel.
Adhere the inside panel using liquid glue.
Instead of using DSP on the envelope flap, I repeated the double lines using the “H” acrylic block.
With that, I’d finished this coordinated card, envelope, and envelope seal set.
Welcome to the newest Cardz 4 Guyz challenge! The theme for this two-week challenge is using any coloring medium. The Rainy Days suite is just wonderful, and I am thoroughly looking forward to getting the dies and loose flowers which were on backorder until this past weekend. When you finish here, I hope you will head over to the challenge site to see the projects from the rest of the design team members. I always enjoy seeing how others interpret the theme.
Here’s my coloring card:
The sketch and optional theme of weather from the Try Stamping on Tuesday # 598 gave me the layout of this card. I am also adding it to the gallery for the Creative Creases challenge.
I used the sketch from the Try Stampin’ on Tuesday #598 challenge sketch for my layout. I turned the sketch so it’s landscape, but you can definitely see the inspiration there. I used clear sequins for the stars in the center of the sketch, and the dots on either end, which can easily be seen if you click on the photo above.
Here’s the Try Stampin’ on Tuesday sketch:
Measurements:
The Balmy Blue base measures 4-1/4 by 11 inches, scored at 2-3/4 and 5-1/2 inches.
I used four pieces of the umbrella DSP (designer series paper). The inside piece measures 4-1/8 by 5-3/8 inches.
The piece for the envelope flap measures 6 by 2-1/2 inches.
Finally, there are 2 pieces trimmed to 4-1/8 by 2-5/8 inches for the two shorter ends.
I trimmed a piece of Balmy Blue for the outside and Basic White for the inside. Each piece measures 3-1/4 by 4-1/4 inches. I did embossed the Balmy Blue using the raindrop embossing folder before I trimmed it to the final size.
I trimmed the banner to two inches wide and punched the diagonal ends using the Pick-a-Banner punch. I used the shiny paper from the Regency Park suite of products.
Finally, I punched a 1-inch circle from coordinating DSP for the envelope seal.
Assembly:
I adhered all the DSP pieces using multipurpose liquid adhesive.
Then, I put a couple of drops of white craft ink on an acrylic block and used a finger daubber to lightly add white to the Balmy Blue embossed cardstock.
Using an empty clear Wink of Stella pen, I added a tiny amount of glitter ink to each raindrop..
Next, I used the Stamparatus to stamp the turtle using black ink. I cleaned the stamp, and restamped it using VersaMark ink. After covering the turtle in clear embossing powder, I heat set it with my heat tool.
I used the Mango Melody and Old Olive blends combos to color in the turtle using the DSP turtle as a guide. I pretty pleased with the way it turned out and I assure you that I really did color it. When I finished, I fussy cut that turtle and the turle on the inside from another piece of DSP.
Next, I stamped the sentiment and umbrella on the inside white panel. I colored the umbrella using an Old Olive Stamping Write Marker.
I added a piece of Old Olive ribbon to the front of the banner and then tied some white bakers’ twine around the ribbon.
I added dimesnionals under the banner and the turtle for the front.
Adhere the Balmy Blue piece to the front flop of the Balmy Blue base.
Adhere the pieces using the dimensionals.
I added three sequins to the banner on. the front. Then, I added three sequins to the top right and lower left corners.
Next, I added the white cardstock to the inside of the card.
HINT: I’ve found it’s easier to add the inside cardstock by working from the back side of the front.
After putting the front Balmy Blue piece face down, I can line up the white cardstock to the front piece.
Then, add liquid glue to the backside of the white cardstock.
Turn the back of the card over onto the white cardstock. This way,. your pieces will line up.
Add the turtle using liquid glue to the inside corner of the white cardstock.
With that, I’d finished this cute as a button coordinated card envelope, and envelope seal set.
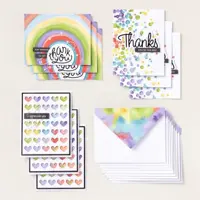
Stampin’ Up! has a numbe of all-inclusive kits available! If you have ever thought that you just couldn’t create cards, these kits are for you! Each kit comes with everything you will need, except for a stamp block in the stamping kits.
Here are just four of the kits available:
Just click on the image to see a larger picture of the kit!
Non-Stamping Kits!
These kits are fabulous because you don’t even need an acrylic block!
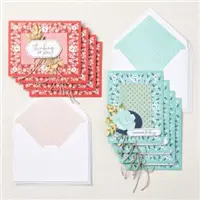
My very favorite kit is now available! If you don’t know what to get for your mother for Mother’s Day, or just a gift for yourself, these card organizer kits are FABULOUS!
I have such a hard time shopping for my mom and my aunt for holidays, birthdays, etc. So, for this past Christmas, I got two of these card organizer kits, and put them together. I also included other cards from card kits and some I had created in bulk to split between the two gifts. All total, they received a completed organizer and more than 25 cards for all different occassions. I was so proud to give each one of them this beautiful combination of cards and the love that went into each part of them.
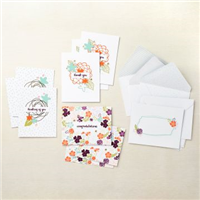
Take a look at just a few of these other non-stamping kits:
Welcome to Cardz 4 Guyz challenge #317. Our host for this two week challenge, Julie, chose Make Us Smile for a theme. So much fun! When you finish here, I hope you will visit the challenge site linked above. It’s always very interesting to see the interpretations of the theme by the rest of the design team members.
Here’s my card:
The layout for this card comes from the Try Stampin’ on Tuesday challenge #596. I’ve always enjoyed these challenges and am glad things worked out so that I could join in on this one. The size of my circles is a little bit off, but the inspiration is definitely evident. I used the Rainy Days DSP (designer series paper) for this card. Pictures don’t really do it justice! The raindrops on the background are heat embossed, as are the umbrellas and the turtle’s shell and flower. The dies and the tiny flowers from the suite are unavailable until next week, and you can bet I will be placing an order asap!
Here’s the challenge banner:
Measurements:
The Mango Melody base measures 11 by 4-1/4 inches, scored at 5-1/2 inches to create a tent fold.
The raindrop background DSP measures 4-1/8 by 5-3/8 inches.
I used the second largest Scalloped Contour die for the umbrella DSP.
After cropping a piece of the flower DSP with the same scalloped die, I trimmed the DSP to 2 by 4 inches, then cut the chevron end.
I used one of the Stylish Shapes circle dies to crop the turtle.
The yellow flower DSP (under the vellum) measures 3-7/8 by 1-1/8 inches.
The vellum was cropped using another Stylish Shape die.
For the inside, the white panel measures my regular 4 by 5-1/4 inches.
The DSP on the bottom of the white panel measures 4 by 1/2 inch.
I used a smaller circle die from the Stylish Shapes for the flowers in the corner and trimmed the sides after I adhered everything together.
I trimmed a piece of the Old Olive flowered DSP to 6 by 2-1/2 inches for the envelope flap then punched a 1 inch circle for the envelope seal.
What I Did:
I used a Balmy Blue Stamping Write marker to outline all the DSP pieces on the front of the card. I should’ve done it for the inside as well, but didn’t think about it before I adhered the inside down.
I adhered the raindrop DSP, the umbrella DSP, and the inside panel using multipurpose liquid glue.
Next, I added dimensionals under the flowered DSP banner and adhered it down.
Then, I carefully added dimensionals under the yellow DSP on either end so it would straddle the banner.
After dry-fitting the turtle circle, I added dimensionals under the top left 1/4 of the circle. I adhered the rest of the circle down using liquid glue.
I used my embossing buddy on a piece of vellum, then stamped the sentiment using VersaMark ink.
Next, I added black embossing powder and heat set it using my heat tool.
HINT: Be careful because the vellum will scorch easily. I found it easier to let the heat tool heat up more than usual so the powder would melt faster.
I added matte Old Olive dots to the corners of the sentiment banner.
I stamped the sentiment on the inside using the Momento Tuxedo Black ink pad. and adhered the inside panel with multipurpose liquid glue.
As an after-thought, I added a baker’s twine bow to the front of the card.
With that, I’d finished this coordinated card, envelope, and envelope seal set.
Starting on March 1, 2023, Stampin’ Up! released an ONLINE EXCLUSIVE line of products! I’ve already gotten my Irresistible Blooms bundle, and the DSP will be joining my stash of DSP next week!
Just Look at this Fabulous Selection of Products!
Even though the two circle punches are at the end of the list below, I’d highly suggest getting them. I use mine all the time. My circle punches are some of my favorite punches!
Do you live in the United States? Do you want to place an order? Of course you do!
If you are placing an order under $150, please use the host code below.
If you are placing an order over $150, please contact me first so you can take advantage of the Stampin’ Rewards for your order!
HOST CODE for MARCH, 2023 is N46V3KNP
Again, thank you for stopping by today! Please take another moment and leave a comment.
Welcome to the newest Cardz 4 Guyz two-week challenge! Our host for # 304, Helen, chose sports and hobbies for the theme. Since my husband and I have been watching MLB (Major League Baseball) pretty much daily, I thought I just needed to go with that. When you finish here, I hope you will visit the challenge site to see the creations from the rest of the design team.
Here’s my card:
Even though I missed the submission deadline, I found the layout for this card on Try Stamping on Tuesday, #570:
What I Did:
The Poppy Parade base measures 4-1/4 by 11 inches, scored at 5-1/2 inches to create a tent fold.
Both pieces of the DSP (designer series paper) come from the Hey Sports Fan pack. The Night of Navy pattern measures 4-1/8 by 5-3/8 inches, which I outlined using a Night of Navy marker. The yellow DSP piece measures 3-1/2 by 5 inches. I outlined that paper using the Poppy Parade marker.
I also trimmed a piece of coordinating DSP to 6 inches by 2-1/2 inches for the envelope flap. Then, I punched a one-inch circle from a coordinating DSP for the envelope seal.
The rest of the pieces also come from the Hey Sports Fan DSP, and I fussy cut them to replicate the challenge layout. I outlined the three on the bottom using my Crushed Curry marker.
Next, I added dimensionals to the back of the four pieces. Before adhering the large top piece, I tied a piece of baker’s twine around the connecting part and tied it in a square knot.
After adhering the pieces down, I added the Night of Navy and yellow stars.
I used some stamps from the past Paper Pumpkin kit, Play Ball, for the inside of the card.
With that, I’d finished this coordinated card, envelope, and envelope seal set.
Precut pieces (No prep work! Get right to crafting). Including printed die-cut sheets: sticker adhesive sheets & non-adhesive sheets
Makes 12 cards of 1 design
Gold foil accents
Folded card size: 5-1/2″ x 4-1/4″ (14 x 10.8 cm)
12 preprinted envelopes
Enough adhesive to complete projects
Linen thread
A 9-7/8″ x 6-1/2″ x 2-3/4″ (25.1 x 16.5 x 7 cm) printed designer box for storage or crafting on the go
Product colors: Cajun Craze, Early Espresso, Evening Evergreen, Garden Green, Poppy Parade, Pumpkin Pie
If you live in the U.S. and don’t already have a demonstrator, I’d be honored to work with you.
Do You Want to Place an Order?
Of course you do, especially since you can earn FREE products with a qualifying purchase!
If you are ordering less than $150.00, please use the host code shown. If you are ordering more than $150.00, please contact me first so you an get your stamping rewards! Any order over $50 will earn a little surprise from me.
The HOST CODE through September 30, 2022 is W9GCXFZ6.
Once again, thank you for stopping by my blog today! I hope you will take another minute and leave a comment.
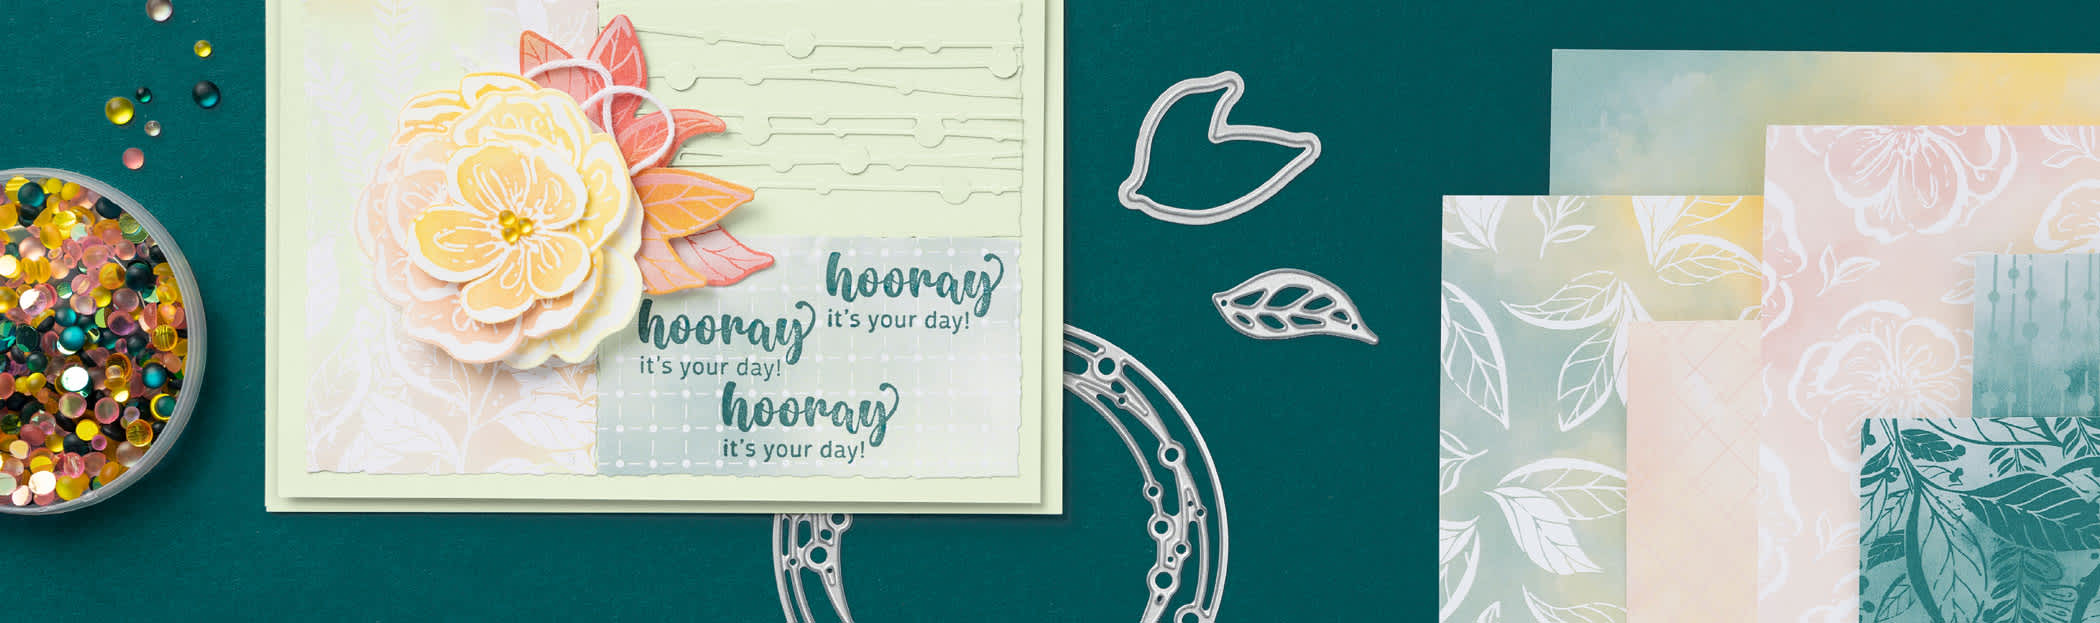
Welcome to my two-fer card for today! You already know I enjoy combining two or more challenges, and I’ve done it again with this card. I took the colors from Sunday Stamps Challenge 287 and the layout, which I made into a slimline card, from Try Stampin’ on Tuesday #565. I chose the Kindest Gnomes bundle for the card because I want to show the versatility of this set – it’s not just for Christmas.
Here’s my card:
Here are the challenge banners:
I used Night of Navy, Pacific Point, Tahitian Tide, Smoky Slate, Old Olive, Crumb Cake, and Soft Suede.
Measurements:
The Pacific Point base measures 9-1/2 by 7 inches, scored at 3-1/2 inches creating a tent fold card.
I wanted to separate the blue DSP from the base. Therefore, I trimmed a piece of white cardstock to 9-3/8 by 3-3/8 inches and adhered it to the base. The white cardstock for the inside of the card measures 9-1/4 by 3-1/4 inches.
Next, I trimmed a piece of the retired Waves DSP (designer series paper) to 9-1/4 by 3-1/4 inches and adhered that to the white using multipurpose liquid glue.
I trimmed the tree DSP, from the Happy Forest Friends DSP pack, to 2-1/4 inches by 9-1/4 inches. I chose the top part of this DSP because the bottom of it has Calypso Coral mushrooms on it.
The Pacific Point trim pieces came from the original piece of cardstock I used for the base. I ran it through the fern 3D embossing folder twice so I’d get the whole piece embossed. Then, I trimmed it in half and it was ready to be adhered to the back of the Happy Forest Friends DSP. Before I adhered the DSP to the front of the card, I wrapped a length of the Tahitian Tide ribbon around the DSP. Right now, it’s tied in a bow. However, if I wind up using this card for a guy, I can untie the bow and retie it in a square knot.
I picked the typeset vellum from the Layering Designs vellum. Using the 1-7/8 inch square die from the Stylish Shapes die set, I cropped three pieces.
That’s it for the measurements.
Stamping and Coloring:
I stamped all three gnomes for the front on white cardstock using the Momento Black Tuxedo ink, which won’t bleed when using the alcohol blends.. Then, I stamped two on the corners of the white inside cardstock.
After I let the ink thoroughly dry, I used blends to color them. I used the medium natural skin tones to color the 5 gnomes. Then, I dabbed the spot on each nose with the color lifting blend.
Next, I partially colored in all their beards using the light Smoky Slate blend,
I colored all the sleeves and shoes using both the light and dark Crumb Cake and Soft Suede blends.
The hats on each gnome were colored using both blends combos for Night of Navy, Old, Olive, and Tahitian Tide. I colored the pants on each, and the underside of the sitting gnome’s hat using just the light blend. Then, I used the black marker to highlight various parts of the gnomes, including the eyes and mouths.
Finally, I added clear Wink of Stella to the lantern for a bit of sparkle and cropped the three for the front of the card.
I used the front sentiment from the Happier than Happy stamp set. The inside sentiment comes from the Kindest Gnomes set.
After cropping the three gnomes, I added dimensionals to the back of each.
Finishing Up:
Time to add the vellum. Adhesives will show through the vellum, but I needed to get it adhered. My favorite way to adhere vellum includes using multipurpose liquid adhesive, my silicone mat and a make-up sponge. I put enough liquid adhesive on the back to cover the whole piece of vellum. Then, I use the make-up sponge to spread the adhesive on the whole back of the vellum. Since the whole piece is covered, the adhesive won’t show.
Next, I added a gnome to each piece of vellum.
Then, I cropped the sentiment and using the label die in the Stylish Shapes die set. Then, I cropped the same size banner in Pacific point and cut it in half. I added it to the back of the sentiment and added dimensionals.
Finally, I added the colored and stamped white cardstock panel to the inside of the card.
It’s July, 2022 ~ do you know what that means? The new Holiday Mini-Catalog and Sale-a-Bration are in full swing!!
Sale-a-Bration runs from July 1 to August 31, 2022. This means you can earn FREE products for two months! Take a look at these Sale-a-Bration products!!
Here’s a link to the new Holiday Mini-Catalog, which runs through January 4, 2023. Click on the following image to open the catalog:
If you live in the U.S. and don’t already have a demonstrator, I’d be honored to work with you.
Do You Want to Place an Order?
Of course you do, especially since you can earn FREE products with a qualifying purchase!
If you are ordering less than $150.00, please use the host code shown. If you are ordering more than $150.00, please contact me first so you an get your stamping rewards! Any order over $50 will earn a little surprise from me.
The HOST CODE through July 31, 2022 is UKDVYZSG.
Again, thank you for stopping by my blog today! I appreciate your comments and your time.
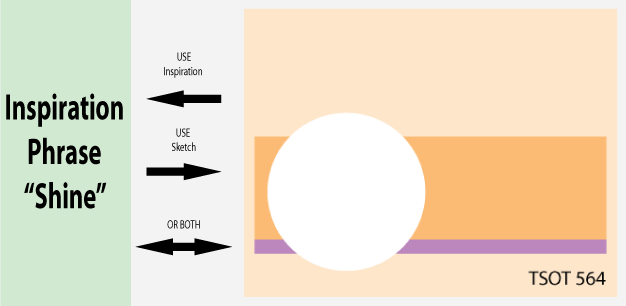
Welcome to the newest two-week challenge for Make My Monday. Our host for this challenge, Claudia, chose outdoor sports for the theme. I used the sketch challenge for Try Stampin’ on Tuesday 564 and a card by Jay Soriano of Mitosu Crafts as my inspiration.
Here’s my card:
Here’s the sketch banner from TSOT:
While I am sharing the latest challenge sketch from TSOT, I also need to say thank you, thank you, thank you! My card for challenge TSOT 562 was chosen as one of the top 3! Thank you to the design team at TSOT! You can see that card here.
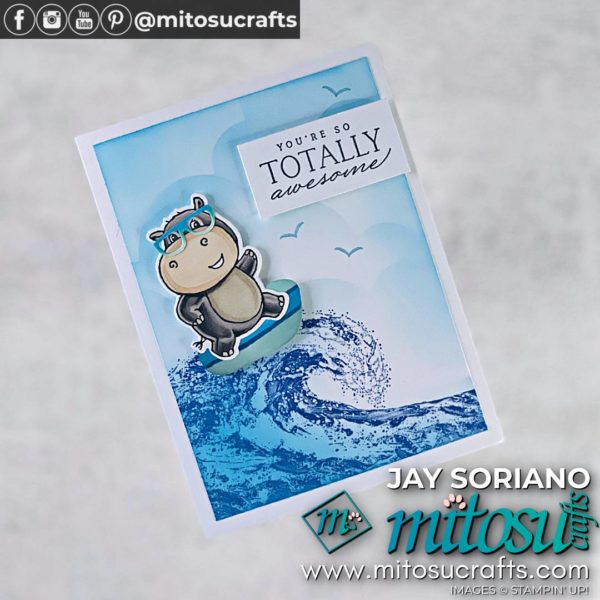
Here’s the inspiration card from Jay Soriano:
This card is so adorable and creative! While Jay used just the Waves of Inspiration stamp set, I used the retired DSP, but the idea totally came from here. If you haven’t checked out the mitosucrafts.com website, I highly recommend that you do! They are extremely talented artists!
Measurements:
The Pacific Point base measures 5-1/2 by 8-1/2 inches, scored at 4-1/4 inches to create a tent card.
The Waves DSP (designer series paper) measures 5-3/8 by 4-1/8 inches. I also trimmed a piece of the DSP to 6 inches by 2-3/8 inches for the envelope flap. Then, I punched a 1 inch circle of coordinating DSP for the envelope seal, which I ran through my create-a-sticker.
Next, I trimmed a piece of white cardstock to 4 inches by 5-1/4 inches.
That’s it for measurements.
What I Did:
After rubbing my embossing buddy over a piece of Pacific Point cardstock, I stamped the wave on it using VersaMark.. Then, I covered it in white embossing powder and heat set it with my heat tool.
Next, I used the wave die and cropped the stamped wave. Since the die doesn’t match up exactly with the stamp, the result is a mottled look of white and Pacific Point.
I wanted two-toned waves, so I used a piece of Coastal Cabana and ran it through using the bark embossing folder. Then, I cropped it using the waves die.
I adhered the Pacific Point wave to white cardstock. Then, I adhered the Coastal Cabana pieces using multipurpose liquid adhesive. When I finished with that, I fussy cut the wave and popped it up on dimensionals.
I stamped the penguin in black ink on white cardstock, then added a Pumpkin Pie beak and foot. Then, I fussy cut him out.
Next, I used the hippo dies to crop the goggles and breathing tube out of Pacific Point cardstock and silver foil. I was able to use what I trimmed to make the strap for the goggles.
The penguin is popped up on dimensionals. I also added a tiny sliver of a mini-dimensional to the top of the breathing tube.
I stamped the sentiment from the Happy & Heartfelt stamp set in black in on white cardstock, then cropped it using a waves die.
Next, I adhered it to Pacific Point cardstock and fussy cut the label, which is also popped up on dimensionals.
Finally, I stamped another sentiment from Happy & Heartfelt on the white cardstock and adhered it to the inside of the card.
With that, this coordinated card, envelope, and envelope seal set was complete.
It’s July, 2022 ~ do you know what that means? The new Holiday Mini-Catalog and Sale-a-Bration are in full swing!!
Sale-a-Bration runs from July 1 to August 31, 2022. This means you can earn FREE products for two months! Take a look at these Sale-a-Bration products!!
Here’s a link to the new Holiday Mini-Catalog, which runs through January 4, 2023. Click on the following image to open the catalog:
If you live in the U.S. and don’t already have a demonstrator, I’d be honored to work with you.
Do You Want to Place an Order?
Of course you do, especially since you can earn FREE products with a qualifying purchase!
If you are ordering less than $150.00, please use the host code shown. If you are ordering more than $150.00, please contact me first so you an get your stamping rewards! Any order over $50 will earn a little surprise from me.
The HOST CODE through July 31, 2022 is UKDVYZSG.
Again, thank you for stopping by my blog today! I appreciate your comments and your time.
Welcome to Just Peachy Stamping by Sue Jackson: an independent Stampin' Up demonstrator.
Through Stampin' Up!, I happily share my love of papercrafting through sales, classes, small stamping group meet-ups and workshops. I think that being a teacher in my "real life", I have a unique approach to sharing my fantastic hobby. I look forward to connecting with you!