This month, the theme is CASE the Catalog. We really hope that you will be inspired by all the amazing creations the Pals are sharing with you! Then, you will find the lineup at the end of my post to help you “hop” along from Pal to Pal.
Here’s my Rainy Day card from page 61 of the catalog:
I just love everything about this Playing in the Rain stamp set, die set, and coordinating rain embossing folder. Absolutely everything. When I was thumbing through the catalog, for probably the fiftieth time, I saw this card and couldn’t resist. Would you believe the DSP comes from the Fresh as a Daisy DSP? I know! I was surprised as well!
Measurements and Assembly:
Trim a piece of Boho Blue cardstock to 8-1/2 by 5-1/2 inches, and score at 4-1/4 inches.
Trim a piece of Old Olive 6 x 6 inch DSP to 6 inches by 2-1/2 inches.
Punch a 1-inch circle of coordinating DSP for the envelope seal. Run it through a XYRON create-a-sticker.
Trim a piece of this landscape DSP from the Fresh as a Daisy DSP to 5-1/4 by 4 inches.
Adhere the DSP to the cardstock base using multipurpose liquid glue
Stamp the adorable fox on white cardstock using Momento Tuxedo Black ink.
Use the Old Olive, Crumb Cake, and Pecan Pie blend combos to colors the fox. I also used one of the natural tone blends for the face and hands.
Outline the umbrella using the dark Daffodil Delight blend.
Stamp the sentiment using Boho Blue ink on white cardstock.
Trim and fussy cut the sentiment into a banner.
Crop the fox using the die set.
Crop the bridge (Crumb Cake) and the grass pieces (Old Olive) pieces.
Add dimensionals to the back of the fox. and bridge.
HINT: If you adhere grass pieces on either end of the front of the bridge using liquid glue, you will be able to hide the dimensionals.
Tie a bow using the Boho Blue In Color jute twine. Use a glue dot to adhere it to the back of the sentiment banner.
Add dimensionals to the back of the banner and adhere to the card.
Trim a piece of white cardstock to 4 by 5-1/4 inches for the inside.
Stamp your sentiment using Boho Blue ink.
With that, I’d finished this coordinated card, envelope, and envelope seal set.
Back to the Pals’ Blog Hop:
More inspiration awaits, so use the lineup below to visit the rest of the Design Team. The Pals are very excited to show you what they’ve created! Then, please mark your calendars for our next blog hop next month (always the second Wednesday each month), when our theme will be “Punch Your Art Out”.
This month, the theme is the New 2023-2025 In Colors. We hope you will be inspired by all the creations the Pals share with you! You will find the lineup at the end of my post to help you “hop” along from Pal to Pal.
I used the Fresh as a Daisy Suite Collection for my inspiration for this blog hop. I couldn’t decide which new In Colors to use, so I decided to use four of them. The Fresh as a Daisy DSP really does all the work for each of the cards. I wound up making cards for each of the three levels of stampers: beginner, casual, and avid. Without further delay, here are my three cards using four of the 2023 – 2025 In Colors.
My beginner card uses Wild Wheat:
HINT: I used the Baker’s Twine wrapped around the DSP three times and adhered the ends using a piece of tear & tape. Then, I added the bow by tying it around the baker’s twine. The best part of doing it this way was that I could slide the bow over to accommodate the sentiment panel.
I did add a tiny amount of Wink of Stella to the Pecan Pie colored part of the center of the flowers. I have to admit, this was my least favorite color in the group, but it looks fabulous with Early Espresso.
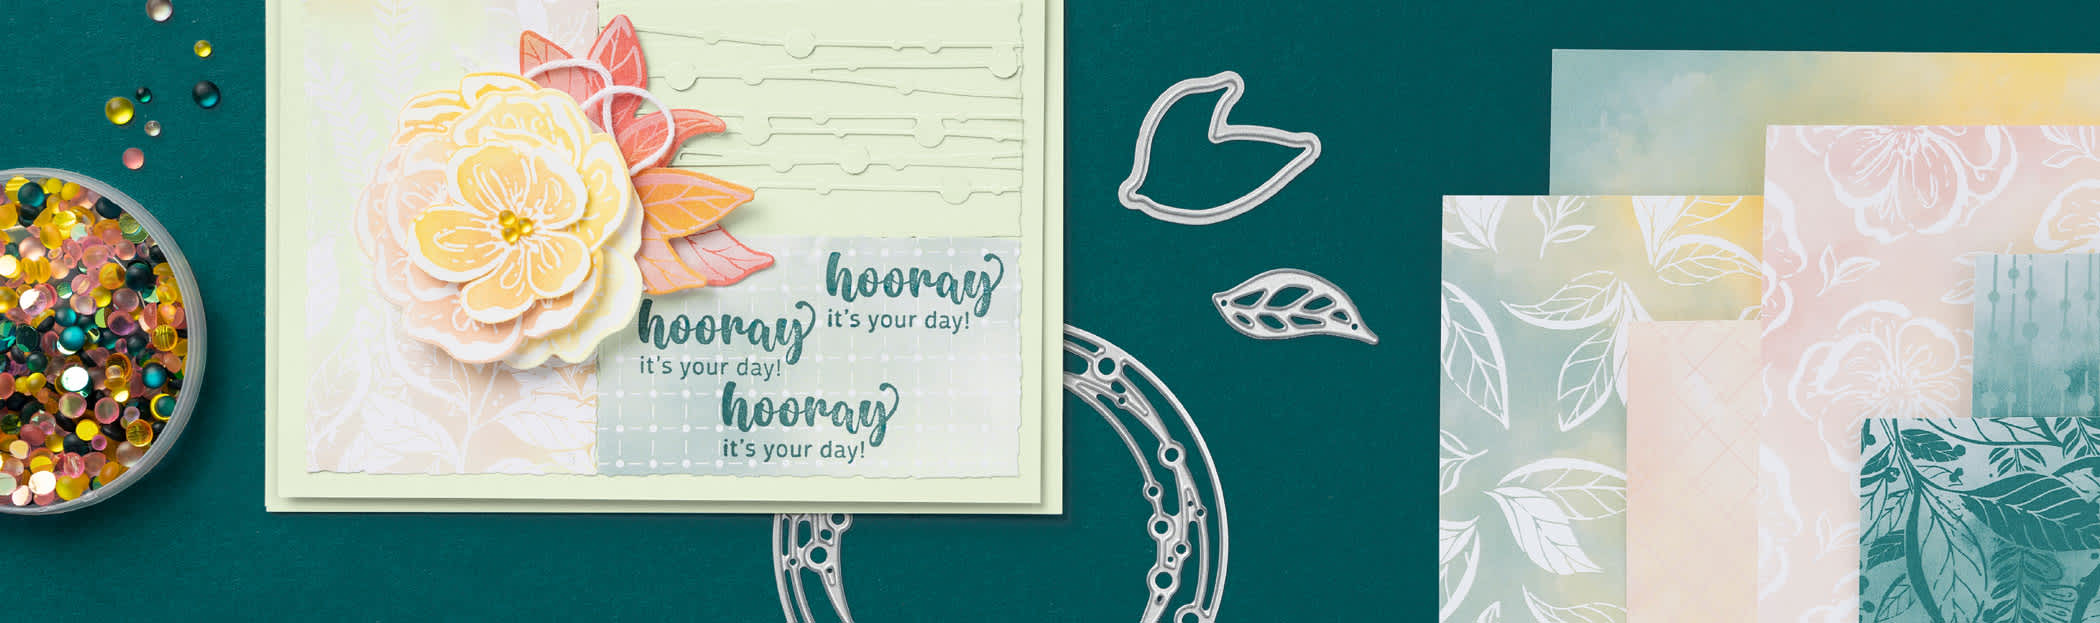
My casual card uses my new very favorite In Color combination, Boho Blue and Copper Clay:
I am going to have to get another pack of this DSP just to be able to have more of the paper using this color combination. You can see another card with this color combination here.
I thought this card would be a casual stamper card because of the heat embossing on the front and inside of the card. On the inside, I wanted something to go over the sentiments without covering them up at all. Enter clear embossing powder.
HINT: Make sure you use an embossing buddy on your cardstock before stamping using the VeraMark. You don’t want any oil from your fingers at all when using embossing powders.
HINT #2: You can’t tell it by looking at it now, but when I stamped the flower on the front using the VersaMark, I had a couple of spots where the ink didn’t transfer to the paper. Never fear, my VersaMark pen allowed me to color in the missing portions before adding the embossing powder. I got mine from Amazon, and you can find the link here. It’s a game changer.
My avid card uses Moody Mauve and Wild Wheat:
There are multiple layers of DSP, all of which comes from the Fresh as a Daisy DSP pack, stamped flowers and leaves, which are then cropped using the dies, baker’s twine and decorative dots on this card.
HINT: When I am dry-fitting my cards, especially those with multiple layers like this one, I find that my removable tape runner is a game changer. You only need about an inch of the tape to adhere the layers and it rubs off with your fingers. I get mine from Amazon, and you can find the link here.
HINT # 2: When using the Stampin’ Cut and Emboss machine, I use Post-It Note tape to keep my dies exactly where I want them. You can find these on Amazon here. I tried the thinner tape first, but found it didn’t hold as well. These pieces of tape are reusable, so keep them handy.
Back to the Pals’ Blog Hop:
More inspiration awaits, so use the lineup below to visit the rest of the Design Team. The Pals are very excited to show you what they’ve created! Then, please mark your calendars for our next blog hop on July 12th, when our theme will be CASE the Catalog, when the design team chooses a card from the new Annual Catalog and recreates it with their own creative twist.
When new team members purchase their Starter Kit, they will be able to redeem $155 USD of Starter Kit eligible products for just $99 USD! No commitment required beyond the starter kit!
Again, thank you for stopping by today. I’d love to hear your comments. Sue
This month, we have a Tic Tac Toe theme. We really hope that you will be inspired by all the amazing creations the Pals are sharing with you! As you hop from blog to blog, we love reading your comments. Then, you will find the lineup at the end of my post to help you “hop” along from Pal to Pal.
Here’s the Tic-Tac-Toe board of inspiration:
Here’s my fancy fold, flowers, and pearls or dots card:
While I’ve already posted a joy fold card, once again, I turned to Mary Deatherage with Stamps-n-Lingers for the measurements. You can find her video with the directions and measurements for this card. here I did make a couple of changes, and will add those in my directions.
Measurements:
The Night of Navy base measures 4-1/4 by 8-1/2 inches, scored at 5-1/2 inches. This creates the front flap.
The Boho Blue cardstock piece measures 3-1/2 by 8-1/2 inches, scored at 4-1/4 inches. This piece is larger than the original directions. I adjusted the measurements based on the die cut from the Scalloped Contours die set.
DSP (designer series paper) pattern # 1 – 5-3/8 by 4-1/8 for the inside panels
DSP pattern # 2 – 3-7/8 x 4-1/8 inches for. the front flap panel.
DSP pattern # 3 – 3-7/8 x 4-1/8 inches.
Don’t forget to trim a piece of DSP to 6 inches.by 2-1/2 inches for the envelope flap. Punch a 1 inch circle from coordinating DSP for the envelope seal.
I added ribbon to tie the card together. I did use by bone folder to get good creases, but thought I needed to add ribbon.
I used the Night of Navy border ribbon and cut two lengths
Each piece is about 6 inches long.
Use tear& tape to adhere ribbon under the front flap DSP and also the folded over DSP,
I have about 3 inches under each piece of DSP.
HINT: Make sure you have it coming out of the front flap of the Night of Navy so that it is on the left-hand side.
I used the Color and Contour stamp set to stamp the flowers. I used Night of Navy ink on Boho Blue for the outside. The sentiment on the inside is Night of Navy and I stamped off Boho Blue using another flower from the same stamp set.
By following Mary’s directions, and with my adjustments, I’d finished this coordinated card, envelope, and envelope seal set.
Back to the Pals’ Blog Hop:
More inspiration awaits, so use the lineup below to visit the rest of the Design Team. The Pals are very excited to show you what they’ve created! Then, please mark your calendars for our next blog hop on June 14th, when our theme will be showcasing the New 2023-2025 In Colors.
The individual color families were also refreshed. Some of your favorites have been moved to another family, some retired, and new ones added. Here are the new color families:
While I love a color refresh, it means I have to reorganize my color families to update them. I like to keep my stamp pads in the Stamp-n-Storage inkpad storage in color families. Same with my markers.
HINT: I use a stamp set container to store my markers. It allows me to keep store them flat and I can fit one color family in each container. I just write down a list of the colors on a piece of paper and slip it in the cover.
However, I haven’t reorganized my color families yet. Truth be told, my room is a mess right now because I am in the middle of reorganizing. I have so, so , so much retired product that I need to sell ASAP.
This month, the theme is Flowers in the Garden. We hope you are inspired by all the wonderful creations the Pals share with you! As you hop from blog to blog, we love reading your comments. Then, you will find the lineup at the end of my post to help you “hop” along from Pal to Pal.
Here’s my Flowers in the Garden card:
I’ll also be entering this in the current Creative Creases Challenge. If you like fun folds as much as I do, this is the challenge for you!
I used a video by Connie Stewart for the measurements and directions to create this card. In her video, Connie didn’t mat her flower DSP (designer series paper) pieces. I’d rather mat mine so I have 1/8 inch difference. You might not even be able to tell because I used some Mango Melody 6 x 6 inch DSP for my mats.
Please don’t let the pictures of the card intimidate you. If you can use a trimmer and can score cardstock, you can create this card! In order to make it easier for myself, I watched the video straight through the first time. Then, I went back and stopped the video with each step.
The flowers I used as embellishments needed to be fussy cut from the Regency Park DSP. However, fussy-cutting can be relaxing (although not as relaxing as coloring), so it’s all good.
You can find the video here:
My Take on Connie’s Card:
I’ve just really started to use Mango Melody for projects, and it’s now retiring. I’ve thoroughly enjoyed using the color with this Regency Park DSP and the Playing in the Rain DSP lately.
In addition to the DSP pieces Connie cut, I added a 6 by 2-1/2 inch piece of coordinating DSP for the envelope flap. Then I punched a piece of Mango Melody DSP for the envelope seal.
I used the Biggest Wish stamp set for the front panel.
The sentiments came from the Happy & Heartfelt and Peaceful Moments stamp sets. I was so tickled with how well the fonts from the two stamp sets worked together.
As I said, I fussy-cut all the flowers.
I added mats to the DSP strips on the first white cardstock layer.
In addition, I added a strip of the flower DSP and a fussy-cut flower on the inside of the card.
For the front sentiment, I added a bow using white bakers’ twine and a Mango Melody enamel dot.
I may have gone overboard, but I hope the recipient doesn’t think so.
Amazingly, I didn’t use any dimensionals on this card. It’s already thick enough, will require extra postage and I wanted to make sure it fits in the envelope.
Back to the Pals’ Blog Hop:
More inspiration awaits, so use the lineup below to visit the rest of the Design Team; The Pals are very excited to show you what they’ve created! Then, please mark your calendars for our next blog hop on May 10th, when our theme will be a Tic Tac Toe challenge, where our Design Team will create projects, using elements/supplies that are three in a row, column, or diagonal from the tic tac toe board.
Thank you very much for stopping by today. Don’t forget to hop along from one Pal to the next. Su Mohr at Arts and Aromas is next and she is truly a very talented artist. You won’t want to miss her project!
There are new and returning colors coming with the new catalog! Sadly, there are also colors that will be retiring. One that makes me sad is Mango Melody, mainly because I’ve recently started really playing with it.
Take a look at this SU! video with the new, returning, and retiring colors:
This month, our blog hop theme is Party Time! We hope you will be inspired by all the beautiful creations the Pals made for you! As you hop from blog to blog, we would love for you to leave a comment. You will find the lineup at the end of my post to help you “hop” along from Pal to Pal.
Here’s my party time card:
Since I’ve used the book binding easel fold, this card also qualifies for the Creative Creases Challenge. If you love fun folds, this challenge is for you because that’s the only requirement!
I’ve already posted two of these bookbinding easel fun fold cards. You can see them here and here. The second link has directions and step-by-step pictures for creating this fun fold card.
For today’s card, instead of using a full front panel, I used two diagonal panels.
For today’s card, I used two diagonal panels instead of the whole panel for the front.
To create the diagonal panels, trim a piece of DSP to 1/8 inch less than your width and height of the front part of the card.
Then, trim the DSP in half diagonally from the top right side down to the bottom left side.
If the panels don’t fit the way you want, you can trim down the sides down.
HINT: Don’t trim on the diagonal line because the pattern won’t line back up properly.
For this card, I used the scalloped border die from the Scalloped Contours die set and a piece of an adhesive foam sheet to create the stop for the easel part of the card.
I’m kind of stinking pleased the way the inside Scalloped Contour white cardstock sits under the scalloped stop for the easel.
These cards are super cute and fun to make! I hope you try one out soon!
Back to the Pals’ Blog Hop:
More inspiration awaits, so use the lineup below to visit the rest of the Design Team. The Pals are excited to show you what they’ve created! Then, please mark your calendars for our next blog hop on April 12, 2023, when our theme will be Flowers in the Garden, showcasing cards/projects that use flowers as the focal point of the project.
Starting on March 1, 2023, Stampin’ Up! released an ONLINE EXCLUSIVE line of products! I’ve already gotten my Irresistible Blooms bundle, and the DSP will be joining my stash of DSP next week!
Just Look at These Exclusive Products!
Even though the two circle punches are at the end of the following product line, they are well worth getting! I use my circle punches very often and they are worth the investment!
Do you live in the United States? Do you want to place an order? Of course you do!
If you are placing an order under $150, please use the host code below.
If you are placing an order over $150, please contact me first so you can take advantage of the Stampin’ Rewards for your order!
HOST CODE for MARCH, 2023 is N46V3KNP
Again, thank you for stopping by today! Please take another moment and leave a comment.
This month, our blog hop team made projects to celebrate Random Acts of Kindness Week, which is February 14-20! We hope you will be inspired by all the beautiful creations the Pals made for you! As you hop from blog to blog, we would love for you to leave a comment. You will find the lineup at the end of my post to help you “hop” along from Pal to Pal.
I have a card club at the high school where I teach. This club creates cards to be donated to a local pediatric cancer foundation to be distributed to children in hospitals undergoing cancer treatments. Our latest card uses the Adorable Owls SAB (Sale-a-Bration) stamp set. I was completely inspired by a fellow Pals’ January Hop card, which you can see here.
Here’s my RAK card:
These owls need to be fussy cut, but they can be snipped quickly and easily. I used Picture This die and the Happier than Happy DSP (designer series paper), both of which can be found in the annual catalog.
Measurements:
The Soft Suede base measures 8-1/2 by 5-1/2 inches, scored at 4-1/4 inches.
Next, the Poppy Parade mat measures 4-1/8 by 5-3/8 inches.
The Happier than Happy DSP measures 4 by 5-1/4 inches.
A coordinating piece of DSP measures 6 by 2-1/2 inches for the envelope flap. I also punched a 1 inch circle of the Old Olive fern DSP pattern for the envelope seal.
The inside panel measures 5-1/4 by 4 inches.
I used white scraps for the owls and sentiment banner.
Assembly:
First, I cropped the DSP using the Picture This die and save the circles cropped out.
Outline the small circles using an Old Olive Stamping Write marker.
Carefully, line up the Old Olive fern pattern (reverse of the tree pattern) under the Picture This die. I purposely adhered them just off from the circles.
Line up the tree pattern circle and adhere to the Poppy Parade mat.
I used the Soft Suede, Poppy Parade, and Old Olive blends to color the owls.
Next, I stamped the sentiment using Poppy Parade ink and cropped the sentiment using a die from the Stylish Shapes die set.
I added dimensionals to the underside of the owls and sentiment and adhered them down.
With that, I’d finished this coordinated card, envelope, and envelope seal set.
More inspiration awaits, so use the lineup below to visit the rest of the Design Team. The Pals are excited to show you what they’ve created! Then, please mark your calendars for our next blog hop on March 8th, when our theme will be Party Time, showcasing cards/projects that celebrate our family and friends.
Welcome to Just Peachy Stamping by Sue Jackson: an independent Stampin' Up demonstrator.
Through Stampin' Up!, I happily share my love of papercrafting through sales, classes, small stamping group meet-ups and workshops. I think that being a teacher in my "real life", I have a unique approach to sharing my fantastic hobby. I look forward to connecting with you!


 \
\