Welcome back to the bi-weekly Cardz 4 Galz challenge #264. It’s my turn to host this edition of our bi-weekly challenge, and I chose A Cute Christmas for the theme. When you finish here, please visit the challenge site to see what the rest of the design team members created. Then, don’t forget to upload your creations to our gallery. We look forward to seeing your creations there!
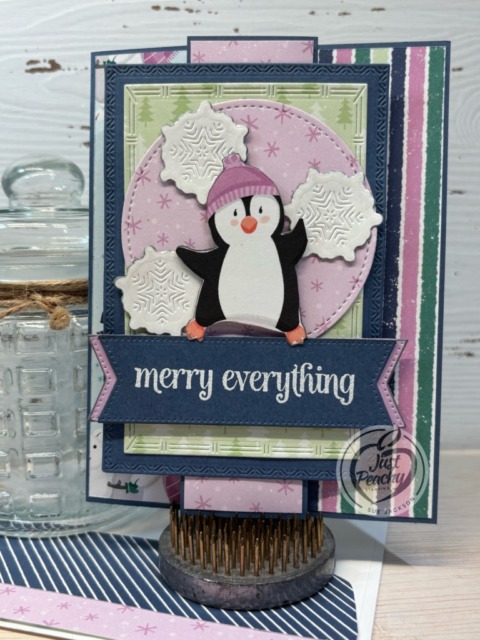
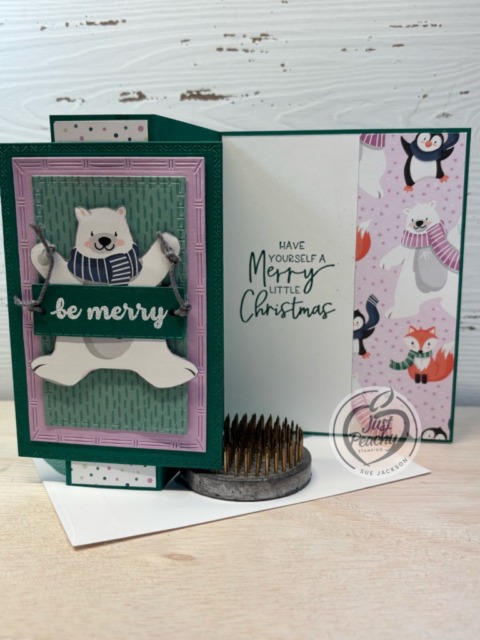
Here are my two cards:
Here goes with all the additional challenge for which these cards qualify.
As always with a fun fold card, I will be adding this to the Creative Creases Challenge where the theme is always Anything Goes with a Fun Fold.
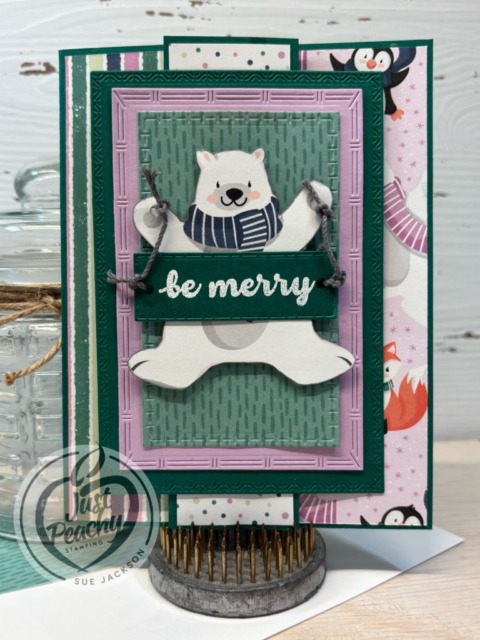
I’m also going to upload this card to the Critter Crazy Challenge . I fussy cut both the penguin and the polar bear from the retired Penguin Playmates DSP (designer series paper).
These cards also qualify for Thing 1’s recipe in the the Double Trouble Challenge #205. My three colors for the penguin card are Fresh Freesia, Misty Moonlight, and Soft Sea Foam. I used Fresh Freesia, Shaded Spruce, and the retired Just Jade for the Polar Bear card. Both cards have more than 2 layers, and they each have one fussy cut image. Three colors – check. Two layers – check. One image – check.
In addition, since I used leftover pieces for all the white cardstock elements of the card, I am also entering it in the Snippets Playground Challenge #520.
I have enough of two patterns of DSP to make two more of these cards, if I am careful when trimming. Then, I will be down to just using strips. Here’s a picture of some of the snippets of this DSP that I have left:
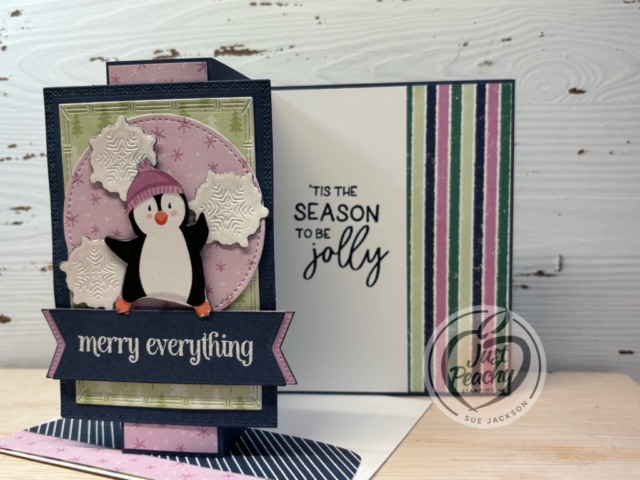
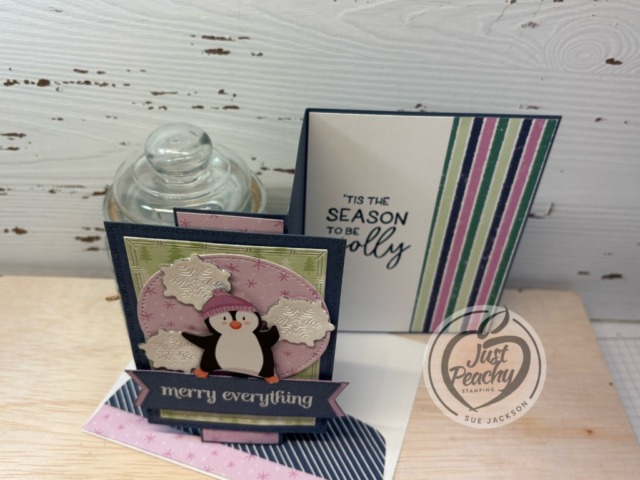
The Modified Z-fold Fun Fold Card:
I’ve already posted a card using this fold for the October, 2025 Stampin’ Pretty Pals’ Blog Hop, which you can see here.
Of course, I made a template so I can easily recreate the card. Instead of using the Everyday Arches dies, I used the Textured Note die set.
Here’s the template:
The circle on the penguin card and sentiment banners were cropped using dies from the Stylish Shapes die set
The Fresh Freesia die under the Misty Moonlight banner was cropped using the same die, which I cut in half and adhered for a mat of sorts
I cropped the snowflakes from the retired Stitched Snowflakes dies, then lightly covered them with clear Wink of Stella for just a touch of sparkle
I added dimensionals under the polar bear and sentiment and the penguin and sentiment
Since these cards already have multiple layers, I adhered the rest of the pieces using multipurpose liquid glue
You’ve asked, and we’ve answered! Get ready for our first-ever Black Friday sale with up to 40% off the most useful, needed, irresistible Stampin’ Up! products at deeper discounts than ever before. Shop between November 25 to December 1 so you can create more by spending less during this limited-time-only sale!
Promotion Details
Sales Period: November 25–December 1
Ordering Deadlines
Phone: December 1, 2025, at 6:59 p.m. (MT)
Online: December 1, 2025, at 11:59 p.m. (MT)
40% off
Stampin’ Blends
Paper Trimmer and blades
Ink refill bundles
25% off
Select adhesive
15% off
Select cardstock
Shop the full selection of discounted products online.
Products are available while supplies last.
Orders will likely arrive in time for the holidays.
This month is my first time posting as a design team member for The Creative Crafters! I am thrilled to be able join this monthly challenge, and encourage you all to play along with us where anything goes is always the theme. We’d love to see your creations and look forward to seeing them in our gallery.
Thing 1’s challenge includes a 3-2-1- Recipe “My Guy” including 3 layers (not including the card base, 2 different patterned papers, and 1 kraft or similar to kraft color. In order to play along, you need to meet the minimum recipe requirements. I have 4 layers, 3 different DSP (designer series paper) patterns, and 1 piece of Crumb Cake (kraft colored) cardstock.
Thing 2’s challenge includes a layout from Try a Sketch on a Tuesday Challenge # 672. I have been honored to be included in the top 3 a number of times for this challenge.
Measurements:
The Early Espresso base measures 8-1/2 by 5-1/2 inches, scored at 4-1/4 inches
I used Weekend Adventures DSP for the three patterned papers
Trim a piece of the plaid DSP to 5-3/8 by 4-1/8 inches
The Old Olive tree DSP measures 2-3/4 by 4-1/8 inches
The top piece of DSP measures 2-1/4 by 4-7/8 inches
Trim a piece of DSP to 6 by 2-1/2 inches for the envelope flap
Punch a 1-inch circle from a different piece of the DSP and run it through the XYRON create-a-sticker for the envelope seal
After dry embossing the Crumb Cake piece of cardstock using the Birchwood folder, I trimmed it to 3-1/2 by 4 inches
Trim a piece of white cardstock to 4 by 5-1/4 inches for the inside of the card
Optional: trim a piece of DSP to 3/4 by 4 inches for the bottom of the inside of the card
Scrap white cardstock for the outside sentiment
Putting the Card Together:
Unless otherwise noted, I used multipurpose liquid glue to adhere pieces together
The DSP patterns and embossing on the Crumb Cake cardstock made me want to keep the rest of the card simple
I used the retired Charming Sentiments stamp set for both the outside and inside sentiments since I wanted this to be a more all-occasion card
Stamp both sentiments using Early Espresso ink
Crop the front sentiment using a last chance Countryside Corners die
The Old Olive ribbon is actually white ribbon that I colored with the dark Old Olive blend
HINT: The white diagonal ribbon is part of a Petal Pink and White Diagonal ribbon, also on last chance
BIG HINT: Make sure you let the ribbon dry completely before touching it or using it on your card – I made that mistake once and never again – what a mess!
Adhere the layers of the card together following the TSOT sketch
Use mini-glue dots to adhere the ribbon to the back of the sentiment panel
Add dimensionals to the back of the sentiment and adhere to the card
Adhere the stamped white cardstock and DSP strip to the inside of the card
With that, I’d finished this coordinated card, envelope, and envelope seal set
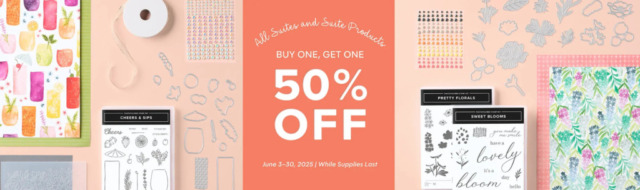
Our suite collections are known (and loved!) for their coordination, quality, and style. With stamps, tools, patterned paper, and embellishments in stunning colors and unique designs, suites make creativity simple and fun. Shop the individual products or buy as a full collection!
I have two orders making their way to me and I couldn’t be more excited! Some of the products are pre-orders for the upcoming additions to the Online Exclusives!
Promotion Details
Sales Period: June 3–30, 2025
Ordering Deadlines
Phone: June 30, 2025, at 6:59 p.m. (MT)
Online: June 30, 2025, at 11:59 p.m. (MT)
All available suites and suite products from the 2025–2026 Annual Catalog and Online Exclusives are buy one, get one 50% off.
When you shop the sale, the 50% off discount will apply to the lower-priced item (for example, if you buy a suite collection and a stamp set from a suite, the suite would be full price, and the stamp set would be 50% off).
Suite collections are available if all items are in stock; if all items are not in stock, you can still shop the available suite products.
You don’t have to buy a suite and suite products all from the same suite collection for the discount to apply. You can buy any suite products from any suite.
The discount will appear in your cart once you’ve added two items within the sale parameters to your cart.
Products are available only while supplies last.
If you live in the U.S. and don’t already have a Stampin’ UP! demo from whom you order, I would be honored to work with you.
Welcome to the newest Make My Monday bi-weekly challenge #248. Our host for this challenge, Heather, chose Make it Green for the theme. When you finish here, please visit the challenge site to see what the rest of the very talented design team members created. Then, don’t forget to upload your creations to our gallery. We look forward to seeing your creations there!
I have 3 balloons, 2 flowers, and one dinosaur. Here’s their challenge banner:
As I have done many times in the pas with fun folds, the fourth challenge is Creative Creases # 101
Isn’t it fabulous when the challenges all work together? Love it!
Measurements for This Z-Fold Card:
The Garden Green base measures 8-1/2 by 5-1/2 inches, scored at 2-1/8 and 4-1/4 inches
Trim a piece of Balmy Blue 6 x 6 inch DSP (designer series paper) to 5-3/8 by 2 inches for the front flap
Trim another piece of Balmy Blue DSP to 6 by 2-1/2 inches for the envelope flap
At this point, I try to remember to punch a 1-inch circle of coordinating DSP for the envelope seal, then run it through my XYRON create-a-sticker
Trim a piece of Balmy Blue cardstock for the inside to 5-3/8 by 4-1/8 inches
You will need two pieces of Garden Green cardstock, each measuring 3-1/2 by 4-3/4 inches to use one on the outside and one on the inside
Next, trim two pieces of white cardstock to 3-3/8 inches by 4 inches
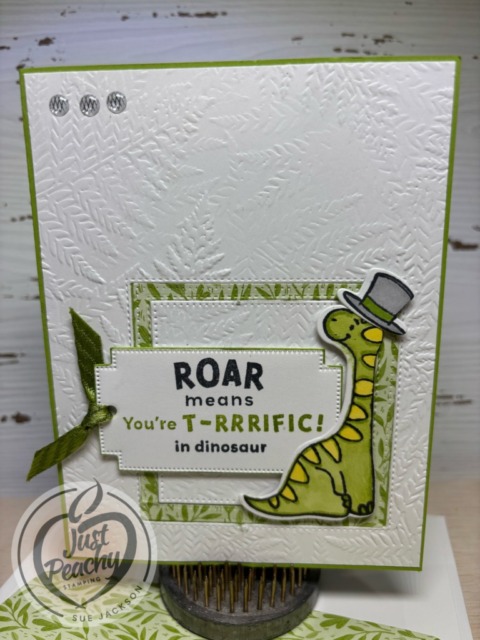
With careful planning, I was able to stamp all the pieces from the Darling Dino stamp set using one piece of white cardstock measuring 4-1/4 by 5-1/2 inches
I had scraps of Garden Green to use for the grass and Balmy Blue for the sentiment banner on the front
Stamping, Coloring, and Die-Cutting:
Using the cloud stamp from the Playing in the Rain stamp set, I added Balmy Blue clouds to the white cardstock for both the inside and outside of the card
Then, I used a blending brush and lightly added Balmy Blue ink to both pieces of white cardstock
The color is very subtle, but the result turned out much better than just using white
After stamping all the Darling Dino pieces using Momento Tuxedo Black ink, I cropped them with the coordinating dies
Do you recognize the Garden Green grass on the front of the card? If you guessed it’s from the Frozen Edges die set, good for you!
Using the grass stamp from the Dinos set, I stamped it using Garden Green ink on the front of the die cut grass piece
I used the splotchy stamp from the Dinos set and stamped it using Garden Green ink on white cardstock, then cropped the two pieces of the egg
I outlined the egg using a black Stamping Write maker so it would pop off the background
Next, I used black ink to stamp both the outside and inside sentiments
The sentiment I used for the inside is actually two stamps: Roar means/in dinosaur is the first stamp and You’re the Best is the second
You can see how I used these sentiments using other combinations here and here
I colored all the Darling Dino pieces using the Balmy Blue, Granny Apple Green, and Garden Green blends combos
Assembly:
Unless otherwise noted, I used multipurpose liquid glue to adhere the pieces of the card together
After adhering the white cardstock pieces to each Garden Green piece of cardstock, I started layering all the other pieces
I started with the grass, then tucked the flowers in behind it
I did need to dry-fit the rest of the card pieces together before adhering them down
Once I figured out where the balloons would live, I drew black lines for the string down to the dino going down into the where the egg would be
The Garden Green balloon and the Granny Apple green balloon were adhered directly to the cardstock
Add a dimensional to the Balmy Blue balloon and adhere to the white cardstock
Adhere the splotched egg to the dinosaur, then add dimensionals to the combined pieces and adhere to the white cardstock
Add dimensionals to the cropped sentiment banner and add to the top of the white cardstock
I had the rock stamp already cropped out and decided to add another flower and the top of the egg to the inside corner of the white cardstock
With that, I’d finished this coordinated card, envelope, and envelope seal set.
If you like the idea of quick and easy cards but don’t know where to start, try our KITS COLLECTION!
Here are three examples of the all-inclusive kits available now!
First, this PAINTED WISHES KIT retails for $14.00 (USD) and contains enough supplies to create NINE cards!
The second kit I’m showcasing is the ALPINE AIR KIT which retails for $22.00 (USD) and it also contains enough supplies for NINE cards! I’ve already posted some cards I’ve made using this kit, which you can see here.
Finally, this BY YOUR SIDE KIT retails for $22.00 (USD) and contains enough supplies for EIGHT cards. I love this kit and have posted cards using it which you can see here, here and here.
If you live in the U.S. and don’t already have a Stampin’ UP! demo from whom you order, I would be honored to work with you.
When ordering, please enter the following HOST CODE when prompted:
Welcome back to the bi-weekly Cardz 4 Galz # 246! Thank you so much to all of you who played along with my Love challenge #245. It was so difficult to chose the winners and honorable mention entries.
Our host for #246,Billie A. , chose Stitching, Faux or Real, for the theme. When you finish here, please visit the challenge site to see what the rest of the very talented design team members created. Then, don’t forget to upload your creations to our gallery. We look forward to seeing your creations there!
For my card, I use my new Darling Dino bundle available in the current January – April mini-catalog. A dear friend at school tells the kids that I am so old I went to high school with the dinosaurs and taught Moses, for whom I edited the Ten Commandments. It’s all in fun, and I love it when the kids play along with their own comments. I could really write a book. Obviously, this card is for my friend.
Anyway, I was able to include faux stitching when cropping all the squares on the outside and inside of the card.
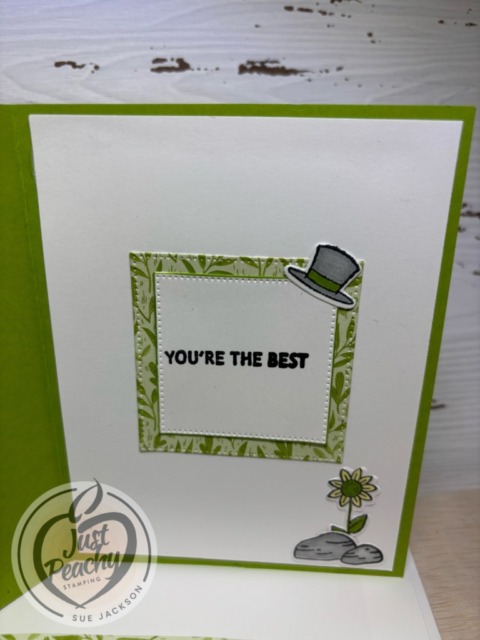
Here’s my faux stitching card:
While you can’t really see it in the pictures, the band on the hats are colored with theGranny Apple Green light blend. Since I have said that my Prom date was a t-rex, this cutie is perfect!
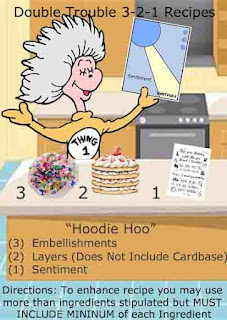
I am also entering this in the Double Trouble Challenge #185 for the Thing 1 part of the challenge, which is the only required part of this challenge. Here’s the challenge banner:
I have more than 3 embellishments, layers with the inside and outside squares, and one sentiment on the front.
Measurements:
The Granny Apple Green base measures 8-1/2 by 5-1/2 inches, scored at 4-1/4 inches
AFTER running a piece of white cardstock through my Cut & Emboss machine using the Ferns embossing folder, I trimmed it to 4-1/8 by 5-3/8 inches
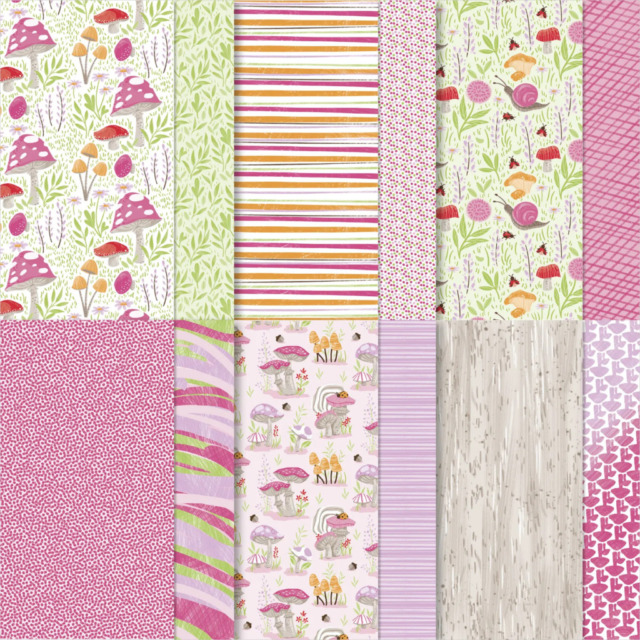
I used a piece of the green fern Toadstool Gardens 6 x 6 inch DSP designer series paper), which is available for FREE through Sale-a-Bration with a $60 purchase, for the square in the center of the card and the one on the inside
Here’s a close-up of this absolutely adorable DSP:
I trimmed a piece of the fern DSP to 6 by 2-1/2 inches for the envelope flap
I punched a 1-inch circle from another piece of the Toadstool DSP and ran it through my XYRON for the envelope seal
Using the Stylish Shapes die set, I used two of the square dies to create a frame and inside square piece
Then, I used the second to the largest square die to crop out a section of the white embossed cardstock
The white cardstock for the inside measures 4 by 5-1/4 inches
I used the inside of the fern DSP and cropped the third smallest square from white cardstock for the sentiment
I was able to stamp and crop the sentiment banner, t-rex, hats, flower, and rocks from one piece of 4-1/4 by 5-1/2 inch cardstock
Stamping, Coloring, & Assembly:
I stamped all the images using Momento Tuxedo Black ink and used Granny Apple Green, Lolly Lemon, and Smoky Slate blends combos to do all the coloring
The outside sentiment is stamped in Tuxedo Black and Granny Apple Green with two stamps from the Delightful Dino stamp set; the black ink was used on one stamp, and the green ink was used on another stamp in the set
I cropped the sentiment using one of the Greetings of the Season dies, and I will probably keep this set for a very long time
Here’s a look at this die set, which is on the Last Chance list for $22.40:
I colored the white diagonal ribbon with the Dark Granny Apple Green blend, threaded it through the hole in the label and tied it in a square knot
I’ve colored other ribbons using the blends before, and you can see a couple of those posts here and here
Unless otherwise noted, I used multipurpose liquid glue to adhere the pieces together
Adhere the embossed white cardstock to the front of the base of the card
Next, adhere the green leaf DSP frame inside the cropped square
Add the white embossed square back into the frame
Add dimensionals to the back of the sentiment label and adhere to the card
Next, figure out where you want your t-rex to live and add dimensionals making sure to keep clear of the sentiment label
Add one mini-dimensional to the hat and adhere
I added three ribboned enamel dots to the top left of the card to help balance out the weight on the bottom of the card; these dots also allowed me to have three embellishments on the card
Stamp the inside sentiment on a small cropped square of white cardstock using Tuxedo Black ink and adhere to the square of green leaf DSP
Adhere to the card
After coloring the rocks using Smoky Slate blends, the flower using Granny Apple Green blends, and the petals using the light Lemon Lolly blend, adhere them to the inside of the card
With that, I’d finished this coordinated this card, envelope, and envelope seal set
I’m so thankful to have my domain issues with my blog figured out after more than a week of being without access.
So many new items have been added since Sale-a-Bration started. Be sure to check them out!
For every $60 and $120 you spend, you’ll earn an exclusive Sale-A-Bration item for FREE! Depending on the amount you spend, you’ll be able to mix and match the Sale-A-Bration items you earn, and we have a stunning variety of stamp sets and Designer Series Paper for you to choose from! Shop now through February 28.
There’s also a new JOIN PROMOTION:
If you live in the U.S. and don’t already have a Stampin’ UP! demo from whom you order, I would be honored to work with you.
When ordering, please enter the following HOST CODE when prompted:
Welcome to the February, 2025 edition of the Sparkles Christmas Challenge! The theme for this month, chosen by Melissa, is A Christmas Cup of Tea. When you get finished here, I hope you will visit the challenge site to view the creations from the very talented members of our design team. After you’ve created your own themed card, please don’t forget to upload it to our gallery.
I am not a tea drinker, and didn’t have anything tea related, so I am using coffee for my card. Here’s my card:
3 images: the coffee cup, and 2 different foam images
2 patterned papersin Cherry Cobbler and Basic Beige
1 sentiment that makes me smile – a cozy day certainly meets that requirement
Measurements:
I outlined all the pieces using a gold Wink of Stella brush
The Cherry Cobbler base measures 8-1/2 by 5-1/2 inches
The Cherry Cobbler and gold flecked DSP (designer series paper) measures 4-1/8 by 5-3/8 inches
I trimmed another piece of DSP to 6 by 2-/2 inches for the envelope flap
Then, I punched a 1-inch circle from the Basic Beige and ran it through my XYRON create-a-sticker for the envelope seal
Trim a piece of Basic Beige to 4 by 5-1/4 inches for the inside of the card
The Basic Beige vertical strip measures 1 inch by 5-3/8 inches
The Basic Beige square in the middle measures 2-1/2 inches square, for which I then rounded the corners
I used scraps of the Cherry Cobbler and Basic Beige DSP for the cups, foam images, and sentiment
Stamping, Cropping, and Assembly:
I stamped all the images from the Latte Love stamp set and sentiment from the Frozen Edges stamp setin VersaMark ink and covered them all with gold embossing powder, which needed to be heat set
Crop the coffee cup and foam images using dies from Latte Love
Crop the sentiment using a tag die from the Greetings of the Season die set
Add gold thread to the hole in the sentiment tag
I used multipurpose glue to adhere pieces unless otherwise noted
Adhere the Basic Beige strip, square, and foam pieces to the Cherry Cobbler DSP
Add dimensionals to the back of the gold and Cherry Cobbler DSP, the sentiment, and the coffee cup and adhere
After stamping the inside sentiment, adhere to the inside of the base of the card
With that, I’d finished this coordinated card, envelope, and envelope seal set.
Welcome to the newest Cardz 4 Guyz challenge! Our host for challenge #347, Dawn, chose Stars &/or Stripes for the theme. When you finish here, please visit the challenge site to see what the rest of the very talented design team members created. Then, don’t forget to upload your creations to our gallery. We look forward to seeing your creations there!
Thing #1’s challenge requirement on the Double Trouble Challenge #166 is to use things that are unmatched or from my “stash or trash”. I chose “stash”. Since I need to resupply my “stash” of thank you cards at work, that’s what I created for these challenges.
This DSP (designer series paper) retired on May 1, 2023, and the Starry Sky color retired on May 1, 2024. I still love this DSP and the Starry Sky/Gray Granite color combination. Sadly, I don’t have much of the DSP left. The Gray Granite ribbon is also retired. The last time I used this paper, I stamped and cropped the leaf sprays and had them stashed in the same envelope as the Nature’s Prints dies. This stamp set and coordinating die set also retired on May 1, 2024. Since everything is retired, or stamped and cropped already, I think I’ve really used stuff from my stash.
I thought I would be able to enter this card into the Tuesday Morning Sketches to go along with the Double Trouble Challenge, but I missed a layer of angled paper. However, out of the four cards, this is my favorite.
Here’s the sketch for TSOT 646:
Things to Know:
I used multipurpose liquid glue to adhere the DSP pieces of paper, and to the cardstock.
I added dimensionals under the sentiment banners and the Starry Sky cropped leaf sprays.
In addition to using DSP for each envelope flap, I stamped a partial leaf spray on the bottom, right-hand corner of the front of the envelopes.
I also punched four 1-inch circles of DSP for the envelope seals. After running them through my XYRON create-a-sticker, I put one seal in each envelope.
After running white cardstock through my Cut & Emboss machine using the Ferns 3D embossing folder, I trimmed each to size.
While I like so much of the new format of the Stampin” UP! annual catalog, I really miss having the DSP all in one place at the back of the catalog. In addition, I find that I need to know what DSP is currently available in the online exclusives. Therefore, I created a spreadsheet for all the current DSP. I broke it up into sections for the 6 x 6 inch, 12 x 12 inch, and the online exclusive DSP and I got it all on one page. The font is small, but I left the doc as a Excel doc so you can download it and change the size if you want.
What’s just as exciting as the new 2024 – 2025 Annual Catalog? That would be the new kits now available. They are fabulous, but I must get the one with the adorable dogs ASAP after it comes back in stock!
Take a look at these all-inclusive kits! All you need to add is a pair of snips/scissors and an acrylic block for stamping.
.
If you live in the U.S. and don’t already have a Stampin’ UP! demo from whom you order, I would be honored to work with you.
When prompted, please enter the following HOST CODE:
Welcome to Just Peachy Stamping by Sue Jackson: an independent Stampin' Up demonstrator.
Through Stampin' Up!, I happily share my love of papercrafting through sales, classes, small stamping group meet-ups and workshops. I think that being a teacher in my "real life", I have a unique approach to sharing my fantastic hobby. I look forward to connecting with you!