Welcome to the new Cardz 4 Galz bi-weekly challenge #202 for today, June 29, 2023. Our host for this time, Helen, chose fun folds for the theme. If you haven’t noticed, I love fun folds! When you finish here, I hope you will visit the challenge site to see what the rest of the design team created. There’s also a call for new design team members or guest designers for a month (2 challenges). If you are interested, you can find the information there.
I’ll be entering this one in the Creative Creases challenges as well.
Here;s my tri-fold birthday card for my great-niece’s 7th birthday:
I used Debbie Henderson’s video for all the measurements for this card. She used the Countryside Inn suite of products. I used the Bright and Beautiful suite of products along with the deckled rectangle die set. But I, did use her measurements. The only thing I have to do is get the gift card for her present. I will add a pocket on the back of the third panel when I get the card.
NOTE: This card will fit inside a medium white Stampin’ Up! envelope. However, for mailing in the U.S., it will require additional postage (2 stamps will work) in order to be mailed.
Putting the Card Together:
The Bright and Beautiful DSP (designer series paper) is adhered with multipurpose liquid glue, as are the two deckled rectangle pieces.
Add dimensionals under all the balloons and decide where your strings need to be stamped BEFORE you adhere the balloons together.
HINT: I first cropped out the trio of balloons from the die set in black cardstock. That allowed me to adhere the balloons without having to figure out where to place each balloon.
I used the clear Wink of Stella pen to outline the balloons to make the edges more definitive.
Stamp the birthday sentiment using Momento Tuxedo Black on a piece of Bright and Beautiful DSP. Crop using the sentiment label die from the Bright and Beautiful die set.
Outline the die cut using a Basic Black marker.
Adhere a piece of the adhesive foam sheets to a piece of black cardstock.
Crop the black cardstock using the same label die.
Use multipurpose liquid glue to adhere the sentiment DSP panel to the blackcardstock.
Peel off the backing on the adhesive sheet and adhere it to the middle panel of the card.
Use baker’s twine to tie a bow through the hole at the top of the sentiment panel.
I stamped the sentiments on the deckled rectangle pieces using Misty Moonlight after I adhered the balloons.
Trim a piece of Bright and Beautiful DSP to 6 inches by 2-1/2 inches for the envelope flap.
Punch another piece of DSP using your 1-inch circle punch for the envelope seal.
If you live in the U.S., the HOST CODE for June is VAMCFNHD.
If you don’t already have a Stampin’ Up! demo with whom you work, I’d love to be your stamping buddy! If you are placing an order for under $150, please use the host code above. If you are placing an order over $150, please contact me so you can get the benefit of the Stampin’ Rewards you will earn. OR, you can take advantage of the joining promotion going on through the end of the month with no long-term commitment! Spend $99 and get $155 of product! Winner!
JUST A COUPLE OF DAYS for ADDITIONAL OPPORTUNITIES!
BOTH OF THE FOLLOWING PROMOTIONS END ON JUNE 30,2023!
It’s a fabulous time to join Stampin’ Up! New team members will get even more FREE products in their customizable Starter Kit. Between 1–30 June, those who sign up can get $125 USD | $165 CAD$155 USD |$206 CAD worth of products for only $99 USD | $135 CAD + free business supplies + free shipping + all the fun being a part of Stampin’ Up!
If you live in the U.S. and want to be a part of my team, please contact me at [email protected].
Welcome to another Cardz 4 Guyz challenge! This host for challenge #323, Melanie, chose many layers for the theme. When you are finished here, I hope you will visit the challenge site to see what the rest of the design team members created. There’s so much inspiration to be found on the site. Don’t forget to upload your creation to the gallery – we’d love to have you play along.
I needed a thank-you card for one of my cousins on Long Island. He helped me out tremendously and went above and beyond to help me with an issue. Since I am in Central Florida, his help really made the whole process so much easier! While creating my thank you card, I layered the sentiments as well as the papers.
Here’s my layered card::
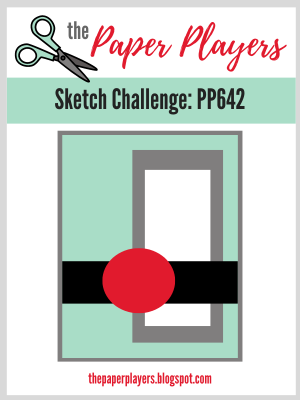
The layout is classic, and goes right along with the current Paper Players Challenge #642.
The Creative Creases challenge theme is always an anything goes with a fun fold. Therefore, this card qualifies for that challenge as well.
Measurements:
The Night of Navy base measures 11 by 4-1/4 inches, scored at 2-3/4 and 5-1/2 inches. Use a bone folder to emphasize the folds.
Trim a piece of Gray Granite cardstock to 4-1/8 by 5-3/8 inches.
I used a piece of retired DSP for the background. It measures 4 by 5-1/2 inches. I trimmed another piece of the same DSP is the background for the inside panel of the card, to the same measurements.
Trim a coordinating piece of DSP to 6 inches by 2-1/4 inches for the envelope flap.
Punch a coordinating piece of DSP using a 1-inch circle punch for the envelope seal.
The while cardstock on the inside panel measures 4 by 5-1/4 inches.
Use scraps of Night of Navy and white cardstock for the sentiment panels.
Stamping, Cropping, and Assembly:
Using sentiments from the Biggest Wish stamp set, stamp “THANKS” three times in Gray Granite on white cardstock.
Stamp the script “thanks” on top of the Gray Granite sentiment.
Stamp “thanks” on white cardstock using Night of Navy ink for the inside panel.
Crop the white cardstock pieces using the deckled rectangle dies.
Crop Night of Navy cardstock to create mats for the sentiment panels.
I used another sentiment from the Here’s a Card stamp set and stamped it in Gray Granite on the inside white cardstock panel.
Tie a length of Gray Granite ribbon using a square knot around the DSP for the front panel.
Adhere the front panel Gray Granite cardstock the the Night of Navy cardstock using multipurpose liquid glue.. Make sure you only adhere the bottom part of the front panel to the Night of Navy. If you adhere the whole front panel, the card won’t stand up.
Use the multipurpose glue to adhere the DSP to the Gray Granite cardstock.
Add dimensionals under the Night of Navy mat for the sentiment. Make sure you add them so the sentiment panel straddles the ribbon.
Adhere the inside piece of white cardstock to the DSP.
Adhere the DSP to the inside panel of the card.
Add dimensionals underneath the “thanks” sentiment near the top of the inside of the card. The placement depends on how straight you want your easel to stand. Higher up will give a steeper easel.
Adhere the DSP to the envelope flap using multipurpose glue and trim.
With that, I’d finished this coordinated card, envelope, and envelope seal set.
Thank you very much for stopping by today! Have a Peachy day!
This kit is fabulous because it includes the supplies and easy to follow directions to make shaker cards!
Take a look at Sara’s unboxing and instructional video:
:
If you live in the United States and don’t already have a SU! demo, I would be honored to help you on your stamping journey! The MAY HOST CODE is E4QVNYD4. Once again, thank you for stopping by!
This month, the theme is Flowers in the Garden. We hope you are inspired by all the wonderful creations the Pals share with you! As you hop from blog to blog, we love reading your comments. Then, you will find the lineup at the end of my post to help you “hop” along from Pal to Pal.
Here’s my Flowers in the Garden card:
I’ll also be entering this in the current Creative Creases Challenge. If you like fun folds as much as I do, this is the challenge for you!
I used a video by Connie Stewart for the measurements and directions to create this card. In her video, Connie didn’t mat her flower DSP (designer series paper) pieces. I’d rather mat mine so I have 1/8 inch difference. You might not even be able to tell because I used some Mango Melody 6 x 6 inch DSP for my mats.
Please don’t let the pictures of the card intimidate you. If you can use a trimmer and can score cardstock, you can create this card! In order to make it easier for myself, I watched the video straight through the first time. Then, I went back and stopped the video with each step.
The flowers I used as embellishments needed to be fussy cut from the Regency Park DSP. However, fussy-cutting can be relaxing (although not as relaxing as coloring), so it’s all good.
You can find the video here:
My Take on Connie’s Card:
I’ve just really started to use Mango Melody for projects, and it’s now retiring. I’ve thoroughly enjoyed using the color with this Regency Park DSP and the Playing in the Rain DSP lately.
In addition to the DSP pieces Connie cut, I added a 6 by 2-1/2 inch piece of coordinating DSP for the envelope flap. Then I punched a piece of Mango Melody DSP for the envelope seal.
I used the Biggest Wish stamp set for the front panel.
The sentiments came from the Happy & Heartfelt and Peaceful Moments stamp sets. I was so tickled with how well the fonts from the two stamp sets worked together.
As I said, I fussy-cut all the flowers.
I added mats to the DSP strips on the first white cardstock layer.
In addition, I added a strip of the flower DSP and a fussy-cut flower on the inside of the card.
For the front sentiment, I added a bow using white bakers’ twine and a Mango Melody enamel dot.
I may have gone overboard, but I hope the recipient doesn’t think so.
Amazingly, I didn’t use any dimensionals on this card. It’s already thick enough, will require extra postage and I wanted to make sure it fits in the envelope.
Back to the Pals’ Blog Hop:
More inspiration awaits, so use the lineup below to visit the rest of the Design Team; The Pals are very excited to show you what they’ve created! Then, please mark your calendars for our next blog hop on May 10th, when our theme will be a Tic Tac Toe challenge, where our Design Team will create projects, using elements/supplies that are three in a row, column, or diagonal from the tic tac toe board.
Thank you very much for stopping by today. Don’t forget to hop along from one Pal to the next. Su Mohr at Arts and Aromas is next and she is truly a very talented artist. You won’t want to miss her project!
There are new and returning colors coming with the new catalog! Sadly, there are also colors that will be retiring. One that makes me sad is Mango Melody, mainly because I’ve recently started really playing with it.
Take a look at this SU! video with the new, returning, and retiring colors:
Welcome to the SU! Demo March Fun Fold Blog Hop! Each month, a group of demonstrators get together under the direction of our fearless leader, Debbie Mageed, to create fun fold cards. Being a part of this hop means I get to share a fun fold, but I also get the opportunity to be inspired by the fun folds the rest of the demos share in this hap.
I found my inspiration for this hop through Mary Deatherage’s video on the flying seagull card. This is the second time in the recent weeks that I’ve turned to her for inspiration, and you can see the other card here.
Here are some photos of my version of the flying seagull card:
As soon as I knew what papers I would be using, I contacted a work colleague/friend and asked if he’d be ok with the colors I chose. I knew it would be ok for two reasons. First, his mother’s favorite color is blue. Second, I’ve made so many cards for him to give out to his family that I just about have carte blanche to create whatever I want. Now, that’s trust, but I haven’t let him down yet, so it’s all good.
When this post goes live, I will be adding it to the gallery in the Creative Creases Challenge.
Measurements and Assembly:
I have to tell you that I followed Mary Deatherage’s video for the creation of the card. You can find that video here. Believe me, it’s much easier to follow her video than for me to try to explain all the steps myself. It’s truly not too difficult. I really think if you can do an easel card, or a double z-fold card, that this would be just a tad more involved. Mary’s video will help you.
Changes I Made:
Mary’s card is absolutely stunning! However, I needed an anniversary card. Therefore, I made a few changes
Before adhering the front patterned DSP to the Balmy Blue mat, I wrapped a length of the Night of Navy ribbon around the card and tied it in a bow.
I knew I wanted to use the swirly circle from the Irresistible Blooms die set. I cropped the swirly circle out of Pool Party cardstock.
Use multipurpose liquid glue to attach the swirly circle to the front panel of the card.
HINT: You will have to just snip the connecting dots to get the circle to come free of the cardstock.
Next, I stamped the outside sentiment in Night of Navy on white cardstock and cropped it using a circle die from the Stylish Shapes set. I made sure that my circle wouldn’t cover the whole swirly circle.
Place dimensionals. under the sentiment circle and adhere to the swirly circle on the front of the card.
Finally, I added some milky adhesive dots in Night of Navy to the sentiment circle. You can easily create your own Night of Navy dots by coloring a few layers of the dark blend to the pearl basic jewels.
I also added white cardstock to the back panels so that my friend has somewhere to write his own comments.
With that, I’d finished this coordinated flying seagull fun fold card, envelope, and envelope seal.
Back to the Blog Hop:
I hope you will follow the links below and visit the sites from the rest of the demos! Each month I find inspiration for future cards. When you create your own fun fold, please add it to the Creative Creases Challenge gallery!
Welcome to the newest Cardz 4 Guyz challenge! The theme for this two-week challenge is using any coloring medium. The Rainy Days suite is just wonderful, and I am thoroughly looking forward to getting the dies and loose flowers which were on backorder until this past weekend. When you finish here, I hope you will head over to the challenge site to see the projects from the rest of the design team members. I always enjoy seeing how others interpret the theme.
Here’s my coloring card:
The sketch and optional theme of weather from the Try Stamping on Tuesday # 598 gave me the layout of this card. I am also adding it to the gallery for the Creative Creases challenge.
I used the sketch from the Try Stampin’ on Tuesday #598 challenge sketch for my layout. I turned the sketch so it’s landscape, but you can definitely see the inspiration there. I used clear sequins for the stars in the center of the sketch, and the dots on either end, which can easily be seen if you click on the photo above.
Here’s the Try Stampin’ on Tuesday sketch:
Measurements:
The Balmy Blue base measures 4-1/4 by 11 inches, scored at 2-3/4 and 5-1/2 inches.
I used four pieces of the umbrella DSP (designer series paper). The inside piece measures 4-1/8 by 5-3/8 inches.
The piece for the envelope flap measures 6 by 2-1/2 inches.
Finally, there are 2 pieces trimmed to 4-1/8 by 2-5/8 inches for the two shorter ends.
I trimmed a piece of Balmy Blue for the outside and Basic White for the inside. Each piece measures 3-1/4 by 4-1/4 inches. I did embossed the Balmy Blue using the raindrop embossing folder before I trimmed it to the final size.
I trimmed the banner to two inches wide and punched the diagonal ends using the Pick-a-Banner punch. I used the shiny paper from the Regency Park suite of products.
Finally, I punched a 1-inch circle from coordinating DSP for the envelope seal.
Assembly:
I adhered all the DSP pieces using multipurpose liquid adhesive.
Then, I put a couple of drops of white craft ink on an acrylic block and used a finger daubber to lightly add white to the Balmy Blue embossed cardstock.
Using an empty clear Wink of Stella pen, I added a tiny amount of glitter ink to each raindrop..
Next, I used the Stamparatus to stamp the turtle using black ink. I cleaned the stamp, and restamped it using VersaMark ink. After covering the turtle in clear embossing powder, I heat set it with my heat tool.
I used the Mango Melody and Old Olive blends combos to color in the turtle using the DSP turtle as a guide. I pretty pleased with the way it turned out and I assure you that I really did color it. When I finished, I fussy cut that turtle and the turle on the inside from another piece of DSP.
Next, I stamped the sentiment and umbrella on the inside white panel. I colored the umbrella using an Old Olive Stamping Write Marker.
I added a piece of Old Olive ribbon to the front of the banner and then tied some white bakers’ twine around the ribbon.
I added dimesnionals under the banner and the turtle for the front.
Adhere the Balmy Blue piece to the front flop of the Balmy Blue base.
Adhere the pieces using the dimensionals.
I added three sequins to the banner on. the front. Then, I added three sequins to the top right and lower left corners.
Next, I added the white cardstock to the inside of the card.
HINT: I’ve found it’s easier to add the inside cardstock by working from the back side of the front.
After putting the front Balmy Blue piece face down, I can line up the white cardstock to the front piece.
Then, add liquid glue to the backside of the white cardstock.
Turn the back of the card over onto the white cardstock. This way,. your pieces will line up.
Add the turtle using liquid glue to the inside corner of the white cardstock.
With that, I’d finished this cute as a button coordinated card envelope, and envelope seal set.
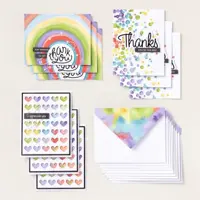
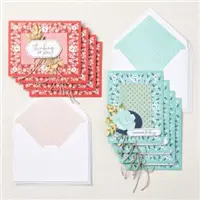
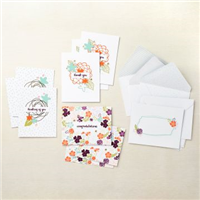
Stampin’ Up! has a numbe of all-inclusive kits available! If you have ever thought that you just couldn’t create cards, these kits are for you! Each kit comes with everything you will need, except for a stamp block in the stamping kits.
Here are just four of the kits available:
Just click on the image to see a larger picture of the kit!
Non-Stamping Kits!
These kits are fabulous because you don’t even need an acrylic block!
My very favorite kit is now available! If you don’t know what to get for your mother for Mother’s Day, or just a gift for yourself, these card organizer kits are FABULOUS!
I have such a hard time shopping for my mom and my aunt for holidays, birthdays, etc. So, for this past Christmas, I got two of these card organizer kits, and put them together. I also included other cards from card kits and some I had created in bulk to split between the two gifts. All total, they received a completed organizer and more than 25 cards for all different occassions. I was so proud to give each one of them this beautiful combination of cards and the love that went into each part of them.
Take a look at just a few of these other non-stamping kits:
Welcome to InKing Royalty’s March Blog Hop! Despite the occasional cold spell or snowfall in some areas, we are well into Spring – and we are ready for the flowers to bloom. We are excited to share our flower-filled creations with you and hope you love them! After you read my post, I hope you’ll hop over to the next person on the list at the base of this post.
Before I do anything else, let me share my card for the Hop:
The rabbit’s shirt on the front has flowers, you can see flowers peeking out on the DSP (designer series paper) on the front, flowers on the second panel, and I stamped some on the last panel. Flowers are everywhere!
The theme for the current Make My Monday challenge, hosted by yours truly, is spring colors. You can see my first card for the challenge here. This card fits as well.
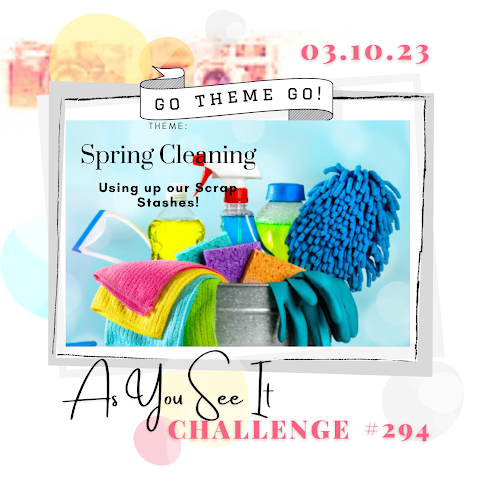
I’ll also be entering this in the As You See It #29 challenge and the Creative Creases Challenge. You can see both banners below:
Mary Deatherage from Stamps-n-Lingers
I could not have made this card as relatively easy as I did without a tremendous amount of help from Mary Deatherage. If you haven’t been to Mary’s Stamps-n-Lingers blog, please visit her site! The woman is a collage and/or fun fold queen and her written and verbal directions are absolutely fabulous! Part of what I love when CASe’ing her cards is that her directions for the measurements are up front. I enjoy getting all my pieces cut first, and then putting everything together. Here’s her blog post for this fun fold. She also included a PDF of directions and, with her permission, I’ve attached it here:
So, there you have it! Basically, I followed her directions but used different DSP patterns. I used a bunny for the front mainly because the bunny has flowers on his shirt.
Since I don’t have the dies yet (!) so I had to fussy cut the additional clouds, the bunny, and the turtle on the inside. I also don’t have the tiny flowers either. Both are supposed to be available on March 20, 2023. I already have my order ready and just have to add the dies and flowers and submit it.
After I had gotten everything put together, I decided I wanted clouds to peek out from the back of the card. Therefore, I used my embossing buddy before stamping the trio of clouds using VersaMark ink. Then, I covered it with white embossing powder and heat set it with my heat tool. So cute!
Back to the InKing Royalty Blog Hop:
Thank you for stopping by today. I hope you’ll hop along to the next stop on the blog hop, Jan Dufour at Stamp me Silly. There’s lots of inspiration to be found in this group – and you don’t want to miss it!
CoThank you for hopping along with us. If you get stuck during the Blog Hop, please use this line-up as a guide:
Stampin’ Up! has a numbe of all-inclusive kits available! If you have ever thought that you just couldn’t create cards, these kits are for you! Each kit comes with everything you will need, except for a stamp block in the stamping kits.
Here are just four of the kits available:
Just click on the image to see a larger picture of the kit!
Non-Stamping Kits!
These kits are fabulous because you don’t even need an acrylic block!
My very favorite kit is now available! If you don’t know what to get for your mother for Mother’s Day, or just a gift for yourself, these card organizer kits are FABULOUS!
I have such a hard time shopping for my mom and my aunt for holidays, birthdays, etc. So, for this past Christmas, I got two of these card organizer kits, and put them together. I also included other cards from card kits and some I had created in bulk to split between the two gifts. All total, they received a completed organizer and more than 25 cards for all different occassions. I was so proud to give each one of them this beautiful combination of cards and the love that went into each part of them.
Take a look at just a few of these other non-stamping kits:
Do you live in the United States? Do you want to place an order? Of course you do!
If you are placing an order under $150, please use the host code below.
If you are placing an order over $150, please contact me first so you can take advantage of the Stampin’ Rewards for your order!
HOST CODE for MARCH, 2023 is N46V3KNP.
Again, thank you for stopping by today! Please take another moment and leave a comment.
Welcome to Just Peachy Stamping by Sue Jackson: an independent Stampin' Up demonstrator.
Through Stampin' Up!, I happily share my love of papercrafting through sales, classes, small stamping group meet-ups and workshops. I think that being a teacher in my "real life", I have a unique approach to sharing my fantastic hobby. I look forward to connecting with you!


 \
\