Welcome to the C4G#328 bi-weekly challenge! Our host for this week, Pamela., chose Music as the theme. When you finish here, I hope you will visit the challenge site, be inspired, and play along. We love seeing your creations in the gallery!
Here’s my music card:
I went to the orthopedic doctor Monday for a problem with my left (dominant) hand. I wound up with a cortisone shot in the joint of the base of my thumb. The doctor said it might be “sore” for a few days.. “Sore” is an understatement and I have a pretty good pain tolerance. Therefore, this post is going to be very short, but sweet, just like my card!
Welcome to the Cardz 4 Guyz challenge #327! The host for this bw-weekly challenge, Dawn, picked On the Water for the theme. When you are finished here, I hope you will visit the challenge site to see what the rest of the design team members created.
For this theme, I chose to use the Waves of Inspiration stamp set and coordinating Waves dies.
Here’s my On the Water easel card:
Since this is a card for a guy, I tried to keep it as clean as possible.
Measurements and More:
The Pacific Point base measures 4-1/4 by 11 inches. Score the base at 2-3/4 and 5-1/2 inches.
I used retired DSP (designer series paper) for this card because I love the colors and swirl patterns. The DSP for the front measures 4-1/8 by 5-3/8 inches.
Trim another piece of DSP to 1/2 by 4-1/8 inches for the bottom of the inside of the card.
Next, trim a piece of DSP to 6 by 2-1/2 inches for the envelope flap.
Punch a 1 inch circle of a coordinating pattern for the envelope seal. Run it through your XYRON createasticker.
Trim a piece of white cardstock to 4-1/8 inches by 5-3/8 inches for the inside.
Stamp the seagull and pilings using Basic Gray ink.
Figure out how steep you want your easel to stand. It’s really up to what you want to do and based on the stamping and inside elements.
Stamp the inside sentiment on the white cardstock. again using the Basic Gray ink.
Stamp the outside sentiment on a scrap piece of white cardstock.
Time to crop using the Waves dies:
Crop the seagull and pilings, the outside sentiment, and the clouds using the Waves dies.
I added dimensionals under the clouds so I could stand up the easel.
HINT: You might need to use two layers of dimensionals, depending on the steepness of your easel. I’ve found two layers of dimensionals tends to work better for a steep easel.
Crop the wave from white cardstock.
HINT: The wave die is longer than the 4-1/8 inch DSP. Therefore, I cropped the wave, and trimmed off the end of it. Then, I trimmed the end down and used liquid glue to attach the vertical edge back on the wave. I thought the wave looked incomplete without the short vertical end piece.
Add a couple of sma;ll pieces of tear & tape to the back of the sentiment banner for the front.
Using some silver braided trim, form a circle using the tear & tape to hold the trim in place.
Add dimensionals on the back of the sentiment banner and adhere to the front of the card.
Adhere the clouds to the top of the inside white cardstock.
The front sentiment banner and the clouds were the only place where I used dimensionals. All the other elements were adhered with multipurpose liquid adhesive.
With that, I’d finished this coordinated card, envelope, and envelope seal set.
Welcome to the newest two-week Cardz 4 Guyz challenge! Our host for #326, Julie, chose Christmas in July for the theme this time. Guyz cards can be a challenge in and of itself, so I hope this bi-weekly challenge gives you some ideas you can use. When you finish here, I please visit the challenge site for ideas and inspiration. We always look forward to your creations and enjoy it thoroughly when you play along!
Here’s my Christmas in July card:
This retired DSP does all the work here. Even though the paper is retired, hopefully it will inspire you to CASe the card using the materials you have.
Measurements:
Trim the cardstock for your card base to 8-1/2 by 5-1/2 inches and score it at 4-1/4 inches.
Trim a piece of DSP (designer series paper) to 5-3/8 by 4-1/8. If your paper is directional, be careful when you trim it. I find that when I don’t check this, I wind up with a sideways direction.
Trim a piece of DSP to 6 inches by 2-1/2 inches for the envelope flap.
HINT: If you do trim it in the wrong direction, never fear. Create a landscape card instead of a portrait one. Just tell yourself you meant to do that. All is well. Life is good.
Trim a coordinating piece of DSP or cardstock to 3-1/2 by 2-1/4 inches for the mat under the sentiment label.
Punch a 1-inch circle from the coordinating DSP for the envelope seal. Run it through the XYRON create-a-sticker tool.
Trim a piece of white cardstock to 4 by 5-1/4 inches for the inside.
Assembly:
Outline the edges on both of the pieces of DSP using a gold Wink of Stella pen.
Use your embossing buddy on a scrap piece of white cardstock.
I used a sentiment from the Brightest Glow stamp set and stamped it in VersaMark.
Next, I covered the sentiment in gold embossing powder and heat set it with my heat tool.
Crop the sentiment using the label die from the Labels Aglow die set. I’m so glad this stamp set and coordinating dies carried over to the new catalog!
Add some tear & tape to the back of the label.
Wind some gold simply elegant trim into circles and play with it to get the shape you want. The tear & tape will help hold the trim into place while also allowing you to gently move it around until you are satisfied.
To assemble, wind a piece of Soft Succulent ribbon around the background DSP.
Adhere the background DSP to the base using multipurpose liquid glue.
Adhere the mat under the label using liquid glue and slide it under the ribbon.
Add dimensionals under your label and adhere to the mat.
Stamp your inside sentiment in the same color ink that you used for the base of the card.
Adhere the inside using multipurpose liquid glue.
With that, I’d finished this coordinated card, envelope, and envelope seal set.
Welcome to the Cardz 4 Guyz challenge #324! Our host for this two week challenge, Deb, chose Father’s Day since it is upcoming in both the UK and the US. When you finish here, I hope you will visit the challenge site to see all the inspiring creations by the rest of the design team! We would love for you to play along with us and look forward to seeing your creations in the gallery!
Here’s my Father’s Day card, although the pictures aren’t the best quality:
I have a colleague who buys all the cards he needs from me. The first picture is from when I first sent him the picture of the card in progress. The second picture is from his phone because I forgot to take final pictures before I brought the card to him the last day we were in school.
Once again, I used the directions for this fun fold from Connie Stewart, and you can see her super simple video here. Truly, with her videos, I watch it the first time and write down the measurements. Then, I just cut trim what I need and watch the video, creating my card as I go.
If this card format looks familiar, I’ve posted other cards like this here and here.
Thank you for stopping by today!
Have a Peachy Day!
Sue
Colors Used:
The Newest Kit is the Gorgeous BOHO BEACH Kit!
Here’s an unboxing and tutorial video from Sara, CEO of Stampin’ Up!:
JUNE is a Wonderful Month in the Stampin’ Up! World!
Select DSP is on sale this month! It’s your chance to stock up!
When new team members purchase their Starter Kit, they will be able to redeem $155 USD of Starter Kit eligible products for just $99 USD! No commitment required beyond the starter kit!
If you don’t already have a SU! demo, or if you are interested in joining under the starter kit promotion, I’d be honored to work with you.
The HOST CODE for June is VAMCFNHD!
If you are ordering under $150, please enter the above host code when prompted.
If you are ordering over $150, please contact me first so you can use the Stampin’ Rewards earned from your order.
Again, thank you for stopping by today. I’d love to hear your comments. Sue
Welcome to another Cardz 4 Guyz challenge! This host for challenge #323, Melanie, chose many layers for the theme. When you are finished here, I hope you will visit the challenge site to see what the rest of the design team members created. There’s so much inspiration to be found on the site. Don’t forget to upload your creation to the gallery – we’d love to have you play along.
I needed a thank-you card for one of my cousins on Long Island. He helped me out tremendously and went above and beyond to help me with an issue. Since I am in Central Florida, his help really made the whole process so much easier! While creating my thank you card, I layered the sentiments as well as the papers.
Here’s my layered card::
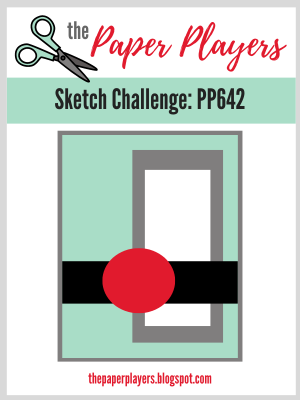
The layout is classic, and goes right along with the current Paper Players Challenge #642.
The Creative Creases challenge theme is always an anything goes with a fun fold. Therefore, this card qualifies for that challenge as well.
Measurements:
The Night of Navy base measures 11 by 4-1/4 inches, scored at 2-3/4 and 5-1/2 inches. Use a bone folder to emphasize the folds.
Trim a piece of Gray Granite cardstock to 4-1/8 by 5-3/8 inches.
I used a piece of retired DSP for the background. It measures 4 by 5-1/2 inches. I trimmed another piece of the same DSP is the background for the inside panel of the card, to the same measurements.
Trim a coordinating piece of DSP to 6 inches by 2-1/4 inches for the envelope flap.
Punch a coordinating piece of DSP using a 1-inch circle punch for the envelope seal.
The while cardstock on the inside panel measures 4 by 5-1/4 inches.
Use scraps of Night of Navy and white cardstock for the sentiment panels.
Stamping, Cropping, and Assembly:
Using sentiments from the Biggest Wish stamp set, stamp “THANKS” three times in Gray Granite on white cardstock.
Stamp the script “thanks” on top of the Gray Granite sentiment.
Stamp “thanks” on white cardstock using Night of Navy ink for the inside panel.
Crop the white cardstock pieces using the deckled rectangle dies.
Crop Night of Navy cardstock to create mats for the sentiment panels.
I used another sentiment from the Here’s a Card stamp set and stamped it in Gray Granite on the inside white cardstock panel.
Tie a length of Gray Granite ribbon using a square knot around the DSP for the front panel.
Adhere the front panel Gray Granite cardstock the the Night of Navy cardstock using multipurpose liquid glue.. Make sure you only adhere the bottom part of the front panel to the Night of Navy. If you adhere the whole front panel, the card won’t stand up.
Use the multipurpose glue to adhere the DSP to the Gray Granite cardstock.
Add dimensionals under the Night of Navy mat for the sentiment. Make sure you add them so the sentiment panel straddles the ribbon.
Adhere the inside piece of white cardstock to the DSP.
Adhere the DSP to the inside panel of the card.
Add dimensionals underneath the “thanks” sentiment near the top of the inside of the card. The placement depends on how straight you want your easel to stand. Higher up will give a steeper easel.
Adhere the DSP to the envelope flap using multipurpose glue and trim.
With that, I’d finished this coordinated card, envelope, and envelope seal set.
Thank you very much for stopping by today! Have a Peachy day!
This kit is fabulous because it includes the supplies and easy to follow directions to make shaker cards!
Take a look at Sara’s unboxing and instructional video:
:
If you live in the United States and don’t already have a SU! demo, I would be honored to help you on your stamping journey! The MAY HOST CODE is E4QVNYD4. Once again, thank you for stopping by!
Welcome to the Cardz 4 Guyz biweekly challenge. First, thank you for participating in challenge #321, which I hosted. It was difficult to narrow down the entries to the winners as I enjoyed seeing all the entries.
Our theme for #322 is bikes of all kinds. When you finish here, I hope you will pop over to the challenge site to see the inspirational projects from the rest of the design team members. We look forward to seeing your creations posted in our gallery.
I chose to use the new Zany Zoo suite of products for my card. This suite is just so much fun! The DSP is fabulous, and if you like black and white patterns,
Here’s my card:
I live in Florida, and you can pretty much guarantee that.any lake in the state has gators. We live on a small lake, an I know there’s at least one gator in our lake, which, quite frankly, freaks me out! However, this fun gator is one I don’t mind seeing or using. He is so colorful and fun!
Measurements and Such:
Trim a piece of Lemon Lime Twist cardstock to 8-1/2 by 5-1/2 inches, and score at 4-1/4 inches.
The black cardstock mat measures 4-1/8 by 5-3/8 inches.
The black and white layer of DSP measures 4 by 5-1/4 inches. This is one of the black and white patterns in the DSP pack.
Trim another piece of DSP to 6 by 2-1/2 inches for the envelope flap.
Punch a 1-inch circle from coordinating DSP for the envelope seal.
Crop a focal mat from the center of the black cardstock layer to conserve paper.
Use the party confetti stamp to randomly stamp confetti all over the black mat using Versa Mark ink.
Cover the VersaMark with clear embossing powder and heat set.
Here’s a close-up of the dry-embossing, but it’s still difficult to see in a picture.
Continued:
Before adhering the black panel, wrap a piece of black and white gingham ribbon around the panel and tie in a square knot.
Adhere the layer for the front of the card using multipurpose liquid glue.
Using the raccoon and balloon stamp from Zany Zoo, make off the raccoon and stamp the balloons using Momento Tuxedo Black ink.
Crop the balloons and trim as needed.
Crop the gator from the DSP. Don’t you just love when the dies match up with the DSP characters?
Stamp the sentiment on a scrap of white cardstock and crop using a deckled rectangle die.
Outline the sentiment panel using a Lemon Lime Twist marker.e
Trim a piece of white .cardstock to 4 by 5-1/4 inches for the inside of the card.
Stamp the sentiment on the inside and adhere using multipurpose liquid glue.
With that, I’d finished this coordinated card, envelope, and envelope seal set.
The individual color families were also refreshed. Some of your favorites have been moved to another family, some retired, and new ones added. Here are the new color families:
While I love a color refresh, it means I have to reorganize my color families to update them. I like to keep my stamp pads in the Stamp-n-Storage inkpad storage in color families. Same with my markers.
HINT: I use a stamp set container to store my markers. It allows me to keep store them flat and I can fit one color family in each container. I just write down a list of the colors on a piece of paper and slip it in the cover.
However, I haven’t reorganized my color families yet. Truth be told, my room is a mess right now because I am in the middle of reorganizing. I have so, so , so much retired product that I need to sell ASAP.
Welcome to Just Peachy Stamping by Sue Jackson: an independent Stampin' Up demonstrator.
Through Stampin' Up!, I happily share my love of papercrafting through sales, classes, small stamping group meet-ups and workshops. I think that being a teacher in my "real life", I have a unique approach to sharing my fantastic hobby. I look forward to connecting with you!