Freshly Made Sketches 452 and Color Throwdown 610 came together in this card. I took advantage of all the white space for FMS610, and the ctd610 colors added interest and movement.
Here’s my card:
Here are the challenge banners:
Measurements
I chose Cherry Cobbler, Bumblebee, Whisper White, Pumpkin Pie and Soft Suede for the autumn colors. I couldn’t figure out whether the yellow-ish option had more yellow or pumpkin color so I used both. Might not really meet the color challenge, but it’s my solution.
First, I decided to use Bumblebee for the base of the card. The cardstock measures 4-1/4 inches by 11 inches, scored at 5-1/2 inches to create a tent card.
The first mat of Soft Suede measures 4-1/8 inches by 5-3/8 inches.
I trimmed two pieces of Whisper White, one for the front and one for the inside. Both pieces measure 4 inches by 5-1/4 inches.
#simplestamping
I used the Forever Fern stamp set to stamp the diagonally opposite corners. The splatter stamp from this set added a bit more texture to the corners. Then, I added just one splatter in the opposite corners just so it wasn’t quite so stark.
After stamping the corners, I needed to stamp the sentiment from Autumn Greetings in Soft Suede. Originally, I was going to stamp the greeting on a white oval and border it with a bit larger Soft Suede oval. However, I am thrilled that I thought about the double-time stamping option instead.
After cropping the stitched oval, I decided that I would just create an outline on the outside of the oval. To accomplish this, I used the Soft Suede marker to create the edge.
On the inside, I stamped the Cherry Cobbler and Bumblebee leaf stems and added one splatter stamp in each of the four corners.
The inside sentiment is also from the Autumn Greetings stamp set.
Time to finish the card
I used the multipurpose glue to adhere everything except the sentiment oval. Using dimensionals under the sentiment added a bit of height.
Finally, I needed to take care of decorating the envelope. Instead of DSP on the envelope flap, I used the Forever Fern to stamp the flap and on the front of the card.
With that, I’d finished this card/envelope set.
As always, thank you so much for stopping by my blog today. I’d also love to hear what you think, and greatly appreciate every comment.
Stay tuned for a BLOG CANDY UPDATE! We have a winner, who has been contacted. I’ll post the winner when I hear back!
It’s a Great Time to Join!
Take a Look at This Get and Go!
In addition to $125 worth of product AND free shipping, you get everything shown above as a bonus! What could be better?
Granny Apple Green card pack contents 8-1/2″ x 5-1/2″ (21.6 x 14 cm) Granny Apple Green Cardstock 3″x 4″ (7.6 x 10.2 cm) Bermuda Bay Cardstock 3″x 4″ (7.6 x 10.2 cm) Coastal Cabana Cardstock 3/4″x 4″ (1.9 x 10.2 cm) Daffodil Delight Cardstock 5-3/4″ x 4-3/8″ (14.6 x 11.1 cm) Whisper White Envelope
Coastal Cabana card pack contents 2-1/4″ x 3-1/2″ (5.7 x 8.9 cm) Whisper White Cardstock 2-3/4″ x 4″ (7 x 10.2 cm) Daffodil Delight Cardstock 3″ x 4″ (7.6 x 10.2 cm) Bermuda Bay Cardstock 8-1/2 x 5-1/2″ (21.6 x 14 cm) Coastal Cabana Cardstock 5-3/4″ x 4-3/8″ (14.6 x 11.1 cm) Whisper White Envelope
Do You Want to Place an Order?
Of course you do! Even more so because of the products in the NEW AUGUST – DECEMBER MINI-CATALOG catalog. This NEW catalog is FABULOUS AND CONTAINS SOMETHING FOR EVERYONE!!
If you are ordering less than $150.00, please use the host code shown. Any order over $50 will earn a gift from me and an August – December mini-catalog.
If you are ordering more than $150.00, please contact me first so you can get your stamping rewards! I want YOU to get the stamping rewards you earn for your order over $150.00
The HOST CODE for September is F6DZNRCX.
Again, thank you for stopping by my blog today! I appreciate your time, and enjoy reading, and responding to, comments.
It’s true, another Forever Fern card for this two-fer. The Color Throwdown #603 challenge calls for green, orange, and yellow. I used Garden Green, Pumpkin Pie, and Daffodil Delight. When paired with the Global Design Project #250 sketch challenge the colors create a completely different look to the Forever Fern stamps. Since I used the split card technique, I have a mirror image card I can use another day in another way.
Here’s my card:
Here are the challenge banners:
This technique is one of the easiest ways to get two cards out of one stamping time. Start with 1/2 sheet of cardstock, in this case I used white cardstock cut to 5-1/2 inches by 8-1/2 inches. I very, very lightly scored this piece at 4-1/4 inches just enough to see the exact middle of the cardstock. Then, I started stamping. When you get a design with which you are happy, simply cut on the 4-1/4 inch line. Ta-da! Two card fronts. I keep my other half of the card front in the back sleeve on the stamp set.
I took the picture on the left after I trimmed the piece on the right for the card front, which explains why the green leaves are off. The picture on the right shows how snug the other half of the card fits in the back sleeve of the stamp case.
Split Card Technique: Measurements
The Garden Green card base measures 5-1/2 inches by 8-1/2 inches, scored at 4-1/4 inches.
I used a piece of the 2020 Garden Green 6 x 6 DSP for the background of the card. This piece measures 4-1/4 inches by 5-1/2 inches. When picking the DSP patterns for both the green and orange mats, I decided I needed very subtle patterns so they wouldn’t clash with the Forever Fern stamped images.
While I originally thought I’d use Daffodil Delight DSP for the tilted DSP mat, I ended up using Pumpkin Pie. I wanted that tilted mat to pop off the green background mat, and the Pumpkin Pie did that much more than the yellow. The Pumpkin Pie DSP is cut to 4-7/8 inches by 3-7/8 inches.
Finally, I trimmed the white stamped cardstock to 4-78 inches by 3-7/8 inches for the outside. I also cut a piece of white for the inside of the card to 4 inches by 5-1/4 inches.
While I was using the paper trimmer, I cut a piece of the Pumpkin Pie DSP to 6 inches by 2-5/8 inches for the envelope flap.
Split Card Technique: Directions
I wanted the green for the largest stamp because the leaves spread out, but the dark color would be prominent. Daffodil Delight was used on the seven leaf stamp. I used Pumpkin Pie for the round berries/cotton pod looking stamp.
Starting with the green stamp, I alternated stamping it on the right and left of my center line score. I thought it was easier to work from the bottom up along the center line. I added the all the stamps along the bottom after I’d stamped everything else.
Next, I stamped the yellow leaves. I really tried to fill in-between the green sprays of leaves going up and out from the center line.
Then, I stamped the Pumpkin Pie round pods. Once again, I tried to have them go up the center, but also spray in towards the center of the cardstock.
Finally, I went back and filled in the stamps along the bottom of the card so they would all surround the sentiment.
I wanted to have one of each color stamp on the front, bottom left corner of the envelope, so I stamped that while I had the stamps and ink pads out.
The white inside panel has one of each of the colored stamps in the bottom right-hand corner.
I used the large THANK YOU from the Ornate Thanks stamp set for the sentiment. Using my Stamparatus made masking and placing the two parts of the stamp much, much easier.
The inside sentiment, from the bottom of my heart, also from Ornate Thanks, is stamped in the middle of the white cardstock inside panel.
Cropping and Assembly
I cropped the sentiment panel using a rectangle stitched die. Just like the sentiment, I played around with the size of the die but didn’t take pictures as I did it. Explaining the easy process in writing really needs accompanying pictures. Next time I’ll remember. I put dimensionals under the sentiment panel.
The bold sentiment and colors needed a bold mat. I used a Stitched So Sweetly die and cropped it from the Garden Green DSP. It was a stroke of genius luck that the cropped sentiment rectangle fit perfectly on the rectangle of the mat. I also put dimensionals under the mat.
Just a note: I cropped the Stitched So Sweetly mat from the DSP I used for the background of the card. Since no one can see the whole center section of that DSP, there’s no reason not to use it for the sentiment mat.
Finally, I assembled all the elements of the card using the multipurpose liquid adhesive for the mats and layers. Even with a double layer of dimensionals on the sentiment, it will still fit in a medium SU! envelope for the standard amount of postage.
After adhering and trimming the DSP to the envelope flap, I had completed this coordinated card/envelope set.
As always, thank you so much for stopping by my blog today. I’d also love to hear what you think, and greatly appreciate every comment.
Earn a $5 coupon for every $50 in product for the month of July.
Do You Want to Place an Order?
Of course you do! Even more so because of the products in the NEW catalog. This NEW catalog is FABULOUS!! Wait until you see the new MINI-CATALOG!! Stay tuned for sneak peeks of those items! I’ll be using some new mini-catalog items for the InKing Royalty blog hop on Wednesday!
If you are ordering less than $150.00, please use the host code shown so YOU can take advantage of the STAMPIN REWARDS YOU EARN. If you are ordering more than $150.00, please contact me first so you can get your stamping rewards! I want YOU to get the stamping rewards you earn for your order over $150.00 Any order over $50 will earn a gift from me and an August – December mini-catalog. Just take a look at the gorgeousness of this cover:
I can’t show you the inside pages until August 4th, unless you decide you just can’t wait! Contact me if you’d like to join my team, with no commitment past the initial kit. The kit is $99 for $125 worth of product, which would easily get you supplies to make your own holiday cards.
In the meantime, take a look at these sample images from the mini-catalog.
The HOST CODE for JULY is K6NND3UU.
Again, thank you for stopping by my blog today! I appreciate your time, and enjoy reading, and responding to, comments.
The Color Throwdown #601 challenge for this week includes the generic colors orange, green, pink, and burgundy. Part of what I really enjoy with the ctd challenges is that the colors are generic. Therefore, there’s so much variety of colors used in the gallery cards. I chose Terracotta Tile, Just Jade, Petal Pink, and Merry Merlot.
Here’s my card:
Here’s the challenge banner:
Field of Poppies
Once I had my color choices, the rest of the card just fell into place. I really like this field of poppies stamp but knew I didn’t want to just have it at the bottom of the card. Therefore, I grabbed the Flowers for Every Season DSP and pulled the vine pattern and trimmed it down to 2 inches high.
I’d already stamped the poppies at the bottom of a piece of white cardstock, which explains how I knew I needed something else on the bottom.
The Merry Merlot base is 4-1/4 inches x 5-1/2 inches. I stepped down the Just Jade mat to 4-1/8 inches x 5-3/8 inches. I trimmed the Just Jade DSP to 2 inches x 4-1/8 inches. The white DSP is trimmed to 4 inches x 3-1/4 inches, which would give me just enough to overlap the DSP.
I stamped the poppie fields from Painted Poppies twice across the white cardstock using Momemto Tuxedo Black ink and then let it completely dry before I started coloring. I used the Terracotta Tile marker to control the bleeding.
Then, I needed to make a decision about some sort of texture on the white cardstock. At first I thought I would dry emboss it, but then changed my mind. I wound up using the splotch stamp from the Forever Fern to stamp the Petal Pink. After inking the splotch, I stamped it three times before re-inking. The different hues create depth and texture on the card.
Putting the Card Together
Next, I started putting the card together, and started with the white cardstock and DSP. Once I’d adhered those two pieces together, I moved onto the ribbon.
Since I am incredibly bow-challenged right now, I only trusted myself to tie a square knot. Therefore, I wrapped the Petal Pink organdy striped ribbon around the Just Jade base and simply tied it. I actually like that because the knot doesn’t overwhelm the bottom of the card.
I am all about saving cardstock when I can. Therefore, I cropped the scalloped circle for the sentiment from the Merry Merlot bottom layer, before adhering it of course. The sentiment on the front and inside of the card came from the SAB Sending You Thoughts stamp set. I used Merry Merlot to stamp the front and inside sentiments on white. Then, I cropped the sentiment using the medium circle from the Stitched Shapes die set. I kept the retired tiny paperclips from a couple of years ago and used that to help attach the sentiment to the top of the DSP. Multipurpose liquid adhesive is keeping the sentiment layer at the angle I wanted.
I adhered the front of the card to the Just Jade layer, and then adhered that to the Merry Merlot. Then I, attached all the layers to the front of the white card base. I’d stamped the inside sentiment at the same time I stamped the front. To add interest, I stamped part of the poppy field on the bottom corner of the inside. After letting it completely dry, I colored those poppies in Terracotta Tile as well.
Final Touches
As long as I was already coloring, I stamped some of the poppies on the bottom left corner of the front of the envelope. They also were colored in Terracotta Tile.
I used a 2-5/8 inch x 6 inch piece of the vine DSP to cover the flap of the envelope. Usually, at this point, I would consider myself finished. However, the more I looked at the front of the card, the more I thought I needed something else.
I’ve used the fine tip glue pen to “color” the poppies on the front of the card. The trick with that is to let the glue really, really dry completely before touching it. Therefore, I left it on my desk and went to bed.
Here’s are close-ups of the now “enameled” poppies:
When I first saw the four colors, I really thought they wouldn’t work together. However, work together they did.
As always, thank you so much for stopping by my blog today. I’d also love to hear what you think, and greatly appreciate every comment.
I’m now on Instagram for just my SU! creations! Finally, right? Follow me at @justpeachystamping or scan the photo below:
Guess What’s Going On Now!
Bonus Days! Earn a $5 coupon for every $50 in product for the month of July.
Do You Want to Place an Order?
Of course you do! Even more so because of the products in the NEW catalog. This NEW catalog is FABULOUS!! Wait until you see the new MINI-CATALOG!! Stay tuned for sneak peeks of those items!
If you are ordering less than $150.00, please use the host code shown. If you are ordering more than $150.00, please contact me first so you can get your stamping rewards! Any order over $50 will earn a gift from me.
The HOST CODE for JULY is K6NND3UU.
Again, thank you for stopping by my blog today! I appreciate your time.
Welcome to the Make My Monday challenge # 125, which is all about using stencils. Until very recently, I didn’t even realize that I only have the hearts and stars Stampin’ Up! stencils, which retired a few years ago. The stars stencil would have been very helpful when trying to create this card for the InKing Royalty blog hop last week. Anyway, I really struggled with a stencil card and have two of the four cards I started ready to share with you today.
Make My Monday Challenge #125
Here’s my card:
This challenge requires stencils. After creating the ctd#598 card described below, I again used the negative space from the largest circle die in the Layering Circles die set. This time, I sponged the inner part of the circle using Pear Pizazz. When I started dry-fitting the cropped pieces over the sponged circle, I decided that I needed more stenciled images. Therefore, I used the negative space around the Forever Fern leave dies. So, I sponged a Pretty Peacock and Shaded Spruce leaves in three places around the circle.
While I was dry-fitting pieces, I realized the card needed ribbon. Therefore, I added the Mint Macaron ribbon around the center of the card, and all the layers went under that ribbon. I used my Xyron to get adhesive on the back of the vellum leaves cropped from the same die set. Looking back, I probably shouldn’t have done that. Looking back, I also decided that I probably should have added texture to the white cardstock. Then, I just needed to add the various layers and the sentiment.
I left the inside blank so a personalized note could be written on the inside. Finally, I added a piece of the Forever Greenery DSP to the envelope flap, which finished off this card/envelope set.
Color Throwdown challenge # 598
The colors for the Color Throwdown challenge #598 includes white, gold, pink, and aqua. I used these colors with the negative part of three sizes of circle punches.
Here’s that card:
Although I later realized I didn’t need to, I first masked off the center of the front of the card. Since I decided to add a strip of Whisper White to the middle of the card I really didn’t need to mask it off, but it helped figuring out the stenciling of the negative circle spaces.
What I Did:
After masking the center, I used the three negative circle stencils and sponges to sponge in a variety of circle sizes using Magenta Madness, Balmy Blue and the Delicata Gold ink pad. Sponging the gold required many layers of sponging just to get the circles I have on the card. Then, I stamped another circle of gold on a piece of scrap white and stamped it with the heart balloon stamp from the Special Someone stamp set.
Next, I stamped the raccoon and balloon string in Momento Tuxedo black on more scraps of white cardstock. Using the Special Day dies, I cropped the raccoon, heart balloon, and string pieces.
The next thing I did was to crop two pieces of Balmy Blue 6 x 6 DSP for the grass. The first piece is adhered directly onto the middle white section piece of cardstock. Then I adhered the raccoon to the first piece of DSP and added dimensionals to the second piece of grass. The dimensionals allowed me to pop up the second piece of grass so it appears that the raccoon is standing in the grass.
A mini-dimensional pops up the heart balloon. Next, I adhered the string to the raccoon and the balloon using liquid adhesive.
I used the Special Someone stamp set for the sentiments on the front of the card. Then, I layered the card front on the same Balmy Blue DSP, and used Magenta Madness for the bottom mat.
The Inside
The card base is white, as is the mat layer I trimmed for the inside. In order to create some border between the two layers of white, I used the Magenta Madness marker to outline the inside layer of white. I also stamped the raccoon on the inside with sentiments from the Sending You Thoughts stamp set.
After stamping the raccoon on the front bottom corner of the envelope, I adhered a piece of the Balmy Blue DSP to the flap. With that, I’d completed this card and envelope set.
As always, thank you so much for stopping by my blog today. I’d also love to hear what you think, and greatly appreciate every comment.
I’m now on Instagram for just my SU! creations! Finally, right? Follow me at @justpeachystamping or scan the photo below:
Pick a Free Bundle STARTER KIT PROMOTION
Do you love a great deal? If you join now as a demonstrator and pick $125 of products for $99! Score!!
THEN, for a limited time, when you become a Stampin’ Up! demonstrator, you can choose any stamp/tool bundle from the new 2020–2021 Annual Catalog for FREE.All this means you can choose the most expensive bundle/tool and get it FREE! That also means that you can get $125 in product PLUS up to a $60 bundle! All for $99!!!
There could not be a better time to make your dreams of having your own Stampin’ Up! business come true.
Just look at some of these gorgeous bundles, one of which can be yours FREE!
Contact me to join my team before the end of June to take advantage of this extra special joining bonus!
Of course you do! Even more so because of the products in the NEW catalog. This NEW catalog is FABULOUS!! Special bonus, I will send you a FREE catalog with a $50 order!
The HOST CODE for JUNE is WW6HSM6A.
If you are ordering less than $150.00, please use the host code shown. If you are ordering more than $150.00, please contact me first so you can get your stamping rewards!
Again, thank you for stopping by my blog today! I appreciate your time.
I really enjoy pairing a sketch challenge with a color challenge. But, I have to say that my final card is nothing like what I thought I would create.
Here’s my card:
Here are the two challenge banners:
Bermuda Bay, Basic Black, and Whisper White
Since Color Throwdown already picked the three colors, I just had to chose a shade of turquoise. The color combination of Bermuda Bay, Basic Black, and Whisper White always seemed like a classic color combo, so my colors were set.
Like I said, the resulting card doesn’t resemble the card I started to create. However, I like the clean and simple outcome. I used Bermuda Bay for the base of the card. The bottom layer of the card front is Basic Black, with a layer of Bermuda Bay on top of that. Whisper White cardstock provides a very clean top layer. I used white Stampin’ Powder to emboss the sentiment from the Sending You Thoughts cling stamp set.
I created the Bermuda Bay center circle using a circle cropped from an uh-oh envelope and the negative over the white cardstock. Using my sponge brayer and the Bermuda Bay ink pad, I started inking the circle. I kept going around and around in a circular motion until I had a shaded circle I liked. While you can’t see it because of the sentiment banner, the center of the circle is lighter than the outside. The black scalloped border comes from a cropped inner circle and scalloped outer circle using the layering circles die set. The card I originally set out to create contained this center circle and scalloped frame.
I Wasn’t Going to do It, But I Did…
The Celebrate Sunflowers bundle came in handy for this card as well, as much as I thought I need to do something without using it. For this card, I only used the two leaves dies. I cropped three of the double leaf stem from vellum and three from Bermuda Bay. Next, I arranged them in a way that I thought would work and adhered them all down using the multipurpose liquid glue.
Using the triple banner punch, I punched out chevron ends of the black and DSP strips for the sentiment banner. If you don’t have this punch, you can always snip the chevrons. I’m just happier if I can get symmetrical ends.
The banner for the GDP challenge includes some sort of layer on the top and bottom of this horizontal card. I hope that the layers of black and Bermuda Bay kind of sort of fullfill that part of the sketch. The whole time I worked on this card, I kept trying different borders and nothing seemed to work. I finally decided that I would go with clean and simple and just move on.
After I cut a white inside layer for the card, I stamped “with a great big wish for happiness” also from Sending You Thoughts.
The only thing left was to trim down a piece of the Bermuda Bay 6 x 6 DSP for the envelope flap and this card/envelope coordinating set was finished.
As always, thank you so much for stopping by my blog today. I’d love to hear what you think, and greatly appreciate every comment.
Of course you do! Even more so because of the products in the mini-catalog, the clearance rack, and the retiring products.
The HOST CODE for MAY is WW6HSM6A. If you are ordering less than $150.00, please use the host code shown. If you are ordering more than $150.00, please contact me first so you can get your stamping rewards!
Just look at this sneak peek into June’s Paper Pumpkin kit from Sara! If you love sunshine, especially when it doesn’t come with humidity, contact me to find out how to order this kit of happiness!
Here’s another video for you, this time it’s for the Ornate Garden Suite, which is available now from the 2020 – 2021 catalog.
Remember, any order over $50 qualifies for a FREE gift from me AND a free catalog for the 2020 – 2021 calendar year! I’ve seen it, it is fabulous, and I have a rather extensive wishlist for the pre-order available to demos NOW! Here’s a preview of the front cover, which is all I can show you right now!
Again, thank you for stopping by my blog today! I appreciate your time.
Obviously, I am thoroughly enjoying my pre-order of the Celebrate Sunflowers cling stamp set bundle, available in the Stampin’ Up! 2020 – 2021 annual catalog. Seeing and pre-ordering new products is just one of the perks of being a SU! demo. The quality of the stamps themselves, including all the intricate details, is the reason I fell completely in love with SU! after purchasing my first stamp set, Lovely as a Tree. I still remember my excitement after using that set for the first time, and my DH does as well. Naturally, he kind of chuckled at me, which he still does when I get excited about new “toys”.
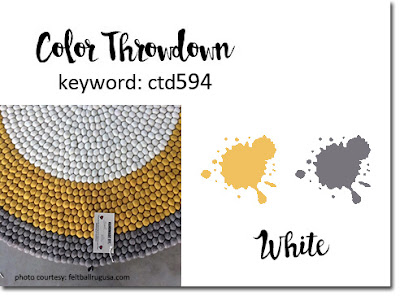
Color Throwdown #594 and Fusion – Enough
Last night I wanted to create another sunflower card, which led to browsing challenge blogs. The colors in ctd594 seemed perfect for sunflowers. Still unsure of a layout, I browsed more and found the Fusion – Enough challenge. I’d found my color combo and sketch combination.
Here’s my card:
Here are the challenge banners:
Combining Challenges for This Two-fer
The trio of colors for ctd594 includes yellow, gray, and white. Perfect for what I wanted to do. The colors I chose Crushed Curry, Basic Gray, and Whisper White.
Since I wanted a very deep, rich color I used the Stamp-a-ratus to stamp the sunflower in Crush Curry. The Stamp-a-ratus allowed me to stamp it multiple times without worrying about lining it up. After three stampings, I made sure to let the ink dry. While waiting just a minute or two, I cleaned off the stamp and grabbed my VersaMark and clear embossing powder. Next, I stamped the sunflower in VersaMark and quickly added the clear embossing powder. Next, I used my heat tool and let the magic happen. Finally, I cropped the flower using the Sunflower Die set. While I was cropping, I used the two dies of stems and cropped them out of vellum.
Using the sketch from the Fusion challenge made creating the rest of the card relatively easy. I used Basic Gray cardstock for the base of the card. The 2019 6 x 6 neutrals DSP gave me the Basic Gray strip down the side and the Smoky Slate banner behind the sentiment. Since I was trying to keep the card as clean as possible, I used the same pattern DSP for both colors.
That gorgeous Bumblebee banner, from the 2020 – 2022 In Color 6 x 6 DSP stack, has a fabulous distressed pattern. It’s just one of the fabulous five new In Colors
The Whisper White panel has been run through the Big Shot using the Subtle 3D embossing folder. If you do not yet have this 3D folder, you need to get it. I use it constantly. The very subtle texture lends itself perfectly to clean and simple cards.
Putting It All Together
After adhering the base, layer of white cardstock and the vertical strip on the left, I went back to the Fusion sketch for the placement of the flower and the sentiment element. I adhered the Bumblee and Smoky Slate banners directly onto the white cardstock. Because I wanted the sunflower to be the focal point, I used dimensionals to pop up the sunflower, which allowed me to slip the leaf stems underneath. Since the bottom of the stems won’t show, I could use the multipurpose liquid glue to attach them to the DSP and cardstock.
The sentiment, stamped in Basic Gray from the Celebrate Sunflowers stamp set, also has dimensionals on the right side to pop it up evenly with the sunflower. All I needed to add was liquid adhesive to the left side of the sentiment.
Finally, I added a piece of the Bumblee DSP to the flap of the envelope. Then I stamped part of the sunflower on the front left corner and I was done, I’d finished this coordinating card/envelope set.
As always, thank you so much for stopping by my blog today. I’d love to hear what you think, and greatly appreciate every comment.
Of course you do! Even more so because of the products in the mini-catalog, which ends June 2nd, the clearance rack, and the retiring products list, which contains many discounted products.
The HOST CODE for MAY is WW6HSM6A. If you are ordering less than $150.00, please use the host code shown. If you are ordering more than $150.00, please contact me first so you can get your stamping rewards! Just look at this gorgeous suite of Ornate Garden products, which is available now!
Remember, any order over $50 qualifies for a FREE gift from me AND a free catalog for the 2020 – 2021 calendar year! I’ve gotten my first pre-order, but I still have a rather extensive wishlist for the more of these fabulous new products, some of which are available to demos NOW! Here’s a preview of the front cover, which is all I can show you right now!
Ask me how you can not only see it NOW, but also place a pre-order as well!
Again, thank you for stopping by my blog today! I appreciate your time.
Welcome to Just Peachy Stamping by Sue Jackson: an independent Stampin' Up demonstrator.
Through Stampin' Up!, I happily share my love of papercrafting through sales, classes, small stamping group meet-ups and workshops. I think that being a teacher in my "real life", I have a unique approach to sharing my fantastic hobby. I look forward to connecting with you!