This is the first of two posts going live on Wednesday, June 15, 2022. The second post goes live at 5 am ET for the InKing Royalty Blog Hop! I hope you will join along with the blog hop fun! In the meantime, I am very thankful for the opportunity to be the Featured Stamper for the Color Throwdown challenge # 697! I’ll be adding that badge to my blog as soon as I remember how to do that. 🙂
Here’s my card:
Here’s the Color Throwdown #697 banner:
https://colorthrowdown.blogspot.com/ Generic colors are teal, pink, and orange
This adorable song bird easel card comes from the Sweet Songbird bundle, which consists of an adorable stamp set and the larger bird builder punch. Here’s the bundle, and if you click on the image you can zoom in on it:
Measurements:
The Bermuda Bay base measures 4-1/4 by 11 inches, scored at 5-1/2 and 2-3/4 inches to create the easel.
Both pieces of white cardstock measure 4-1/8 by 5-3/8 inches.
I used a piece of the Polished Pink 6 x 6 DSP (designer series paper) cut down to 6 by 2-1/2 inches for the envelope flap.
I wanted to cover the back of the easel parts that show when the easel stands up. Therefore, I trimmed two pieces of Coastal Cabana DSP to 4-1/8 by 2-5/8 inches and adhered them to the back of the easel.
Then, I punched a 1 inch circle from a piece of Coastal Cabana DSP for the envelope seal and ran it through my XYRON create-a-sticker.
HINT: When you remove the sticky layer from the envelope sea layer, that piece of sticky goodness comes in very handy. I have tile floors, and I use that stickiness to pick up stray dimensional hexagon covers. Those things have a mind of their own! They very much enjoy floating away instead of going in the garbage can as intended.
That’s it for the measurements!
Creating the Clouds:
Recently, I saw a beautiful card and when I read the directions, I had an “AH-HA” moment. Sadly, I can not even begin to remember the name of the genius who posted this brilliant move. I don’t know where to begin to search for it either, so my apologies if it’s you!
I used a piece of window sheet film and cropped it with the cloud looking die from the basic borders die set. Then, I used the window sheet clouds as a stencil. Here are photos of this process using the stencil, a blender brush, and Bermuda Bay ink:
I did move the “clouds” as I worked my way up the white cardstock. I also blended very light areas using the dry blender brush. This way, only the bottom layer of clouds appear stark white.
For the inside/bottom of the easel, I only added one layer of clouds. Then, I dry brushed ink working up the white cardstock.
Sweet Songbirds:
I stamped the larger bird using Polished Pink ink on white cardstock. Then I punched out the pieces using the bird builder punch. I used scraps to punch out the wing from Polished Pink DSP, and the beak from Pale Papaya cardstock.
Then, I used Momento tuxedo black ink for the eyes, sentiments, music notes, and the Pumpkin Pie bird’s feet.
Next, I stamped the next using Soft Suede ink on Crumb Cake cardstock. The nest needed texture, so I ran it through my cut and emboss machine using the bark 3D embossing folder. This nest needed to be fussy cut, as did the smaller Pumpkin Pie bird.
The branches are also stamped using Soft Suede ink. I used Bermuda Bay ink for the leaves, and Polished Pink for the flowers.
The pink bird and nest have dimensionals added for height.
I cropped the top sentiment using a banner die from the new Stylish Shapes die set. If you don’t have this die set yet, I highly recommend it! I’ve used it so much since I got it!
Finally, I added four Coastal Cabana resin dots to hold the easel in place.
With that, I’d completed this coordinated card, envelope, and envelope seal set.
Thanks for stopping by my blog today! I hope you’ll come back to check out the InKing Royalty Blog Hop going live at 05:00 am ET.
Here are just a few of my favorite new things, and about half of which arrived Monday! I’ve already been playing with my new goodies. I’m also working on a pre-order from the upcoming July – December mini-catalog. Fun times!! My card for Thursday’s Cardz 4 Galz design team post uses a bundle from the upcoming Sale-a-Bration catalog!
Do You Want to Place an Order?
Of course you do!
If you are ordering less than $150.00, please use the host code shown. If you are ordering more than $150.00, please contact me first so you can get your stamping rewards! Any order over $50 will earn a little surprise from me.
The HOST CODE through June 30, 2022 is 6YTD44QQ.
Again, thank you for stopping by my blog today! I appreciate your comments and your time.
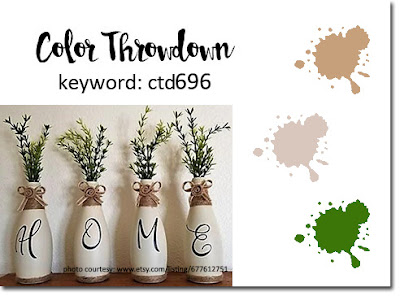
It took me a couple of days, and a couple of trials and errors, but I figured out how to combine Try Stampin’ on Tuesday #559, Double Trouble #113, and Color Throwdown #696.
Without further ado, here’s my card:
Here are the three challenge banners:
Measurements:
The Mossy Meadow base measures 4-1/4 by 11 inches, scored at 5-1/2 inches.
AFTER I embossed the Very Vanilla cardstock with the Fern 3D embossing folder, I trimmed it to 4-1/4 by 5-3/8 inches.
The Very Vanilla for the inside of the card measures 4 by 5-1/4 inches.
The In Good Taste wood striped DSP (designer series paper) measures 4-1/4 by 2 inches. I also trimmed a piece to 2-1/2 by 6 inches for the envelope flap.
Finally, the Mossy Meadow DSP strip measures 5-3/8 by 1/2 inches. I used this DSP to punch a 1 inch circle for the envelope seal. Then I ran it through my XYRON create-a-sticker.
That’s it for the measurements, and all of these pieces were adhered with multipurpose liquid glue..
Leftovers:
One of the great things about saving leftover cardstock is that I have plenty of pieces to use on other projects. In this case, I used leftovers for all the stamped and cropped elements on the front of the card. I took me a while to find a system that works for me, and one day I should share how I store my papers.
Stamping and Such:
All the stamped elements come from the Nature’s Prints bundle. If you haven’t gotten it yet, I highly recommend adding it to your wish list.
I stamped the two different sprays in Mossy Meadow on either Crumb Cake or Very Vanilla.
Next, I stamped the sentiment on Very Vanilla using Soft Suede ink.
After cropping all four pieces, I used markers to outline the Very Vanilla pieces so they would stand out from the Very Vanilla embossed background. I used my Mossy Meadow marker for the sentiment banner, and Crumb Cake for the spray of leaves.
The Crumb Cake/Mossy Meadow sprays are adhered using multipurpose liquid glue.
I added dimensionals under the Very Vanilla/Mossy Meadow leave spray. Once I had that adhered where I wanted it, I carefully placed dimensionals on the back of the sentiment. Basically, those dimensionals adhere the left side and the top right corner. I added multipurpose liquid adhesive for the middle of the sentiment banner where it lays on the Very Vanilla spray.
Finally, in keeping with the sketch, I added two matte dots on the top left next to the Mossy Meadow DSP. Since odd numbers of elements please the eye, I added a tiny one to the bottom right of the sentiment banner.
I didn’t do anything yet to the inside because of the versatility of the outside sentiment. When I’m ready to use this card, I’ll add a sentiment.
With that, I’d finished this coordinated card, envelope, and envelope seal set.
Here are just a few of my favorite new things, and about half of which arrived Monday! I’ve already been playing with my new goodies. I’m also working on a pre-order from the upcoming July – December mini-catalog. Fun times!!
Do You Want to Place an Order?
Of course you do!
If you are ordering less than $150.00, please use the host code shown. If you are ordering more than $150.00, please contact me first so you can get your stamping rewards! Any order over $50 will earn a little surprise from me.
The HOST CODE through June 30, 2022 is 6YTD44QQ.
Again, thank you for stopping by my blog today! I appreciate your comments and your time.
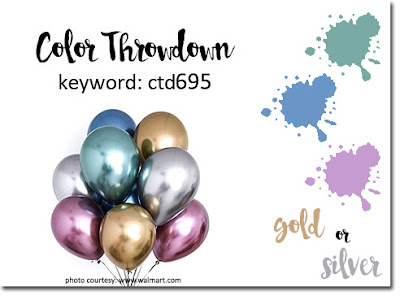
When I saw the current Color Throwdown #695 challenge, the Seas the Day stamp die set seemed like the perfect fit, at least in my humble opinion..
Here’s my card:
Here’s the challenge banner:
Thankfully, the Color Throwdown Challenge calls for generic colors and shades of those colors. In this case, the colors are green, blue, lavender, and gold or silver. I used Granny Apple Green, Pacific Point, Highland Heather, and silver. I’ve created a similar card and you can see that card and directions here.
Measurements:
The Granny Apple Green base measures 5-1/2 by 8-1/2 inches, scored at 4-1/4 inches.
The Waves of Inspiration DSP background measures 4-1/8 by 5-3/8 inches. I trimmed another piece to 6 inches by 2-1/2 inches for the envelope flap. Then, I punched a 1 inch circle from coordinating DSP for the envelope seal.
I also trimmed the Pacific Point cardstock top to 4-1/8 by 5-3/8 inches. After stamping the cardstock using the Gentle Waves stamp with Pacific Point ink, I cropped it using the frame from the Seas Dies. This layer is popped up with dimensionals.
Next, I cropped another frame from Granny Apple Green cardstock. I also cropped the coral from a piece of Highland Heather DSP. Then, I trimmed both the green seaweed and coral and adhered them with multipurpose glue.
I stamped the starfish and sentiment using VersaMark then added silver embossing powder, which I set with my heat tool.
I outlined the scallops of the banner with my silver Wink of Stella pen. I used dimensionals and multipurpose glue to allow for the dimension of the frame.
Part of what I love about this stamp set includes the two mirror image fish stamps. I stamped these in Highland Heather and cropped them with the dies from the Seas Die set. Then, I added a dimensional under each fish and adhered them.
Finishing Up:
I stamped the front, left-hand side of the envelope the same as the inside of the card.
Then, the only thing left was to run the envelope seal through my XYRON 1.5 inch create-a-sticker.
With that, I’d finished this coordinated card, envelope, and envelope seal set
Here are just a few of my favorite new things, all of which arrive on Monday!
Do You Want to Place an Order?
Of course you do!
If you are ordering less than $150.00, please use the host code shown. If you are ordering more than $150.00, please contact me first so you can get your stamping rewards! Any order over $50 will earn a little surprise from me.
The HOST CODE through June 30, 2022 is 6YTD44QQ.
Again, thank you for stopping by my blog today! I appreciate your comments and your time.
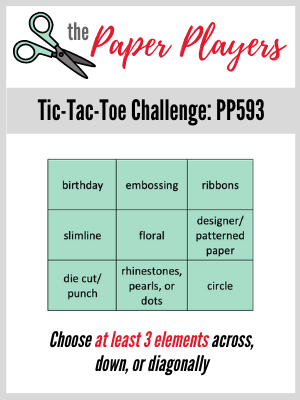
Welcome back to what has become bee-central. I promise, I’ve made other cards, but this one fit the bill for a three-fer card. I used three card challenges for this card, The Paper Players # 593, Freshly Made Sketches # 537, and Color Throwdown # 694.
Here’s my card:
Here are the challenge banners that inspired the layout, color combination, and elements:
I used the bottom row with a punch, matte black dots, and the flower for a circle.
.
Measurements:
The Basic Black base measures 4-1/4 by 11 inches, scored at 5-1/2 inches to create a tent-fold card.
The Pool Party mat measures 4-1/8 by 5-3/8 inches.
This woodgrain DSP comes from the Flowering Fields DSP (designer series paper). It measures 4 x 5-1/4 inches. I outlined it using a black Stamping Write Marker to make it really stand out from the Pool Party cardstock.
AFTER I embossed the Poppy Parade cardstock using the Painter Texture 3D embossing folder, I trimmed it to 4 inches wide. I measured up from the bottom 2-1/2 inches on each side and marked it with a tick. Then, I just eyeballed it to make the point off-center, following the FMS537 layout.
I used multipurpose glue to adhere all these layers together.
While I had my trimmer out, I trimmed a coordinating piece of DSP to 6 inches by 2-1/2 inches for the envelope flap.
The white cardstock inside panel measures 4 by 5-1/4 inches.
The Front Elements:
I punched the black cardstock “bee” using my ladybug punch. Then, I punched two sets of wings from vellum cardstock.
I used some leftover Harvest Meadow DSP to trim the bee’s stripes to 1/8 inch. I trimmed them after adhering them using multipurpose glue.
The stinger comes from a corner of the same DSP cut down to size.
To create the top set of wings, I cut one of the vellum sets in half and adhered them with multipurpose glue. Then,, I added the bottom set of wings and adhered them with multipurpose glue as well. I covered the dots of glue using three matte black dots.
Both the inside and the outside sentiments come from the Happy and Heartfelt stamp set and stamped them with Tuxedo Black ink.
Next, I trimmed the front sentiment white cardstock to 3/4 inches and punched the chevron using the Banners Pick A Punch. Then, I trimmed a piece of the same DSP that I used for the bee’s stripes to 3/4 inch wide and punched the end using the banner punch. I added dimensionals under the sentiment banner.
Putting the Pool Party daisy layers together was easy because I already had the pieces punched from Pool Party 6 x 6 inch DSP. I used dimensionals and liquid glue to adhere the flower to the banner.
In order to be able to accomodate the dimensionals on the banner and flower, I needed to use a double layer of dimmensionals under the bee. Multipurpose liquid glue adhere the part of the bee that overlapped the flower and banner.
After adding a single matte black dot to the corner of the sentiment banner, I’d finished the front.
Finishing Up:
The inside sentiment is also stamped in Momento Tuxedo Black ink.
Then, I used the daisy stamp from the Daisy Lane stamp set. I used Pool Party ink and stamped them off the bottom of the inside panel. I also stamped one of the daisies on the bottom left-hand corner of the envelope.
Next, I punched a 1 inch circle from the DSP I used for the bee and sentiment mat to make the envelope seal. Finally, I ran the circle through my XYRON create-a-sticker to finish off the envelope seal.
With that, I’d finished this coordinated card, envelope, and seal set.
Thank you very much for stopping by my blog today!
Here are just a few of my favorite new things. I can not wait for this order to arrive!
But wait, there’s more, and this bonus ends May 31st!
Along with the new catalog, there’s a really fabulous joining bonus! As always, your starter kit is just $99 for $125 of your choice of products. The bonus? Over $66 of the new 2022 – 2024 In Color supplies! You get the following at no extra cost to you:
In Color Ink Pad Collection
and In Color Grid Paper
plus In Color Cardstock Collection
and the 6 x 6 inch In Color Designer Series Paper Assortments
Do You Want to Place an Order?
Of course you do!
If you are ordering less than $150.00, please use the host code shown. If you are ordering more than $150.00, please contact me first so you can get your stamping rewards! Any order over $50 will earn a little surprise from me.
The HOST CODE through May 31, 2022 is E3W722BD.
Again, thank you for stopping by my blog today! I appreciate your comments and your time.
When I saw the challenge colors for the Color Throwdown # 643 challenge, I instantly thought I’d try the alcohol and blends technique again. My first try at thie technique didn’t turn out at all the way I hoped. After doing some research, I found out what I did wrong: 1.) you must use at least 90% rubbing alcohol, and 2.) the key is to tap the alcohol on the blends, not paint with it.
The challenge called for aqua, ice blue, and light green. I used the light Bermuda Bay, dark Mint Macaron, and Dark Pool Party blends.
Since I really thought this would make a much bigger mess than it did, I used a chopping mat (from Dollar Tree) to protect my desk. Then, I put a piece of printer paper over the chopping mat. I also had an old washcloth to blot my water painter.
Truly, if you can scribble, you can do this technique. Using one blend at a time, I simply colored random blocks using each of the blends, making sure to completely cover the 5-1/2 inches by 4-1/4 inches piece of cardstock vellum.
Next, I used a pipette to fill the large, flat tipped water painter with alcohol. While I was doing that, I felled a Stampin’ Spritzer with alcohol as well. (You can find the pipettes here.)
Using the water/alcohol painter, I simply tapped all of one color blend scribbles, blotted the painter to remove that color, and repeated for the other two colors. So easy-peasy!!
At this point, the result was pretty smooth and there was veining where the colors met. After the colors dried, and just to see what would happen, I lightly spritzed the whole piece of vellum with alcohol. That’s how I got the more mottled look, and I am really pleased with how it turned out.
Measurements:
I used Coastal Cabana for the base of the card measuring 4-1/4 inches by 8-1/2 inches, scored at 4-1/4 inches to form a tent card.
Then, I trimmed a piece of white cardstock and the colored vellum to 4-1/8 inches by 5-3/8 inches. Using Stampin’ Seal, I adhered the vellum to the cardstock. Just make sure you really seal the edges as the vellum will tend to roll after it dries.
While I had the white cardstock out, I trimmed a piece to 5-1/4 inches by 4 inches for the inside of the card.
I created a three layer butterfly using the Brillant Wings die set. The layers from bottom to top are Bermuda Bay (for contrast, which is still aqua), Pool Party, and Mint Macaron.
Next, I wrapped a piece of retired Bermuda Bay ribbon around the card and tied it in a bow. I attached the bow using a couple of glue dots.
Any sentiment for the front would work, so I chose to use the birthday sentiment from Here’s a Card. Then, I cropped the sentiment using the Stitched So Sweetly die set.
I did use dimensionals under the sentiment and under the whole vellum/cardstock layer.
Finally, I used three middle sized Coastal Cabana resin dots to create a triangle connecting the sentiment to the butterfly. Embellishments in a triangle pattern help move the eyes across the card.
I used a piece of Coastal Cabana 6 x 6 inch DSP for the envelope flap. The piece measures 6 inches by 2-1/2 inches and is attached using multipurpose glue.
Using the DSP, I punched a 1-inch circle and ran it through the create a sticker XYRON machine to create an envelope seal.
Finally, after trimming the envelope flap, I’d completed the card set.
Do You Love Fun Folds?
If you do, please stop by a new challenge, Creative Creases from Debbie Mageed at The Secret Stamper! I am having a blast with her challenges and have learned some new fun folds! Join the fun at her website! Hope to see your entry in the gallery soon! My card for the current challenge is just waiting for a blog post!
Thank you so much for stopping by today.
I’d love to hear what you think, and greatly appreciate every comment.
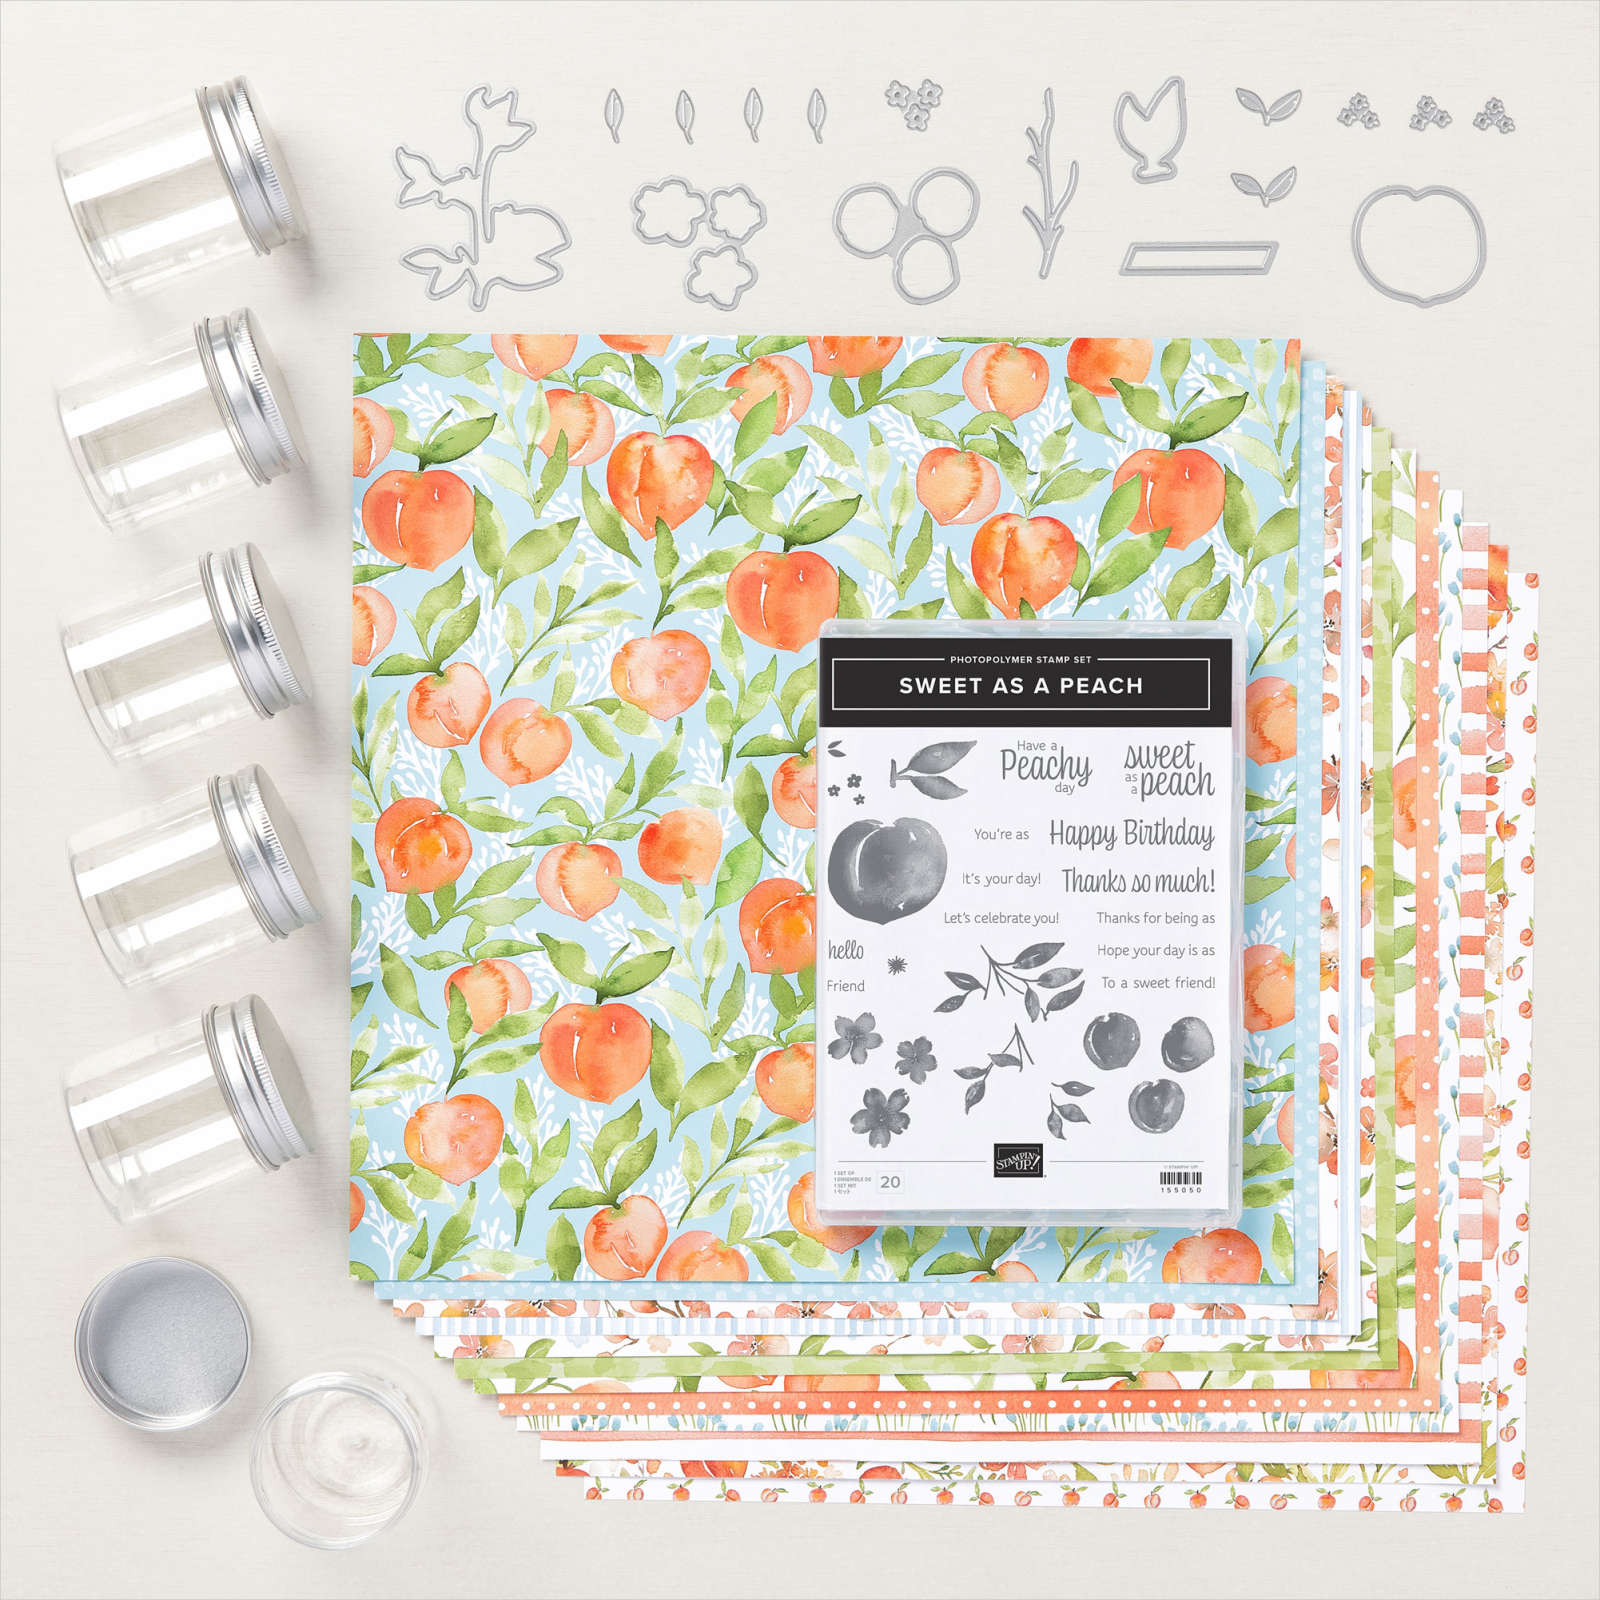
Of course, I purchased the You’re a Peach Suite on the first day of ordering! Take a look at this fabulous suite!
I say “Have a Peachy day” to my kids (aka students) all. the. time. Hence, the Just Peachy Stamping name. Naturally this suite is a must have!
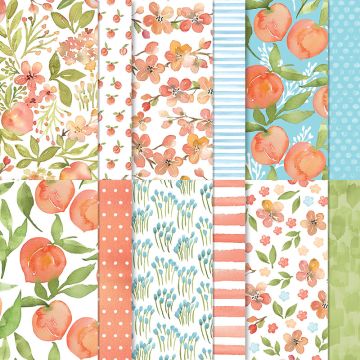
The picture doesn’t do the DSP justice, so here’s a look at just that:
Join the Fun!
It’s a fabulous time to join Stampin’ Up! New team members get even MORE FREE products in their customizable Starter Kit. From 4–31 May, new team members can get $155 USD worth of products for only $99 USD + free business supplies + free shipping + all the fun being a part of Stampin’ Up!
Do you live in the U.S. and need a demonstrator? If so, I’d love to talk to you!
Do You Want to Place an Order?
Of course you do!
If you are ordering less than $150.00, please use the host code shown. If you are ordering more than $150.00, please contact me first so you can get your stamping rewards! Any order over $50 will earn a little surprise from me.
The HOST CODE for May is ZM63ASKZ.
Again, thank you for stopping by my blog today! I appreciate your comments and your time.
Sundays are usually the day during which I am supposed to be working on lesson plans. I did get that done, but I also got to relax by creating two cards. This card meets Color Throwdown #619 for aqua, red, and silver, which ends tomorrow at 6 pm.. It also meets The Paper Players #517 for a clean-and-simple holiday card.
Without further ado, here’s my card:
Here are the ctd619 and PPT517 challenge banners:
Measurements and More
I used Real Red for the card base, trimmed to 5-1/2 inches by 8-1/2 inches, scored at 4-1/4 inches.
The Pool Party mat is 4-1/8 inches by 5-3/8 inches. I cropped the square out of the middle of the mat layer using the largest Stitched Shapes square.
I used two pieces of Whisper White, one for the inside and one for the outside. Before trimming the outside piece, I ran it through the Big Shot using the brick and mortar 3D embossing folder. Then I trimmed it to 4 inches by 5-1/4 inches, which is the same size as the inside piece.
A third piece of white cardstock was enough to stamp the bells and the sentiment. I used Versamark to stamp the bells using my Stamp-aratus, then added silver embossing powder and heat set it. The Stamp-aratus also helped trememdously when I stamped the sentiment in Real Red. Then I added clear embossing powder and heat set the sentiment. I trimmed the sentiment block to 2-1/4 inches square.
By the way — do you recognize the sentiment on the front? Yes, it’s from It’s a Wonderful Life and is just one of four movie quotes in the Christmas Means More stamp set.
Elements
The Sounds of the Seasons die set contains a die for the single bell. However, I had to fussy cut the pair of bells, which wasn’t difficult at all and only took a few minutes.
I used the Pool Party sheer ribbon to thread through the holes I made in the bell rings.
Next, I put dimensionals under the sentiment block and the bells. I had to be careful with the placement under the pair of bells so it would overlap the sentiment block. There’s multipurpose liquid adhesive in the corner of the sentiment block to adhere the bells.
After putting everything together on the front, I decided that it needed something, but I had to keep it clean and simple. Therefore, I used the clear Wink of Stella pen to paint random bricks.
There are times that i don’t want a lot of white space on the inside of the card, and this was one of those times. I used the snowflakes, stamped in Pool Party, from Frosted Foliage to form a frame around the Merry Christmas sentiment on the inside. The sentiment is stamped in Real Red to coordinate with the front sentiment.
Next, I stamped some Pool Party snowflakes on the front, bottom, left corner of the envelope. I also stamped snowflakes on the envelope flap.
With that, I’d finished this card/envelope set.
Thank you so much for stopping by today.
I’d love to hear what you think, and greatly appreciate every comment.
Do you live in the U.S. and need a demonstrator? If so, I’d love to talk to you!
Of course you do! Even more so because you are now moving on to create Thanksgiving and holiday cards, right? There’s more information about the August – December 2020 mini-catalog below!
If you are ordering less than $150.00, please use the host code shown. If you are ordering more than $150.00, please contact me first so you can get your stamping rewards! Any order over $50 will earn a little surprise from me.
The HOST CODE for NOVEMBER is CBDP2DQT.
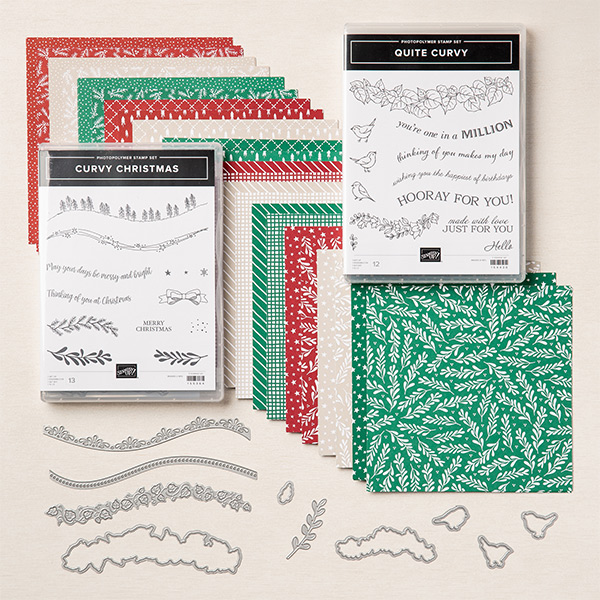
This absolutely gorgeous bundle is now available! I already have one of the bundles and used it this past weekend. You can see that card here.
Here are some fabulous images from Stampin’ Up! Each bundle is available separately, but if you want it all, the whole variety bundle is pictured below:
158396 – QUITE CURVY VARIETY BUNDLE
Again, thank you for stopping by my blog today! I appreciate your time.
Welcome to Just Peachy Stamping by Sue Jackson: an independent Stampin' Up demonstrator.
Through Stampin' Up!, I happily share my love of papercrafting through sales, classes, small stamping group meet-ups and workshops. I think that being a teacher in my "real life", I have a unique approach to sharing my fantastic hobby. I look forward to connecting with you!