Welcome to the current Cardz 4 Guyz biweekly challenge. Caz picked the theme of “something with a P” for C4G #288. When you are finished here, I hope you hope over to the challenge site to see the inspiration from the rest of the design team.
TSOT has partnered with the Double Trouble Challenge as an option. The Double Trouble challenge is to use three different patterns of paper. Here’s that challenge banner:
Measurements:
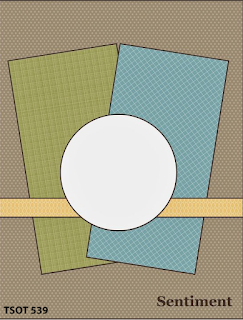
My goal for the card was to have a monochromatic card with three pops of one color added. Red, grey, and white really fit the goal.
I used a Real Red base for the card. It measures 8-1/2 inches by 5-1/2 inches, scored at 4-1/4 inches.
The three DSP (designer series paper patterns come from the Peaceful Place DSP pack from the previous mini catalog. However, any three patterns would work. .
The background DSP measures 4-1/8 by 5-3/8 inches.
The smaller panels each measure 4 inches by 2 inches.
While I had the DSP out, I trimmed a piece to 2-1/2 inches by 6 inches for the envelope flap.
I cropped both the sentiment circle and the scalloped circle border using the layering circle dies.
I stamped the pair of partridges on a piece of scrap white cardstock. Next, I colored them with the Smokey Slate blends combo, which kept the partridges in the shades of grey like the rest of the card.
The white inside panel measures 4 inches by 5-1/4 inches.
What I Did:
I really didn’t know what I wanted to do with the shape in the middle of the card, so I went on Pinterest for inspiration. I found a partridge card by Tina Wardell at Tina’s Crafty Ink Spot and CASE’d her center circle and placement of the partridges. Her coloring of the partridges is stunning, mine is plain to keep with the color scheme.
Both the inside and outside sentiments come from the Catch You Later stamp set found in the current mini-catalog.
I didn’t want to add another DSP pattern for the horizontal line on the challenge banner. Therefore, I attached a 4-1/4 inch piece of Read Red sheer ribbon to the card using some tear-and-tape. Then, I used glue dots to attach the black and white gingham ribbon.
I only popped the sentiment circle and partridges up on dimensionals. . Everything else was adhered using multipurpose glue.
Finally, I added 5 red dots to the border of the circle.
Welcome to my first post in 2022, so Happy New Year! My hope for all of us is that 2022 is the year we can finally begin to see the light at the end of the tunnel for COViD. I took a much needed break during the second week of my Christmas break from school and simply relaxed and recharged. Now, I am happily back in the swing of things.
Julie chose the theme of spots or stripes for the C4G #287 challenge. So many fun possibilities, especially since the card can be for any aged guy. Mine is for a good friend at work who has had some major surgery. When you finish here, I hope you will hop over to the challenge page to see the creations of the rest of the design team. I look forward to seeing your creations in our gallery!
Here’s my card:
I don’t know if it’s possible to take the theme to an extreme, but this fun DSP pattern has spots in a striped pattern.. I carried those horizontal stripes onto the Misty Moonlight DSP behind the sentiment and the sloth. Then, I used the fine tip glue pen to create my own epoxy drops on some of the Misty Moonlight spots surrounding the sentiment/mat/sloth focal images. These are very difficult to photograph, but in person they do reflect light and shine.
Measurements:
The Granny Apple Green base measures 4-1/4 inches by 11 inches, scored at 5-1/2 inches to create a tent card.
Next, I trimmed a piece of Misty Moonlight cardstock to 4-1/8 inches by 5-3/8 inches. Then, I used the largest square from the stitched shapes die set to crop a square from the center of the cardstock for the mat. Then, I used my Simply Scored scoring tool to score horizontal 1/4 inch lines inside the square.
This very colorful DSP paper comes from the Pattern Party DSP pack, which can be earned by hosting a workshop. There’s 48 sheets in this fabulous pack of paper. One side of each is a colorful pattern, while the reverse sides are all black and white patterns. Fun!! I love black and white patterns and have been using this DSP pack since the current catalog launched.
I trimmed the DSP for the front of the card to 4 inches by 5-1/4 inches. While I had this DSP out, I also trimmed a piece to 6 inches by 2-1/5 inches for the envelope flap.
Then, I trimmed a piece of white cardstock to 4 inches by 5-1/4 inches for the inside. I used scraps of white for the sloth and sentiment.
A Quick Card:
The sloth and the sentiments on the outside and inside are from the Back on Your Feet stamp set.
I stamped the sloth on white cardstock using the Momento Tuxedo Black ink pad. Then, I used the light and dark blends combos for Crumb Cake and Soft Suede to color the sloth and the branch. I pulled the Granny Apple Green from the DSP and used the light and dark blends to color the leaves. Then, I cropped the image using one of the ovals from the Stitched Shapes dies.
I stamped both the outside and inside sentiments using the Misty Moonlight ink pad.
I used the triple banner punch to create the chevron tag for the sentiment.
Finally, I trimmed the DSP on the envelope flap and punched a one-inch circle from a scrap of Misty Moonlight DSP. As always, I ran the circle through the XYRON create-a-sticker to make a seal for the envelope.
With that, I’d finished this quick card/envelope/seal coordinated set.
Do you live in the U.S. and need a demonstrator? If so, I’d love to talk to you!
Do You Want to Place an Order?
Of course you do!
If you are ordering less than $150.00, please use the host code shown. If you are ordering more than $150.00, please contact me first so you can get your stamping rewards! Any order over $50 will earn a little surprise from me.
The HOST CODE through January 30, 2022 is UW3JNRTD.
Again, thank you for stopping by my blog today! I appreciate your comments and your time.
Contemporary Christmas Welcome to the last Cardz 4 Guyz challenge for 2021. Dawn chose Contemporary Christmas for this two week challenge.. When you are finished here, I hope you will hop over to the challenge blog to see what the design team created. The team’s cards are fabulous examples of a wide variety of creativity and inspiration!
Here’s my contemporary Christmas card, CASE’d, with some changes, from Pinterest:
My contemporary Christmas card is actually CASE’d Marcia Woodring Eblen’s Pinterest post. I have searched my pins, and other Sweet Stockings pins and can’t find the original post. I did send Marcia a message through Pinterest, so I will be updating this post as soon as I get a response.
Here’s Marcia’s card:
Measurements:
The Cherry Cobbler base measures 5-1/2 inches by 8-1/2 inches, scored at 4-1/4 inches.
One of my new favorite color combinations is Cherry Cobbler and Pool Party. This great pattern comes from the Sweet Stockings DSP. It measures 4-1/8 inches by 5-3/8 inches.
I also cut a piece of the DSP to 2-1/2 inches by 6 inches for the envelope flap. Then, I punched a 1 inch circle for the envelope seal.
The white cardstock for the inside measures 4 inches by 5-1/4 inches.
I used scraps for the rest of the front of the card. You’d need Cherry Cobbler, Pool Party, and Basic White cardstock for the other pieces.
What I Did:
I fussy cut the cat from the Sweet Stockings DSP.
Then, I started to fussy cut those little round ornaments. After cutting two, I decided that I would much rather stamp, color, and crop the ornaments from the Whimsical Trees stamp set. Much easier! I used Cherry Cobbler, Pool Party, and Old Olive for the ornaments. The gold Wink of Stella pen worked wonderfully for the top part of the ornaments.
I cropped both layers of the tree using the Christmas Trees Dies, which are part of the Whimsy and Wonder suite. Multipurpose glue adhered these pieces together.
Then, I wrapped some of the gold trim (from the Simply Elegant Suite) around the tree.
HINT: It’s much easier to leave a length of trim on the left side of the tree and then use tear-and-tape on the back of the tree at the bottom, middle, and top. That way, as I wound the gold trim around the tree it would stick to the back.
I found it much easier to unravel the length of trim after I had it adhered to the back. It was easier when I used a piercing tool to carefully pull the threads apart.
I used dimensionals to pop up the tree and the cat.
Then I added the ornaments with just a dot of multipurpose adhesive and slipped the tops under the gold trim.
This sentiment on the front just happens to be one of my favorite “Merry Christmas” stamps, mainly because of the font. It can be found in the Perfectly Plaid stamp set. I stamped it with VersaMark on the Pool Party cardstock. Then I covered it with gold embossing powder and heat set it. After the cardstock cooled, I cropped it using a stitched rectangle die. Then, I trimmed the Cherry Cobbler mat to fit under the Pool Party sentiment block.
I didn’t use dimensionals under the sentiment block because I wanted it to tuck under the tree.
At this point, I thought I had finished. Then I decided that I needed to add some bling to the sentiment. I grabbed my Wonderful Gems in gold glitter and put two on the sentiment block. Of course, I couldn’t stop with just two, so I added three to the tree.
Since I’d already trimmed the DSP on the envelope and created the seal, I’d finished this coordinated card/envelope/seal set.
Welcome to Cardz 4 Guyz #285! Deb is hosting this bi-weekly challenge and has chosen the theme ofShades of Brown. When you are done here, I hope you will hop over to the blog and check out all the inspiration from the design team!
Here’s my card:
I have a confession to make about this card: I mailed it my daughter in northern California. However, the colors and layout could very definitely be for a male card as well. She’s actually able to see a REAL fall color change, and the colors on this card match some of the colors in pictures she’s sent me.
Measurements:
The Merry Merlot base measures 5-1/2 inches by 8-1/2 inches, scored at 4-1/4 inches.
Next, the Cinnamon Cider DSP (designer series paper) in the wood pattern measures 4-1/8 inches by 5-3/8 inches.
I used a pattern from the Beauty of the Earth for the layer under the vellum. Both the vellum and the DSP measure 4 inches by 3 inches.
I used scraps to cut out all the leaves in Cinnamon Cider, Merry Merlot, and the Early Espresso branches.
For the front leaf, I cropped it in Crumb Cake and then used my blending brushes. Before I finished, I wound up using Bumblebee, Pumpkin Pie, and Early Espresso inks.
The Intricate Leaves die set make cropping these pieces very easy. My only problem was user error. I didn’t decide to use the foam adhesive sheets under the intricate, focal leaf until after I cropped and used ink on it. Therefore, I had to very, very carefully try to line up the cardstock leaf with the foam adhesive cut-out. There’s not as much foam showing when you look at the card straight on. The angle in the picture makes the white foam more prominent.
I used the Forever Flourishing die set for the lone piece of Pumpkin Pie foliage.
Since I used enamel dots in the four corners of the vellum, I was able to add adhesive to the backs of those corners. I also added adhesive on the vellum underneath the focal collage.
I used the end of my roll of faux suede Early Espresso ribbon for the bow.
Then, I used a Sweet Scallops die for the sentiment block. But, it still works for a guy, right?
Thanks for stopping by today!
Have a Peachy Day!
Sue
Basic Crafting Supplies:
Do you live in the U.S. and need a demonstrator? If so, I’d love to talk to you!
Do You Want to Place an Order?
Of course you do!
If you are ordering less than $150.00, please use the host code shown. If you are ordering more than $150.00, please contact me first so you can get your stamping rewards! Any order over $50 will earn a little surprise from me.
BUT WAIT ——– There’s more!!!
Check out the JOINING INCENTIVE for November!!
You chose up to $125 worth of ANY current crafting products that you want to come in your starter kit… for only $99$75 in November! Plus shipping is FREE!
Welcome to the Cardz 4 Guyz Challenge, #284. For this challenge, Helen has chosen gingham checks or plaids. I hope when you are finished here, you will hop over to the challenge website to see what the rest of the design team created! There’s quite a variety of inspiration just waiting for you!
I know I am late with this post. Last night my internet went out around 7 pm my time. The provider’s messages said it would only be down for an hour. It came back up at 5:30 am my time, which is after this post was supposed to go live. Anyway, I am late.
Once I had my DSP pattern and colors chosen, the happy Grinch seemed to be a natural choice. The sentiment is from last year’s Christmas Means More stamp set, with which I couldn’t part. I can’t remember where I got the Grinch stamp, but am fairly certain I found it on Etsy.
Here’s my card:
Measurements:
While there are more measurements than usual, the card really comes together quite with multipurpose glue and dimensionals.
The Real Red base measures 5-1/2 inches by 8-1/2 inches, scored at 4-1/4 inches.
The white cardstock layer measures 5-3/8 inches by 4-1/8 inches. I stamped the sentiment on white cardstock and cropped it using the largest square in the Stitched Shapes die set. There’s also white cardstock on the inside, and it measures 4 inches by 5-1/4 inches.
This DSP (designer Series Paper) comes from the Gingerbread and Peppermint 6” x 6” DSP, found in the current mini-catalog. It measures 4 inches by 5-1/4 inches.
I used a polka dot pattern from the same DSP pack for the envelope flap. It measures 6 inches by 2-1/2 inches.
Next, I used two squares of Old Olive cardstock. The first layer (right under the sentiment) measures 2-3/4” square. The bottom layer (adhered to the DSP) measures 3-3/8” square.
The Real Red layer on the front measures 2-7/8” square. You will need a second piece of Real Red cardstock measuring 3-1/4” by 2-1/2 inches. I used this piece for the Grinch tag. Next, I stamped Grinch on a scrap of white cardstock, which I trimmed to 2 inches by 3-1/8 inches.
What I Did:
I stamped the Grinch in Momento Tuxedo Black on the white cardstock, which allowed me to use my Stampin’ Blends with which I could color him. The two blends combos I used were the light and dark Old Olive and Real Red. I colored his eyes with the So Saffron light blend. Once he was completely dry, I adhered him to the Real Red piece I trimmed for the tag. This Real Red ribbon provided a bow, but it’s also used to pull the tag up from the sentiment layers.
I also used Tuxedo Black for the sentiment. The Stampin’ Write markers seemed better for this coloring, and I used Real Red and Old Olive markers for the mistletoe.
The front of the card just required some very careful layering.
The white cardstock and the DSP are adhered with multipurpose glue.
I put the whole pocket/sentiment piece together before I adhered it to the front of the card.
There are dimensionals under the sentiment square to pop it up. I had the Old Olive scallop trim already in my page protectors of those scraps, and decided to use it here. The sentiment went down on the smaller Old Olive square.
Then I used multipurpose glue to adhere the Old Olive to the Real Red layer.
In order to accommodate the Grinch tag, I used mini-dimensionals on three sides of the red layer to attach it to the bottom Old Olive layer. The tag needs to slide in and out easily, so be careful of the placement of the mini-dimensionals.
That’s it for the front.
Finishing Up:
Here’s the inside:
I used the Christmas Cheer sentiment from the Perfectly Plaid stamp set for the inside of the card. I also stamped Ho Ho Ho from that stamp set on the bottom of the inside panel and on the bottom front of the envelope.
With that, I’d finished this coordinated card and envelope set.
Thanks for stopping by my blog today!
Have a Peachy Day!
Sue
Basic Crafting Supplies:
Do you live in the U.S. and need a demonstrator? If so, I’d love to talk to you!
Check out the NEW EDEN”S GARDEN preview collection from the upcoming January – June mini-catalog! Customer pre-order is from now to January 3, 2021
Do You Want to Place an Order?
Of course you do!
If you are ordering less than $150.00, please use the host code shown. If you are ordering more than $150.00, please contact me first so you can get your stamping rewards! Any order over $50 will earn a little surprise from me.
The HOST CODE through November 30, 2021 is 6CCBCK4A.
Again, thank you for stopping by my blog today! I appreciate your comments and your time.
Hello and welcome back for another Cardz 4 Guyz challenge! This time Melanie has chosen leaves for the theme, which leaves (pun intended) the options wide open! When you are finished readying my blog, I hope you will hop over to the challenge and see all the wonderfully inspired cards from the rest of the design team members!
Here’s my bay window fun fold card:
As you probably already know, I love all kinds of fun folds. This one will blow its recipient’s mind, just don’t tell them you didn’t really spend all day slaving over it!
I found this on Frenchie Stamps blog. She’s one of my favorite demos to watch, and I have more than a few I love to visit for inspiration and tutorials. She’s a hoot and sometimes creates on the fly. Love her! Please head over to her blog and video post for the easy to follow step-by-step directions.
Measurements:
If you want to get everything cut before you head over to her blog, the measurements are as follows:
I used a Mossy Meadow card base measuring 4-1/4 inches by 11 inches. It gets scored at 1/2 inch 2 inches, 3-3/4 inches, 5-1/4 inches, and 5-1.2 inches.
In keeping with the leaves theme, I chose to use the Beauty of the Earth DSP 9designer series paper). I needed 3 panels, 2 of which measure 1-3/8 inches by 4-1/8 inches. The middle panel measures 1-5/8 inches by 4-1/8 inches.
While I had the DSP out, I trimmed a piece to 2-1/2 inches by 6 inches for the envelope flap.
HINT: I followed along with Frenchie’s video when trimming down the panels. Next time, I will cut the first 1-3/8 inches by 4-1/8 inches, then the middle panel, then the other 1-3/8 inches by 4-1/8 inch panel. It is difficult to tell on my card, but the DSP patterns don’t line up across the fold lines. Not a big deal for this card, but there are other DSP patterns for which it will definitely matter.
I used the Bumblebee piece of 6 x 6 inch DSP for the end panel of the card. It measures 1-1/2 inches by 4 inches. I wanted to use a Night of Navy mat under this panel, and it measures 1-5/8 inches by 4-1/8 inches.
In order to tie the Night of Navy mat in with the small fold on the center of the card, I trimmed another piece to 4-1/8 inches by 1-4 inches.
Stamping:
The white cardstock on the inside of the card measures 3-1/2 inches by 4-1/8 inches. Since the Forever Fern stamp set contains leaves similar to those on the DSP, I stamped two of the stamps on the bottom left-hand corner. I used Mossy Meadow ink and also Bumblebee ink over which I randomly colored/highlighted leaves with my Cajun Craze Stamping Write Marker. I did the same thing on the front left-hand bottom corner of the envelope.
Next, I used the “GRATEFUL” sentiment from the Sparkle of the Season stamp set stamped in Night of Navy on white cardstock. The two sets of leaves poking out also come from the Forever Fern stamp set and Forever Flourishing coordinating dies. I pulled in the Night of Navy and Misty Moonlight colors from the DSP for those leaves. The sentiment and leaves are popped up on dimensionals.
Finally, I used a piece of Bumblebee 6 x 6 DSP for the mat. I am still using up my 6 x 6 DSP color family packs, which explains the patterns for the Bumblebee DSP.
Once you have everything cut and stamped, please go to Frenchie’s video link to put it together. The one thing that I found was an AH-HA moment was putting dimensionals under the Bumblebee/Night of Navy mat panel. That’s how the card stays open to a bay window.
Do you live in the U.S. and need a demonstrator? If so, I’d love to talk to you!
Check out the NEW EDEN”S GARDEN preview collection from the upcoming January – June mini-catalog! Customer pre-order is from now to January 3, 2021
Do You Want to Place an Order?
Of course you do!
If you are ordering less than $150.00, please use the host code shown. If you are ordering more than $150.00, please contact me first so you can get your stamping rewards! Any order over $50 will earn a little surprise from me.
The HOST CODE through November 30, 2021 is 6CCBCK4A.
Again, thank you for stopping by my blog today! I appreciate your comments and your time.
Welcome to Just Peachy Stamping by Sue Jackson: an independent Stampin' Up demonstrator.
Through Stampin' Up!, I happily share my love of papercrafting through sales, classes, small stamping group meet-ups and workshops. I think that being a teacher in my "real life", I have a unique approach to sharing my fantastic hobby. I look forward to connecting with you!