Jul 29, 2019 | Freshly Made Sketches |
Freshly Made Sketches 398
This sketch challenge called for a clean card. My clean card used Daisy Lane photopolymer stamp set, Painted Harvest stamp set,and All Things Thanks (retired) stamp set. I also used the large daisy punch and the leaf punch for the card. At first, I thought this would be a #simplestamping card, but it did not turn out that way.
Here’s the sketch banner for this challenge:

Here’s the card I created:


The Process
I started with all the stamped items I would need. Therefore, I stamped 3 sets of leaves from the Painted Harvest stamp set in Old Olive on Old Olive card stock, which I then punched out. I used the light Old Olive blend to just ass some additional texture to the leaves.
Staying with the Old Olive, I started stamping the ferns on the Whisper White cardstock.
Here’s an example of the first stamping off:

At first, I was only going to do one set of stamped off ferns. I created the triple ferns by stamping the fern, then slightly pivoting the stamp and stamping the second time, then repeating for the third stamp.
At this point I realized I would need more stamped off ferns in order for them to show behind the large daisy. Therefore, I just started the trio stamping process to form a very loose circle.
Finishing up with the Old Olive, I inked the sides of both the white cardstock on the outside and inside.
I stamped the inside sentiment, then the front sentiment so I could put the ink pad away. The fewer ink pads on my desk, the better.
The Daisy
While I like the lined pattern daisy stamps from Daisy Lane, I thought the So Saffron ink would just blend into the white. Therefore, I pulled out the So Saffron blends combo. I started blending using the light and dark from the center out making sure none of the petals were blended the same.
Dimensionals provided the pop between the bottom and the top daisy. After gluing the layered daisy onto the middle of the fern trios, I dry fit the leaves, then glued them down as well.
I added a clear faceted gem to the center of the daisy (but I am still not sure about that look). Next on the list, placing the sentiment.
I added the burlap ribbon for a bit of contrast and texture which also anchored all the elements. Then I created the sentiment banner and dry fit it on the ribbon. Can I begin to tell you how stinking pleased I was that two of the punched leaves just peak out from under the sentiment.
Stamping the daisy over the inside sentiment and decorating the envelope finished off this card.
Thank you very much for stopping by my blog today.
Have a Peachy day!
Sue
If you live in the U.S. and are in need of a demonstrator, please CLICK HERE to be connected to my store. I would be honored to help you create cards from beginner levels, to casual, and to avid levels. Placing an order with me would also entitle you to a free copy of the Holiday Catalog being released the first week of September.
Just a few more days to earn bonus coupons! $5 coupon for every $50 spent.

Mar 12, 2018 | Fab Friday |
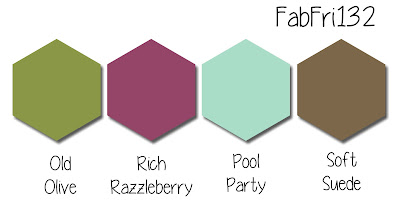
Fab Friday 132
I have been looking at this four color challenge for a little more than a week just waiting for inspiration to hit. I love each of these colors: Pool Party, Old Olive, Rich Razzleberry, and Soft Suede. I’ve looked at the cards from the Design Team a number of times, again waiting for inspiration to hit.
Tonight I was just browsing through Pinterest (that should be a hobby in and of itself) and saw a card using the Delightful Daisy stamp set and punch, and inspiration hit. Hard, like someone had literally smacked me up the side of my head.
Here’s the challenge:
My Challenge Card Creation

The three stamp sets I used were Daisy Delight (flowers), Dragonfly Dreams (sentiment), and Painted Harvest (leaves). All three sets are current photoplymer sets. When I stamped the daisies in Pool Party on Whisper White, I decided I didn’t want all the white showing, so I used an Aqua Blender to very lightly shade all the petals with Pool Party. After I shaded, I punched using the coordinating daisy punch. Two clear faceted gems added bling for the centers of the daisies.
The leaves are stamped in Old Olive on the Old Olive cardstock, then punched with the coordinating leaf punch.
The sentiment is in Rich Razzleberry and matted on Soft Suede. I decided I wanted just a touch of ribbon, so I made a very tight little knot using Rich Razzleberry ribbon and adhered it to the sentiment using a glue dot.
The background Rich Razzleberry cardstock was run through the Big Shot using the Leaves TIEF. If you haven’t tried any of the Textured Impressions Embossing Folders, you need to treat yourself to one, or two, or more. The textures on these folders are deep and detailed.
The Soft Suede DSP panel is out of one of my very favorite In Color stacks. I absolutely, positively adore these patterns and have been hoarding er, saving, all the scraps so I can continue to love them all. A mat of Soft Suede cardstock under the DSP adds depth to the panel.
When all was said and done….
While getting all the card elements stamped, punched, embossed, matted, I briefly thought that all the patterns would overwhelm each other. I don’t think that happened. The daisies really toned down the pattern on the DSP. The Rich Razzleberry background and sentiment give your eyes some place to rest. The softly colored daisies pair well with the leaves tucked under them so they just peek out. Mini-dimensionals provided a bit of additional dimension to the daisies and the leaves.
I wasn’t sure I would be inspired for this challenge, but it all worked out; at least I think so. What do you think? Comments are always welcome!
Have a Peachy day!
Mar 3, 2018 | Color Throwdown |
Pink, Grey, and Kraft
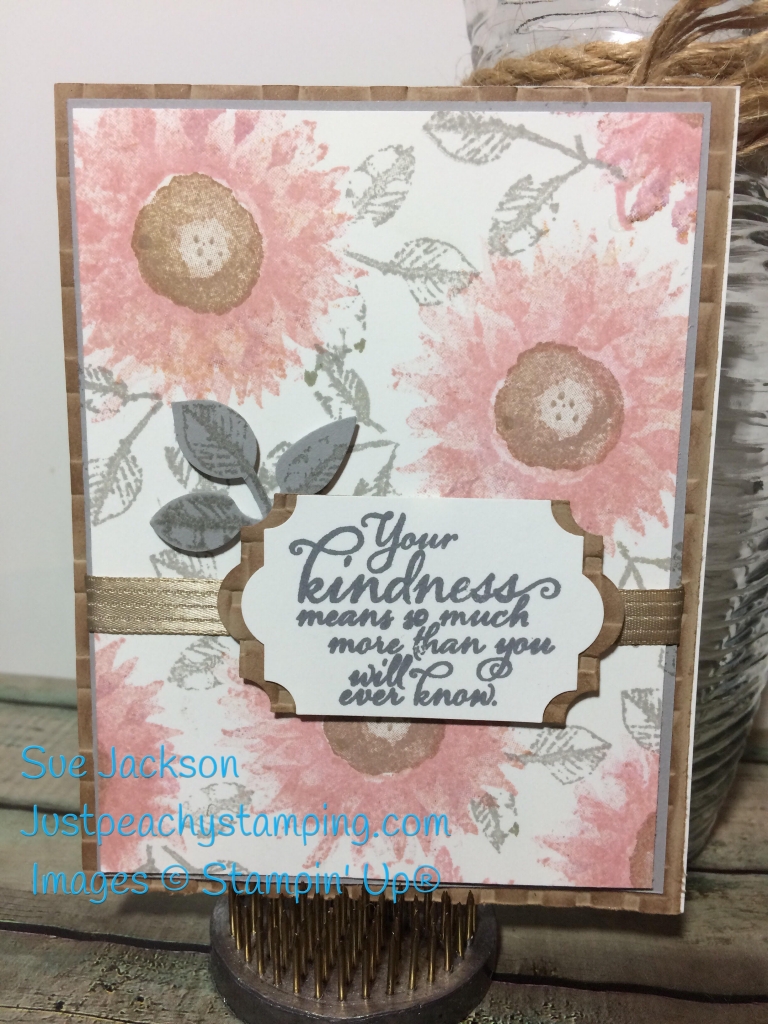
This week’s CTD challenge is to use the soft colors of pink, grey, and kraft. I wanted a soft floral card, so I chose Painted Harvest stamp set used Blushing Bride and Powder Pink for the layers. I stamped the center of each flower in Crumb Cake and used Smokey Slate for the stamped leaves.

Layout Decisions
When starting this card, the colors and stamp set were the only things I knew I was using. After a period of trial and error, I finally decided on the layout and elements to finish the card. For the bottom layer, I used the new Basket TIEF on Crumb Cake cardstock, onto which I sponged Crumb Cake ink for dimension. Smokey Slate cardstock provided the middle layer. Crumb Cake ribbon anchored the sentiment, also from Painted Harvest, stamped in Basic Grey on Whisper White cardstock. I wanted a mat for the sentiment, which I punched out with the Everyday Label Punch. I wasn’t sure how a piece of embossed cardstock would punch. However, it was very easy to punch out the basket embossed cardstock. Almost as an afterthought, I stamped and punched out a trio of leaves to tuck behind the sentiment.
Color Throwdown Inspiration
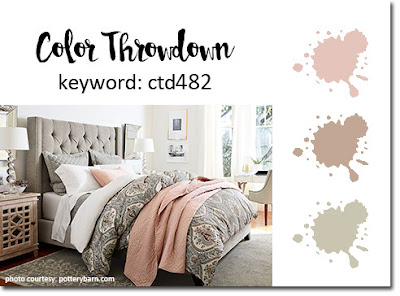
This inspriation photo is so peaceful, which I also wanted to convey in my card for this challenge. A soft thank you card which matched what I wanted to accomplish. A baby girl card is now running around in my head using these colors, so I think it’s time to create.
Have a Peachy Day.
Feb 13, 2018 | Uncategorized |
Tic, Tac, Toe #34 Challenge
I chose the left vertical line of the tttc#34, Anything but a card, die cut, and green. I’m doing my very first vendor fair this weekend and wanted to have a little something for a door prize. After spending time on Pinterest, I decided on mini-desk calendars. Since that is the anything but a card, I needed a die cut and used the Stitched Shapes die set. The final element is green, so I used some Garden Green and Lemon Lime cardstock on a base of Painted Harvest DSP. The base of the calendar and the ink are Garden Green. The Beautiful You stamp set provided the sentiment.

Tic, Tac, Toe #034 Challenge Board

The Calendar Base
Figuring out the base involved a great deal of trial and error. I couldn’t find anything on Pinterest or YouTube that matched the size that I needed, which meant I had to figure out my own measurements. Don’t get me wrong, I love math, but this is where the trial and error occurred. The best thing I can share with you is to use a card-like base for the front and back. The mountain fold was a 4 inch x 4 inch cardstock square scored at 1, 2 , and 3 inches, The mountain fold is attached to the open ends of the calendar base. Once I figured out the measurements, I quickly cut all the pieces I needed to make a total of 6 calendars. The remaining 5 calendars are below:

I used the Every Day Label Punch for the sentiment and punched one lighter one for the sentiment. The mat is another punch cut in half, spread apart, and adhered to the back of the sentiment.