A friend asked me for a card for his mom, who is in a rehab center up in the Plains States. I tried to create a card using purple as one of the major colors since it’s her favorite. I also wanted to create a card with a light, springtime feel to it, because their weather is anything but springtime right now.
Here’s my card:
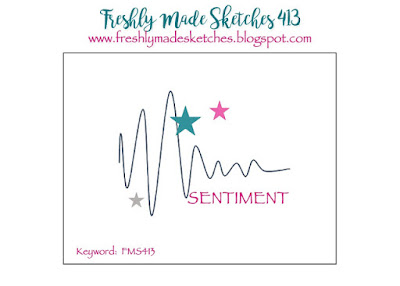
Here’s the FMS413 banner, which inspired the layout of my card:
I’ll admit, this sketch intrigued me, so I’ve been coming back to it for most of the week trying to figure out what I could do. The card must be clean with lots of white space around the center focal point. Today, it hit me ~ Free as a Bird.
I’ve seen so many cards on challenges and on Pinterest using a white on white base. The cards have always impressed me with their beautiful simplicity. I’ve tried it before, and always wind up going back to add texture through embossing on the background. Today, I pushed myself to leave it just white. I only added a Highland Heather outline to the popped up layer of Whisper White. This outline adds just a tiny bit of color, which added dimension. Just what I wanted.
For the Birds and the Flowers
The Free as a Bird bundle really saved me for this card. After stamping the birds, I cropped them using the Stitched Nested Label die set. My friend didn’t really want a “get well” card. I thought the “wishing you well” sentiment, from the retired Lasting Lily stamp set, would fit perfectly. Thankfully it did and doesn’t overpower the bird and flower stamp. I’ve used the Lasting Lily set twice within the past two weeks. Until two weeks ago, the stamp set had been unused.
I used Stamping Blends for all of the coloring. So Saffron blend combo and the light Soft Suede colors were used for the birds. I used a Soft Suede marker for the beaks.
After I used the Soft Suede blend combo for the branch, I decided I needed to do something to highlight the birds talons. Therefore, I using the bullet tip of a Basic Black Stampin’ Write marker to trace the talons. Now, the birds don’t look like they are standing on stumps.
Old Olive blends combo provided all the color I needed for the leaves. In order to follow the challenge sketch, I needed something on the top and bottom on the left. After playing around and dry-fitting, I decided on two fussy cut leave sets. I really had to play around with the leaves, and the fussy cut flowers, quite a bit. Finally, I settled on the finished design. The leaves provide the up and down movement I needed. The flowers added the items to cover the three stars in the challenge sketch.
Original Thoughts
Originally, I thought I would color the birds with the Purple Posy blend combo and use So Saffron on the flowers. I tried that on one bird, and didn’t like it at all. Therefore, I started over, restamped everything, recolored all the branches and leaves. Then, I colored the flowers using the Purple Posy blend combo. Ta-da! I wanted the purple to be a pop of color, and it worked. At least it worked in my humble opinion.
I added a piece of the Bird Ballad DSP to the envelope flap. I also stamped and colored a single flower on the front of the envelope, and this coordinated card set is complete.
Since I was done, I sent a picture of the card set to my friend, and he approved.
As always,
Thank you so very much for stopping by my blog today. I appreciate your the time you take to read, and comment, on my cards.
Have a Peachy Day!
Sue
Contemplating placing an order today? Of course you are, especially because the new Stamping Trimmer is now available! If you don’t already have a Stampin’ Up! demonstrator, I would be honored to work with you. Please contact me or visit my shop to order the supplies for this card.
If you are ordering $150 or more, please contact me first so you earn all the Stamping Rewards for your order.
If you are ordering less than $150, please use the host code, 49KJF94R when prompted. I use the combined rewards for gifts for customers.
Some MUST HAVE goodies ~~~
Paper Pumpkin ~ an all-inclusive kit delivered to you every month!
Contact me to subscribe, or order, January’s Paper Pumpkin kit! Doesn’t the floral design just scream “spring is coming”?
Supplies Used
Free as a Bird bundle, item # 151123 ~~~ 10% savings
This is my second card using this beautiful bundle consisting of the Free as a Bird stamp set and Stitched Nested Labels die set. You can see the first card here.
I always enjoy the Color Throwdown challenges, and sometimes they really are a challenge. After thinking about this one for a few days, all of a sudden it dawned on me what I would create.
Here’s the banner for CTD#599:
Here’s the card I created:
And here’s the inside:
When Inspiration Strikes
During one of the Pinterest browsing scrolling, a card I saw reminded me that I hadn’t used the double time technique lately. One thought led to another, and that’s when the whole card came together in my mind.
I used Very Vanilla/cream for the base, and the top label for the bird and the greeting.
After cropping the labels to the sizes I wanted, I lined them up and stamped the single and double flowers from the Free as a Bird stamp set. Then I carefully lined up the Calypso Coral layer on the Very Vanilla background and stamped another layer of the flowers. I had to very carefully line all three layers together to fill in the outlines for the stamps.
I now had the Calypso Coral color I needed, and added the Night of Navy as the base, Very Vanilla/Cream was covered with the background and the label. The only color I needed to incorporate was mustard. In order to accomplish a mustard looking color, I used the Crumb Cake and Daffodil Delight blends combos. I also used the Crushed Curry Stamping Write marker on top of the blends. The bird’s beak is Calypso Coral.
I colored the flowers by laying all the layers flat and used the Calypso Coral blends combo to color them. I used the Calypso Coral Stamping Write marker to add details to the center of the flowers.
Finishing Touches
Dimensionals pop up each layer of the labels, which I carefully realigned before adhering the layers together.
I really felt that something was needed to tie all the elements together. Therefore, I used my Night of Navy dark blend to color three of the largest Pearl Basic Jewels. Turns out that I am really, really pleased with the pop of Night of Navy jewels on the Very Vanilla background. I now had some weight with the colored flowers, and the added weight with the Night of Navy jewels. Those two elements dictated the general area where I needed to place the Calypso Coral pearl in order to create a triangle of the three elements, which is very pleasing to the eye.
As always, I finished with the envelope. I used a piece of the coordinating DSP for the envelope flap. Finally, I stamped and colored another bird on the bottom, right corner on the front of the envelope.
Ta-Da! Success
Thank you for stopping by today.
Have a Peachy day!
Sue
You Know You Want to…….
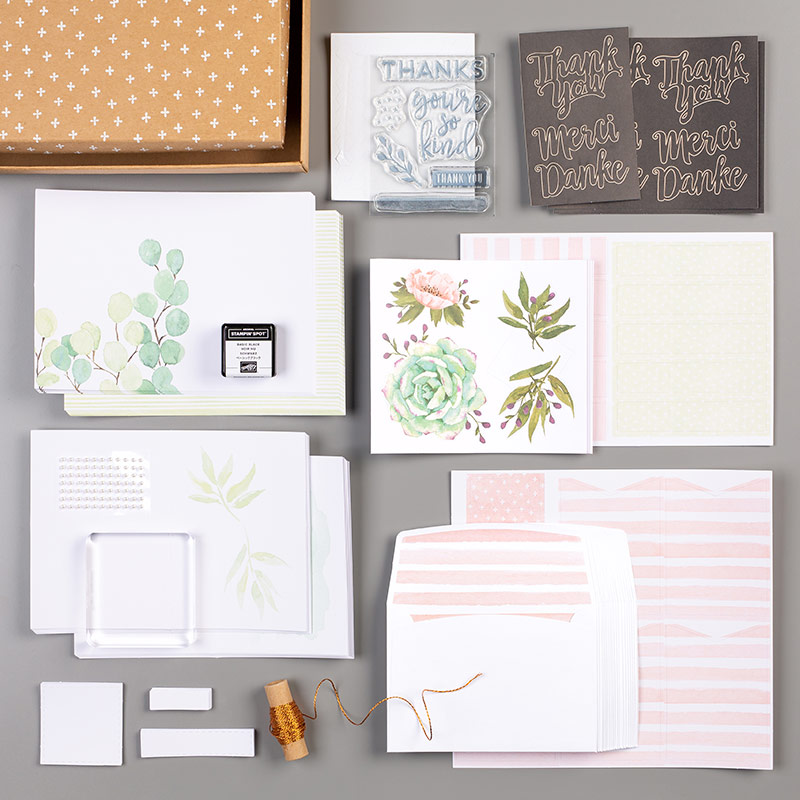
If you would like to order the bundle, stamp set, and/or punches, and live in the U.S., please use the icon above to be connected to my store. With just a few simple supplies, you, too, can create fabulous cards. I would be honored to help you do so. For example, check out this all-inclusive kit: Notes of Kindness Card Kit, item # 148266 ($35.00). The only thing you need to add is a Momento Tuxedo Black ink pad (item # 132708, $6.00) and some Tombow liquid adhesive (item # 110755, $4.00). One kit, 20 cards, 5 of each of 4 designs. Check it out!
HOST CODE
IF you are placing an order (you know you want to do so) over $150, please contact me so you can earn all the Host Rewards for which you are entitled. If your order is less than $150, please use YYX6FBEC for the host code.
Wednesday was a HUGE day for Stampin’ Up! Not only did the Holiday Catalog go live for customers, the Buy 3, get 1 Free DSP sale from the annual catalog starts! I already have my FOUR sets of DSP picked out! Get yours now!
To shop from the holiday catalog, available now, click on the image below:
This stamp set and the Stitched Nested Label Dies are gorgeous, and I’ve used it for these two challenges. I’ve also created a card with this set for another challenge, which will be posted tomorrow.
Jumping right in, let’s look at the challenge banners:
Here’s the inside and outside of the card I created:
Easy Peasy Card
The Freshly Made Sketches challenges just beg to have clean and simple cards created. Sometimes I have a real problem with that, but I did not today, and the Global Design Project sweet color combination just seemed to work with FMS.
My card really follows the sketch very closely. The smaller offset circle comes from the In Color 2019 – 2021 DSP for the Rococo Rose. The larger Mint Macaron circle comes from the Subtles DSP set. Both circles have been outlined with their respective inks by lightly rolling the circles in their respective colors. I decided to use Mint Macaron for the card base, topped by a layer of Whisper White, which I ran through the Subtle 3D folder. I know I have used it a lot already, but the texture allows the whole card to have much needed white space without it being bland. After I ran the white through the Big Shot, I outlined it using the Rococo Rose ink pad. I like the way the outlining creates a clean edge without adding bulk, so I tend to do it quite frequently.
Instead of using the triple leaf punch for this card, I chose to use sprig punch. I already had a scrap piece of Mint Macaron stamped with the dots in Mint Macaron, so that’s what I used.
Easy Peasy Coloring with the Stamping Blends
I judged the size of the Stitched Nested Label Die by the height of the bird stamp. She fits perfectly right inside this while allowing room for the simple sentiment, also from Free as a Bird. I colored her using the So Saffron and Crumb Cake blends combos. She is standing on a kind of sloppy patch created by the Mint Macaron blends combo. I like the on purpose sloppiness and think a solid patch of Mint Macaron would be too much ink for this clean card.
As I tend to do, I colored in the stitches in the ditch using the Rococo Rose marker and thought I was finished. Then I realized I wanted just a hint of So Saffron outlining the label, so I gently tapped each side into the ink pad.
Time to Assemble
Assembly was easy peasy. Everything is glued down using the Tombow liquid adhesive except the label, which sits on dimensionals for depth.
I wanted to add just a little something something, and I remembered I have the In Color Faceted Dots. Three of those for across the top, and I really wanted to add something down in the right corner of the label. Thankfully, I had a Mint Macaron Faceted Dot from the Share What You Love suite.
The card was then mounted on a white card base. I wanted a sentiment on the inside, but did not want it just floating in space. Therefore, I stamped another bird in So Saffron and then stamped the sentiment in the Momento Tuxedo Black, which is what I used to stamp the bird on the front.
Finishing Touches
As always, I finished by decorating the envelope. I used a piece of the Rococo Rose DSP for the envelope flap. Then, I stamped and colored a bird on the lower, left corner of the front of the envelope. With that, I was done.
Thank you for stopping by today.
Have a Peachy day!
Sue
You Know You Want to…….
If you would like to order the bundle, stamp set, and/or punches, and live in the U.S., please use the icon above to be connected to my store. With just a few simple supplies, you, too, can create fabulous cards. I would be honored to help you do so. For example, check out this all-inclusive kit: Notes of Kindness Card Kit, item # 148266 ($35.00). The only thing you need to add is a Momento Tuxedo Black ink pad (item # 132708, $6.00) and some Tombow liquid adhesive (item # 110755, $4.00). One kit, 20 cards, 5 of each of 4 designs. Check it out!
HOST CODE
IF you are placing an order (you know you want to do so) over $150, please contact me so you can earn all the Host Rewards for which you are entitled. If your order is less than $150, please use YYX6FBEC for the host code.
Wednesday was a HUGE day for Stampin’ Up! Not only did the Holiday Catalog go live for customers, the Buy 3, get 1 Free DSP sale from the annual catalog starts! I already have my FOUR sets of DSP picked out! Get yours now!
To shop from the holiday catalog, available now, click on the image below:
In just a few hours, 12:01 am MT, the Clearance Rack will be loaded with retiring stamp sets. Stamps sets….on clearance? Yes, please!
On the 27th, at 10 am MT, the trimmer blades will be available until supplies run out. How many orders will you be placing to be able to get groups of 3 trimmer blades?
If you are desperately searching for
Magnolia Lane DSP is Beautiful!
As a demo with a great hobby, I need to really plan out my purchases, so I’ve only gotten the Magnolia Lane DSP and the Magnolia 3D embossing folder. I used two different patterns of the DSP with a debossed magnolia flower for the focal portion of this card.
Here’s my card:
And here’s the sketch:
As you can see, I was very literal about using the sketch for inspiration. I wound up using the debossed side of the magnolia, but I thought it needed something to make it stand out. I didn’t want to add color, so I wound up using the clear Wink of Stella to highlight each of the debossed sections. While I feel semi-satisfied, my husband likes the card, so I am leaving it alone.
Putting It ALL Together
I really gave my trimmer a workout for this challenge. I kept trimming and trimming until I got a layout with which I was happy.
My next challenge was the greeting. I knew that I wanted to leave the white space at the bottom, but I also needed a sentiment. This one, from Free as a Bird, fit the space and seemed to have a balancing effect. After I create a simple banner, I stamped it, outlined the banner using the Petal Pink marker, then popped the whole thing up on dimensionals.
Dimensionals also pop up the darker magnolia circle, which I cropped using the Stitched Shapes die set. I used the Layering Circles die set, which provided the mat for the magnolia.
I really enjoy sketch challenges because of the given layout for inspiration. However, it’s always interesting to see how many different variations of cards are posted to the individual challenges each week.
Thanks so much for stopping by today.
Have a Peachy day!
Sue
About Me
Welcome to Just Peachy Stamping by Sue Jackson: an independent Stampin' Up demonstrator.
Through Stampin' Up!, I happily share my love of papercrafting through sales, classes, small stamping group meet-ups and workshops. I think that being a teacher in my "real life", I have a unique approach to sharing my fantastic hobby. I look forward to connecting with you!