Hello, and welcome to my card for the Color Throwdown Challenge # 698. I missed the deadline for the layout, CASe’d from the Try Stampin on Tuesday #560 challenge while I was at our annual family beach week.
Here’s my all-occasion card:
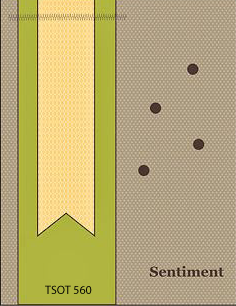
Here are the challenge banners from which I drew my inspiration:
I used Poppy Parade, Petal Pink, Crushed Curry, and Old Olive to play along with the #ctd698 challenge.
What I Did:
For this short and sweet blog post, here’s how I put it together:
The Poppy Parade base measures 8-1/2 by 5-1/2 inches, scored at 4-1/4 inches.
I already had an embossed piece of white cardstock. All I had to do was trim it down to 4-1/8 by 5-3/8 inches.
All three DSP patterns come from the Flowering Fields DSP, which retires on June 30,2022 at midnight. It’s a gorgeous DSP pack and well worth looking at it in the January – June mini-catalog on page 15. It’s actually on sale for $8.05. Here’s a look at this gorgeous paper:
The background DSP measures 4 by 5-1/4 inches. In order to have this DSP pop off the white embossed background, I used the Poppy Parade Stamping Write Marker to outline it.
The Old Olive checked DSP strip measures 5-1/4 by 1-3/4 inches.
The tulip banner measures 1-5/8 inches wide.
The sentiment comes from the Special Moments stamp set. I stamped it in black and quickly added clear embossing powder to the wet ink. Then, I heat embossed it using my heat tool. I didn’t want to cover any of the DSP and I thought the heat embossing would help the sentiment stand out.
I used multipurpose liquid glue to adhere the layers, except for the banner. That’s popped up on dimensionals.
Finally, I added five Crushed Curry dots to the front surrounding the sentiment.
That’s it. Actually, working out the measurements took longer than putting the card together.
Without further ado, I need to get this post closed out and published so I make the ctd#698 deadline. Come back tomorrow morning to check out my four-fer card using the Sale-a-Bration Hippest Hippos stamps and dies!
I think it’s completely obvious that I am completely obsessed with the ladybug builder punch! My original plan for a card for the Paper Players Challenge #592 didn’t look anything like the final product.
Here’s my card:
Here’s the challenge banner:
You can see my other ladybug cards here, here,here, and here. I told you I am obsessed!
Short and Sweet:
The Evening Evergreen base measures 8-1/2 by 5-1/2 inches, scored at 4-1/4 inches to create a tent fold.
AFTER I ran the Soft Succulent cardstock through my cut and emboss machine using the brick 3D embossing folder, I trimmed it to 4-1/8 inches by 5-3/8 inches.
I wanted the brick texture to stand out so I used a blending brush and Evening Evergreen ink. After tapping the brush in the ink, I tapped it off on a piece of scrap paper because I wanted a dry-brush look. In order to highlight just the raised texture, I brushed on the diagonal. It took a few layers of ink, but it was much better to have a light hand to achieve the look I wanted.
I wrapped a length of Evening Evergreen ribbon around the cardstock and tied it in a square knot.
Next, I used a scrap of the Flowering Fields DSP (designer series paper) and cropped two circles using the new Stylish Shapes die set. If you loved the now retired Stitched Shapes die set, you will LOVE this set. Put it high on your wish list!
Then I started on my bee. I punched a black body and two vellum cardstock wings using the ladybug punch. I cut one set of wings in half and turned them over to create the top set of wings on this bee.
Every bee has to have a stinger and I cut a tiny corner piece of DSP to make this one.
I trimmed the strips of DSP to 1/8 inch wide for the stripes on the bee.
Finally, I added three black matte dots to the wings to cover my adhesive.
Finishing Up:
I stamped the sentiment using Early Evergreen ink and trimmed it down to size. Then, I added a very thin mat of Early Evergreen cardstock for a mat.
I used dimensionals under the sentiment and the bee. My favorite adhesive, multipurpose liquid glue, took care of the rest of the pieces.
I trimmed a piece of Early Evergreen DSP to 2-1/ by 6 inches for the envelope flap. Then, I punched a 1 inch circle from the Flowering Fields DSP for the envelope seal and ran it through my XYRON create-a-sticker.
With that, I’d finished this coordinated card, envelope, and envelope seal set.
Thank you very much for stopping by my blog today!
Welcome to the newest Make My Monday challenge! Caz chose the theme of springtime for challenge #174. When you finish here, I hope you will pop over to the challenge site and be inspired by the projects created by the rest of the design team. I’m always blown away by the talent these wonderful ladies present for each and every challenge.
Yesterday was Mother’s Day in the U.S., and I am sharing my card for my mom. I went with clean and simple with a gorgeous color combination of Poppy Parade, Pool Party, and white. At first, I wasn’t sold on the Flowering Fields DSP (designer series paper). However, I’m now in love and am going to be ordering this DSP quickly before it goes away when the mini-catalog sales period ends. I can see myself using this color combination over and over in the next few months. The DSP does all the work on this card.
Here’s my card:
Measurements and Such:
I started with a Poppy Parade base measuring 4-1/4 inches by 11 inches, and scored it at 5-1/2 inches.
The white cardstock layer on the outside measures 4-1/8 inches by 5-3/8 inches. I cropped the sentiment from the center of that cardstock since no one will see the ugly center.
I started with a 4 inch by 5-1/4 inch piece of white cardstock for the inside panel as well. Then I used the scalloped die from the Scalloped Contour dies. I did eyeball the placement of the die so it would be relatively even on both ends.
The Flowering Fields DSP on the front measures 4 inches by 5-1/4 inches. I outlined the DSP with the brush end of my Poppy Parade marker.
Next, I trimmed a piece of coordinating DSP from the Flowering Fields papers to 6 inches by 2-1/2 inches for the envelope flap. I used the same DSP for the inside of the card. That piece measures 5-1/4 inches by 1-1/2 inches.
This Poppy Parade ribbon is too thick, for the lack of a better word, for a bow. However, it works beautifully for a square knot.
The outside sentiment comes from the Strong and Beautiful stamp set. I used a sentiment from In Your Words for the inside. Even though it’s probably a birthday sentiment, it works for Mother’s Day as well.
I used a piece of leftover Pool Party cardstock for the mat of the outside sentiment.
Using my dark Pool Party blend, I colored three basic pearls to match the color combination.
Finally, I trimmed the DSP on the envelope flap, punched a 1 inch circle and ran it through my XYRON create-a-sticker for the envelope seal. With that, this coordinated card, envelope, and seal set was complete.
Thank you very much for stopping by my blog today!
I’m so happy that a number of items carried over into this catalog. However, I’m even happier with so many of the new products!
But wait, there’s more:
Along with the new catalog, there’s a really fabulous joining bonus! As always, your starter kit is just $99 for $125 of your choice of products. The bonus? Over $66 of the new 2022 – 2024 In Color supplies! You get the following at no extra cost to you:
In Color Ink Pad Collection
In Color Grid Paper
In Color Cardstock Collection
In Color Designer Series Paper Assortments
I’d love to have you join my team! Contact me at justpeachystamping@gmail.com
Do you live in the U.S. and need a demonstrator? If so, I’d love to talk to you!
Do You Want to Place an Order?
Of course you do!
If you are ordering less than $150.00, please use the host code shown. If you are ordering more than $150.00, please contact me first so you can get your stamping rewards! Any order over $50 will earn a little surprise from me.
The HOST CODE through May 31, 2022 is E3W722BD.
Again, thank you for stopping by my blog today! I appreciate your comments and your time.
About Me
Welcome to Just Peachy Stamping by Sue Jackson: an independent Stampin' Up demonstrator.
Through Stampin' Up!, I happily share my love of papercrafting through sales, classes, small stamping group meet-ups and workshops. I think that being a teacher in my "real life", I have a unique approach to sharing my fantastic hobby. I look forward to connecting with you!