Welcome back to the first Make My Monday for 2024! I’m hosting this challenge and chose Happy New Year as the theme for challenge #216. When you finish here, I hope you will visit the challenge site to see the creations from the rest of the design team.
Here’s my card:
This double z-fold card uses DSP (designer series paper) that retired on New Year’s Eve. However, the colors, Lost Lagoon, Pebbled Path, and white cardstock are all available.
I used the nested essentials die set for the sentiment and number hexagon shapes.
Measurements for a Double Z-Fold card:
The base measures 5-1/2 by 11 inches, scored at 2-1/8 and 4-1/4 inches.
The smaller z-fold piece measures 1-1/2 by 11 inches, scored at 4-1/4 and 6-1/8 inches.
Remember, that the 4-1/4 inch long piece gets adhered to the panel on the very front. The shorter piece gets adhered to the inside of the base.
I used the Alphabet a-la mode dies for the numbers. I did want the numbers to have more sturdiness to them than just a single piece of DSP. Therefore, I cropped 4 sets of the numbers and very, very carefully adhered them together.
The DSP for the front measures 2 by 5-3/8 inches.
The inside DSP measures 5-3/8 by 4-1/8 inches.
I used a piece of white cardstock for the inside piece that doesn’t show. This is where I wrote my note to my daughter and her boyfriend.
The DSP for the z-fold measures 4-1/8 by 1-3/8 inches. There are two pieces which measure 2 by 1-3/8 inches.
Welcome back to the bi-weekly Make My Monday challenge # 215. Our host for this time, Caz, chose Oh Christmas Tree or Christmas Forest for the theme. When you finish here, I hope you will visit the challenge site to see the projects created by the rest of the design team. We’d love to see your interpretations of our theme in our gallery!
Here are my cards:
I used two sheets of the One Horse Open Sleigh 6 x 6 inch DSP (designer series paper) after I found a video tutorial from Rachel Tessman of stamp your art out with Rachel. I watched the whole video first and absolutely fell in love with her cards!! Once I started, I just kept going and created 10 of the 16 cards I need for friends at work in one night. This card makes such an impact, and is just stamping, trimming, and scoring. My top card base is Real Red as is the ribbon and ink. The bottom card base is Mossy Meadow and ink. I used Pebbled Path jute twine, which is one of the colors in the DSP. The sentiments come from the Brightest Glow stamp set.
Rachel’s video is so easy to follow. I am so thankful that she put the measurements and supplies in a PDF. The link to her blog post is here, and you can find the PDF link on her blog.
Thank you for stopping by today!
Have a Peachy Day!
Sue
It’s time to sign up for your December Paper Pumpkin kit!
Send a wish to all your loved ones with the December Paper Pumpkin Kit! It comes with nine card fronts, three each of three designs, and nine coordinating envelopes. It has paper pieces detailed with gold foil, embellishments, an all-occasion stamp set, and an acetate box where you can store your finished cards! You can gift the kit itself or the finished product in the acetate box; either way, it’s the perfect last minute gift for any occasion.
If you live in the U.S. and don’t already have a Stampin’ UP! demo from whom you order, I would be honored to work with you.
When prompted, please enter the following HOST CODE:
Welcome back to another bi-weekly Make My Monday challenge! Our host for #214, Debbie, chose wreaths for the theme this week. When you finish here, I hope you will visit the challenge site to see the projects by each of the other design team members. We’d love to see your wreath creations in our gallery!
Here’s my fun fold wreath card:
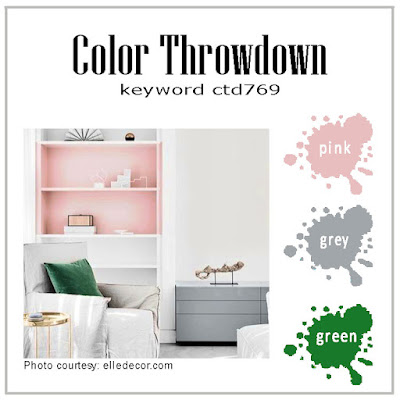
I realized that I don’t really have any stamp sets with Christmas wreaths, so I had to make my own. Once I knew this card was going to be a labor of love, I thought I needed to make it a fun fold to go all out. Full credit for this fun fold goes to Connie Stewart of Simply Simple Stamping. You can find her video here. I used the colors from the Color Throwdown 769 challenge, as shown below. I’m also entering it in the Creative Creases #70 challenge. The DSP, colors, and ribbon I used are retired, but I love the set and haven’t been able to bring myself to sell it.
Can I just say that I’m pretty stinking pleased that I “almost” figured out how to use columns in my post?
Measurements:
Follow the directions in Connie Stewart’s video (link above) to create the base of the card. I used Mint Macaron for the base.
The pink snowflake DSP (designer series paper) on the front measures 4-1/8 by 5-3/8 inches.
I also trimmed a piece of this DSP to 6 by 2-1/2 inches for the envelope flap. Then, I punched a 1-inch circle of coordinating DSP for the envelope seal, which I ran through my XYRON create-a-sticker.
The two pieces of white cardstock on the inside flaps each measure 4 by 5-1/4 inches.
Stamping, Coloring, & Cropping:
Front:
Thankfully, I used many scraps for all the holly & berry pieces, along with the trees on the inside.
First, I stamped more than 20 holly & berry pieces using Smoky Slate ink.
Then, I added clear Wink of Stella to all the flourish pieces.
Next, I colored them using the Mint Macaron blends combo and a Blushing Bride Stamping Write Marker.
Before cropping them all out, I outlined the berries and holly using a Smoky Slate marker.
For the base of the wreath, I used two of the Stylish Shapes circles and Mossy Meadow cardstock to create a ring.
Next, I wiped down a piece of white cardstock using my embossing buddy.
Stamp the sentiment using VersaMark ink and cover with silver embossing powder.
Heat set with your heat tool and crop using the inner Stylish Shapes circle.
Use some tear & tape to adhere the sentiment circle to the back of the Mossy Meadow ring.
Adhere the first layer of holly & berry pieces to the Mossy Meadow ring using multipurpose liquid glue.
Add the second layer of holly & berry pieces using mini-dimensionals.
Adhere the ring to the front of the card using liquid glue.
Create a bow using Mint Macaron ribbon and adhere with a mini glue dot.
Inside Panels:
Stamp the ornaments and inside sentiments using Smoky Slate ink.
I colored the ornaments with the Mint Macaron blends combo and Wink of Stella clear.
I stamped the last inside sentiment using Smoky Slate ink,
I cropped the trees from white cardstock. Then, I used a blending brush and Blushing Bride ink to lightly color the trees.
I had an “oops” when I stamped the sentiment, so I simply stamped it again and cropped it with a Stylish Shape circle.
I used liquid glue to adhere the trees, sentiment, and lone holly & berry piece on the inside panels.
Stamp the three lower trees using Mint Macaron ink. Add dots of Blushing Bride using a Stamping Write marker.
With that, I’d finished this labor of love coordinated card, envelope, and envelope seal set.
Welcome back to the Make My Monday biweekly challenge. Our host for challenge # 212, JoAnn B., chose Funny or Pun Sentiments for the theme. When you finish here, I hope you will visit the challenge site to see what the rest of the design team members created. We’d love to see your creations based on our theme, so please upload them to our gallery.
I didn’t really have pun sentiments, but I do have the Hey Chuck bundle, and the sentiments are kind of pun-ny, at least in my humble opinion.
Here’s my card:
If this layout looks extremely familiar, it’s because I’ve already used it twice. It’s from Try Stampin’ on Tuesday, and you can see my other cards using the layout here and here. Can you tell I am just pleased as punch with it?
The measurements are exactly the same as both of my previous posts. The DSP comes from the Sun Prints (retired) set. The base and dominant color is Starry Sky. It’s very difficult to see, but the whole rooster and the outline, as well as the outline of the circle are all outlined with Starry Sky marker and then I added clear Wink of Stella on them.
I used one of the online exclusive Basics Embossing folders for the background of the circle.
The fence pieces are stamped with Gray Granite on Gray Granite 6 x 6 inch DSP. I used them instead of ribbon on this version of the card.
The ink for the outside and inside sentiments is Starry Sky.
Thanks for stopping by today!
Have a Peachy Day!
Sue
Sorry for the much abbreviated post. My husband and I are both under-the-weather.
Welcome back to the Make My Monday bi-weekly challenge! Our host for # 211, Meg, chose autumn colors for the theme. One of the advantages of MMM is how open it is for individual interpretation. When you first see my tag, you might be asking yourself how pink and white relates to autumn colors. Here in the U.S., October is Breast Cancer Awareness Month, and the color for that cause is pink. I am in the process of making 40 of these tags for an event sponsored by the high school where I teach. The school mascot is a hornet, but this bee works, and the colors are black and gold.
Here’s a shot of 9 of the tags:
I kept the retired Honey Bee stamp and die set, and still have two packs of the DSP because it is black and gold. Last year, I made a couple of sets of tags for senior night for girls’ basketball and all the track and field seniors. Here’s a photo of one set of these:
Cropping, Stamping, and Assembling:
I used the Scalloped Contours die set for both the pink and white layers.
I used Momento Tuxedo Black ink to stamp the sentiment, from the Honey Bees stamp set, on the front of the white scalloped layer.
After using the embossing buddy, I stamped groups of 6 bees on pink cardstock using VeraMark ink. I found that trying to work with more than 6 bees at a time made a mess of the embossing powder.
After I covered the bees with black embossing powder, I set each group with my heat tool.
Then, I cropped all of the bees at once.
Since I had the black school color on the tag, I decided to add some gold as well. Therefore, I used a gold ink stamp pad and dragged the edges of the pink layer through the gold ink. Four sides through ink for 40 tags. However, it didn’t take as long as I thought, and I found that I could run three tags through the ink at once and still get the coverage I wanted.
I only used multipurpose liquid glue to attach the layers. These tags will have messages written on each of them, so I wanted to keep them as level as possible.
After adhering the white and pink layers, I punched a hole in the side of each.
Here’s a video showing the easiest way I’ve found to get ribbon wider than the hole threaded through:
That’s it. I hope you find some sort of inspiration from my unconventional autumn color tags.
Thanks for stopping by today.
Have a Peachy Day!
Sue
FREE SHIPPING!
72 Hours! October 9 – 11, 2023
If you live in the U.S. and don’t already have a SU! demo from whom you order, I would be honored to work with you.
Welcome to the Make My Monday challenge # 209. Our host for this challenge, Johanna, chose create your own background for the theme. When you finish here, please visit the challenge site to see the projects created by the rest of the design team. Our hope is that you will be inspired to play along and upload your project to the gallery. We can’t wait to see what you create!
I chose to create a Christmas card. Here’s my monochromatic project:
While the card is mainly Boho Blue, with touches of white, there is some sparkle thanks to Wink of Stella.
Measurements:
The Boho Blue base measures 11 by 4-1/4 inches, scored at 5-1/2 inches.
After I embossed another piece of Boho Blue cardstock using the Christmas Tidings embossing folder, I trimmed it to 4-1/8 by 5-3/8 inches.
The white cardstock for the inside measures 4 by 5-1/4 inches.
I used scrap white cardstock for the sentiment.
Finally, I trimmed a piece of Boho Blue 6 x 6 inch DSP to 6 by 2-1/2 inches for the envelope flap. I also punched a 1-inch circle for the envelope seal and then ran it through my XYRON create-a-sticker.
That’s it for the measurements.
What I Did:
After trimming the embossed Boho Blue cardstock, I outlined it using Wink of Stella.
Then, I very lightly swiped the Wink of Stella brush over the embossed cardstock. I held the brush parallel to the cardstock so that the swipes would be very light.
Even doing light swipes, I thought that there was too much shine. Therefore, I used Boho Blue ink and a blending brush to add ink over the shiny Wink of Stella. This also made the embossed piece pop off the Boho Blue base.
Since I didn’t have any Boho Blue twine, I took a length of jute and pulled the strands apart.
Then, I wrapped the twine around the embossed cardstock, and added some Elegant Essentials silver thread to the square knot.
I used a sentiment from the _____ set, and stamped it in Boho Blue ink.
I cropped the sentiment using one of the Nested Essentials dies, which can be found in the September – December mini-catalog.
Next, I added dimensionals to the back of the sentiment panel so it would straddle the jute.
Using three In Color Boho Blue enamel dots on the sentiment panel, I was able to hide a couple of small smudges of ink.
I also added dimensionals to the back of the embossed cardstock to allow for the width of the jute.
After stamping the inside sentiment in Boho Blue, I adhered it to base using multipurpose liquid glue.
With that, I’d finished this coordinated card, envelope, and envelope seal set.
You can download the following catalog, or find the link on the Stampin’ UP! website. Not surprisingly, some items have already gone on backorder. Now is the time to order your Halloween and some of your Autumn supplies.
Welcome to Just Peachy Stamping by Sue Jackson: an independent Stampin' Up demonstrator.
Through Stampin' Up!, I happily share my love of papercrafting through sales, classes, small stamping group meet-ups and workshops. I think that being a teacher in my "real life", I have a unique approach to sharing my fantastic hobby. I look forward to connecting with you!