Welcome to InKing Royalty’s October Blog Hop! During this year’s blog hops, we are having fun with our stamping favorites – our favorite themes for seasonal cards and projects. This month’s projects center around Harvest & Hope, so prepare yourself for gratitude and love in Fall-themed projects. We are excited to share our creations with you today! After you read my post, I hope you’ll hop over to the next person on the list at the base of this post.
Here’s my harvest card:
Let me explain how this is a “harvest” card to me.
My daughter moved to northern California a year ago July. Because of that pandemic that shall not be named (Harry Potter reference), I haven’t been able to go out there to see her. I finally went out last weekend for a long weekend. Living in northern California means wine country, and she’s right in the middle of it. It’s harvest season for the grapes, and the fields were in various stages of green turning to yellow, and it was so pretty! When I came home, I made this card keeping those sweeping views in mind.
The layout inspiration came from a card challenge I saw online. However, we all know what it’s like to get into a clicking pattern that goes on and on and on and on. Then, I closed the browser and have no idea where I saw the challenge. I do know that the challenge is no longer operating, but that really doesn’t help me now.
Measurements:
The Old Olive base measures 5-1/2 inches by 8-1/2 inches and scored at 4-1/4 inches to create a tent fold card.
I used coordinating DSP (designer Series Paper) from the Beauty of the Earth DSP pack. The wood background piece measures 4-1/8 inches by 5-3/8 inches.
I’m so pleased that there is a border print pattern in this pack! The border print DSP measures 5-3/8 inches by 1-1/2 inches. I had a scrap length of Bumblebee, so I trimmed it in half and cut it down to 5-3/8 inches. Then I trimmed it horizontally to fit on the top and bottom of the border print.
I used the layering circles die set to cut out the trees DSP and the scalloped Bumblebee circle bordering it.
The DSP for the banner at the top measures 1-3/4 inches wide. This measurement allowed me to use the triple banner punch to get the Bumblebee mat.
I used a coordinating DSP from Beauty of the Earth for the envelope flap. It measures 2-1/2 inches by 6 inches.
I used the one inch circle punch to punch out a piece of the border print. After I ran it through my XYRON create-a-sticker, I ad my envelope seal.
The white cardstock on the inside measures my usual of 5-1/4 inches by 4 inches.
What I Did:
I described a fair amount of the putting together process above, so I’ll just move on.
The sentiment stamp comes from the Sparkle of the Season stamp set, which is in the mini-catalog. I stamped it in Early Espresso on the right front of the border DSP.
Next, I wrapped linen thread around the border print DSP three times then tied a bow. I adhered this to the wood pattern DSP using the multipurpose liquid glue. The linen thread actually reminded me of the wire fencing to which the grapevines are attached in straight rows. It also helps to direct your eyes toward the sentiment going from left to right.
I used the Tombow multipurpose liquid glue, my favorite, to adhere the wood DSP pattern to the card base. I also used it to attach the border print DSP, the circle to the scalloped circle mat, and the banner to the banner mat.
Dimensionals pop up the circle focal element and the banner at the top of the page. I was careful to place the dimensionals on the circle so they would straddle the linen thread.
The Inside:
I trimmed the DSP to 1/2 inch by 5-3/8 inches for the bottom border of the inside white cardstock panel.
Next, I stamped the sentiment in Early Espresso. This stamp also comes from the Sparkle of the Season stamp set.
In that same stamp set is the twig and leaves stamp, and I used markers to color parts of the stamp. First, I used the Early Espresso marker to color over the wood twig parts and then stamped just the twigs. Next, I grabbed my Old Olive and Bumblebee markers for the leaves. I covered all the leaves in Bumblee. Then, I went back and just hit random spots with the Old Olive before stamping it on the twigs.
I was so stinking pleased with the result that I did the same thing on the bottom, left-hand corner of the front of the card.
With that, I finished this coordinated card/envelope./seal set.
Thank you for stopping by today. I hope you’ll hop along to the next stop on the blog hop, Pam Morris at Tap, Tap Stamp. There’s lots of inspiration to be found in this group – and you don’t want to miss it!
Thank you for hopping along with us. If you get stuck during the Blog Hop, please use this line-up as a guide:
Do you live in the U.S. and need a demonstrator? If so, I’d love to talk to you!
Do You Want to Place an Order?
Of course you do!
If you are ordering less than $150.00, please use the host code shown. If you are ordering more than $150.00, please contact me first so you can get your stamping rewards! Any order over $50 will earn a little surprise from me.
The HOST CODE through October 31, 2021 is HZH2AENJ.
Again, thank you for stopping by my blog today! I appreciate your comments and your time.
Welcome to October’s Sparkles Christmas Buddies challenge forum # 129. Helen chose Flora or Fauna for this month’s challenge theme. I hope you will visit the challenge blog to see all the cards by the design team. We would love to see your creations in our gallery!
For this challenge, I created a double-z fold card using the Peaceful Places DSP (designer series paper). You’ll only see my card here because I forgot about time differences and didn’t get my card up on the design team in a timely manner.
Here’s my card in the closed and open positions:
As soon as I saw this DSP in the current mini-catalog, I knew I just had to have it. The grey tones are gorgeous and the silver foil specialty DSP makes everything stand out. The only stamp set I needed to use was Perfectly Plaid because both of those beautiful sentiments are in one set.
Measurements:
The Basic Grey base measures 5-1/2 inches by 8-1/2 inches. In order to create the z-fold, the base gets scored at 4-1/4 inches and 2-1/8 inches. In other words, the back of the base is the same size as an A2 card. The front half of the card is folded in half.
The band which creates the double z-fold measures 1-1/2 inches by 8-1/2 inches. This piece also gets scored at 4-1/4 inches and 2-1/8 inches. However, this time, the long piece goes in the front. The folded half gets adhered to the back of the base.
Each of the DSP pieces for the folded front pieces measures 2 inches by 5-3/8 inches.
The DSP for the back panel measures 4-1/8 inches by 5-3/8 inches.
I used silver foil to mat the DSP on the band. This foil on the short pieces measures 1-1/4 inches by 1-7/8 inches. The foil on the long end measures 1-1/4 inches by 4-1/8 inches.
The long DSP panel for the front of the band measures 4 inches by 1-3/8 inches.. Then, I trimmed the DSP on the short ends to 1-3/8 inches by 1-1/8 inches.
I also trimmed a piece of DSP for the envelope flap to 2-1/2 inches by 6 inches.
I used scrap white cardstock for the front sentiment.
What I Did:
First, I used multipurpose liquid glue to attach each of the three panels to the base of the card.
Next, I adhered the silver foil and snowflake DSP to the front of the band, again using multipurpose liquid glue.
Then, I got to play with embossing powder and my heat tool. First, I used my embossing buddy to clean off the front of the cardstock and back panel of the DSP. I used my Stamparatus to stamp each sentiment using Versamark ink pad. Using the Stamparatus allowed me to stamp the Versamark multiple times without worrying about placement of the stamps.
Next, I covered both sentiments with silver embossing powder, tapped off the excess, then used my heat tool to set it. It’s beautiful, if I do say so myself.
After cropping the front sentiment using one of the stitched rectangle dies, I adhered it to the band with dimensionals.
Surprisingly, I easily made a double bow using silver thread. It’s adhered to the back of the card using multiple glue dots and a couple of dots of liquid glue.
Last, but definitely not least, I decided to add some bling using the subtle shimmer sequins from the same product suite as the DSP.
HINT: I’ve always struggled with adhering sequins, but I think I’ve finally figured it out. I put a couple of drops of liquid glue on my silicone mat. I used my opposable (or reverse) tweezers to pick up individual sequins and lightly dripped each in the liquid glue. Then I just randomly placed them on the trees and front band. If you haven’t used these tweezers before, I urge you to get them (here). They can act like a third hand and are well-worth the money.
After adhering and trimming the DSP to the envelope flap, I’d finished this coordinated card/envelope set.
Thanks so much for stopping by my blog today. I’d love to hear your thoughts on this card.
Do you live in the U.S. and need a demonstrator? If so, I’d love to talk to you!
Do You Want to Place an Order?
Of course you do!
If you are ordering less than $150.00, please use the host code shown. If you are ordering more than $150.00, please contact me first so you can get your stamping rewards! Any order over $50 will earn a little surprise from me.
The HOST CODE through October 31, 2021 is HZH2AENJ.
Again, thank you for stopping by my blog today! I appreciate your comments and your time.
Welcome to another Make My Monday Challenge challenge! Billie A. chose wet or dry embossing for challenge #158 . I hope you will pop over to the MMM blog to see what the rest of the design team created as well! I was both dry and wet embossing on my card:
Here’s my card:
I used two stamp sets for this card. The first set is the Biggest Wish for the sentiment panel. The second set, Textures and Frames, is a Sale-a-Bration FREE stamp set with a qualifying $50 order. Sale-a-Bration ends at midnight on September 30th, so time’s quickly slipping away!
This red, white, and blue card will be sent to a 2021 alum who is now at West Point Academy. The colors, Real Red, Night of Navy, and Basic White.
Measurements:
The Night of Navy card base measures 4-1/4 inches by 11 inches, scored at 5-1/2 inches to create a tent card.
The white cardstock panel measures 4-1/8 inches by 5-3/8 inches.
As usual, I trimmed a piece of white cardstock for the inside of the card to 4 inches by 5-1/4 inches.
I used a matted sentiment panel for contrast. The Night of Navy layer measures 1-1/2 inches by 5-1/2 inches. The Real Red mat for the sentiment measures 1-3/4 inches by 5-1/2 inches.
I used an old star punch for the stars. I actually already had a piece of scrap white cardstock dry embossed using the bark 3D embossing folder.
That’s it for the pieces.
What I Did:
I used the circle outline from Textures and Frames and randomly stamped the circles in Real Red. After cleaning the stamp, I did the same with Night of Navy.
This perfectly aligned sentiment panel could not have been as easy if I didn’t use the Stamparatus. I did have to make a practice panel with the two difference sentiments using ink and just a piece of scrap copy paper. After getting it worked out, I stamped the block “HELLO” using Versamark. The Stamparatus allowed me to step down two places and stamp again. I repeated that for the third block HELLO.
Next, I used the second acrylic panel with the previously aligned script hello greeting, again using Versamark.
Then, I used the white Stampin’ Embossing Powder for all five hellos. After tapping off the excess powder, I used my heat tool to set the embossing powder.
HINT: I use a small, stiff, angled make-up brush to very carefully remove some wayward powder specks. Recently, I found out that using the putty end of the Take Your Pick tool will also allow you to tap on wayward powder specks.
Next, I used multipurpose glue to adhere the sentiment panel to the Real Red mat. Multipurpose liquid glue also holds the Real Red mat to the stamped white cardstock.
Finally, I put dimensionals under the dry embossed stars and adhered them to the card.
Since I didn’t use any DSP, I stamped the same colors of circles on the envelope flap. With that, I’d completed this coordinated card/envelope set.
Thanks so much for stopping by my blog today. I’d love to hear your thoughts on this card.
The Mini-Catalog AND Sale-a-Bration are LIVE for THREE MORE DAYS, counting today!
What’s better than getting a delivery from Stampin’ Up!? Getting a delivery with FREE products inside the box! I have a box en route right now and am hoping it’s here as scheduled on Monday when I get home from work! Check out the FREE items from the Sale-a-Bration catalog!
Sale-a-Bration FREE items with a $50 purchase:
I’ve earned every $50 and $100 Sale-a-Bration item and have been happily using them! Which ones are your favorites? Let me show you how to earn them for FREE! But, you need to do so before the end of September!
Sale-a-Bration FREE items with a $100 purchase:
Do you live in the U.S. and need a demonstrator? If so, I’d love to talk to you!
Do You Want to Place an Order?
Of course you do!
If you are ordering less than $150.00, please use the host code shown. If you are ordering more than $150.00, please contact me first so you can get your stamping rewards! Any order over $50 will earn a little surprise from me.
The HOST CODE through September 30, 2021 is W3N4C22K.
Again, thank you for stopping by my blog today! I appreciate your comments and your time.
Welcome to another Cardz 4 Galz challenge! Caz chose Autumn/Fall Leaves for the theme 0f #156. I hope you will pop over to the C4Galz blog to see what the rest of the design team created as well! Since I haven’t seen an autumn since my youngest sister was in college, I used some creative license with the colors.
Here’s my card:
I used DSP from Harvest Meadow for the background of this card. There are three 1-3/4 inches squares trimmed from the cork specialty paper in the mini-catalog. The colors I used are Soft Succulent, Crumb Cake, and Evening Evergreen. I used the Pretty Pumpkins stamp set for the sentiment. The leaves are from the Gorgeous Leaves bundle of the stamp set and dies.
Measurements:
The Evening Evergreen base measures 8-1/2 inches by 5-1/2 inches, scored at 4-1/4 inches.
Next, I trimmed a piece of Crumb Cake cardstock to 4-1/4 inches by 5-3/8 inches. I added this layer mainly because I needed to tie in the cork and leaves to the rest of the card.
The Harvest Meadow DSP (designer series paper) measures 4 inches by 5-1/4 inches. While I was working with the DSP, I trimmed a piece to 6 inches by 2-1/2 inches for the envelope flap, which I adhered as soon as I trimmed it.
The three cork 1-3/4 inch squares help anchor the leaves and sentiment. The two outside squares are the cork. The middle square, which you can barely see, is the backside of the cork. I found this layout on a recent challenge, but it closed before this challenge started.
The white cardstock panel for the inside measures 4 inches by 5-1/4 inches.
What I Did:
I stamped the leaves on Crumb Cake scraps using Early Espresso. The maple leaf is the full ink stamp. I also stamped the smaller leaf in Early Espresso, but I stamped it off before doing so. I thought I needed to add more dimension to the smaller leaf. Therefore, I added an extra leaf directly on top of the first one.
The Soft Succulent vellum in the 2021 – 2023 In Colors can be found in the annual catalog on page 135. I used the open leaf die from the Gorgeous Leaves die set for the vellum. Somehow I didn’t think a sparkly leaf would work, so I used the back-side of the vellum without the shimmer. Very thin lines of multipurpose glue on the vellum allowed me to securely adhere the leave, even across the layers of cork.
I used large glue dots to adhere the maple leaf to the cork and vellum. The large glue dots provided some lift to the leaf without using dimensionals.
I did use dimensionals under the small leaf.
I stamped the sentiment from Pretty Pumpkins using Evening Evergreen ink on a scrap of white cardstock. After cropping it using the stitched rectangle die, I matted it on a scrap piece of Soft Succulent trimmed to size.
I wrapped the Evening Evergreen ribbon around the DSP and tied it in a square knot. In order to accommodate the ribbon, I used dimensionals under the sentiment.
Next, I added three of the Evening Evergreen In Color jewels to the front in a triangle pattern, which is pleasing to the eye.
To finish off the card, I stamped “Celebrate together” from the Create With Friends stamp set in Evening Evergreen on the white cardstock. As always, I adhered the inside panel using multipurpose glue.
Finishing Up:
Last, but definitely not least, I trimmed the DSP on the envelope flap. Then, I stamped a maple leaf and a stamped off smaller leaf on the bottom, left corner of the front of the envelope.
With that, I’d finished this coordinated card and envelope set.
Thanks so much for stopping by my blog today. I’d love to hear your thoughts on this card.
The Mini-Catalog AND Sale-a-Bration are LIVE for SEVEN MORE DAYS!
What’s better than getting a delivery from Stampin’ Up!? Getting a delivery with FREE products inside the box! I have a box en route right now and am hoping it’s here as scheduled on Monday when I get home from work! Check out the FREE items from the Sale-a-Bration catalog!
Sale-a-Bration FREE items with a $50 purchase:
I’ve earned every $50 and $100 Sale-a-Bration item and have been happily using them! Which ones are your favorites? Let me show you how to earn them for FREE! But, you need to do so before the end of September!
Sale-a-Bration FREE items with a $100 purchase:
Do you live in the U.S. and need a demonstrator? If so, I’d love to talk to you!
Do You Want to Place an Order?
Of course you do!
If you are ordering less than $150.00, please use the host code shown. If you are ordering more than $150.00, please contact me first so you can get your stamping rewards! Any order over $50 will earn a little surprise from me.
The HOST CODE through September 30, 2021 is W3N4C22K.
Again, thank you for stopping by my blog today! I appreciate your comments and your time.
Welcome to the Cardz 4 Galz challenge #152.Helen chose using dies &/or punches theme for the challenge starting today, July 29, 2021. I hope you will pop over to the challenge blog to see what the rest of the design team created as well. We all look forward to seeing what you create in our gallery! I used both dies and punches for my card.
Here’s my card:
Measurements:
The Crumb Cake base measures 8-1/2 by 5-1/2 inches, scored at 4-1/4 inches.
I used Calypso Coral as an accent color. The mat measures 4-1/8 by 5-3/8 inches.
I dry embossed the white cardstock layer before trimming it down to 4 inches by 5-1/4 inches. There’s a white panel for the inside that’s the same size as the outside white panel.
The Crumb Cake and Early Espresso cardstock elements are all from my scraps.
The faux suede ribbon wraps around the Calypso Coral mat and I tied it in a square knot.
Putting It Together:
I used multipurpose glue to attached the embossed white panel to the Calypso Coral mat.
All three sentiments are from the Nothing’s Better Than stamp set. I just love this set with the coordinating dies and haven’t used it nearly as often as I should. The sentiments and cookies are stamped in Early Espresso on Crumb Cake cardstock.
After stamping the cookies, I cropped them using the cookie die.
I’ve been using the foam adhesive sheets very frugally. However, I used it the way the directions describe. Therefore, I cut a piece of Early Espresso just a tad larger than the die. I placed the Early Espresso cardstock on top of one side of the adhesive sheet. Then, I cropped “cookies” with the coordinating die set.
The Classic Label punch retired when the 2021 – 2022 annual catalog went live. However, I thought it would be perfect over and under “cookies”.
Next, I trimmed the bottom sentiment to 2-7/8 inches by 1-1/8 inches.
Then I outlined all three sentiments using the Calypso Coral Stampin’ Right marker.
Finally, I randomly stamped cookies on the envelope flap and put one on the bottom left-hand corner on the front.
The sentiment on the inside of the card says “because adulting is hard”. I stamped three more cookies along the bottom of the inside white cardstock panel.
That’s it. While the card might look complicated, the coordinating stamp set and dies make it less complicated.
Thank you very much for stopping by my blog. I appreciate every visit and comment.
BEAUTY OF THE EARTH 12″ X 12″ (30.5 X 30.5 CM) DESIGNER SERIES PAPER
$11.50 USD | 15.75 $ CAD $9.78 USD | 13.39 $ CAD
155696
131
BLOOM WHERE YOU’RE PLANTED 12″ X 12″ (30.5 X 30.5 CM) DESIGNER SERIES PAPER
$11.50 USD | 15.75 $ CAD $9.78 USD | 13.39 $ CAD
155499
131
HAND-PENNED 12″ X 12″ (30.5 X 30.5 CM) DESIGNER SERIES PAPER
$11.50 USD | 15.75 $ CAD $9.78 USD | 13.39 $ CAD
152494
132
IN GOOD TASTE 12″ X 12″ (30.5 X 30.5 CM) DESIGNER SERIES PAPER
$21.00 USD | 29.00 $ CAD $17.85 USD | 24.65 $ CAD
155817
132
IN THE WILD 12″ X 12″ (30.5 X 30.5 CM) DESIGNER SERIES PAPER
$11.50 USD | 15.75 $ CAD $9.78 USD | 13.39 $ CAD
155807
132
PANSY PETALS 12″ X 12″ (30.5 X 30.5 CM) DESIGNER SERIES PAPER
$11.50 USD | 15.75 $ CAD $9.78 USD | 13.39 $ CAD
155605
133
SWEET SYMMETRY 12″ X 12″ (30.5 X 30.5 CM) DESIGNER SERIES PAPER
$11.50 USD | 15.75 $ CAD $9.78 USD | 13.39 $ CAD
155718
133
TIDINGS OF CHRISTMAS 6″ X 6″ (15.2 X 15.2 CM) DESIGNER SERIES PAPER
$11.50 USD | 15.75 $ CAD $9.78 USD | 13.39 $ CAD
155686
134
YOU’RE A PEACH 12″ X 12″ (30.5 X 30.5 CM) DESIGNER SERIES PAPER
$11.50 USD | 15.75 $ CAD $9.78 USD | 13.39 $ CAD
It’s Almost Time for the Mini-Catalog and Sale-a-Bration launch!
I can’t begin to tell you how excited I was to see the new Mini-Catalog and Sale-a-Bration catalogs! Both catalogs go live on Tuesday, August 3rd! While I can’t show you the inside pages YET, I can share a card I made for a future blog post!
How stinking cute are those sheep?!? The Counting Sheep stamp set is FREE with a $50 purchase. The Sheep die set, including all the cropped shapes on the front (with the exception of the stitched rectangle die for the sentiment) is also FREE with a $50 purchase. That means, for a $100 total purchase, you can earn the stamp set AND the die set. Score! Contact me to find out how! justpeachystamping@gmail.com
Do you live in the U.S. and need a demonstrator? If so, I’d love to talk to you!
Do You Want to Place an Order?
Of course you do!
If you are ordering less than $150.00, please use the host code shown. If you are ordering more than $150.00, please contact me first so you can get your stamping rewards! Any order over $50 will earn a little surprise from me.
The HOST CODE through July 30, 2021 is 2TJSU2RQ.
Again, thank you for stopping by my blog today! I appreciate your comments and your time.
Welcome to another Make My Monday Challenge! Dawn chose Anything Airborne for this two-week challenge. I hope you will pop over to the MMM blog to see what the rest of the design team created as well!
Here’s my card:
Over the past few weeks, I’ve realized that I have no dies for stars, and only a couple of airborne sets. I chose Sailing Home for this challenge because of the sentiment I used on the front: Set Sail in the Direction of Your Dreams. I made this card specifically for a former student who is halfway through bootcamp. He can’t get much in the mail, but I hope this card reminds him how proud I am of him.
After this challenge, I need to hide the Sailing Home stamp set, though. I posted a fun fold card using this stamp set for the design team for Cardz 4 Guyz about a week ago. You can see that card here.
What I Did:
The first thing I should say is that I actually mailed the card before writing this blog post. Not the best sequence of events I know, but I can give you basic information.
The Just Jade base measures 5-1/2 inches by 8-1/2 inches, scored at 4-1/4 inches.
The DSP on the front of the card measures 4-1/8 inches by 5-3/8 inches.
I cropped the frame and the white cardstock behind the frame using the stitched rectangle dies. The sentiment square was cropped using the Stitched Shapes die set.
I stamped the sentiment and the boat onto scrap white cardstock. Then, I used the Just Jade blends combo to color the various parts of the boat.
I really needed to make sure that I had some airborne birds on this card. There are three on the background behind the boat and three more on the sentiment block. I needed to mask off the individual birds in order to get them separated around the sentiment.
The white inside panel measures 4 inches by 5-1/4 inches. I also stamped a set of birds in the upper, right-hand corner of the inside.
Just to make sure I had myself covered, I stamped another set of birds on the bottom, left-hand corner of the envelope.
Thanks so much for stopping by my blog today!
I’d love to hear what you think, and greatly appreciate every comment.
BEAUTY OF THE EARTH 12″ X 12″ (30.5 X 30.5 CM) DESIGNER SERIES PAPER
$11.50 USD | 15.75 $ CAD $9.78 USD | 13.39 $ CAD
155696
131
BLOOM WHERE YOU’RE PLANTED 12″ X 12″ (30.5 X 30.5 CM) DESIGNER SERIES PAPER
$11.50 USD | 15.75 $ CAD $9.78 USD | 13.39 $ CAD
155499
131
HAND-PENNED 12″ X 12″ (30.5 X 30.5 CM) DESIGNER SERIES PAPER
$11.50 USD | 15.75 $ CAD $9.78 USD | 13.39 $ CAD
152494
132
IN GOOD TASTE 12″ X 12″ (30.5 X 30.5 CM) DESIGNER SERIES PAPER
$21.00 USD | 29.00 $ CAD $17.85 USD | 24.65 $ CAD
155817
132
IN THE WILD 12″ X 12″ (30.5 X 30.5 CM) DESIGNER SERIES PAPER
$11.50 USD | 15.75 $ CAD $9.78 USD | 13.39 $ CAD
155807
132
PANSY PETALS 12″ X 12″ (30.5 X 30.5 CM) DESIGNER SERIES PAPER
$11.50 USD | 15.75 $ CAD $9.78 USD | 13.39 $ CAD
155605
133
SWEET SYMMETRY 12″ X 12″ (30.5 X 30.5 CM) DESIGNER SERIES PAPER
$11.50 USD | 15.75 $ CAD $9.78 USD | 13.39 $ CAD
155718
133
TIDINGS OF CHRISTMAS 6″ X 6″ (15.2 X 15.2 CM) DESIGNER SERIES PAPER
$11.50 USD | 15.75 $ CAD $9.78 USD | 13.39 $ CAD
155686
134
YOU’RE A PEACH 12″ X 12″ (30.5 X 30.5 CM) DESIGNER SERIES PAPER
$11.50 USD | 15.75 $ CAD $9.78 USD | 13.39 $ CAD
What’s Your Favorite?
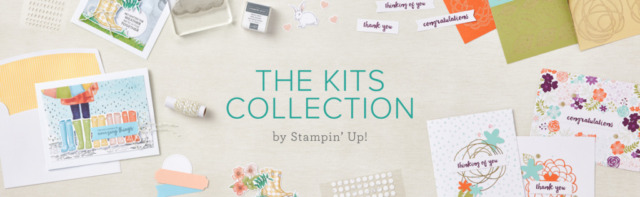
The KITS COLLECTION is still available as well!
Take a look at this video explaining what you get with your kit! Remember, the kits are all inclusive! Just add some of your own crafting basic tools, and you are good to go!
Do you live in the U.S. and need a demonstrator? If so, I’d love to talk to you!
Do You Want to Place an Order?
Of course you do!
If you are ordering less than $150.00, please use the host code shown. If you are ordering more than $150.00, please contact me first so you can get your stamping rewards! Any order over $50 will earn a little surprise from me.
The HOST CODE through June 30, 2021 is 26AD7SA3.
Again, thank you for stopping by my blog today! I appreciate your comments and your time.
Welcome to Just Peachy Stamping by Sue Jackson: an independent Stampin' Up demonstrator.
Through Stampin' Up!, I happily share my love of papercrafting through sales, classes, small stamping group meet-ups and workshops. I think that being a teacher in my "real life", I have a unique approach to sharing my fantastic hobby. I look forward to connecting with you!