Textures & Gears for the April Pals’ Blog Hop & the NBUS #85

Welcome to the Stampin’ Pretty Pals’ Blog Hop!

This month’s Stampin’ Pretty Pals Blog Hop is all about the Male Room theme—because the men in our lives deserve handmade cards too! Whether you’re creating for a dad, husband, son, grandson, brother, or friend, this hop is packed with ideas to help you craft something special. Today, the Pals are sharing male-themed card designs using Stampin’ Up! products, from bright and playful styles to classic looks and quick-and-easy layouts. If you’re looking for fresh inspiration (or just a good reason to dive into your craft room), you’re in the perfect place.
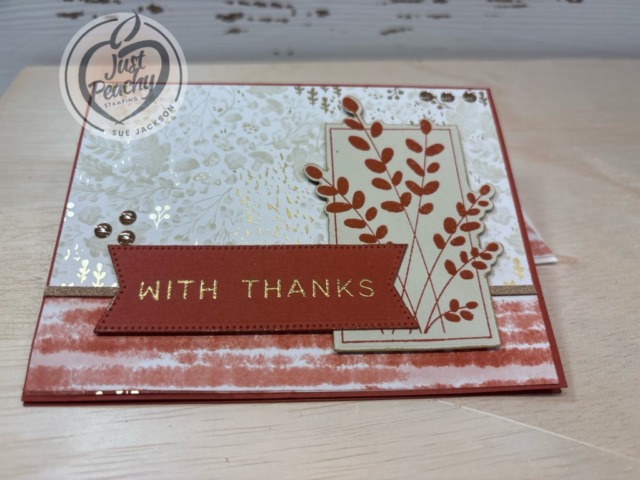
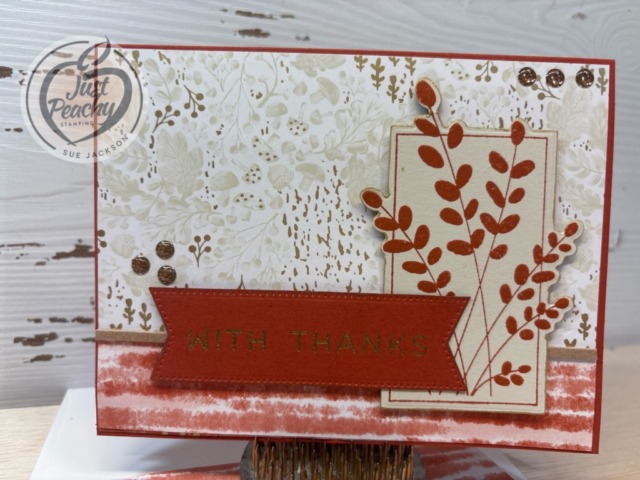
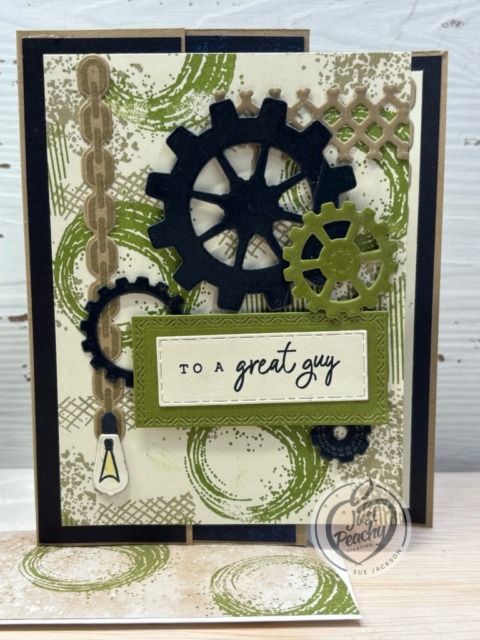
Here’s my card:

I’ve already posted two other 4-panel accordion fold cards. You can see those posts here, here and here. I am looking forward to making many more cards using fun fold since it’s quickly become one of my absolute favorite fun folds.

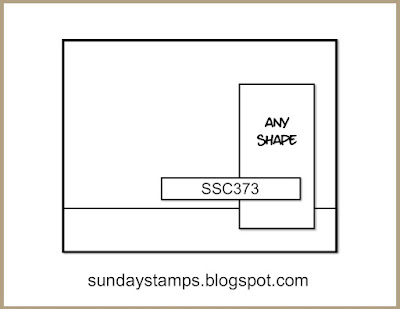
As always with a fun fold card, I will be adding this to the Creative Creases Challenge where the theme is always Anything Goes with a Fun Fold. I know I’ve already posted cards using this fold to Creative Creases, but it’s such an easy fold and it makes very good use of the 12 x 12 inch DSP (designer series paper).

I’ve been introduced to a new-to-me card challenge, the Never-Before-Used-Schtuff challenge. Since this is the first time I am using the Textures & Gears bundle, this card qualifies!

Measurements:

When trimming and scoring the DSP I wanted to use, I completely forgot that I needed to score on the opposite side of the DSP I wanted to use. Therefore, I used a piece of Crumb Cake cardstock and followed the template. Then, I trimmed the DSP to the appropriate measurements.

Here’s the template:

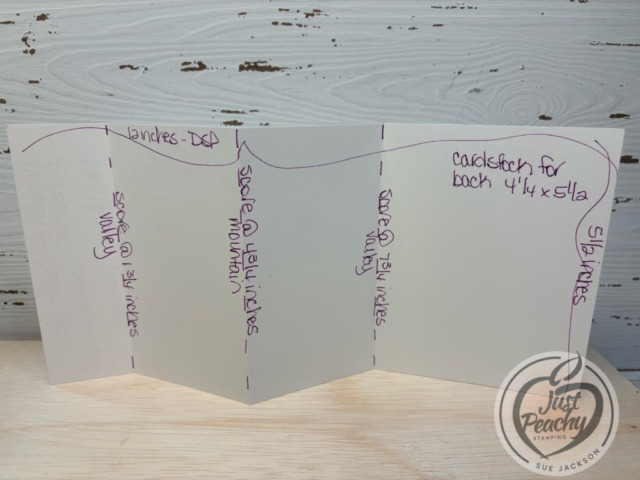
  • Trim the Secret Sea DSP to the following measurements:
    • 5-3/8 by 1-5/8 inches
    • 2 pieces at 5-3/8 by 2-7/8 inches
    • 5-3/8 by 4-1/8 inches
  • Trim two pieces of Very Vanilla cardstock to 4 by 5-1/4 inches, one for the front and one for the inside
    • I used the Textures & Gears stamp set and Crumb Cake and Granny Apple Green ink to create my own DSP
  • Trim a piece of Crumb Cake 6 x 6 inch DSP to 6 by 2-1/2 inches for the envelope flap
    • I stamped the Granny Apple Green circles on the Crumb Cake DSP
    • I love the way that turned out so I will be doing more of that for envelope flaps
  • Punch a 1-inch circle from the Secret Sea DSP and run it through your XYRON create-a-sticker for the envelope seal
  • I wanted shiny gears and lattice on the front of the card, so I added packing tape to pieces of cardstock before cropping the shapes
    • HINT: You will need to run the dies/cardstock through the Cut & Emboss machine two or three times
    • BIG HINT: Don’t try to crop out the gears through more than one layer of packing tape – trust me on this
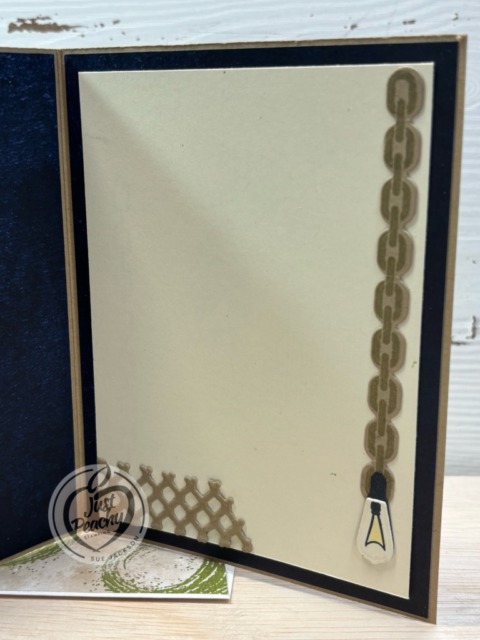
  • I cropped the chains for the inside and outside from Crumb Cake cardstock after stamping with the same ink
  • Stamp the Edison light on a scrap of Very Vanilla cardstock and crop using the die
  • Crop the background for the light from a scrap of Secret Sea cardstock

What I Did:

  • Unless otherwise noted, I used multipurpose liquid glue to adhere pieces together
  • Adhere the Secret Sea DSP to the Crumb Cake cardstock
  • Adhere the first flap of cardstock to the second flap (optional)
  • Stamp one piece of the Very Vanilla cardstock using Granny Apple Green and Crumb Cake ink
  • Crop the gears from the packing tape/cardstock layers
  • Adhere the lattice, chains & Edison lights, and smaller Secret Sea circles to the Very Vanilla cardstock
  • Add dimensionals to the large Secret Sea and the Granny Apple Green gears and adhere to the front
  • Stamp the sentiment, from the Nature’s Symphony in Secret Sea ink on Very Vanilla cardstock, and crop
  • Crop a piece of Granny Apple Green cardstock and adhere it to the sentiment banner
  • Add dimensionals to the Granny Apple Green layer and adhere to the front of the card
  • Adhere the completed Very Vanilla front to the base of the card
  • Adhere the inside Very Vanilla cardstock so that it matches up with the cardstock layer on the front
  • I didn’t stamp a sentiment on the inside yet since the outside sentiment can be used for many ocassions

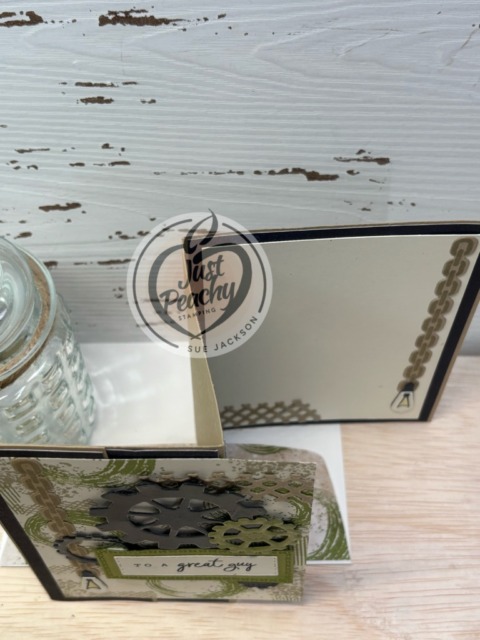
With that, I’d finished this coordinated card, envelope, and envelope seal set.

Back to the Pals’ Blog Hop:

Thanks so much for stopping by today! Keep the inspiration going! I hope my project inspired you to create something special for the guys in your life. Be sure to continue along the hop for even more Male Room inspiration from the Stampin’ Pretty Pals. Next month will be Flowers in Bloom, so mark your calendars!

Stampin’ Pretty Pals Blog Hop

  1. Su Mohr
  2. Windy Ellard
  3. Rae Burnet
  4. Peggy Noe
  5. Debbie Mageed
  6. Stesha Bloodhart
  7. Tricia Chuba
  8. Beth McCullough
  9. Lisa Ann Bernard

Thank you for stopping by today!

Have a Peachy Day!

Sue

Colors Used:

Supplies Used:

April Product of the Month!

The Eyelet Blooms Die:

Product detail

Give your card fronts and crafts a dainty touch with the Eyelet Blooms Die. Create delicate backgrounds with a hand-stitched look or layer pieces for a classic finish that works for any occasion. It’s eyelet magic for every card.

The Eyelet Blooms Die is the exclusive Product of the Month for April 2026! Only available until stock runs out—don’t wait to get yours!

DETAILS
– April 2026 Product of the Month
– 1 die
– Largest die: 4-3/8″ x 6″ (11.1 x 15.2 cm)
– Use with a Stampin’ Cut & Emboss Machine (sold separately)

PRODUCT OF THE MONTH
– Is a new exclusive product released each month!
– Can be unlocked for just $5 with orders over $75 (after discounts and rewards).
– Is only available while supplies last—they can sell out quickly!
– Is limited to one per customer (including language versions).

  • Last Chance Products include retiring products from both catalogs and online releases, excluding Paper Pumpkin.
  • Last Chance Products in this category are available while supplies last and will be discontinued when they sell out. Items will be automatically removed from the category and the online store when they are discontinued.
  • Discounts vary and are subject to change. Also, depending on inventory, these products may or may not have discounts.

Click here to see the LAST CHANCE PRODUCTS!

Remember, when they are gone, they are gone. Don’t let these deals slip away!

If you live in the U.S. and don’t already have a Stampin’ UP! demo from whom you order, I would be honored to work with you.

You can reach me at  justpeachystamping@gmail.com, and you can find me in the Find A Demonstrator index for Sue Jackson, Florida.

Just click on this link to be directed to my store 24/7.

Again, thank you for stopping by today!

Friendly Foliage for MMM #265 & SSC373

Welcome to the newest Make My Monday bi-weekly challenge #265. Our host, Pamela, chose Gratitude or Thankful for the theme. I used a piece of DSP (designer series paper) from the Gathering Together 12 x 12 inch DSP, which can be found in the online exclusives.

When you finish here, please visit the challenge site to see what the rest of the very talented design team members created. Then, don’t forget to upload your creations to our gallery. We look forward to seeing your creations there!

Here’s my card:

I needed to take the picture with the card almost laying down in order to have the gold embossed sentiment show up in the picture.

Here’s a look at the card standing up:

Here’s the Sunday Stamps sketch banner:

I’ve already posted a card using this sketch, which you can find here.

As I was enjoying all the cards entered into the MMM # 264 challenge, I came across Bonnie Lynn’s card and found a new-to-me challenge: Never-Before-Used-Schtuff! Since I’ve never used the Friendly Foliage bundle, I am going to be adding this card to that challenge. How fun!

Measurements:

  • Trim a piece of Cajun Craze cardstock to 8-1/2 by 5-1/2 inches, and score at 4-1/4 inches to create a tent card
  • Choose a background DSP and trim it to 4-1/8 by 5-3/8 inches
  • I used a strip of the Cajun Craze 6 x 6 inch DSP for the bottom, and I trimmed that piece to 1 by 5-3/8 inches
    • I find it easier to adhere strips like this over the bottom of the background DSP rather than try to fuss with measurements to create the size I need
  • Trim a piece of coordinating DSP to 1 by 5-3/8 inches for the bottom of the inside of the card
  • I trimmed a piece of the Cajun Craze DSP to 6 by 2-1/2 inches for the envelope flap
  • Then I punched a 1-inch circle of the background Gathering Together DSP and ran it through my XYRON create-a-sticker for the envelope seal
  • Trim a piece of Basic Beige cardstock to 4 by 5-1/4 inches for the inside of the card
  • I used scraps of Cajun Craze and Basic Beige cardstock for the foliage rectangle & sentiment banner on the front of the card

Another Quick Card:

Since I’d already created a card using the Sunday Stamps template, this card fell into place quickly.

  • I stamped the foliage from the Friendly Foliage stamp set using Cajun Craze ink on the Basic Beige cardstock
  • After wiping down a scrap of Cajun Craze cardstock with my embossing buddy, I stamped from last year’s September Paper Pumpkin kit in VersaMark ink
  • Then, I covered the ink with WOW! metallic embossing powder and heat set it with my heat tool
  • Next, I cropped the sentiment using one of the Stylish Shapes banners and the foliage with the coordinating Friendly Foliage die
  • Unless otherwise noted, I used multipurpose liquid glue to adhere pieces together
  • First, I adhered the background DSP, then added the striped Cajun Craze DSP to the bottom
    • HINT: I just barely missed lining up the striped DSP perfectly with the background DSP, so I used my Cajun Craze marker to add some color to the tiny piece of the background DSP showing on the bottom
  • I have some of the gold faux leather trim left, so I adhered it to the line where the two DSP patterns meet
  • In order to add more gold to the two cardstock pieces, I used my (almost dry) gold Wink of Stella brush to outline both the sentiment and the foliage, which created subtle gold edges
  • I added dimensionals to the back of the foliage box and the sentiment and added them to the front of the card, using liquid glue to adhere the overlapping sentiment banner
  • Once those pieces were adhered to the front, I finished the car with some (retired) ribboned enamel dots
  • I stamped the sentiment for the inside in Cajun Craze ink, added the strip of the Cajun Craze DSP to the bottom, and adhere the inside of the card
  • With that, I’d finished this coordinated card, envelope, and envelope seal set

Thank you for stopping by today!

Have a Peachy Day!

Sue

Colors Used:

Supplies Used:

Kits Make Crafting Simple, Fun, and Just Simply Fun!

Here’s a look at the two new kits available:

First, it’s the Everyday Beauty Kit, which retails for $25 USD.

Create the perfect card for any occasion using the all-inclusive Everyday Beauty Kit. This kit comes with everything you need to make three unique card designs: printed card bases and coordinating envelopes with lovely botanical patterns, precut paper pieces, timeless faux wax seals, shimmering metallic thread, and a versatile stamp set that you can use on countless other projects.

DETAILS
– Makes 9 cards: 3 each of 3 designs
– Folded card size: 5-1/2″ x 4-1/4″ (14 x 10.8 cm)
– Colors: Basic Beige, gold, Gray Granite, Lost Lagoon, Night of Navy, Petal Pink
– Also available in French

Kit includes one of each item listed below.
– Everyday Beauty Photopolymer Stamp Set
– Clear stamp block
– Night of Navy Classic Stampin’ Spot
– Step-by-step instructions
– 9 printed envelopes
– Faux wax seal stickers
– Metallic thread
– Adhesive

The second kit is the Adventure Awaits kit, which retails for $14 USD.

Let your creativity take the driver’s seat with the Adventure Awaits Kit. Coast in the retro colours and hand-drawn artwork that can be either feminine or masculine. With printed sentiments, precut paper, and vellum details, this kit comes with everything you need to make nine cute cards.

DETAILS
– Makes 9 cards: 3 each of 3 designs
– Folded card size: 5-1/2″ x 4-1/4″ (14 x 10.8 cm)
– Colors: Basic Black, Coastal Cabana, Crushed Curry, Garden Green, Granny Apple Green, Pecan Pie, Petal Pink, Poppy Parade, Pretty Peacock, Timid Tiger
– Sentiments printed in English, French, and German

Kit includes one of each item listed below.
– Step-by-step instructions
– 9 printed envelopes
– Vellum
– Adhesive

If you have any questions, or need a bit of a creative mojo boost, you can reach me at my justpeachystamping@gmail.com.

If you live in the U.S. and don’t already have a Stampin’ UP! demo from whom you order, I would be honored to work with you.

Just click on this link to be directed to my store 24/7.

Again, thank you for stopping by!