Welcome back for another MMM challenge. Here in Central Florida we had a few days of storms last week. Rainy days are perfect for reading or crafting, but I was working. However, I did create an April Showers card using the Under My Umbrella photopolymer stamp set and coordinating punch.
Here’s my card:
This Ornate Garden DSP retires in just a few short weeks, but I’ve really enjoyed using it throughout the year. Since January I’ve really come to love Terracotta Tile and Rococo Rose and will be sorry to see them go!
The clean and simple layout is from the Try Stamping on Tuesday #503 challenge, which ends on May 2nd, so you have time to play along with it and with this MMM challenge.
Measurements:
I used Terracotta Tile for the base, and it measures 4-1/4 inches by 11 inches, scored at 5-1/2 inches to create a tent fold.
The Pear Pizazz mat measures 4-1/8 inches by 5-3/8 inches. I did crop the oval shape for the sentiment panel from the center of this mat.
The floral Ornate Garden DSP is trimmed to 4 inches by 5-1/4 inches.
While I was trimming this floral DSP, I trimmed a piece for the envelope flap to 6 inches by 2-1/2 inches.
Next, I trimmed the Terracotta Tile cardstock to 2-1/4 inches by 5-1/4 inches. The Pear Pizazz DSP 2 inches by 5-1/4 inches.
I cropped the ovals from scraps of white for the sentiment using the Layered Ovals die set.
The white cardstock panel for the inside of the card measures my usual 5-1/4 inches by 4 inches.
Putting It Together
I picked a single color DSP from the Ornate Garden DSP for the umbrella and boots. Then, I stamped the umbrella and boots from the Rococo Rose DSP and punched the umbrella out.
I did stamp the boots on a scrap piece of white as well. After coloring in the soles and top rims of the boots, I fussy cut both of the boot pieces. I adhered the DSP boots to the white boots.
Since I was using a photopolymer stamp set, I was able to stamp the sentiment using the Momento Tuxedo Black after cropping the oval.
Even after outlining the white ovals with the Terracotta Tile Stamping Write Marker, I knew the top oval needed something more. Therefore, I used the raindrop stamp and stamped it randomly using VersaMark. Then I heat embossed the drops using clear stamping powder. These drops are very subtle, but do make a difference.
Here’s a close-up of the raindrops:
The only dimensionals I used are under the scalloped oval, the umbrella and the boots.
Since I created this card for my daughter, I used a sentiment from the Strong and Beautiful stamp set for the inside.
Finally, I adhered and trimmed the DSP on the envelope flap. I also punched a 1 inch DSP circle using the DSP from the umbrella and boots. I ran this circle and through the XYRON create-a-sticker to use to seal the envelope.
This card./envelope/seal coordinated set was finished!
Thank you so much for stopping by today.
I’d love to hear what you think, and greatly appreciate every comment.
It’s Almost Time for the 2021 – 2022 Annual Catalog!
So far, I’ve only gotten the new In-Color basic supplies. However, I will be putting in another pre-order. There are two suites at the top of my wish list, and as soon as I can order them, I will. There’s a sneak peak of the first suite on the cover of the 2021 – 2022 Annual Catalog:
That DSP is absolutely, stunningly gorgeous! I can not wait to order this on May 4th!
It’s a fabulous time to join Stampin’ Up! New team members get even MORE FREE products in their customizable Starter Kit. From 4–31 May, new team members can get $155 USD worth of products for only $99 USD + free business supplies + free shipping + all the fun being a part of Stampin’ Up!
Do you live in the U.S. and need a demonstrator? If so, I’d love to talk to you!
Do You Want to Place an Order?
Of course you do!
If you are ordering less than $150.00, please use the host code shown. If you are ordering more than $150.00, please contact me first so you can get your stamping rewards! Any order over $50 will earn a little surprise from me.
The HOST CODE for April is 6QMKRYXG.
Again, thank you for stopping by my blog today! I appreciate your comments and your time.
Welcome to this week’s Make My Monday challenge # 146! I’m the host for this week’s challenge, which is Checks or Plaid. I have DSP (Designer Series Paper) in both of this week’s patterns. However, for some reason I made it a bit more involved.
Here’s my card:
See what I mean about involved? I decided to make my own check pattern. Once I did the math, it really came together easily.
Here’s the outdoor theme challenge banner for Paper Craft Crew #421:
Measurements and Math
The card base measures 4-1/4 inches by 11 inches, scored at 5-1/2 inches to create a tent fold.
In my humble opinion, this set of DSP patterns look stunning on black backgrounds, so that’s what I did. The black mat measures 4-1/8 inches by 5-3/8 inches.
I used the Butterfly Bijou DSP, but once you have the dimensions of the boxes, any DSP will work. For my card, there I chose to have four columns and 5 rows. Since all the math stays the same, this could also be a landscape card.
The boxes each measure 1 inch by 15/16 inches. In my happy world, I find it easier to measure it out to 1 inch by 1 line before 1 inch on my paper trimmer. Either way, it comes out the same.
I started cutting the DSP to place it on the black mat from the bottom up. First, I cut a 1 inch strip, then started cutting the 15/16 inch pieces. I made sure that I kept the pieces in order so that I could match all of them up as I went. I found it much easier to adhere each row down as I cut it out. This process helped me keep the DSP pattern in order.
Since I had the DSP out, I cut a piece measuring 6 inches by 2-1/2 inches for the envelope flap. I’ve also found that I really need to adhere the envelope flap when I cut out the paper. If I don’t, then I tend to put the strip away with the DSP, which means I later start searching.
Adding the Rest of the Elements
Since I want to be able to add an inside sentiment when I am ready to send this card out, I wanted to keep the outside sentiment very generic. I think “Thinking of You” allows me to add a variety of sentiments from get well to just a hello card.
The sentiment from the front of the card is from the Good Morning Magnolia stamp set. I stamped it using the Momento Tuxedo Black stamp pad on white cardstock.
Next, I cropped the sentiment using the Stitched So Sweetly die set. The sentiment mat in Just Jade is also cropped using that die set. I outlined both pieces using my Basic Black Stampin’ Write Marker.
Next, I wrapped the Just Jade ribbon around the black base mat, and tied it in a little bow. I decided on a left-hand placement for the bow after dry-fitting the sentiment pieces on the front of the card.
I used large glue dots to adhere the Just Jade sentiment mat just for a bit of height, which made it easier for it to lay down over the ribbon.
The actual sentiment panel has dimensionals under it for more height.
Finally, I played around with the two butterflies to decide where they needed to live and used multipurpose glue and dimensions to adhere them down.
Finishing Up
After adhering a 5-1/4 inch by 4 inch white cardstock panel to the inside of the card, I trimmed the DSP on the envelope flap.
Finally, I punched a coordinating piece of DSP using my 1 inch circle punch. Then I ran that circle through my XYRON create-a-sticker machine. By creating a sticker, I can seal the envelope cleanly and germ-free.
With that, I’d finished this coordinating card/envelope/sticker seal set. I think it’s gorgeous, and am quite sure it will be going in the mail quickly.
Thank you so much for stopping by today.
I’d love to hear what you think, and greatly appreciate every comment.
So far, I’ve only gotten the new In-Color basic supplies. However, I will be putting in another pre-order. There are two suites at the top of my wish list, and as soon as I can order them, I will. There’s a sneak peak of the first suite on the cover of the 2021 – 2022 Annual Catalog:
That DSP is absolutely, stunningly gorgeous! I can not wait to order this on May 4th!
If you want to be able to take advantage of the pre-order period, let me know! You can join with an order of just $125 of supplies for $99. There’s no obligation, either!
Do you live in the U.S. and need a demonstrator? If so, I’d love to talk to you!
Do You Want to Place an Order?
Of course you do!
If you are ordering less than $150.00, please use the host code shown. If you are ordering more than $150.00, please contact me first so you can get your stamping rewards! Any order over $50 will earn a little surprise from me.
The HOST CODE for April is 6QMKRYXG.
Again, thank you for stopping by my blog today! I appreciate your comments and your time.
Welcome to another bi-weekly Make My Monday challenge! Wei picked the Clean and Simple theme for this challenge, and that means a lot of white space.
Here’s my card:
Measurements
I started with a Just Jade base trimmed to 5-1/2 inches by 8-1/2 inches, scored at 4-1/4 inches.
The black mat measures 4-1/8 inches by 5-3/8 inches. I cropped the Stitched Shapes middle circle out of this mat to save cardstock.
The white cardstock measures 4 inches by 5-1/4 inches, and I dry embossed it with the Petal Burst embossing folder. I thought that the shape of the petals on the embossing folder matched the shape of the black petal on the DSP.
I also cut a piece of white cardstock to 4 inches by 5-1/4 inches for the inside of the card.
Next, I cut two strips of the Flowers and Field DSP. The one for the card measures 2 inches by 4 inches. I trimmed the second one for the envelope flap, so it measures 2-1/2 inches by 6 inches.
I used scraps of white to punch out two of the large daisy punch flowers. Then, I used the blending brush with the Bumblebee ink pad to color the two stamps. I tried to get a darker color towards the center of the petals, but I don’t think it shows up well on the card.
As long as I had the blending brush and ink handy, I created a very light, loose circle of color right on the center of the inside panel. Then, I used another sentiment from Rooted in Nature for the inside panel.
While I’ve had the Rooted in Nature stamp set since it released a couple of years ago, I finally used the sentiment BE STRONG, BE HAPPY, BE YOU. After stamping it on a scrap of white, I trimmed between the lines of the sentiment for a lighter impact on the card. I thought a single sentiment block wouldn’t work with the CAS theme.
Finally, I cut a piece of Just Jade ribbons long enough to wrap around the white cardstock layer and tied it in a bow. I placed the ribbon so that it would form a border between the DSP and the white cardstock.
Putting It Together
I used multipurpose glue to adhere the black, white, and DSP layers together. I almost goofed, but remembered to tie the ribbon before adhering the white/DSP layer to the black cardstock. Multipurpose glue also adhered the interior panel to the inside of the card.
In order to get just enough height to clear the ribbon on the front, I used a couple of the 3/4 inch glue dots under the black Stitched Shape circle.
There are dimensionals under each layer of the daisy. I also used mini-dimensionals under the three sentiment strips.
After trimming down the DSP on the envelope flap, I’d finished this card/envelope coordinated set. I just love this DSP!
Thank you so much for stopping by today.
I’d love to hear what you think, and greatly appreciate every comment.
Just look at all that gorgeousness! The butterfly stamp is all one piece, as is the coordinating die. The die will also perfectly crop out butterflies on the coordinating DSP! No coloring needed, unless you want to do so.
Do you live in the U.S. and need a demonstrator? If so, I’d love to talk to you!
Do You Want to Place an Order?
Of course you do!
If you are ordering less than $150.00, please use the host code shown. If you are ordering more than $150.00, please contact me first so you can get your stamping rewards! Any order over $50 will earn a little surprise from me.
The HOST CODE for MARCH is 7EUAPNKA.
Again, thank you for stopping by my blog today! I appreciate your comments and your time.
Welcome, again, to another Make My Monday challenge. The theme for challenge #143 is masculine birthday. For this challenge, I created a pretty clean and simple card using the Soar Confidently stamp set, with a birthday sentiment from the Art Gallery stamp set.
Here’s my card:
While creating a masculine collage card would also completely work, I decided that this one would be very clean.
What I Did:
Not only is the card very clean, but the way I created this is very simple. Therefore, this card falls into the easy-peasy category.
Since I wanted to stay as neutral as possible, I used Early Espresso for the base of the card. I trimmed the cardstock to 5-1/2 inches by 8-1/2 inches, and scored at 4-1/4 inches.
I trimmed the Crumb Cake mat to 5-3/8 inches by 4-1/8 inches.
Next, I trimmed the In Good Taste DSP to 4 inches by 5-1/4 inches.
I also cut a piece of this DSP to 6 inches by 2-1/2 inches for the envelope flap.
The multipurpose glue adhered all these layers together.
I wanted to tie in the Crumb Cake and the Navy in the DSP. Therefore, I used the Night of Navy ink to stamp the hot air balloon onto Crumb Cake cardstock. Then I very carefully fussy cut the balloon out.
The Night of Navy ink made a bold statement on the white cardstock. Next, I trimmed the sentiment block using the Stitched Rectangles die.
The rule of threes for balance on the card told me that I needed to add something, which would also tie in the sentiment and the balloon so they don’t look like they just float on the card front. In order to have three elements on the front of the card, I grabbed the burlap ribbon and cut a piece to run vertically down the left side of the card.
I used glue dots to adhere the burlap ribbon. Dimensionals and mini-dimensionals gave the sentiment and hot air balloon some height.
There is a piece of white cardstock on the inside of the card, but I haven’t added a sentiment for it yet. I will wait until I know the recipient and will then add a personal note and sentiment.
After adhering and trimming the DSP to the envelope flap, I’d completed this card/envelope set.
Thank you so much for stopping by today.
I’d love to hear what you think, and greatly appreciate every comment.
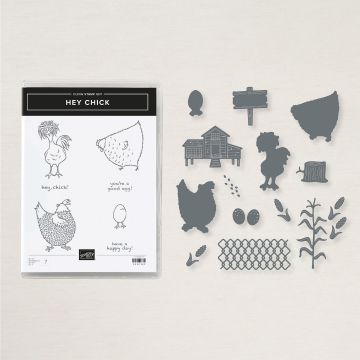
If you liked the “Hey, Chick” stamp set from two years ago, you are going to LOVE these bundles!
Happy Birthday Chick and Hey Chick stamp sets! Each stamp set has it’s own coordinating die set!
Do you live in the U.S. and need a demonstrator? If so, I’d love to talk to you!
Do You Want to Place an Order?
Of course you do!
If you are ordering less than $150.00, please use the host code shown. If you are ordering more than $150.00, please contact me first so you can get your stamping rewards! Any order over $50 will earn a little surprise from me.
The HOST CODE for FEBRUARY is 7EUAPNKA.
Again, thank you for stopping by my blog today! I appreciate your comments and your time.
The theme for MMM # 142 is Emergency Services. I don’t have anything specifically for first responders, so I got on Pinterest. I knew I wanted to create an eclipse card, and originally thought I’d use “1st”. Realistically I knew that wouldn’t work, and that’s as far as I got. So, I searched for “Stampin’ Up! first responder cards” and the first one on my results had been posted by JCapCards. Her trio of cards inspired me!
Here’s my card:
I used one of the sentiments from the Happy Thoughts cling stamp set. This sentiment seemed appropriate for the card.
Measurements
The card base measures 5-1/2 by 8-1/2 inches, scored at 4-1/4 inches to create a tent card.
I used two patterns from the In Good Taste DSP for the front of the card and envelope flap. The bottom mat of the Early Espresso wood grain DSP measures 5-1/2 by 4-1/4 inches. While I had it out, I also trimmed a piece to 6 inches by 2-1/2 inches for the envelope flap.
I trimmed the middle, Pool Party, layer to 4-1/8 by 5-3/8 inches.
Then I trimmed the top In Good Taste DSP to 4 by 5-1/4 inches.
Since I already had my trimmer out, I trimmed some white cardstock for the inside panel to 5-1/4 by 4 inches.
I used Early Espresso to stamp the sentiment on the front trying to get it as even as possible. Then, I stamped “Thank You” from the same stamp set on the white inside panel. My stamping for this card was done.
I used Early Espresso to stamp the sentiment on the front trying to get it as even as possible. Then, I stamped “Thank You” from the same stamp set on the white inside panel. My stamping for this card was done.
Assembly
I’ve learned some tricks along the way for creating eclipse cards, mainly because I’ve made quite a few of them. For example, I’ve found that it is much easier to align everything on the magnetic base and a cutting plate from the Big Shot. I also use a magnetic ruler so i know I have a straight line right from the start.
Washi tape helps tremendously to hold the letter dies in place while trying to get the correct spacing for the word.
I cropped the word “HERO” using the retired large letter dies, but any alphabet set of dies would work. The next step is to adhere the front DSP, less the letters, onto the Pool Party mat.
In the past, I’ve then spent a very long time trimming down dimensionals for the backs of each letter. Not any more! The Stampin’ Up adhesive sheets are fabulous for this technique! After I crop each letter, I use the dies to separately crop out each letter from the adhesive sheets. Next, carefully, very carefully, place the die cut DSP onto the die cut letter. Slow and steady is the key to getting this all lined up.
Then I adhered the letters onto the front of the card, and moved on to the inside of the “O” and “R”. I used the multipurpose liquid glue and my opposable tweezers to adhere the insides down. Again, slow and steady works here.
Since I’d finished the front, it was time to adhere my inner panel to the card. Finally, I adhered the DSP to the envelope flap and trimmed it down.
With that, I’d finished this card/envelope set.
Back to the InKing Royalty Blog Hop:
Thank you for stopping by today. I hope you’ll hop along to the next stop on the blog hop, Renae Novak at Blessed by Cards. There’s lots of inspiration to be found in this group – and you don’t want to miss it!
Thank you for hopping along with us. If you get stuck during the Blog Hop, please use this line-up as a guide:
Do you live in the U.S. and need a demonstrator? If so, I’d love to talk to you!
Do You Want to Place an Order?
Of course you do!
If you are ordering less than $150.00, please use the host code shown. If you are ordering more than $150.00, please contact me first so you can get your stamping rewards! Any order over $50 will earn a little surprise from me.
Welcome to another Make My Monday challenge! For this challenge, Meg chose shaped cards, not a square or rectangle. While my card looks complicated, it’s really not at all.
Here’s my card:
I found this fabulous card on Dawn Griffith’s Stampin Up YouTube channel. She gives credit to the demo from whom she got the idea. Dawn’s video is fabulous and completely step-by-step. It’s very easy to follow. I’m still practicing my video skills, and so far I haven’t had anything I would want to publish. However, aren’t we all our own worst critics? I often think about teenagers listening to me in class day after day and hearing my voice. I don’t know what I should think about that.
The most important thing you need to do when creating this card is to follow Dawn’s directions to make the template you are going to need. I used a piece of white cardstock that I had previously used to crop out a sentiment. Save your template! You can use it again and again. As a matter of fact, I already have enough trial and error pieces to create two more cards. They aren’t damaged pieces, I just decided to use the Playful Pets suite.
Here’s my template:
That’s All for Now, Fellow Crafters!
Thank you so much for stopping by today.
I’d love to hear what you think, and greatly appreciate every comment.
Do you live in the U.S. and need a demonstrator? If so, I’d love to talk to you!
Do You Want to Place an Order?
Of course you do!
If you are ordering less than $150.00, please use the host code shown. If you are ordering more than $150.00, please contact me first so you can get your stamping rewards! Any order over $50 will earn a little surprise from me.
Welcome to Just Peachy Stamping by Sue Jackson: an independent Stampin' Up demonstrator.
Through Stampin' Up!, I happily share my love of papercrafting through sales, classes, small stamping group meet-ups and workshops. I think that being a teacher in my "real life", I have a unique approach to sharing my fantastic hobby. I look forward to connecting with you!