Welcome to the Make My Monday challenge #155. Mary V. chose a n Anything But a Card theme for the challenge starting today, August 16, 2021. I hope you will pop over to the challenge blog to see what the rest of the design team created as well. We all look forward to seeing what you create in our gallery!
My great-niece just had her 5th mermaid themed birthday party. I made 16 mermaid thank you tags and a matching birthday card.
Here’s one of my tags:
Here’s the coordinating card:
Both of these projects were inspired by fellow Pal, Tricia Chuba Neild.
What I Did:
Sadly, I gave the tags to my niece before I measured anything or even took pictures. I can tell you that the size of the Balmy Blue tag was based on the height of the second largest Stitched with Whimsy die. I adjusted the width so that I would have more of a tag size.
The mermaid tail started out with a piece of white cardstock. I used one of the Adorning Designs Decorative Masks and a blending brush. First, I used the blending brush and Magenta Madness ink with the mask. Then, I used the blending brush to lightly swirl Magenta Madness over the whole area. This process took the longest and I used 3 pieces of white cardstock for the 16 tails. I did have a hand-drawn template for the tail, and then I needed to do quite a bit of fussy cutting.
The Highland Heather “shell” comes from the In Symmetry stamp set. Thankfully there’s a die in the In Symmetry bundle for this “shell” so I didn’t have to fussy cut them.
The seaweed in the background of the tag is from a Smooth Sailing die in Soft Seafoam and Granny Apple Green.
After adhering all the layers down with multipurpose glue, I used the Label Me Fancy punch to punch out the space for the Gorgeous Grape ribbon.
Finally, I stamped the sentiment, again from In Symmetry, in Gorgeous Grape on white cardstock. Then, I just used one of the (retired) Stitched Shapes oval dies. The only dimensionals used on the tags are under the sentiment.
HINT: When mass-producing projects, it is much easier to create one element at a time. When you have individual piles of elements, assembly takes much less time.
Thanks so much for stopping by my blog today. I’d love to hear your thoughts on this card.
One of my favorite bundles and coordinating Sale-a-Bration DSP:
156789
PENGUIN PLACE BUNDLE (ENGLISH)
BUNDLED SAVINGS
$31.50
158420
PENGUIN PLAYMATES 12″ X 12″ (30.5 X 30.5 CM) DESIGNER SERIES PAPER
SALE-A-BRATION
FREE
Do you live in the U.S. and need a demonstrator? If so, I’d love to talk to you!
Do You Want to Place an Order?
Of course you do!
If you are ordering less than $150.00, please use the host code shown. If you are ordering more than $150.00, please contact me first so you can get your stamping rewards! Any order over $50 will earn a little surprise from me.
The HOST CODE through August 31, 2021 is CJQW69XN.
Again, thank you for stopping by my blog today! I appreciate your comments and your time.
Welcome to the Make My Monday challenge #154. Wei chose a slimline theme for the challenge starting today, August 2, 2021. I hope you will pop over to the challenge blog to see what the rest of the design team created as well. We all look forward to seeing what you create in our gallery!
Here’s my card:
Before I begin, I need to let you know that this blog post will be very short, but hopefully sweet. As I’ve said before, I live in Central Florida, about halfway between Orlando and Daytona Beach. We have been having heat index temperatures between 98-102 for quite a while. Saturday our air conditioning went out and my blue room, aka craft studio, is already the warmest room in the house. I feel like the Wicked Witch in that I am melting. So, short and sweet, I hope.
Measurements:
The Pear Pizazz base measures 9 inches by 8 inches, scored at 4 inches to create a tent card.
The white cardstock on the front of the card measures 3-7/8 inches by 8-7/8 inches.
The white cardstock for the inside panel measures 3-3/4 inches by 8-3/4 inches.
Everything else on the front of the card comes from scraps.
One day I need to explain how I keep my scraps. I always say I am using scraps, but without an explanation of how they are stored, it might not make sense.
What I Did:
I colored the white cardstock for the front using my blending brushes. Balmy Blue provides a nice color for the sky and lets the white clouds pop. I used Pear Pizazz for the grassy area.
Everything else, right down to the grass stamp, comes from the Sale-a-Bration catalog! You know what that means: FREE STUFF with a qualifying purchase.
The Counting Sheep stamp set is FREE with a $50 purchase, and the Sheep Dies are FREE with a $50 purchase. So, with a $100 purchase, you get the stamp set and dies FREE. FREE is good!
Since sheep are not always pure white, I used a blending brush and smoky slate ink to give all three sheep some color. The stamping blends made coloring their legs, ears, and faces a breeze.
Their adorable little party hats, also found in the stamp set and die set, are colored with Balmy Blue and Old Ol
Thank you very much for stopping by my blog. I appreciate every visit and comment.
Have a Peachy Day! Sue
The Mini-Catalog AND Sale-a-Bration start tomorrow, August 3, 2021!!
Catalog Cover Images for a Sneak Peek:
I already have this set and LOVE it! Check my sheep slimline card on Make My Monday challenge, August 02,2021!
Do you live in the U.S. and need a demonstrator? If so, I’d love to talk to you!
Do You Want to Place an Order?
Of course you do!
If you are ordering less than $150.00, please use the host code shown. If you are ordering more than $150.00, please contact me first so you can get your stamping rewards! Any order over $50 will earn a little surprise from me.
The HOST CODE through August 31, 2021 is CJQW69XN.
Again, thank you for stopping by my blog today! I appreciate your comments and your time.
Welcome to the Make My Monday challenge #153. Debbie chose a trees theme for the challenge starting today, July 19, 2021. I hope you will pop over to the challenge blog to see what the rest of the design team created as well. We all look forward to seeing what you create in our gallery!
For this challenge, I used my very first Stampin’ Up! stamp set: Lovely as a Tree. I remember how excited I was at the quality of the used stamp set I’d purchased on eBay. When I purchased the stamp set, I really didn’t know anything about Stampin’ Up!. However, I was so completely in love with the details in the stamped images that I tried to get my husband just as excited. For some strange and unknown reason, he wasn’t as excited as I. This one stamp set started me on my SU! obsession journey. Yeah, that’s it – a journey.
Here’s my card:
Measurements:
The So Saffron base measures 5-1/2 inches by 8-1/2 inches, scored at 4-1/4 inches to create a tent.
I used Whisper White for the front and the inside panel of the card. The front piece of white measures 4-1/8 inches by 5-3/8 inches. As usual, the inside panel measures 4 inches by 5-1/4 inches.
Since I stamped the same tree image on the envelope flap, I didn’t need anything else.
Masking with Post-it notes:
Thankfully, the finished card completely matches the picture I had in my head before I started.
The width of the stamped image measures about 4 inches. That’s how I determined that she size of the background box I needed would measure 4-1/2 inches by 1-3/4 inches. Before I did anything else with the card, I needed to mask off the area I needed. When masking straight lines, Post-it notes are one of the best ways to accomplish a clean edge.
If you don’t have Post-It notes, using repositionable tape on the back of copy paper works just as well.
Here’s a picture of my mask:
Ink Pads and Blending Brushes, and Sentiments:
I started to color the panel with Basic Grey ink and a blender brush along the bottom edge. Without putting more ink on the brush, I started swirling up the marked off box. My goal was to have the grey blending into the yellow to resemble a misty morning.
HINT: In order to get a smooth color while using the blending brush, it helps to gently tap off the brush a couple of times.
Then, I started using the So Saffron ink pad and a blending brush along the top. I did reink the brush with the yellow as I worked my way down into the grey.
When I was satisfied with the depth of the So Saffron color, I went back to the Basic Grey. This time I gently pulled the grey color up into the yellow. I didn’t reink the brush a second time after I started pulling color upwards.
After I removed the post-it notes, I stamped the image from Lovely as a Tree. I purposely lined the top of the stamp up with the top edge of the colored panel. I wanted to have the bottom of the stamp run slightly over the bottom edge.
The sentiments on the inside and outside of the card come from the new Color and Contour stamp set. I used Smoky Slate for the sentiments.
Next, I stamped another tree image in the bottom, left corner on the inside panel.
Before adhering the front panel to the outside of the card, I used the Basic Grey Stampin’ Write Marker to outline the white cardstock. I wanted this outline to go with the misty morning, so the width of the outline varies as I went around the cardstock.
Finally, I adhered both pieces of white cardstock using multipurpose glue.
Thanks so much for stopping by my blog today!
I’d love to hear what you think, and greatly appreciate every comment.
These all-inclusive kits are for beginning stampers, casual stampers, and avid stampers. There are only two things you will need to have on-hand to create the same cards as shown in the directions included with each kit: liquid adhesive and scissors for the ribbon/twine. That’s it!
These KITS are available to view online only, but I’ve included each of the available kits below:
Just click on the picture of each kit to see what’s included!
Take a look at this video explaining what you get with your kit! Remember, the kits are all inclusive! Just add some of your own crafting basic tools, and you are good to go!
Do you live in the U.S. and need a demonstrator? If so, I’d love to talk to you!
Do You Want to Place an Order?
Of course you do!
If you are ordering less than $150.00, please use the host code shown. If you are ordering more than $150.00, please contact me first so you can get your Stamping Rewards! Any order over $50 will earn a little surprise from me.
The HOST CODE through July 30, 2021 is 2TJSU2RQ.
Again, thank you for stopping by my blog today! I appreciate your comments and your time.
Welcome to another MMM challenge! Meg is hosting the theme of cats or dogs and I’m looking forward to seeing your creations in the gallery. Since I just posted a dogs card for Cardz 4 Guyz (you can see that here), I chose cats for this MMM.
Here’s my card:
I thoroughly enjoyed playing around with the DSP (designer series paper) to find a non-pattern with which I was happy. I used the Playful Pets stamps, coordinating die set, and both ribbons. In addition, I used the tailored label punch and a circle punch.
Measurements:
The Flirty Flamingo card base measures 4-1/4 inches by 11 inches, scored at 5-1/2 inches to form a tent card.
I trimmed the black mat to 4-1/8 inches by 5-3/8 inches.
The sentiment circle came from scrap white cardstock. I also trimmed a piece of white cardstock for the inside to 4 inches by 5-1/4 inches.
The last measuring I did was for the envelope flap. I used a piece of the cats DSP and trimmed it to 2-1/2 inches by 6 inches. I adhered this directly to the envelope flap so I wouldn’t misplace it.
What I Did:
Without any real thought, I just started punching a bunch of tailored tags out of the cat themed DSP.
Happily this grumpy cat fit inside one of my circle punches. I used the layering circles die set to crop the mat for it out of scrap black.
This grumpy cat immediately reminded me of Garfield, which led to the use of the “Enjoy” sentiment. Hopefully, eventually, grumpy cat would smile sooner or later. Both the cat and the sentiment have dimensionals underneath them so they pop off the card.
Then, I just needed to play around with the DSP tags until I found something suitable. Using this removable tape helped me move things around without worrying about getting everything out of place.
Once I found a layout with which I was happy, I used multipurpose liquid adhesive to adhere everything down to the black mat.
Next, used the Label Me Fancy punch to get a slit punched out in the tip of the sentiment circle. I wrapped the ribbon and baker’s twine around the black mat and slipped one set of ends through the slit. The dimensionals really keep the sentiment from just flapping on the card.
I used a glue dot to adhere one of the (retired) pet trinkets to the cats collar. Then I used 3 black matte dots to embellish the sentiment.
I stamped “I hope your day is a real treat” on the inside and added a cropped cat to the bottom, left corner.
After trimming the DSP on the envelope flap, I punched a circle for the seal, which I ran through my XYRON create-a-sticker. The seal then lives inside the envelope until I am ready to use the card.
With that, I’d completed this card/envelope/seal coordinated set.
I’d love to hear what you think, and greatly appreciate every comment.
What’s New? Since you asked, it’s The Kits Collection!
Take a look at this video explaining what you get with your kit! Remember, the kits are all inclusive! Just add some of your own crafting basic tools, and you are good to go!
Do you live in the U.S. and need a demonstrator? If so, I’d love to talk to you!
Do You Want to Place an Order?
Of course you do!
If you are ordering less than $150.00, please use the host code shown. If you are ordering more than $150.00, please contact me first so you can get your stamping rewards! Any order over $50 will earn a little surprise from me.
The HOST CODE through June 30, 2021 is 26AD7SA3.
Again, thank you for stopping by my blog today! I appreciate your comments and your time.
Welcome back to another Make My Monday challenge! The design team members each created floral birthday cards, so please visit their blogs as well.
I used the new and absolutely fabulous Hand-Penned DSP (designer series paper) for my card. When I first saw it in the new catalog, I thought it looked washed-out. Then I saw cards using the DSP, and they were stunning! Of course, I ordered it ASAP, which meant during the demonstrator pre-order period!
Here’s my card:
Letting the DSP Do All the Work!
I wanted to leave as much of the DSP showing as possible. It’s just too pretty to cover up, especially since this was my first time using it! Therefore, I made sure the DSP did all the work for me.
What I Did:
I used Highland Heather cardstock for the base of the card. It measures 4-1/4 inches by 11 inches, scored at 5-1/2 inches to form a tent card.
The Hand-Penned measures 4-1/8 inches by 5-3/8 inches. While I had the DSP out, I also trimmed a piece to 6 inches by 2-1/2 inches. In addition, I punched a 1 inch circle of it to create the envelope seal. After running it through the XYRON create-a-sticker machine (you can see it here), I adhered the DSP to the envelope flap and trimmed it. I’ve found that if I don’t do that right away, I loose track of the envelope flap piece. The envelope seal goes inside the envelope, and it’s ready to be written out and mailed.
I figured out where I wanted my raised block of DSP to live, then eyeballed it to make sure I had it straight. Using the Stitched Rectangle dies, I cropped a vertical rectangle measuring 2-1/4 inches by 3-5/8 inches.
Then I very carefully trimmed a scrap piece of black cardstock to 2-3/8 inches by 3-3/4 inches for the mat.
The last piece of cardstock I trimmed measures 4 inches by 5-1/4 inches for the inside panel of the card.
Putting It Together
After carefully adhering the DSP to the black mat, I wrapped a length of the Soft Succulent open weave ribbon around the matted DSP. Amazingly, this bow turned out to actually work the first time I tied it. Will wonders ever cease? I adhered the bow to the DSP using two glue dots. I put one on the front under the bow, and the one on the back of the mat.
Next, I stamped the birthday sentiment on a scrap piece of white cardstock. Then, I cropped it using the nested labels die set. While I used a sentiment from the Here’s a Card stamp set (available in the current mini-catalog), any birthday sentiment would’ve worked since I offset it from the raised DSP. Finally, I outlined the sentiment using the Soft Succulent marker.
I used dimensionals under the DSP mat and under parts of the sentiment. Where the sentiment label overlaps the raised DSP I used multipurpose glue to adhere it down.
Every birthday card needs some bling, right? I used three of the Soft Succulent In Color Jewels and placed one on the center of each of the three flowers on the raised DSP.
Next, I adhered the whole front to the Highland Heather cardstock using multipurpose glue. I know I’ve said it many times before, but this adhesive just makes me happy. You could even say I am obsessed with it. Take a peek at my stash of the Tombow in one of my drawers:
That’s not counting the three I have ready to use on my desk.
After adhering the white cardstock to the inside of the card, I’d finished this card/envelope/seal coordinated set. I know it took me longer to type this blog post than it did to create the card!
Do You Love Fun Folds?
I always enjoy finding and learning how to do a new fun fold card! If you do as well, please stop by a new challenge, Creative Creases from Debbie Mageed at The Secret Stamper! I am having a blast with her challenges and have learned some new fun folds! Join the fun at her website! My card for the current challenge is made and will be blogged before the end of the challenge this week.
Thank you so much for stopping by today.
I’d love to hear what you think, and greatly appreciate every comment.
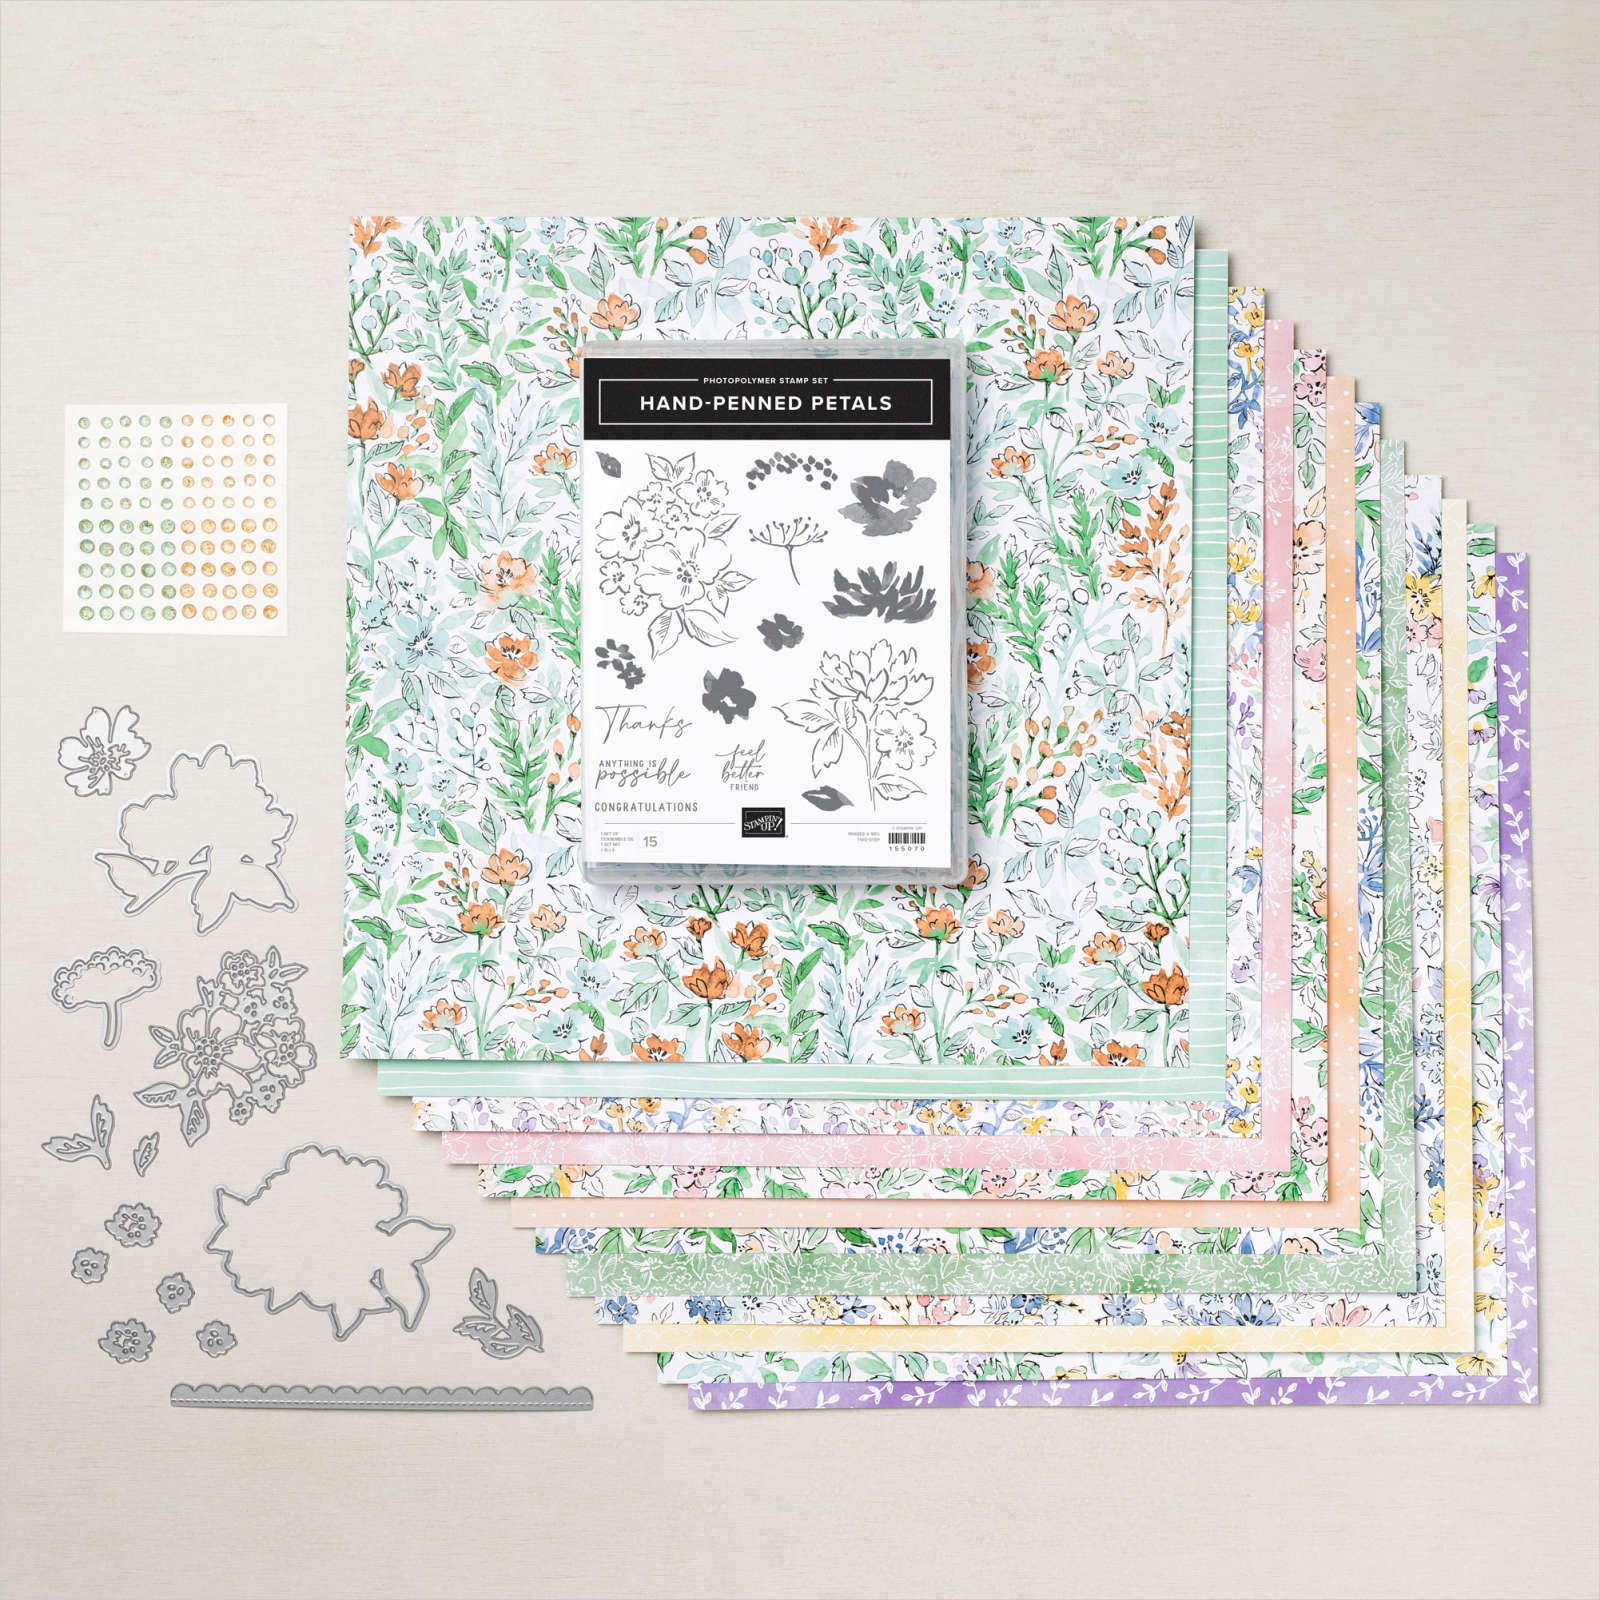
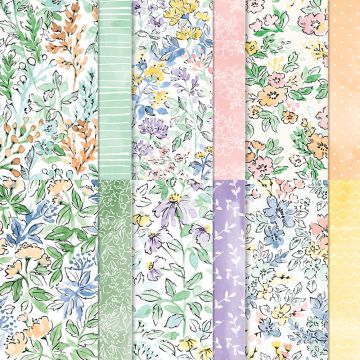
Just Take a look at this fabulous Hand-Penned suite!
The picture doesn’t do the DSP justice, so here’s a look at just that:
Join the Fun!
It’s a fabulous time to join Stampin’ Up! New team members get even MORE FREE products in their customizable Starter Kit. From 4–31 May, new team members can get $155 USD worth of products for only $99 USD + free business supplies + free shipping + all the fun being a part of Stampin’ Up!
Do you live in the U.S. and need a demonstrator? If so, I’d love to talk to you!
Do You Want to Place an Order?
Of course you do!
If you are ordering less than $150.00, please use the host code shown. If you are ordering more than $150.00, please contact me first so you can get your stamping rewards! Any order over $50 will earn a little surprise from me.
The HOST CODE for May is ZM63ASKZ.
Again, thank you for stopping by my blog today! I appreciate your comments and your time.
Welcome back to another Make My Monday Challenge! The theme for MMM#148 is to create a sympathy card. These cards seem so difficult to do when the need arises. I almost feel like I am tempting fate when I make one in advance, but then am thankful when needed.
Here’s my card:
Black, yellow and white is such a classic color combination and I’ve always loved it. While yellow seems doesn’t seem like a traditional sympathy color, I think the intentional pops of black make this combination completely appropriate for a sympathy card.
Measurements:
The So Saffron base measures 5-1/2 inches by 8-1/2 inches, scored at 4-1/4 to create a tent card.
The black mat measures 5-3/8 inches by 8-1/4 inches.
Since the Painted Texture #D embossing folder creates such a deep emboss that I like to trim the paper to size after embossing. This top layer measures 4 inches by 5-1/4 inches.
While I had the white paper handy, I trimmed a piece for the inside of the card to the same measurements.
Amazingly, I had the black flourish in the 8×8 inch page protectors I use for scraps of cardstock. I simply needed to trim it to 5-1/2 inches wide.
The piece of the So Saffron 6 x 6 inch DSP measures 1-1/8 x 5-1/4 inches.
I picked a piece of coordinating yellow butterfly DSP for the envelope flap. That piece measured 2-1/2 inches by 6 inches. I have realized I need to attach the paper for envelope flaps as soon as I trim it down so I don’t misplace the piece.
Putting It Together
Once I had all my pieces, putting the card together proved to be a simple process.
I attached the Basic Black mat and the white embossed card front using the multipurpose glue.
Then I adhered the So Saffron strip and the black flourish using multipurpose glue as well. This Tombow adhesive is my favorite go-to adhesive. So much so that I make sure I always have at least 15 tubes on hand. I don’t want to have any chance of running out, especially when I start creating cards en masse.
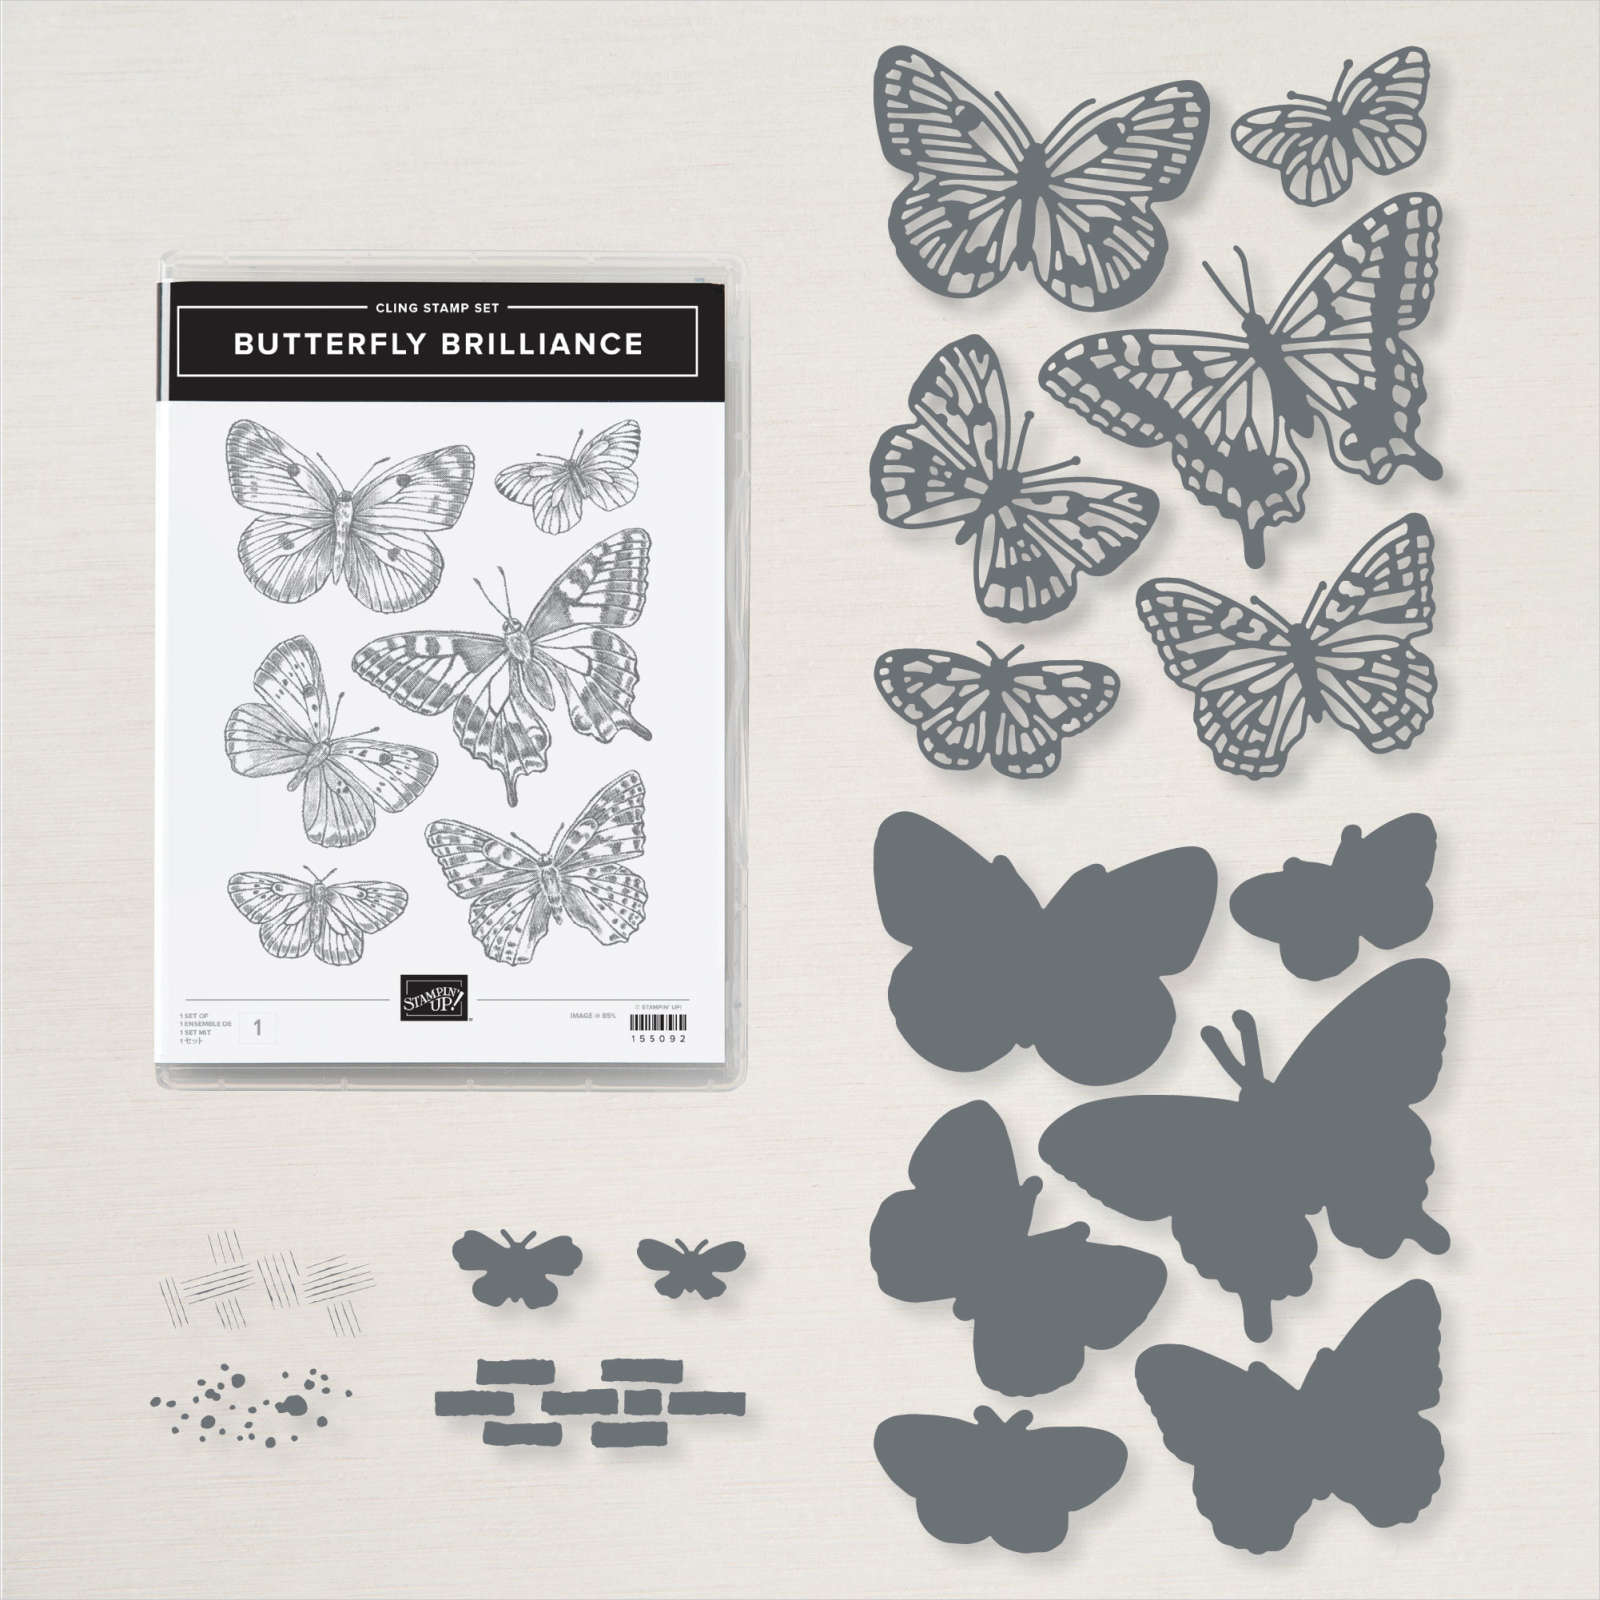
I cropped this beautiful butterfly from a piece of the Butterfly Bijou DSP, which has sold out. However, happiness still abounds because the Butterfly Brilliance bundle contains the coordinating stamp set and die set. Take a look at this gorgeousness:
The stamp set is actually all one stamp, as is the coordinating die. Many demonstrators have purchases a second stamp set to cut it apart for single butterflies. I think I will have to do that as well.
This beautifully simple sentiment on the front comes from the Heal Your Heart Sale-a-Bration stamp set. I stamped it using the Momento Tuxedo Black ink pad, then cropped it using the stitched rectangle dies. Next, I outlined the rectangle with the black marker to add some dimension to the sentiment.
I popped up the sentiment and the butterfly on dimensionals.
Finally, I used three of the 2020 – 2022 In Color enamel dots to add something simple to the card.
I purposely didn’t add ribbon because I thought the flourish carried the eyes from one side of the card to the other. Adding ribbon would take away the card clean and simple design of the card.
With that, I’d finished this coordinated card and envelope set.
Thank you so much for stopping by today. I hope you will visit the Make My Monday Challenge and also visit the blogs of the other design team members. I look forward to seeing your creations in our gallery!
I’d love to hear what you think, and greatly appreciate every comment.
My new catalog order arrives Wednesday! I plan to do an unboxing video and hope to post that later in the week.
Do you live in the U.S. and need a demonstrator? If so, I’d love to talk to you!
Do You Want to Place an Order?
Of course you do!
What could be better than placing an order?
$25 additional Stampin’ Rewards for qualifying orders!
If you are ordering less than $150.00, please use the host code shown. If you are ordering more than $150.00, please contact me first so you can get your stamping rewards! Any order over $50 will earn a little surprise from me.
The HOST CODE for May is ZM63ASKZ.
Of course, joining my team is another fabulous option! Contact me to find out how!
It’s a fabulous time to join Stampin’ Up! New team members get even MORE FREE products in their customizable Starter Kit. From 4–31 May, new team members can get $155 USD worth of products for only $99 USD + free business supplies + free shipping + all the fun being a part of Stampin’ Up!
Again, thank you for stopping by my blog today! I appreciate your comments and your time.
Welcome to Just Peachy Stamping by Sue Jackson: an independent Stampin' Up demonstrator.
Through Stampin' Up!, I happily share my love of papercrafting through sales, classes, small stamping group meet-ups and workshops. I think that being a teacher in my "real life", I have a unique approach to sharing my fantastic hobby. I look forward to connecting with you!