Once again, I am honored to be a guest designer for the September Creative Creases Challenge #107. As always, the theme for the challenge is Anything Goes with a Fun Fold, and if you’ve been following my blog you already know I love finding new fun folds! Here’s the link to the Creative Creases Challenge #107!
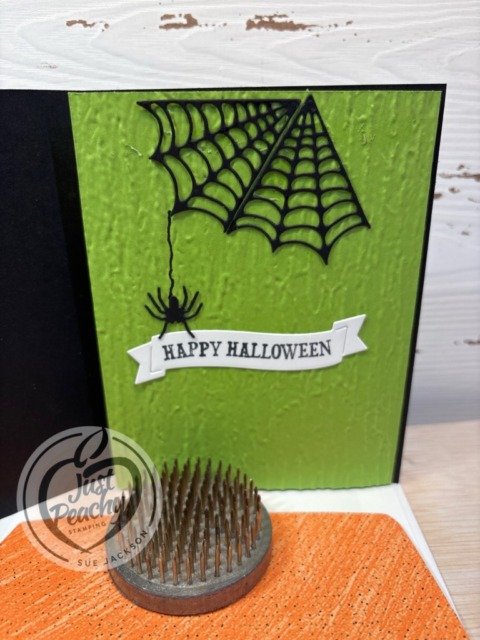
Here’s my Spooky Sweet fun fold card:
I’ve already posted a couple Spooky Sweet cards, and you can see them here and here. This whole suite is fabulous and I’ve been having so much fun with it. I combined the DSP with the Fright Night bundle, Granny Apple Green, and Basic Black cardstocks.
Measurements and Such:
I caught Mary Deatherage’s Stamps-N-Lingers live tutorial for this fan fold card. When Mary says “Hi Sue” that’s me! I would very, very strongly recommend that you watch the video to get the measurements and directions for creating the fan fold. The crow and pumpkin piece is a pre-punched cutie from the Spooky Sweet DSP (designer series paper).
For the inside, I trimmed a piece of Granny Apple Green cardstock to 8 by 5-3/8 inches, scored at 4 inches for the inside fold of the card. I embossed the front only using the Bark 3D embossing folder.
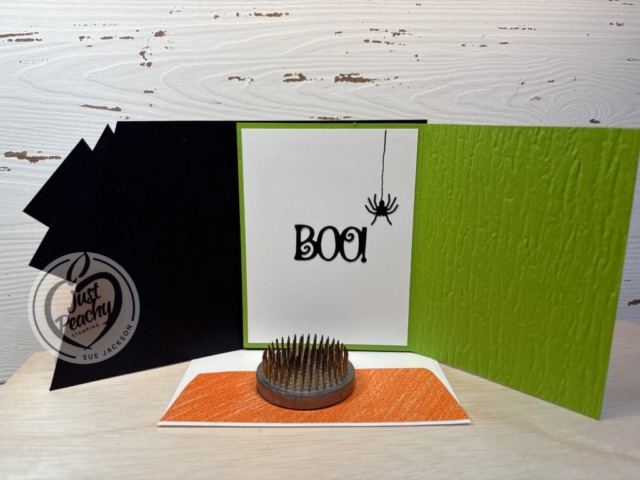
I was able to crop the spiders, web, BOO, and the Fright Night front sentiment from “scraps” of black cardstock.
I could also get the Happy Halloween sentiment on the inside from a white scrap of cardstock.
The white cardstock on the inside measures 3-7/8 by 5-1/8 inches.
I used a black Stamping Write marker to draw the spiders’ web lines before adhering the spiders.
Since there is so much bulk with this fun fold fan card, I only used dimensionals on the front sentiment on the top left and bottom right of the sentiment panel. This card would very definitely require extra postage if mailed, but this one will be hand-delivered.
I did want to make sure that nothing on the front of the Granny Apple Green cardstock didn’t show when the fan fold front was closed.
Please, please watch Mary’s video for the tutorial. I would never have been able to create this fan front without her directions.
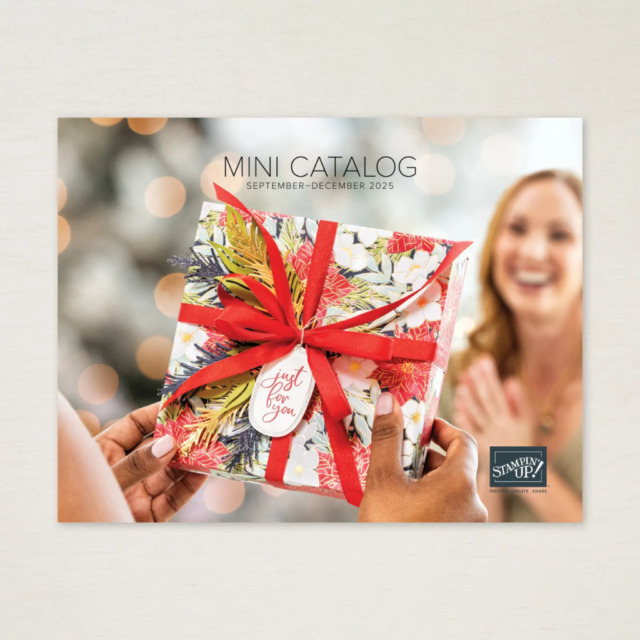
The September – December 2025 Mini-Catalog is now available!
As a demonstrator, I was able to pre-order some of these items. Take a look at the products I’ve already purchased:
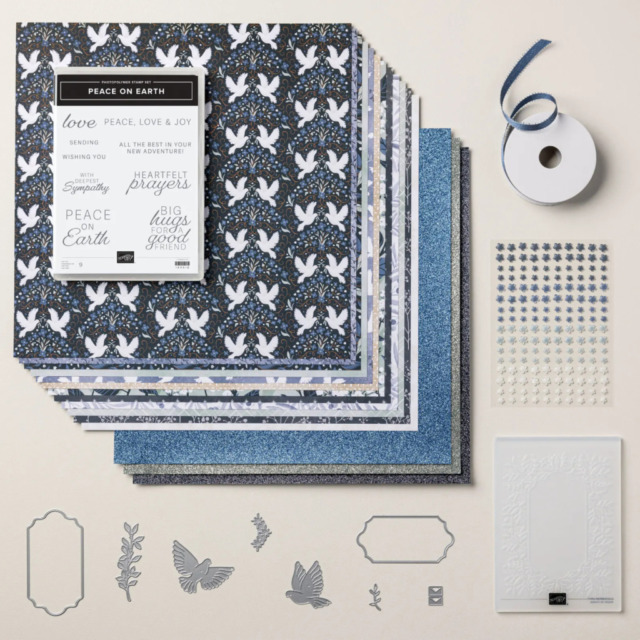
The first suite I purchased is this Peaceful Garden Suite Collection! You can see some cards using this suite here and here.
This DSP is stunning!
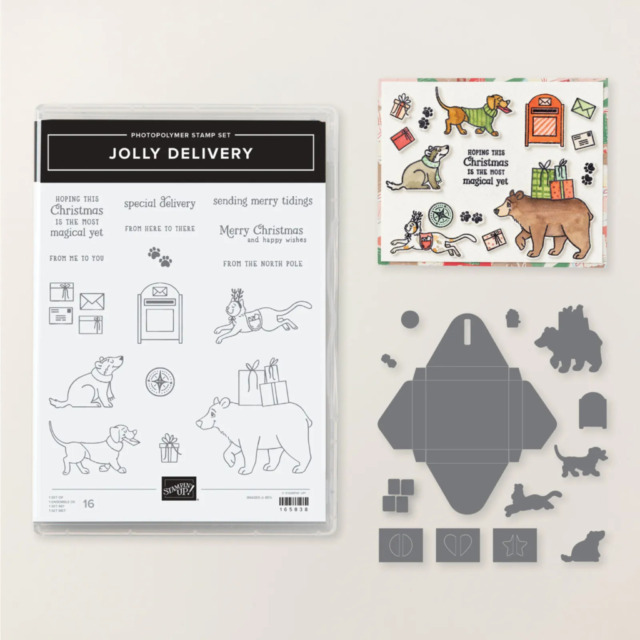
If you like Christmas Critters, this Jolly Delivery Bundle is for you!
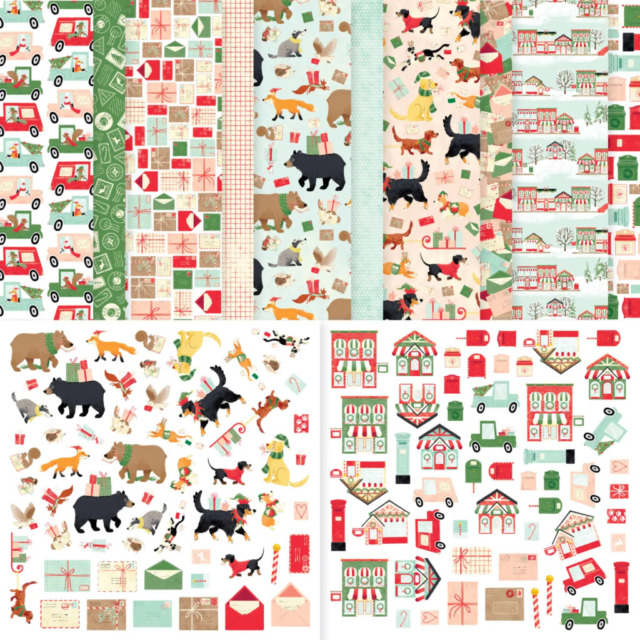
Don’t forget the matching 12 x 12 inch DSP:
Last Chance Stamping Write Markers!
While you are shopping, make sure you pick up the Last Chance Stamping Write Markers! These markers, including the 2025 – 2027 In Color markers, are being discontinued. I love using these markers when sending cards because I can coordinate the card with the writing color. Therefore, I have all the available sets ready and waiting in my SU! cart.
If you live in the U.S. and don’t already have a Stampin’ UP! demo from whom you order, I would be honored to work with you. You can reach me at my [email protected].
Welcome back to the bi-weekly Cardz 4 Galz challenge.Billie A, our host for this #258 challenge, chose Stitching, Real or Faux for the theme. Since I am obsessed with all things fun fold I was so pleased to create a card with new products. When you finish here, please visit the challenge site to see what the rest of the very talented design team members created. Then, don’t forget to upload your creations to our gallery. We look forward to seeing your creations there!
Today is my last physical therapy session after my knee replacement surgery. I’ve had two absolutely wonderful therapists and am actually going to miss going, as strange as that sounds.
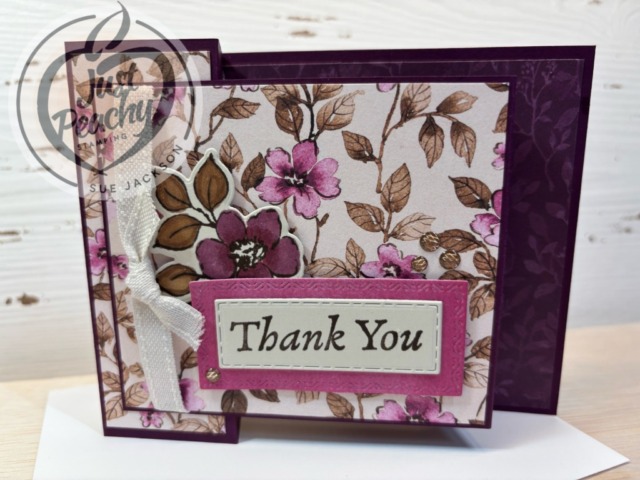
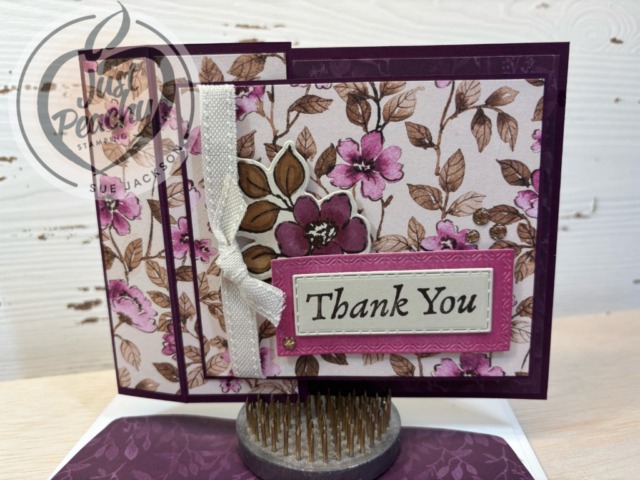
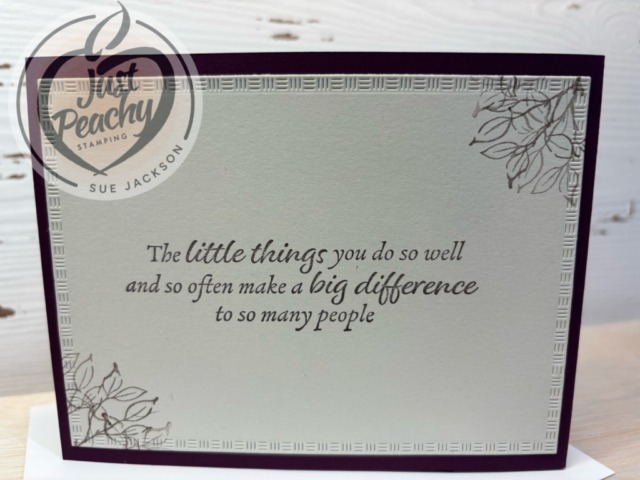
This is my thank you card for one of the therapists:
The faux stitching is on both layers of the sentiment on the front and around the panel on the back of the card. There’s real stitching along the sides of the Basic Beige ribbon. Real Stitching – check. Faux stitching – check. Theme met – check.
I’ve already posted cards using this same fold, and you can see them here and here.
I originally found this card on the Wandering Stamper’s YouTube channel. You can see that tutorial here.
As always with a fun fold card, I will be adding this to the Creative Creases Challenge where the theme is always Anything Goes with a Fun Fold.
Measurements:
Of course, I had to make a template for this fun fold, which you can see below:
Hints:
I find it much easier to watch a video than trying to follow written directions, so I highly recommend you watch the Wandering Stamper’s video after you use the above template to trim your papers
Another thing I find that works for me is to trim all my papers before starting anything else on the card
Once all the pieces are trimmed, I can add the DSP (designer series paper) to the envelope flap and put all the pieces in the envelope until I can finish it
Since this card will be hand-delivered, I didn’t need to worry too much about the bulkiness of the card
If you do need to mail the card, you very well might have to use extra postage even without using any dimensionals., ribbon, or enamel dots
The September – December 2025 Mini-Catalog is now available!
As a demonstrator, I was able to pre-order some of these items. Take a look at the products I’ve already purchased:
The first suite I purchased is this Peaceful Garden Suite Collection! You can see some cards using this suite here and here.
This DSP is stunning!
If you like Christmas Critters, this Jolly Delivery Bundle is for you!
Don’t forget the matching 12 x 12 inch DSP:
If you live in the U.S. and don’t already have a Stampin’ UP! demo from whom you order, I would be honored to work with you. You can reach me at my [email protected].
Welcome to Team B’s turn for the Atlantic Hearts Sketch Challenge #644! Starting the creative process with a sketch invites individual takes on the sketch, and this one is no different. This challenge is a weekly event, and we’d all love for you to play along with the sketches and then post your creations to the challenge gallery.
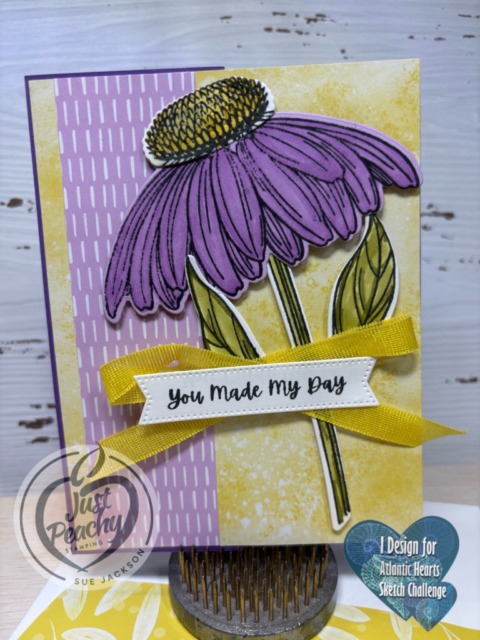
Here’s my Coneflower Celebrations card:
This is a pretty straightforward z-fold card. If you can score and trim paper, this fun fold is for you!
As always with a fun fold card, I will be adding this to the Creative Creases Challenge where the theme is always Anything Goes with a Fun Fold.
Measurements:
The Gorgeous Grape base measures 8-1/2 by 5-1/2 inches, scored at 2-1/8 and 4-1/4 inches
Trim a piece of Darling Duckling 6 x 6 inch DSP (designer series paper) to 4-1/8 by 5-3/8 inches for the card front
You need another piece of Darling Duckling DSP trimmed to 2-1/2 by 6 inches for the envelope flap, which needs to be adhered and trimmed
Punch a 1-inch circle from the Fresh Freesia DSP for the envelope seal, and run it through the XYRON create-a-sticker
Trim a piece of Fresh Freesia 6 x 6 inch DSP to 201/2 by 5-3/8 inches for the panel on the front of the card
Trim a piece of white cardstock to 4-1/8 by 5-2/8 inches for the inside of the card
You will also need another piece of white cardstock for the stem, leaves, center of the flower, and the sentiment
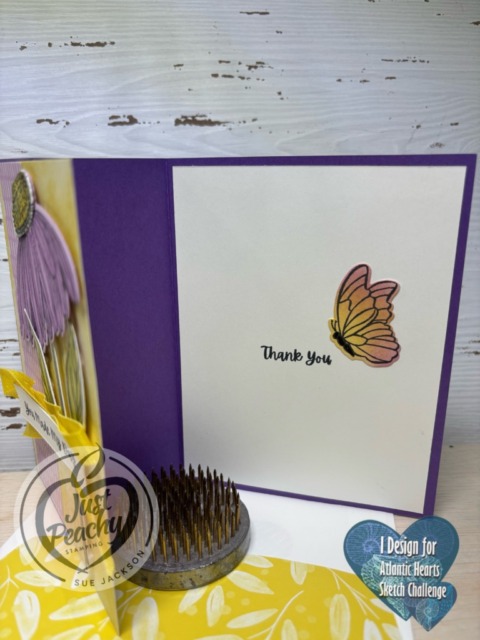
I already had the butterfly cropped for another project and decided to use it here.
Putting the Card Together:
I stamped everything using Momento Tuxedo Black ink
Unless otherwise noted, I used multipurpose liquid glue to adhere the pieces together
Stamp the flower on Fresh Freesia cardstock and color using the multiple layers of the Fresh Freesia blends combo
Stamp the stem and leaves, then color using the Old Olive blends combo
After stamping the center of the flower, I colored it using Daffodil Delight and Darling Duckling blends combos
The inside and outside sentiments come from the Coneflower Celebrations stamp set
Use the coordinating Coneflower Celebration dies to crop the flower, center, stem, and leaves
Crop the outside sentiment using a banner from the Stylish Shapes die set
Adhere the center to the top of the flower
Add dimensionals to the back of all the flower pieces and the senteiment banner
Adhere the Fresh Freesia DSP to the Darling Duckling DSP
Add glue to just the left back side of the Darling Duckling DSP, then adhere to the Gorgeous Grape base
Adhere the white inside cardstock to the base of the card
Adhere the butterfly near the sentiment
Position the coneflower pieces and adhere using the dimensionals
Add a loopy loop bow from Darling Duckling ribbon using mini-glue dots
Add the sentiment on top of the loopy loop bow
With that, I’d finished this coordinated card, envelope, and envelope seal
The Loopy Loop Bow:
I was able to watch Mary Deatherage’s, from Stamps -n- Lingers, Perfectly Pears tutorial. In that video, she showed her loopy-loop bow. That’s what I used for the front of my card. I’m bow-challenged and this technique allows me to relatively easily add ribbon without adding the bulk of a tied bow. If you’ve never seen her videos, you owe it to yourself to watch them. I think she’s the Queen of the Collage. Gorgeous cards!!
Time is running out for the 2025 – 2027 In Color SALE!
Who would love a sale on select In Color Merchandise?
We all would, right?
Here are the Promotion Details:
Sales Period: August 5–31
Ordering Deadlines
Phone: August 29, 2025, at 6:59 p.m. (MT)
Online: August 31, 2025, at 11:59 p.m. (MT)
Sale includes select inks, cardstock, Designer Series Paper, embellishments, and other products that include these new In Colors. Only products featured on the 2025–2027 In Colors page are included in this promotion.
Some products are excluded from the sale, including the Month by Month Album Retreat 2025 kit (167338).
Products are available only while supplies last.
Pre-Order for SU! Demos for the upcoming September – January Mini Catalog and the September online exclusives release is ongoing. I’ve already gotten some products, and just placed an order for more. In the meantime, here’s some sneak peek cards for you:
If you live in the U.S. and don’t already have a Stampin’ UP! demo from whom you order, I would be honored to work with you. You can reach me at my [email protected].
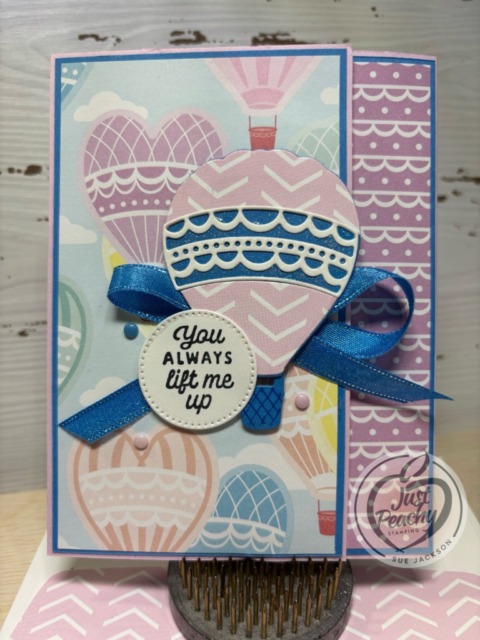
Welcome to the newest Make My Monday bi-weekly challenge #259. Our host & fearless leader, Caz, chose Hot Air Balloons for the theme. When you finish here, please visit the challenge site to see what the rest of the very talented design team members created. Then, don’t forget to upload your creations to our gallery. We look forward to seeing your creations there!
Here’s my card:
I’m very thankful that, as a design team member, I have access to the themes months in advance, especially for this theme. I didn’t have anything for this challenge, and needed to search. Luckily, the hot air balloon die set was on last chance product list for Stampin’ Up! so I snagged that. Then I turned to eBay, where I found a card kit for this retired DSP (designer series paper), which contained all the DSP I used for this card.
I’ve used this hidden flap card so many times because it lends itself perfectly to 6 x 6 inch DSP. You can see some of those cards here, here, here, and here.
As always with a fun fold card, I will be adding this to the Creative Creases Challenge where the theme is always Anything Goes with a Fun Fold.
Measurements:
Trim a piece of DSP to 6 by 2-1/2 inches for the envelope flap
Punch a 1-inch circle from coordinating DSP and run it through the XYRON create-a-sticker for the envelope seal
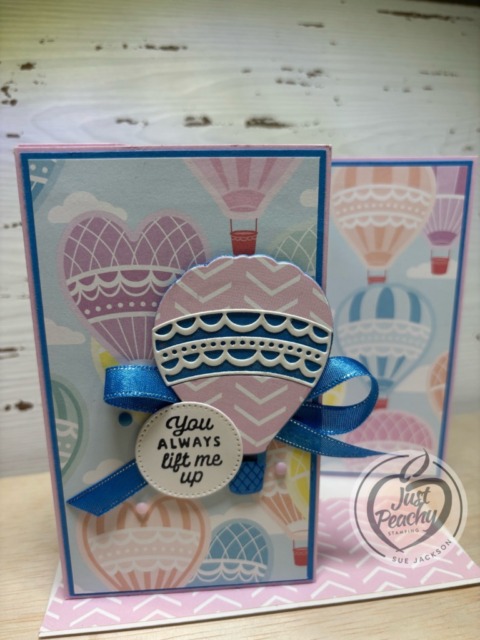
I’ve created a template for this card, and all the measurements are on the template. It’s so easy to just get it out of my fun fold mini-binder of templates and create without having to find all the measurements.
Here’s the template:
What I Did:
II used Fresh Freesia for base pieces according to the measurements on the template
I used Azure Afternoon cardstock for the mats, trimming it down by 1/8 inch on the short side and 1/8 inch on the long side
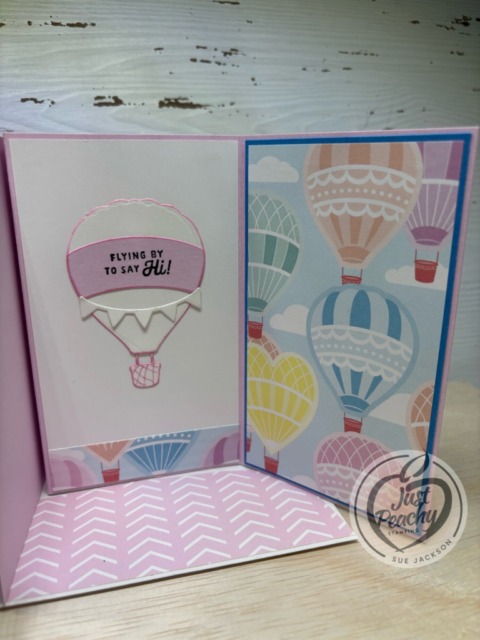
Trim the 6 x 6 inch DSP down to 5-1/4 inches by 3 inches, using the left piece for the outside panel and the right piece for the hidden flap part of the card
I trimmed a coordinating piece of the card kit DSP to 2 by 5-1/4 inches
The mat for this piece of DSP measures 2-1/8 by 5-3/8 inches
Unless otherwise noted, I used multipurpose liquid glue to adhere pieces together
I cropped one hot air balloon from the card kit DSP and the two coordinating pieces from Azure Afternoon and the center from white cardstock
After adhering the pieces together, I colored the Azure Afternoon pieces in clear Wink of Stella
Next, I cropped another hot air balloon from white cardstock, along with the coordinating banner
The center part of the white balloon was cropped from Fresh Freesia cardstock scraps
I used sentiments from the Adventurous Sky stamp set and stamped them in black ink
I adhered the pieces together and then it was time for the front
I created a loopy-loop bow from Azure Afternoon ribbon following the directions from Mary Deatherage and adhered it with mini-glue dots
After adhering the bow, I used dimensionals to adhere the hot air balloon and the sentiment
Finally, I added the enamel dots that came with the card kit
With that, I’d finished this coordinated card, envelope, and envelope seal set
The Loopy Loop Bow:
I was able to watch Mary Deatherage’s, from Stamps -n- Lingers, Perfectly Pears tutorial. In that video, she showed her loopy-loop bow. That’s what I used for the front of my card. I’m bow-challenged and this technique allows me to relatively easily add ribbon without adding the bulk of a tied bow. If you’ve never seen her videos, you owe it to yourself to watch them. I think she’s the Queen of the Collage. Gorgeous cards!!
Who would love a sale on select In Color Merchandise?
We all would, right?
Here are the Promotion Details:
Sales Period: August 5–31
Ordering Deadlines
Phone: August 29, 2025, at 6:59 p.m. (MT)
Online: August 31, 2025, at 11:59 p.m. (MT)
Sale includes select inks, cardstock, Designer Series Paper, embellishments, and other products that include these new In Colors. Only products featured on the 2025–2027 In Colors page are included in this promotion.
Some products are excluded from the sale, including the Month by Month Album Retreat 2025 kit (167338).
Products are available only while supplies last.
Pre-Order for SU! Demos for the upcoming September – January Mini Catalog and the September online exclusives release is ongoing. I’ve already gotten some products, and just placed an order for more. In the meantime, here’s some sneak peek cards for you:
If you live in the U.S. and don’t already have a Stampin’ UP! demo from whom you order, I would be honored to work with you. You can reach me at my [email protected].
Welcome to the Cardz 4 Guyz #377 challenge! Dawn., our host for this challenge, chose Boats for the theme. When you finish here, please visit the challenge site to see what the rest of the talented design team members created. Then, don’t forget to upload your creations to our gallery. We look forward to seeing your creations there!
Here’s my card:
My first card using this fold was for a Halloween card using the Spooky Sweet 12 x 12 inch DSP (designer series paper). Make sure to add it to your wish list because it is just too stinking cute to pass up! You can see that card here, in all it’s googly-eyes adorableness!
I saw the tutorial reel on FaceBook posted by the West Coast Papercrafter. You can see her video here.
Measurements:
The following template is with measurements given in the West Coast Papercrafter’s video. I wanted thinner borders for this card, but it would totally work with her original measurements, so I am including those.
I didn’t use DSP for this card. Instead, I embossed two pieces of 4-1/4 by 5-1/2 inch white cardstock using the sunrise Sailling embossing folders
I trimmed one piece for the outside to 4-1/8 by 5-3/8 inches for the outside
I used the second embossed cardstock for the inside
I trimmed two pieces of the “waves” for the two pop-up shelf pieces
Then I trimmed the remaining for the top part of the inside
Since I didn’t want the embossed sailboat be a main focus, I used a bone folder to smooth down the boat as much as possible before covering it with cropped clouds
Stamping, Dry Embossing, & Cropping:
I stamped two of the sailboats on white cardstock using Tuxedo Black ink, then stamped the sail parts using Azure Afternoon ink
Stamp the ahoy sentiment using Tuxedo Black ink
On the inside part of the pop-up card, stamp the waves using Azure Afternoon ink and the sentiment in black ink
Color the hull part of the boats using the Gray Granite blends combo
Crop the two sailboats and clouds using the Sunrise Sailing dies
After cropping the ahoy sentiment with a banner die from Stylish Shapes dies
Crop the three birds from a scrap of black cardstock
After cropping the clouds for the inside, outline them using Gray Granite
Crop one of the wave pieces from Azure Afternoon cardstock
Putting the Card Pieces Together:
Since there would already be so much bulk to the card that extra postage would be needed, I didn’t want to add dimensionals
Therefore, I used multipurpose liquid glue to adhere all of the pieces together
Personally, I think that I need to be most careful about adhering the inside of the card to the base
Therefore, using the Adtech Removable adhesive tape is essential to the inside placement
I can use the tape to eyeball where I think the inside top and bottom needs to be adhered, then open and close the card to make sure everything works as it should
The removable adhesive allows me to make adjustments before permanently adhering the inside
This card is basically many layers coming together to create a fabulous and unexpected fun fold
I hope you try this card for yourself and don’t forget to follow along with the West Coast Papercrafter’s tutorial video
Pre-Order for SU! Demos for the upcoming September – January Mini Catalog and the September online exclusives release is ongoing. I’ve already gotten some products, and just placed an order for more. In the meantime, here’s some sneak peek cards for you:
It’s time for a 2025 – 2027 In Color SALE!
Who would love a sale on select In Color Merchandise?
We all would, right?
Here are the Promotion Details:
Sales Period: August 5–31
Ordering Deadlines
Phone: August 29, 2025, at 6:59 p.m. (MT)
Online: August 31, 2025, at 11:59 p.m. (MT)
Sale includes select inks, cardstock, Designer Series Paper, embellishments, and other products that include these new In Colors. Only products featured on the 2025–2027 In Colors page are included in this promotion.
Some products are excluded from the sale, including the Month by Month Album Retreat 2025 kit (167338).
Products are available only while supplies last.
If you live in the U.S. and don’t already have a Stampin’ UP! demo from whom you order, I would be honored to work with you. You can reach me at my [email protected].
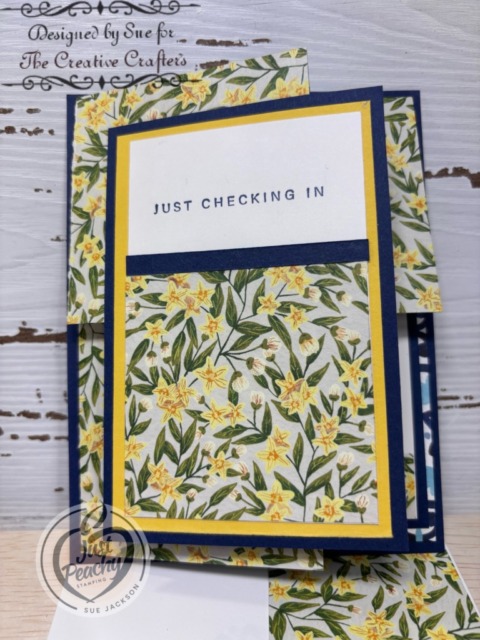
Welcome to my one card, two challenges post. As always, the theme for The Creative Crafters challenge # 90, is Anything Goes. Combining Summer Holidays and Anything Goes with the Creative Creases Challenge theme which is always Anything Goes with a Fun Fold, I brought all both challenges together into one card.
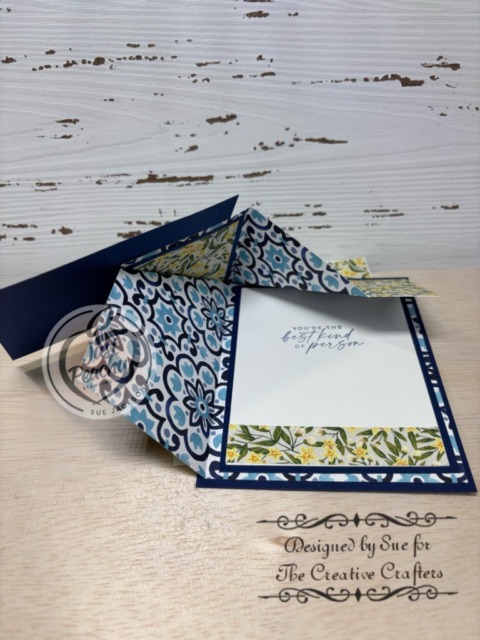
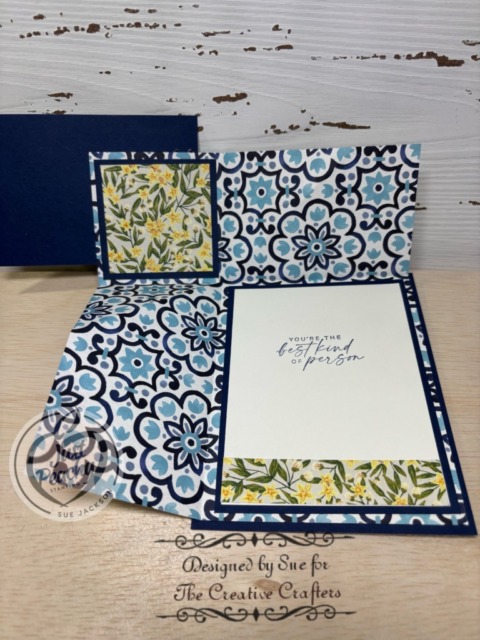
Here’s my card:
As always with a fun fold card, I will be adding this to the Creative Creases Challenge where the theme is always Anything Goes with a Fun Fold.
What I Did:
I used Connie Stewart’s video tutorial for this card. Her tutorials are always exactly what Simply Simple Stamping, and you can see the video tutorial here. I did follow her directions, but there are things I learned along the way.
Make sure you remember that the inside DSP (designer series paper) pattern is facing up when you are scoring
If you don’t have the inside facing up, you will wind up with a backwards card, which will then become scrap pieces of DSP – just saying
I would recommend watching the video through first before following along by pausing the video as needed
When choosing DSP, make sure it is not lightweight DSP since the score lines might tear the paper
Have fun with this card! Connie Stewart makes it much easier than I thought it would be – just follow her directions and you can WOW! the recipient
Thank you very much for stopping by today!
Have a Peachy Day!
Sue
It’s time for a 2025 – 2027 In Color SALE!
Who would love a sale on select In Color Merchandise?
We all would, right?
Here are the Promotion Details:
Sales Period: August 5–31
Ordering Deadlines
Phone: August 29, 2025, at 6:59 p.m. (MT)
Online: August 31, 2025, at 11:59 p.m. (MT)
Sale includes select inks, cardstock, Designer Series Paper, embellishments, and other products that include these new In Colors. Only products featured on the 2025–2027 In Colors page are included in this promotion.
Some products are excluded from the sale, including the Month by Month Album Retreat 2025 kit (167338).
Products are available only while supplies last.
If you live in the U.S. and don’t already have a Stampin’ UP! demo from whom you order, I would be honored to work with you. You can reach me at my [email protected].
Welcome to Just Peachy Stamping by Sue Jackson: an independent Stampin' Up demonstrator.
Through Stampin' Up!, I happily share my love of papercrafting through sales, classes, small stamping group meet-ups and workshops. I think that being a teacher in my "real life", I have a unique approach to sharing my fantastic hobby. I look forward to connecting with you!