This month, the Pals have been busy creating cozy, frosty, whimsical card ideas and paper crafts for our Winter Wonderland theme — using our favorite Stampin’ Up! goodies. Each project brings a different twist, and that’s what makes the hop feel like a stroll through a creative winter village. If you’re looking for inspiration (or maybe a reason to stay inside with your craft supplies), this hop is for you!
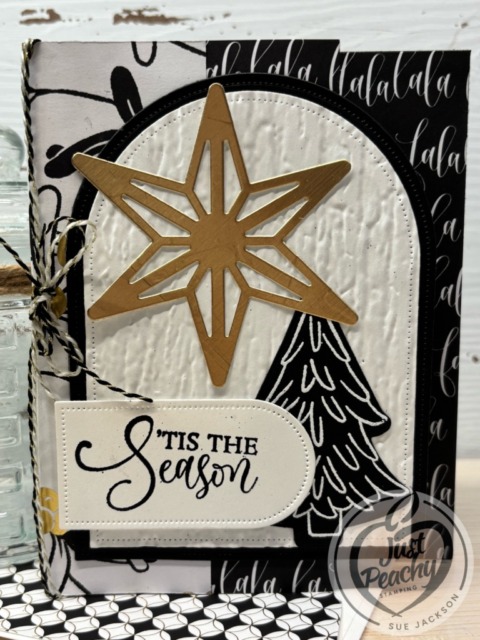
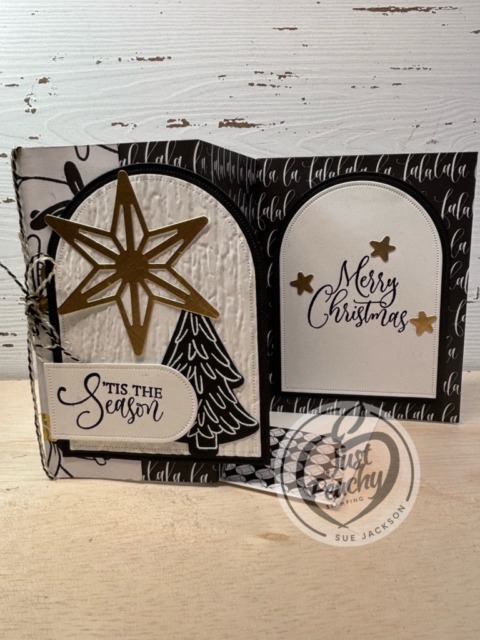
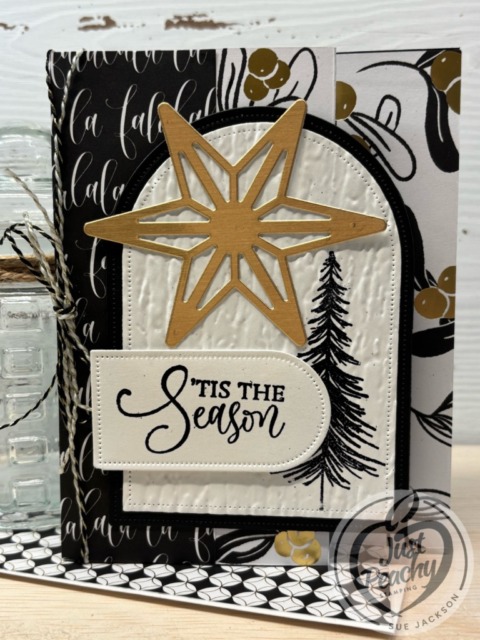
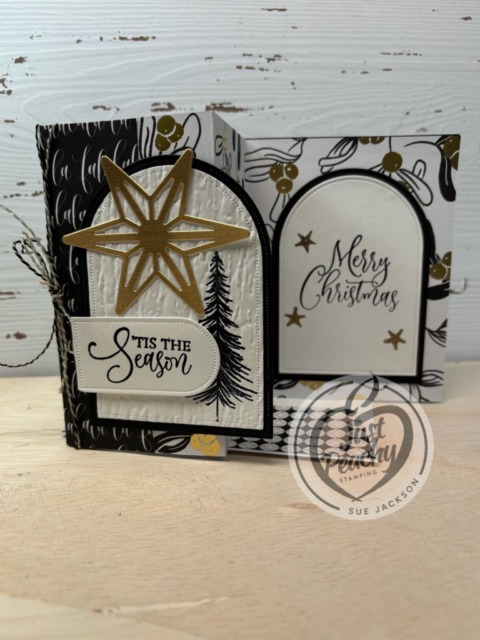
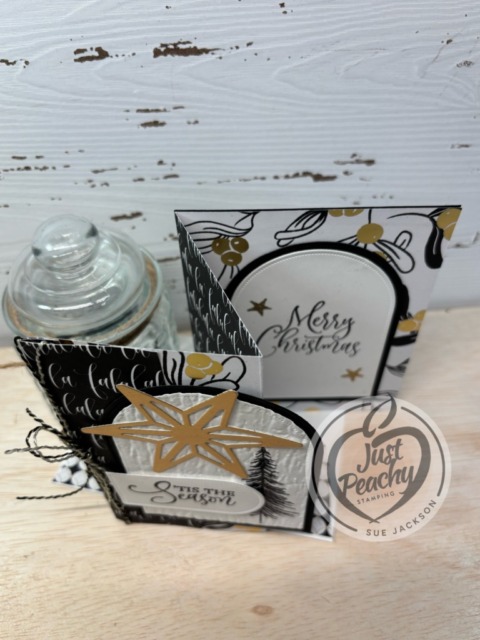
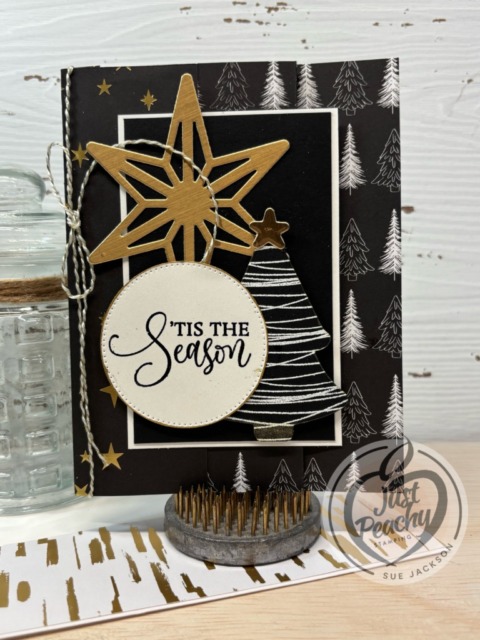
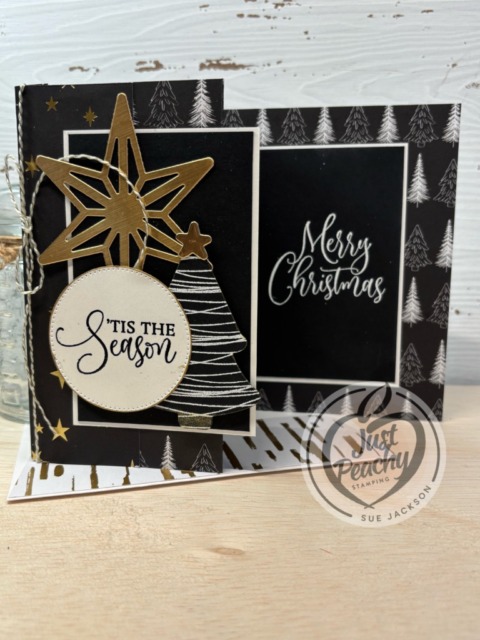
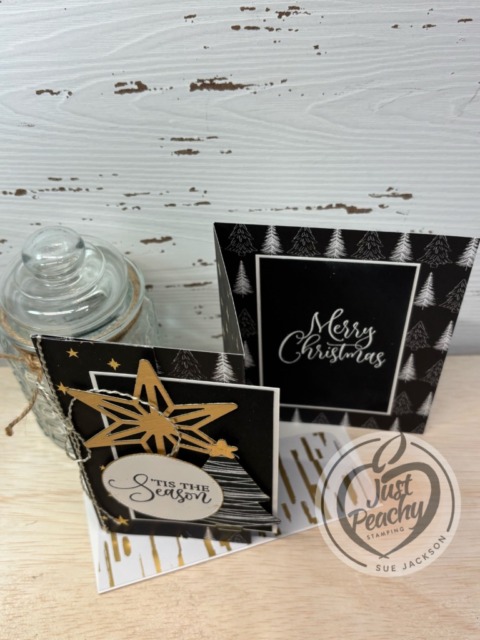
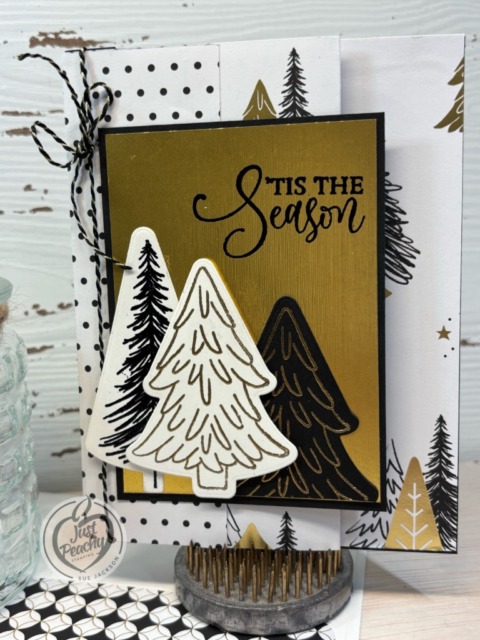
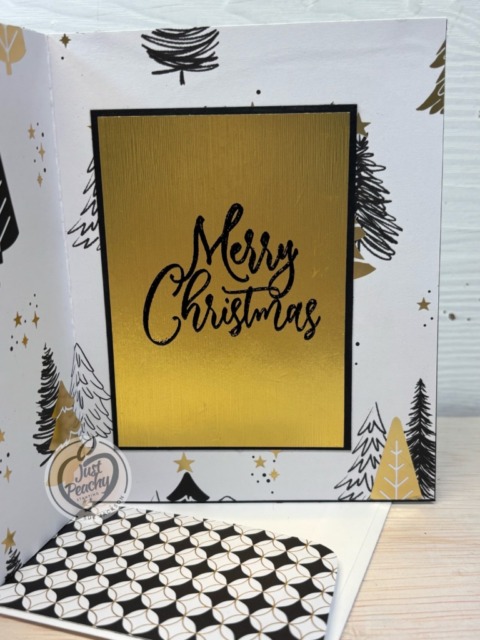
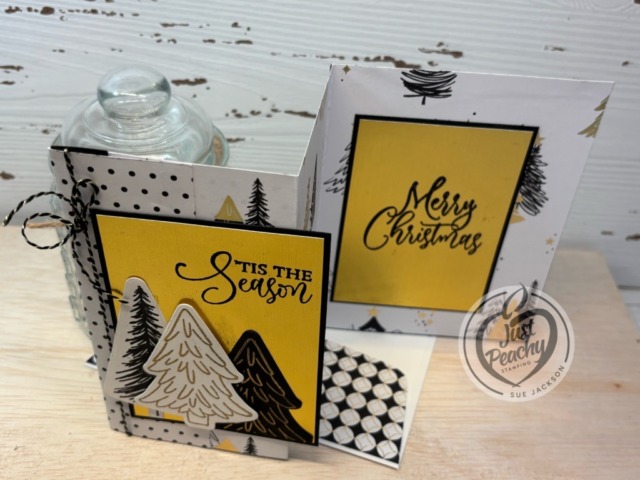
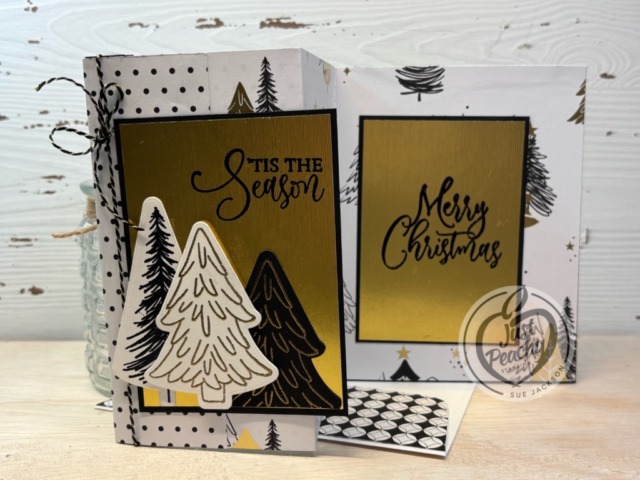
Once again, I chose to use the Modern Christmas Suite of products to create two 4-panel accordion cards. I am thoroughly enjoying this fun fold and for this hop I used one 12″ by 12″ piece of DSP for these two cards.
Here are my cards:
I’ve already posted two other 4-panel accordion fold Christmas cards using the same suite of products. You can see those posts here and here. I am looking forward to making many more cards using this suite of products and fun fold.
As always with a fun fold card, I will be adding this to the Creative Creases Challenge where the theme is always Anything Goes with a Fun Fold.
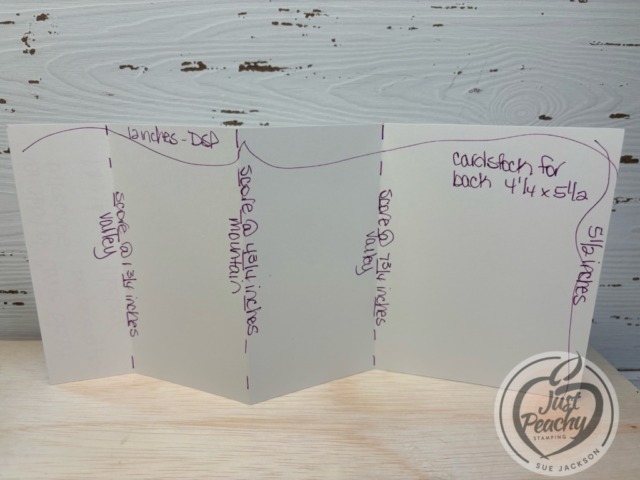
Measurements:
The extra cardstock piece for the back isn’t necessary because the card will stand up without it. However, I just wanted extra stability.
I added two pieces of 1/2 by 5-1/4 inches strips on either side of the first score line at 1-3/4 inches so I could add the baker’s twine without worrying about it tearing the DSP. Since I used the two 1/2 inch strips of DSP left after trimming each half to 5-1/2 inches. When everything was said and done, I only had two little pieces of leftover DSP, each measuring 1/2 inch by 1 inch.
I needed to crop 4 black arches and 4 white arches. I just realized that the arches on the card with the white on black tree are larger than the other card. I think I like the larger arches, but the smaller set shows more of the DSP on the front.
I embossed the white cardstock arches for the fronts of the cards using the Birchwood embossing folder.
I used the smaller arch die for the sentiments.
Don’t forget to trim a piece of coordinating DSP to 6 by 2-1/2 inches for the envelope flap.
I also punched a 1-inch circle from another DSP pattern and ran it through my XYRON create-a-sticker.
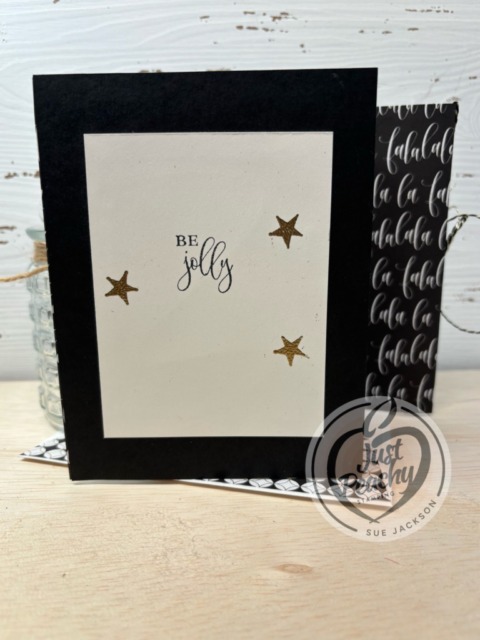
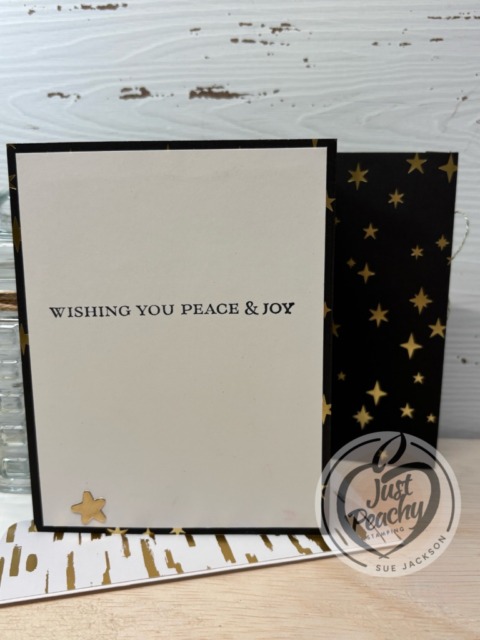
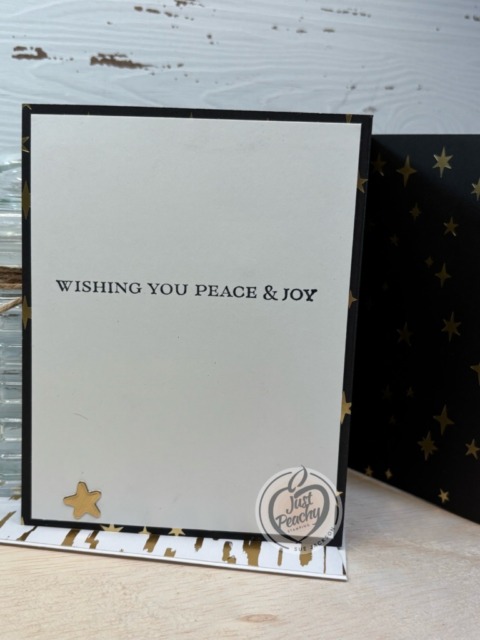
I cropped the large star and tiny gold stars using the dies from the suite of products. The star on the back of the card is actually covering a smudge of black ink, but that can just be our secret.
What I Did:
I added dimensionals on the back of the cropped sentiments on the front and glue dost to hold the baker’s twine bow in place
For everything else, I used multipurpose liquid glue to adhere pieces together since this card is already bulky
This will fit in a medium SU! envelope, but it will require additional postage
I adhered the front flap down so the extra pieces of DSP I used for the baker’s twine support are covered
I used embossing white and black embossing powder for the tree and sentiments on the inside and front
For all areas to be embossed, make sure you wipe down the papers using your embossing buddy
Cover the areas with either black or white embossing powder and heat set using your heat tool
Make sure to allow the embossed images to cool before cropping to prevent smudging
Crop the tree using the Ornamental Christmas die included in the suite of products
Adhere both sentiment panels together
Add liquid glue on the left half of the front sentiment panel and adhere it to the front flap
Adhering to just the front flap is especially important if you are not going to glue the flap down
After adhering the front sentiment, open the card and position the inside sentiment arches face down on the back of the front sentiment
This will allow you to make sure you line up both sentiment pieces so the inside doesn’t show when the card is closed
Add liquid glue to the back of the inside sentiment panel, then fold the back of the card over the panel
TA-DA! Perfect placement!
I did add another holiday sentiment on the back of the card, which has room for a personal message as well
With that, I’d completed this coordinated card, envelope, and envelope seal set.
Back to the Stampin’ Pretty Pals’ Blog Hop:
Keep the inspiration going! Follow the lineup below to hop through each blog and enjoy every beautifully frosty idea. And stick around — next month we’re creating for the “Something New” theme, and you won’t want to miss it!
Browse our selection of Last Chance paper crafting products. Additional items are added every other month. These products are available only while supplies last so be sure to buy them before they are discontinued! Discounts vary and are subject to change.
Once again, I am honored to be a guest designer for the December Creative Creases Challenge #110. As always, the theme for the challenge is Anything Goes with a Fun Fold, and if you’ve been following my blog you already know I love finding new fun folds! Here’s the link to the Creative Creases Challenge #110! I hope you will play along with the challenge, then upload your creations to the challenge site.
Initially, I wasn’t going to get the Modern Christmas Suite of products because I already had what I thought I needed for Christmas card. Then I started seeing projects created with these gorgeous products and knew I had to have it.
Here’s my 4 panel accordion fun fold card using the Modern Christmas Suite:
I just posted another 4 panel accordion fold card using the Modern Christmas Suite on Monday. You can find that post here. However, I really love this card and want to make as many of them with the black DSP patterns as possible! Stay tuned!
The extra cardstock piece for the back isn’t necessary because the card will stand up without it. However, I just wanted extra stability.
I added two pieces of 1/2 by 5-1/4 inches strips on either side of the first score line at 1-3/4 inches so I could add the baker’s twine without worrying about it tearing the DSP.
Don’t forget to trim a piece of coordinating DSP to 6 by 2-1/2 inches for the envelope flap.
I also punched a 1-inch circle from another DSP pattern and ran it through my XYRON create-a-sticker.
The two white cardstock panels for the mats on the front and inside measure 3 by 4-1/8 inches.
The black cardstock panels measure 2-7/8 by 4 inches.
I used scraps of black and white cardstock for the Christmas tree and the front sentiment circle.
I cropped the large star and tiny gold stars using the dies from the suite of products. The star on the back of the card is actually covering a smudge of black ink, but that can just be our secret.
What I Did:
I added dimensionals on the back of the Christmas tree on the front and the glue dot to hold the baker’s twine bow in place
For everything else, I used multipurpose liquid glue to adhere pieces together since this card is already bulky
This will fit in a medium SU! envelope, but it will require additional postage
I adhered the front flap down so the extra pieces of cardstock I used for the baker’s twine support to be covered
I used embossing white and black embossing powder for the tree and sentiments on the inside and front
For all areas to be embossed, make sure you wipe down the papers using your embossing buddy
Cover the areas with either black or white embossing powder and heat set using your heat tool
Make sure to allow the embossed images to cool before cropping to prevent smudging
Crop the tree using the Ornamental Christmas die included in the suite of products
Adhere both sentiment panels together
Add liquid glue on the left half of the front sentiment panel and adhere it to the front flap
Adhering to just the front flap is especially important if you are not going to glue the flap down
After adhering the front sentiment, open the card and position the inside sentiment face down on the back of the front sentiment
This will allow you to make sure you line up both sentiment pieces so the inside doesn’t show when the card is closed
Add liquid glue to the back of the inside sentiment panel, then fold the back of the card over the panel
TA-DA! Perfect placement!
I did add another holiday sentiment on the back of the card, which has room for a personal message as well
With that, I’d completed this coordinated card, envelope, and envelope seal set.
Browse our selection of Last Chance paper crafting products. Additional items are added every other month. These products are available only while supplies last so be sure to buy them before they are discontinued! Discounts vary and are subject to change.
Welcome to the newest Make My Monday bi-weekly challenge #266. Our host, Heather, chose Christmas Trees for the theme. I used the Modern Christmas suite collection.
When you finish here, please visit the challenge site to see what the rest of the very talented design team members created. Then, don’t forget to upload your creations to our gallery. We look forward to seeing your creations there!
Here’s my card:
As always with a fun fold card, I will be adding this to the Creative Creases Challenge where the theme is always Anything Goes with a Fun Fold.
The extra cardstock piece for the back isn’t necessary because the card will stand up without it. However, I just wanted extra stability.
I added two pieces of 1/2 by 5-1/4 inches strips on either side of the first score line at 1-3/4 inches so I could add the baker’s twine without worrying about it tearing the DSP.
Don’t forget to trim a piece of coordinating DSP to 6 by 2-1/2 inches for the envelope flap.
I also punched a 1-inch circle from another DSP pattern and ran it through my XYRON create-a-sticker for the envelope seal.
The two black cardstock pieces for the sentiment panels measure 3 by 4-1/8 inches
The gold foil specialty DSP pieces measure 2-7/8 by 4 inches.
What I Did:
I added dimensionals on the back of the white Christmas tree on the front and the glue dot to hold the baker’s twine bow in place
For everything else, I used multipurpose liquid glue to adhere pieces together since this card is already bulky
This will fit in a medium SU! envelope, but it will require additional postage
I adhered the front flap down so the extra pieces of cardstock I used for the baker’s twine support needed to be covered
I used embossing gold and black embossing powder for the trees and sentiment on the inside and front
Embossing on the gold foil was easier than I thought it would be
For all areas to be embossed, make sure you wipe down the papers using your embossing buddy
Cover the areas with either black or gold embossing powder and heat set using your heat tool
Make sure to allow the embossed images to cool before cropping to prevent smudging
Crop the trees using the Ornamental Christmas dies included in the suite of products
Adhere both sentiment panels together
Add liquid glue on the left half of the front sentiment panel and adhere it to the front flap
Adhering to just the front flap is especially important if you are not going to glue the flap down
After adhering the front sentiment, open the card and position the inside sentiment face down on the back of the front sentiment
This will allow you to make sure you line up both sentiment pieces so the inside doesn’t show when the card is closed
Add liquid glue to the back of the inside sentiment panel, then fold the back of the card over the panel
TA-DA! Perfect placement!
I did add another holiday sentiment on the back of the card, which has room for a personal message as well
With that, I’d completed this coordinated card, envelope, and envelope seal set.
You’ve asked, and we’ve answered! Get ready for our first-ever Black Friday sale with up to 40% off the most useful, needed, irresistible Stampin’ Up! products at deeper discounts than ever before. Shop between November 25 to December 1 so you can create more by spending less during this limited-time-only sale!
Promotion Details
Sales Period: November 25–December 1
Ordering Deadlines
Phone: December 1, 2025, at 6:59 p.m. (MT)
Online: December 1, 2025, at 11:59 p.m. (MT)
40% off
Stampin’ Blends
Paper Trimmer and blades
Ink refill bundles
25% off
Select adhesive
15% off
Select cardstock
Shop the full selection of discounted products online.
Products are available while supplies last.
Orders will likely arrive in time for the holidays.
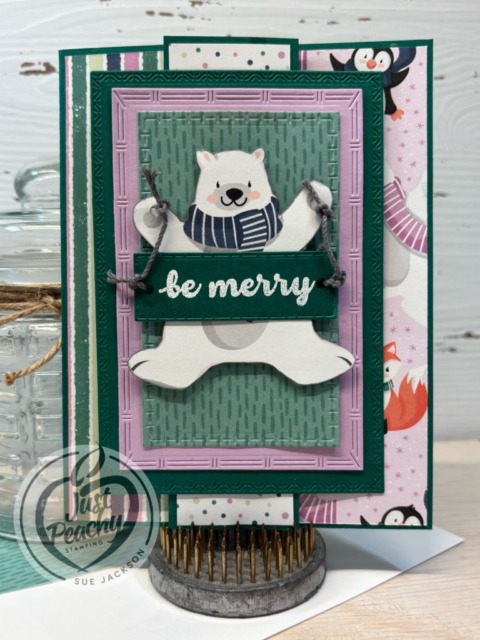
Welcome back to the bi-weekly Cardz 4 Galz challenge #264. It’s my turn to host this edition of our bi-weekly challenge, and I chose A Cute Christmas for the theme. When you finish here, please visit the challenge site to see what the rest of the design team members created. Then, don’t forget to upload your creations to our gallery. We look forward to seeing your creations there!
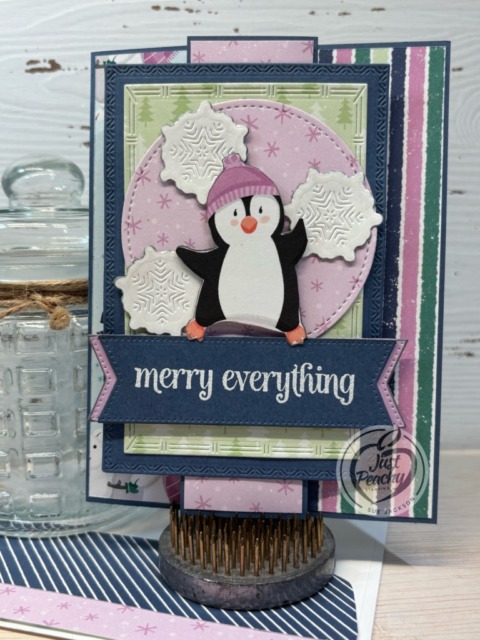
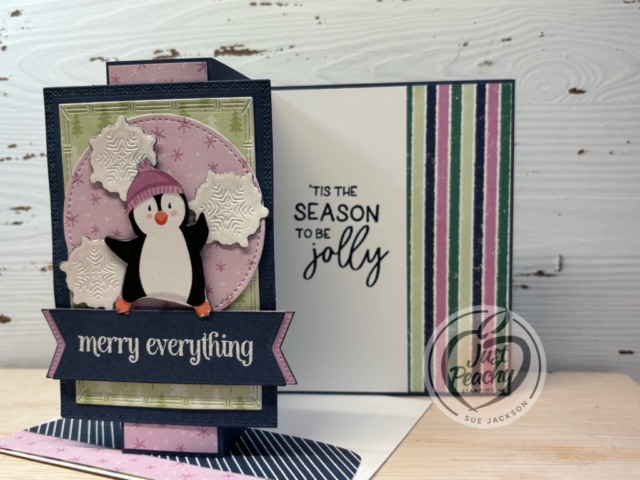
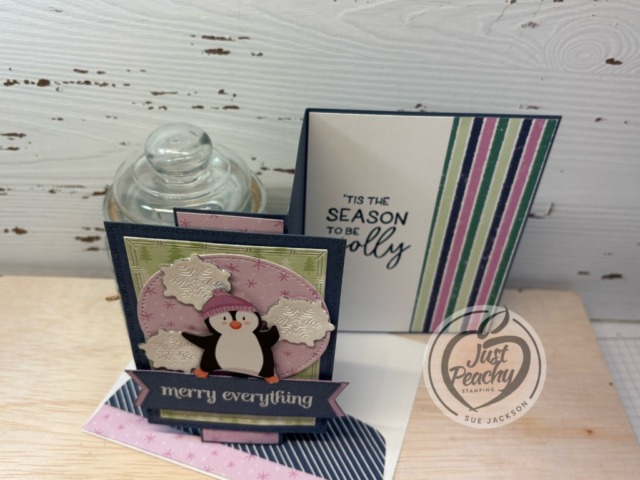
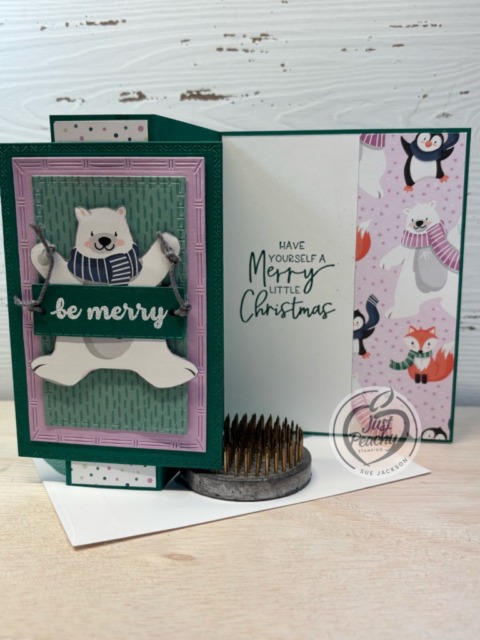
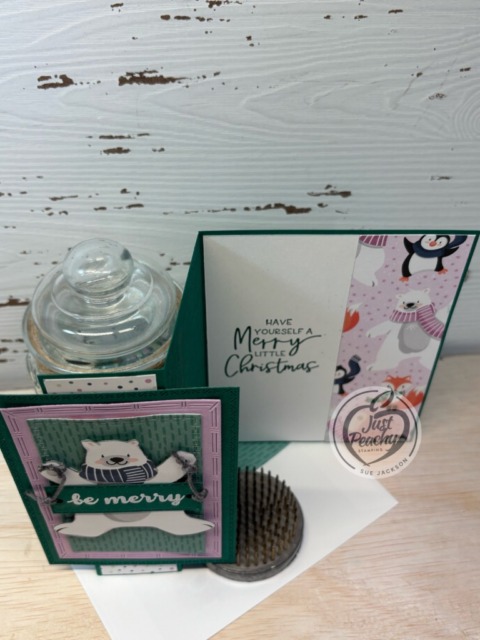
Here are my two cards:
Here goes with all the additional challenge for which these cards qualify.
As always with a fun fold card, I will be adding this to the Creative Creases Challenge where the theme is always Anything Goes with a Fun Fold.
I’m also going to upload this card to the Critter Crazy Challenge . I fussy cut both the penguin and the polar bear from the retired Penguin Playmates DSP (designer series paper).
These cards also qualify for Thing 1’s recipe in the the Double Trouble Challenge #205. My three colors for the penguin card are Fresh Freesia, Misty Moonlight, and Soft Sea Foam. I used Fresh Freesia, Shaded Spruce, and the retired Just Jade for the Polar Bear card. Both cards have more than 2 layers, and they each have one fussy cut image. Three colors – check. Two layers – check. One image – check.
In addition, since I used leftover pieces for all the white cardstock elements of the card, I am also entering it in the Snippets Playground Challenge #520.
I have enough of two patterns of DSP to make two more of these cards, if I am careful when trimming. Then, I will be down to just using strips. Here’s a picture of some of the snippets of this DSP that I have left:
The Modified Z-fold Fun Fold Card:
I’ve already posted a card using this fold for the October, 2025 Stampin’ Pretty Pals’ Blog Hop, which you can see here.
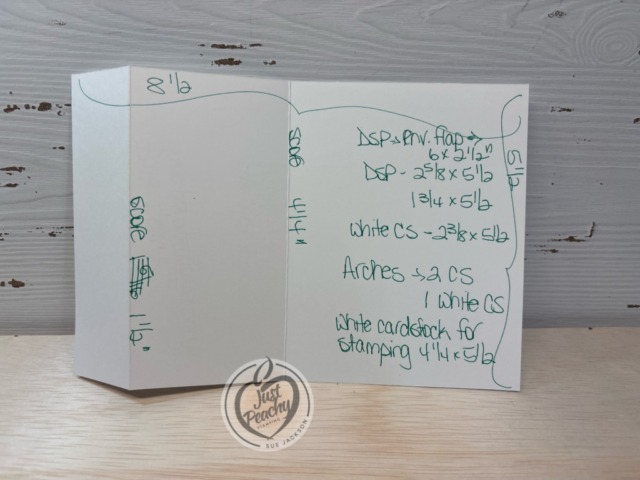
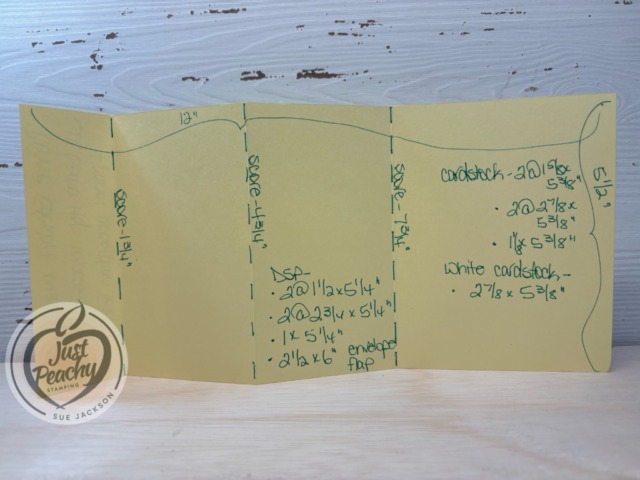
Of course, I made a template so I can easily recreate the card. Instead of using the Everyday Arches dies, I used the Textured Note die set.
Here’s the template:
The circle on the penguin card and sentiment banners were cropped using dies from the Stylish Shapes die set
The Fresh Freesia die under the Misty Moonlight banner was cropped using the same die, which I cut in half and adhered for a mat of sorts
I cropped the snowflakes from the retired Stitched Snowflakes dies, then lightly covered them with clear Wink of Stella for just a touch of sparkle
I added dimensionals under the polar bear and sentiment and the penguin and sentiment
Since these cards already have multiple layers, I adhered the rest of the pieces using multipurpose liquid glue
You’ve asked, and we’ve answered! Get ready for our first-ever Black Friday sale with up to 40% off the most useful, needed, irresistible Stampin’ Up! products at deeper discounts than ever before. Shop between November 25 to December 1 so you can create more by spending less during this limited-time-only sale!
Promotion Details
Sales Period: November 25–December 1
Ordering Deadlines
Phone: December 1, 2025, at 6:59 p.m. (MT)
Online: December 1, 2025, at 11:59 p.m. (MT)
40% off
Stampin’ Blends
Paper Trimmer and blades
Ink refill bundles
25% off
Select adhesive
15% off
Select cardstock
Shop the full selection of discounted products online.
Products are available while supplies last.
Orders will likely arrive in time for the holidays.
Welcome back to the monthly Stampin’ UP! Demonstrators Fun Fold Blog Hop. If you love fun folds, you’ve come to a hop filled with really great projects by some very talented fellow demonstrators. When you finish here, I hope you will hop along with the rest of the demos using the links below.
I made my great-nieces and great-nephew fun fold cards for Halloween. My 9 year-old great niece loved hers and I said that I was doing something special for Christmas cards for them. That sent me on the hunt for new-to-me fun folds.
Here’s my open bay window card:
It’s just a given that fun fold cards also post to the Creative Creases Challenge. Debbie Mageed at Secret Stamper coordinates both this hop and the challenge. Hopefully, you will be inspired to upload your own fun fold project to the challenge!
I’m also going to upload this card to the Critter Crazy Challenge since I have the dog and squirrel on the front and center, and added the chipmunk on the back. I hope that qualifies for Critter Crazy.
I found this card and video tutorial posted by Creative Moments By G on October 14, 2025, and loved it. After watching the video the first time, I sat down and used their measurements to trim all my paper, then followed along with the YouTube video while creating my test card. I probably should’ve used retired DSP (designer series paper), but live and learn. I also created a template for myself to follow using a 1/8 inch margin instead of a 1/4 inch margin.
Template & Practice Card:
Here’s my practice card, without the acetate and floating front:
Here’s the template:
What I Did:
I’d strongly suggest watching the video by Creative Moments by G, which I linked above just to see how the card goes together
I used the Jolly Delivery stamp set and North Pole Delivery 12″ by 12″ Specialty DSP, which includes two sheets of precut designs
Just a little side note – I can not believe that I was able to get all 4 of the Christmas village DSP pattern strips to line up so perfectly
Before I started putting anything together, I first trimmed all the paper I would need which made it much easier for me to follow along with the video
Since this card is already bulky, I only used multipurpose liquid glue and tear & tape to adhere all the pieces together
Make sure you let the liquid glue dry completely
The layers of the sentiment panel on the front were cropped using two of the Nested Essential dies
The three glittery dots come from the low-profile sparkly dots set
For the bay window Garden Green pieces, I used the Regals 6 x 6 inch DSP
The center inside panel comes from the Pool Party pattern in the Subtles 6 x 6 inch DSP
The adorable dog pulling the gift sleigh comes from the precut designs, as does the squirrel I added behind the presents
The addition of Very Vanilla cardstock on the back is necessary for a sentiment and my personal note to my great-niece
I also used two precut pieces for the back bottom corners of the card
BIG HINT: I added cardstock layers behind all the DSP pieces, which was a mistake because the card won’t fit in the envelope
This card will be hand-delivered, so I can get an envelope better suited for the bulk
The practice card only has one layer of added cardstock, and that’s behind the inside center DSP panel
The practice card easily fits in a medium envelope, and will do so even after the acetate and front pieces are added
This card will require additional postage
It truly took longer to trim all the paper than it did to put this card together, so I hope you will add it to your fun fold rotation
With that, I’d finished this coordinated card, envelope, and envelope seal set.
Back to the Stampin’ Up! Demo Fun Fold Blog Hop:
We all hope you will follow the links below and hop along with us. There’s so much inspiration to be found here. We’d love to see what inspires you to create a fun fold as well. Don’t forget to upload it to the Creative Creases challenge!
If you get lost along the way, you can always come back here to find the next demo in line.
You’ve asked, and we’ve answered! Get ready for our first-ever Black Friday sale with up to 40% off the most useful, needed, irresistible Stampin’ Up! products at deeper discounts than ever before. Shop between November 25 to December 1 so you can create more by spending less during this limited-time-only sale!
Promotion Details
Sales Period: November 25–December 1
Ordering Deadlines
Phone: December 1, 2025, at 6:59 p.m. (MT)
Online: December 1, 2025, at 11:59 p.m. (MT)
40% off
Stampin’ Blends
Paper Trimmer and blades
Ink refill bundles
25% off
Select adhesive
15% off
Select cardstock
Shop the full selection of discounted products online.
Products are available while supplies last.
Orders will likely arrive in time for the holidays.
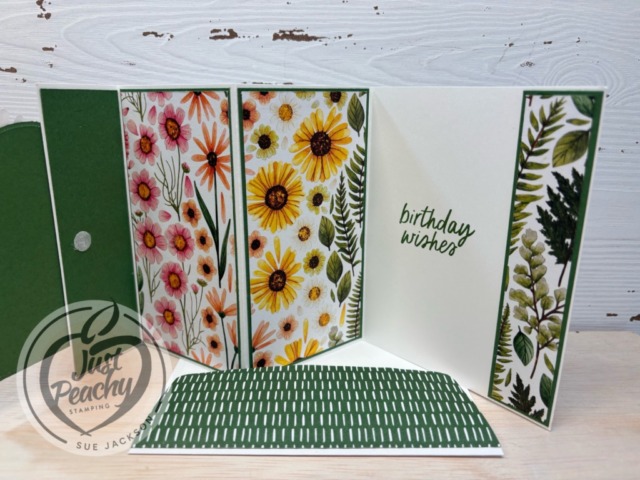
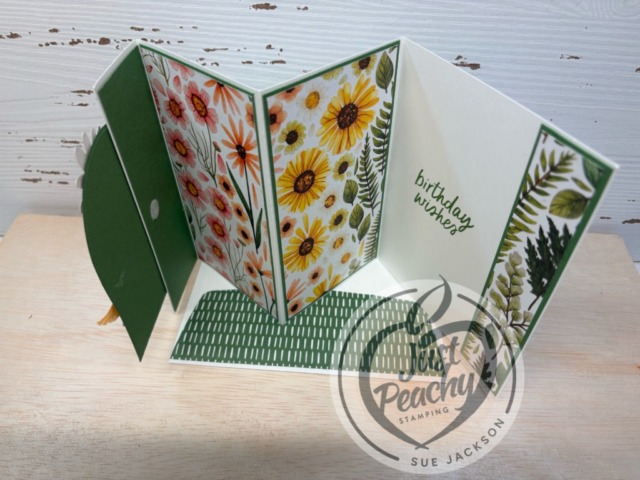
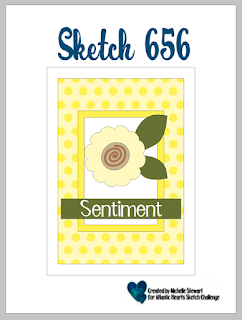
Welcome to the weekly Atlantic Hearts Sketch Challenge! Challenge #656 is for Team B, which is my team. I love getting kickstarted with a sketch, then just letting the card come together. Sometimes, I know exactly what I want to do. Other times, like for this week’s challenge, the card evolves. Everyone on Team A and Team B would love for you to play along with the sketches and then post your creations to the challenge gallery. Don’t forget to come back tomorrow to see the creations of the design team. We hope our projects inspire you to play along with us.
Here’s my card:
Here’s the Atlantic Hearts Sketch Challenge #656 layout sample:
It’s just a given that if I can create a fun fold card while using a sketch challenge, I will do it. It’s also a given that I will post fun folds to the Creative Creases Challenge, coordinated by Debbie Mageed at Secret Stamper. Hopefully, you will be inspired to upload your own fun fold project to the challenge!
I found this 4 panel accordion fold card on Connie Stewart’s, from Simply Simple Stamping, YouTube channel. You can find her video tutorial here. I was so happy to find this fold because I’ve been wanting to show the beauty of this DSP. This 4 panel card lets the DSP shine!
Template & Tips:
Of course, I created a template. My templates are handwritten because it’s easier and faster for me to do it that way than trying to make a pretty computerized template.
BIG TIP: When trimming your DSP (designer series paper) for this layout, place the side you want to show down on your paper trimmer! Trust me on that.
I also trimmed a piece of the Garden Green 6 x 6 inch DSP to 6 by 2-1/2 inches for the envelope flap.
Next, I punched a 1-inch circle out of the floral DSP and ran it through my XYRON create-a-sticker for the envelope seal. I started doing these seals during COVID and liked it so much, I have been do it since then.
Putting the Card Together:
Following Connie Stewart’s video, or the measurements on my template, would be much clearer than if I tried to type everything out for you
I used Garden Green, Strawberry Slush, and Basic White cardstock for the base, arches, and inside panel for this card
I cropped the leaves on the front from Garden Green cardstock using the Impressions Abloom die set
The flowers were stamped using Strawberry Slush, Peach Pie using the Impressions Abloom stamp set
I used Daffodil Delight and Crumb Cake for the centers of the flowers, stamping the Daffodil Delight ink first
The outside sentiment comes from the Coneflower Celebrations stamp set, which I cropped using the banner from the Stylish Shapes die set
The inside sentiment comes from the Simply Said stamp set
I stamped both sentiments in Garden Green ink
I added dimensionals under the outside sentiment banner and the two Strawberry Slush flowers
I used multipurpose liquid glue to adhere all the other pieces
While this card is bulky and will require extra postage, it will fit in a medium SU! envelope
With that, I’d finished this coordinated card, envelope, and envelope seal set
As a Stampin’ Up! demonstrator, I get to start pre-ordering products today from the upcoming mini-catalog which starts in January. As soon as I get my new products, I will make sure to start sharing cards made with new products.
Kits Make Crafting Simple, Fun, and Just Simply Fun!
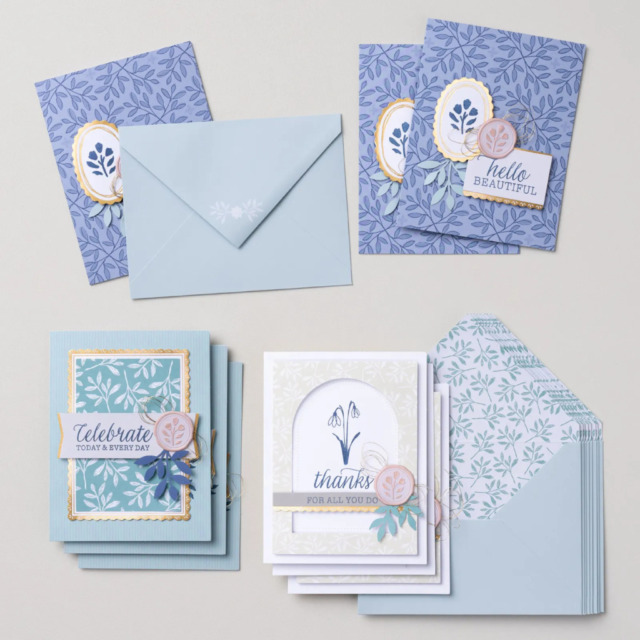
Here’s a look at the two new kits available:
First, it’s the Everyday Beauty Kit, which retails for $25 USD.
Create the perfect card for any occasion using the all-inclusive Everyday Beauty Kit. This kit comes with everything you need to make three unique card designs: printed card bases and coordinating envelopes with lovely botanical patterns, precut paper pieces, timeless faux wax seals, shimmering metallic thread, and a versatile stamp set that you can use on countless other projects.
DETAILS – Makes 9 cards: 3 each of 3 designs – Folded card size: 5-1/2″ x 4-1/4″ (14 x 10.8 cm) – Colors: Basic Beige, gold, Gray Granite, Lost Lagoon, Night of Navy, Petal Pink – Also available in French
Kit includes one of each item listed below. – Everyday Beauty Photopolymer Stamp Set – Clear stamp block – Night of Navy Classic Stampin’ Spot – Step-by-step instructions – 9 printed envelopes – Faux wax seal stickers – Metallic thread – Adhesive
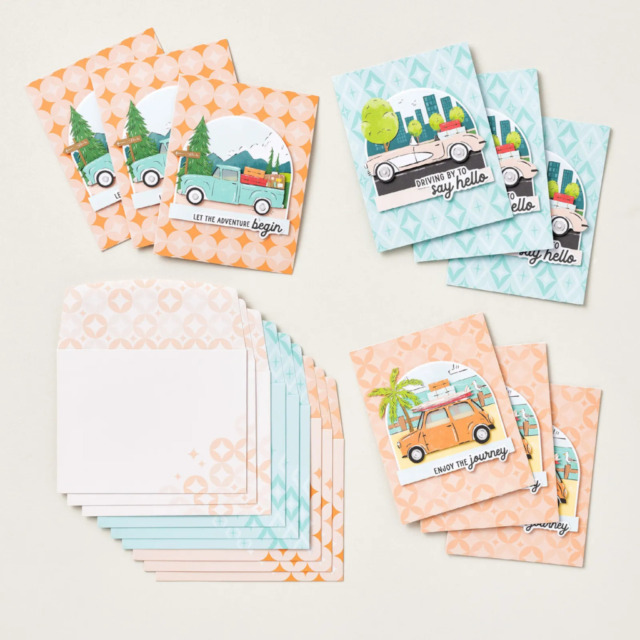
The second kit is the Adventure Awaits kit, which retails for $14 USD.
Let your creativity take the driver’s seat with the Adventure Awaits Kit. Coast in the retro colours and hand-drawn artwork that can be either feminine or masculine. With printed sentiments, precut paper, and vellum details, this kit comes with everything you need to make nine cute cards.
DETAILS – Makes 9 cards: 3 each of 3 designs – Folded card size: 5-1/2″ x 4-1/4″ (14 x 10.8 cm) – Colors: Basic Black, Coastal Cabana, Crushed Curry, Garden Green, Granny Apple Green, Pecan Pie, Petal Pink, Poppy Parade, Pretty Peacock, Timid Tiger – Sentiments printed in English, French, and German
Kit includes one of each item listed below. – Step-by-step instructions – 9 printed envelopes – Vellum – Adhesive
If you have any questions, or need a bit of a creative mojo boost, you can reach me at my [email protected].
If you live in the U.S. and don’t already have a Stampin’ UP! demo from whom you order, I would be honored to work with you.
Welcome to Just Peachy Stamping by Sue Jackson: an independent Stampin' Up demonstrator.
Through Stampin' Up!, I happily share my love of papercrafting through sales, classes, small stamping group meet-ups and workshops. I think that being a teacher in my "real life", I have a unique approach to sharing my fantastic hobby. I look forward to connecting with you!