Welcome to another Cardz 4 Guyz challenge! Dawn chose “shades of blue” for the theme for #276. I hope you will pop over to the C4G blog to see what the rest of the design team created as well!
Here’s my card:
This card falls into the easy-peasy category when using the Stamparatus. I can’t imagine trying to do this card without that tool.
Measurements:
The Night of Navy base of the card started out measuring 5-1/2 inches by 8-1/2 inches, scored at 4-1/4 inches.
Next, I trimmed off 1-1/4 inches from the top, outside part of the card.
The white cardstock on the front measures 5-3/8 inches by 2-7/8 inches.
The white cardstock on the inside panel measures 4-1/8 inches by 5-3//8 inches.
The DSP panel for the inside of the card measures 4-1/8 inches by 1-1/2 inches.
I also trimmed a piece of the DSP to 6 inches by 2-1/2 inches for the envelope flap. Since I have a tendency to put the envelope DSP pieces away, I adhered it to the envelope flap as soon as I trimmed it down.
At the same time, I punched a 1 inch circle of coordinating DSP and ran it through my XYRON create-a-sticker machine for the envelope seal.
Stamparatus for the Win!
I used the Biggest Wish photopolymer stamp set from the annual catalog for the sentiment words.
First, I used a piece of printer paper trimmed to the same size as the white cardstock on the front. That way I could make sure that I wouldn’t wind up with half a sentiment. I could also make sure that I had almost the same white space at the top and bottom of the front of the card.
Using the second plate of the Stamparatus, I placed “happy” where I wanted it to be stamped, and tried it out on the copy paper. Success! On to the white cardstock!
I first stamped all the Balmy Blue “BIRTHDAY” sentiments going down the front of the white cardstock. To accomplish this, I simply moved the Stamparatus plate down one notch and restamped four more times.
Then, I stamped the Night of Navy “happy” using the same process of moving the plate down one notch after each stamping.
That’s it! The result looks so cool!
Finishing Up:
Next, I adhered the DSP panel to the right side of the white cardstock for the inside. At first, I thought I would have the stripes line up vertically. However, the vertical stripes with the horizontal lines of the sentiments did not look good at all together. Once I changed the stripes to horizontal. everything on the front of the card flowed nicely.
Since I adhered the DSP first, I was able to pick out a birthday sentiment that would fit on the remaining white panel. I chose “wishing you your BEST year yet” from the Best Year stamp set, also in the annual catalog. I used the Night of Navy ink pad for the inside sentiment.
That’s it. This card came together very quickly. It just might become my go-to card layout when I need something fast!
What’s New? Since you asked, it’s the DSP SALE! The sale ends on Monday, August 2nd.
What’s Your Favorite DSP?
ITEM
PAGE
DESCRIPTION
PRICE
155841
130
BEAUTY OF THE EARTH 12″ X 12″ (30.5 X 30.5 CM) DESIGNER SERIES PAPER
$11.50 USD | 15.75 $ CAD $9.78 USD | 13.39 $ CAD
155696
131
BLOOM WHERE YOU’RE PLANTED 12″ X 12″ (30.5 X 30.5 CM) DESIGNER SERIES PAPER
$11.50 USD | 15.75 $ CAD $9.78 USD | 13.39 $ CAD
155499
131
HAND-PENNED 12″ X 12″ (30.5 X 30.5 CM) DESIGNER SERIES PAPER
$11.50 USD | 15.75 $ CAD $9.78 USD | 13.39 $ CAD
152494
132
IN GOOD TASTE 12″ X 12″ (30.5 X 30.5 CM) DESIGNER SERIES PAPER
$21.00 USD | 29.00 $ CAD $17.85 USD | 24.65 $ CAD
155817
132
IN THE WILD 12″ X 12″ (30.5 X 30.5 CM) DESIGNER SERIES PAPER
$11.50 USD | 15.75 $ CAD $9.78 USD | 13.39 $ CAD
155807
132
PANSY PETALS 12″ X 12″ (30.5 X 30.5 CM) DESIGNER SERIES PAPER
$11.50 USD | 15.75 $ CAD $9.78 USD | 13.39 $ CAD
155605
133
SWEET SYMMETRY 12″ X 12″ (30.5 X 30.5 CM) DESIGNER SERIES PAPER
$11.50 USD | 15.75 $ CAD $9.78 USD | 13.39 $ CAD
155718
133
TIDINGS OF CHRISTMAS 6″ X 6″ (15.2 X 15.2 CM) DESIGNER SERIES PAPER
$11.50 USD | 15.75 $ CAD $9.78 USD | 13.39 $ CAD
155686
134
YOU’RE A PEACH 12″ X 12″ (30.5 X 30.5 CM) DESIGNER SERIES PAPER
$11.50 USD | 15.75 $ CAD $9.78 USD | 13.39 $ CAD
It’s Almost Time for the Mini-Catalog and Sale-a-Bration launch!
I can’t begin to tell you how excited I was to see the new Mini-Catalog and Sale-a-Bration catalogs! Both catalogs go live on Tuesday, August 3rd! While I can’t show you the inside pages YET, I can share a card I made for a future blog post!
How stinking cute are those sheep?!? The Counting Sheep stamp set is FREE with a $50 purchase. The Sheep die set, including all the cropped shapes on the front (with the exception of the stitched rectangle die for the sentiment) is also FREE with a $50 purchase. That means, for a $100 total purchase, you can earn the stamp set AND the die set. Score! Contact me to find out how! [email protected]
Do you live in the U.S. and need a demonstrator? If so, I’d love to talk to you!
Do You Want to Place an Order?
Of course you do!
If you are ordering less than $150.00, please use the host code shown. If you are ordering more than $150.00, please contact me first so you can get your stamping rewards! Any order over $50 will earn a little surprise from me.
The HOST CODE through July 30, 2021 is 2TJSU2RQ.
Again, thank you for stopping by my blog today! I appreciate your comments and your time.
Welcome to another Cardz 4 Guyz challenge! Deb chose “keys” for the theme for #275. I hope you will pop over to the C4G blog to see what the rest of the design team created as well!
Here’s my card:
I’ll admit, this theme had me stumped for a bit. I do not have anything with a key as a stamp or embellishment. Therefore, I did what any good crafter does when stumped: go to Pinterest! I saw a number of nautical themed cards with keys as embellishments and thought I could do something with that. Thankfully, Michaels had small keys in the jewelry section, so I grabbed them. I used products from the Sailing Home line of Stampin’ Up! products.
Measurements:
After I bought the keys, the rest of the card fell into place quite rapidly.
The Night of Navy base measures 8-1/2 inches by 5-1/2 inches, scored at 4-1/4 inches.
I used a Crumb Cake mat trimmed to 5-3/8 inches by 4-1/8 inches.
The Sailing Home DSP (designer series paper) measures 4 inches by 5-1/4 inches. While I was trimming that, I also trimmed a piece to 6 inches by 2-1/2 inches for the envelope flap. I adhered it to the flap immediately so I wouldn’t misplace it while I was working on the card.
Next, I used scraps of white cardstock to stamp both the anchor and the sentiment.
I already had the nautical steering wheel cropped using the Smooth Sailing dies, from which I also cropped the anchor. Once again, I used the stitched rectangle dies to crop out the sentiment.
The white cardstock for the inside of the card measures 4 inches by 5-1/4 inches, as always.
Thoughts and Assembly:
The DSP appears to almost be distressed, but I thought I could add to it to make it stand out against the Crumb Cake mat. Therefore, I used the brush end of my Early Espresso marker and outlined the piece of DSP. As you can see, I wasn’t too careful and the corners have a bit more distressing than the rest of the DSP. However, since the print on the DSP uses Early Espresso, everything blends in for one cohesive look.
While I had my marker out, I also used it to distress the white cardstock for the inside panel.
That’s just one of the great things about using Stampin’ Up! products: all the color products match perfectly creating a seamless end product.
I really wanted the embellishments to be clean and un-distressed since the keys are shiny. So, I didn’t distress anything else on the front of the card.
After dry-fitting all the pieces on the DSP, I used multipurpose glue to adhere the steering wheel. Then, I used dimensionals under the anchor and sentiment.
The bakers’ twine also comes from the Sailing Home products. I wrapped it around the DSP three times and tied it in a knot on the front. While the keys may look like they are attached to the twine, I actually used glue dots to keep them in place.
In order to compensate for the bulk of the twine, I popped the DSP up on dimensionals before adhering it to the Crumb Cake cardstock.
I Thought I was Done, but I was Wrong.
After I adhered the front of the card to the Night of Navy base, I thought I had finished the card. However, something just kept bugging me. After a few hours, it dawned on me – I’d used an even number of items on the front of the card. The steering wheel, anchor, twine, two keys, and the sentiment. I grabbed my last steering wheel sailing trinket and used a glue dot to attach it.
I didn’t stamp anything on the inside of the card because I wanted to be able to use it as an all occasion thank you card.
With the addition of the steering wheel trinket, I could call this card/envelope/seal coordinated set complete.
Thanks so much for stopping by my blog today!
I’d love to hear what you think, and greatly appreciate every comment.
BEAUTY OF THE EARTH 12″ X 12″ (30.5 X 30.5 CM) DESIGNER SERIES PAPER
$11.50 USD | 15.75 $ CAD $9.78 USD | 13.39 $ CAD
155696
131
BLOOM WHERE YOU’RE PLANTED 12″ X 12″ (30.5 X 30.5 CM) DESIGNER SERIES PAPER
$11.50 USD | 15.75 $ CAD $9.78 USD | 13.39 $ CAD
155499
131
HAND-PENNED 12″ X 12″ (30.5 X 30.5 CM) DESIGNER SERIES PAPER
$11.50 USD | 15.75 $ CAD $9.78 USD | 13.39 $ CAD
152494
132
IN GOOD TASTE 12″ X 12″ (30.5 X 30.5 CM) DESIGNER SERIES PAPER
$21.00 USD | 29.00 $ CAD $17.85 USD | 24.65 $ CAD
155817
132
IN THE WILD 12″ X 12″ (30.5 X 30.5 CM) DESIGNER SERIES PAPER
$11.50 USD | 15.75 $ CAD $9.78 USD | 13.39 $ CAD
155807
132
PANSY PETALS 12″ X 12″ (30.5 X 30.5 CM) DESIGNER SERIES PAPER
$11.50 USD | 15.75 $ CAD $9.78 USD | 13.39 $ CAD
155605
133
SWEET SYMMETRY 12″ X 12″ (30.5 X 30.5 CM) DESIGNER SERIES PAPER
$11.50 USD | 15.75 $ CAD $9.78 USD | 13.39 $ CAD
155718
133
TIDINGS OF CHRISTMAS 6″ X 6″ (15.2 X 15.2 CM) DESIGNER SERIES PAPER
$11.50 USD | 15.75 $ CAD $9.78 USD | 13.39 $ CAD
155686
134
YOU’RE A PEACH 12″ X 12″ (30.5 X 30.5 CM) DESIGNER SERIES PAPER
$11.50 USD | 15.75 $ CAD $9.78 USD | 13.39 $ CAD
What’s Your Favorite?
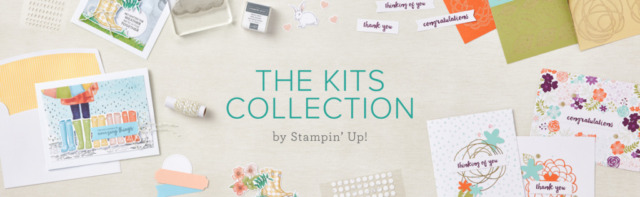
The KITS COLLECTION is still available as well!
Take a look at this video explaining what you get with your kit! Remember, the kits are all inclusive! Just add some of your own crafting basic tools, and you are good to go!
Do you live in the U.S. and need a demonstrator? If so, I’d love to talk to you!
Do You Want to Place an Order?
Of course you do!
If you are ordering less than $150.00, please use the host code shown. If you are ordering more than $150.00, please contact me first so you can get your stamping rewards! Any order over $50 will earn a little surprise from me.
The HOST CODE through July 31, 2021 is 2TJSU2RQ.
Again, thank you for stopping by my blog today! I appreciate your comments and your time.
Welcome to another Cardz 4 Guyz challenge! The theme for this challenge is to use dogs or puppies in your project. I chose dogs, and used the Pampered Pets dies along with some leftover items from the retired suite of products. In addition to the old, I used the new Bark 3D embossing folder for the background of my card.
Here’s my card:
I just love schnauzers! We had one, Brandy, when I was growing up on Long Island. Brandy did not like the snow and would kind of hop/jump instead of walking through it. Happy memories!
A Four Square Background
I really wanted to keep the color scheme simple with just Real Red, Basic Black, and Basic White. It’s such a classic color combination.
I used Read Red for the card base. It measures 4-1/4 inches by 11 inches, scored at 5-1/2 inches to create a tent fold card.
I started with a piece of white measuring 4-1/4 by 5-1/2 inches. Then, I ran it through the Big Shot using the Bark 3D embossing folder. With the 3D embossing folders, you will find it much easier to emboss before trimming. After I embossed the white cardstock, I trimmed it to 4 inches by 5-1/4 inches.
I used white cardstock on the inside of the card. It also measures 4 inches by 5-1/4 inches.
Each of the four DSP (designer series paper) squares measures 1-5/8 inches square.
While I had the DSP out, I trimmed a piece for the envelope flap. It measures 6 inches by 2-1/2 inches.
The Real Red mat under the DSP squares measures 3-1/2 inches square.
Assembly
Before adhering the embossed white cardstock to the base, I attached 3 pieces of ribbon to the white cardstock. The ribbon doesn’t reach all the way around since I just needed it to fold under. I placed a piece of tear-and-tape vertically on the back to hold each piece in place.
I dry-fit the DSP squares in place before adhering them down on the red square of cardstock with multipurpose glue.
Then, I adhered the red cardstock to the embossed white cardstock with multipurpose glue.
I did have a schnauzer left on the remaining Pets DSP, so I cropped it with the Pets die. The schnauzer is attached using dimensionals.
The front and inside sentiments are stamped using the Momento Tuxedo Black ink pad. Then, I cropped the front sentiment using one of the stitched rectangle dies. In order to have the sentiment straddle the ribbon, I used dimensionals along just the top and the bottom of the sentiment block.
Finally, I used a glue dot to attach one of my remaining pets trinkets to the schnauzer’s collar.
Finishing Up
Here’s a picture of the inside of the card:
The sentiment also comes from the Pampered Pets stamp set.
I’ve never really figured out what to do with the paw die. However, I really think it works as a border on the bottom.
Finally, I trimmed the DSP on the envelope flap, punched a circle seal from DSP and ran it through my XYRON create a sticker. The seal lives inside the envelope until I am ready to use it.
With that, I’d finished this card/envelope/seal coordinated set.
I’d love to hear what you think, and greatly appreciate every comment.
The United Through Creativity FREE Digital Download features inclusive, multicultural, and multilingual craft elements that represent each of Stampin’ Up!’s markets. And, it’s free for all! Print your favorite pieces, color and create, then share to social media using #UnitedThroughCreativity!
Do you live in the U.S. and need a demonstrator? If so, I’d love to talk to you!
Do You Want to Place an Order?
Of course you do!
If you are ordering less than $150.00, please use the host code shown. If you are ordering more than $150.00, please contact me first so you can get your stamping rewards! Any order over $50 will earn a little surprise from me.
The HOST CODE through June, 2021 is 26AD7SA3.
Again, thank you for stopping by my blog today! I appreciate your comments and your time.
Normally, I would be welcoming you to the next Cardz 4 Guyz challenge, # 272. The new theme, Father’s Day, includes endless possibilities. However, on this Tuesday, the 1st of June, also coincides with the Sparkles Christmas Challenge #125going live, of which I am now a design team member starting with this challenge. This month’s theme, a Krafty Christmas, brings a plethora of ideas to my mind. Just check all the other cards by the design team, and you will see what I mean.
I really tried to figure out a way to try to better incorporate both challenges into one blog post, but it just didn’t happen. My other choice, two blog posts going live at the same time, didn’t seem feasible either. So, here we have it. Two Cards for Two Design Teams, Two Challenges and One Time Slot to go live.
Forgive me, please. I am having a complete brain fart and can’t remember how to link the picture to the URLs. Hopefully, I will figure it out before this has to go live.
Everything I used for the Father’s Day card actually came from May’s Paper Pumpkin kit! Sweet! I’ve been making special order cards for a work colleague for about two years. His father is a huge baseball fan, so this Paper Pumpkin arrived at the perfect time!
Here’s the card:
I used two of the included card bases to create this fun fold. The inside fold did get trimmed about a quarter of an inch so it would fold nicely. Literally everything else was contained in the kit, including the stamps, Night of Navy inkspot, dimensionals, enamel dots. Everything for under $25.00!
Next month’s Paper Pumpkin will coordinate with the stunningly beautiful Expressions in Ink DSP! Can’t wait! If you want to get in on that order, click on the link below or get in touch with me! You only have until June 10, 2021 to order it!
Sparkles Christmas Buddies
Here’s my Krafty Christmas card:
I used the now retired Curvy Christmas stamp and coordinating die set for this card. Some of you may have kept your set, just as I did. If you didn’t the layout could be copied with another set in the same color combination.
The Cherry Cobbler base measures 4-1/4 inches by 11 inches, and scored at 5-1/2 inches to create a tent card.
The DSP under the front of the card measures 4-1/8 inches by 5-3/8 inches.
The top Cherry Cobbler layer measures 4 inches by 5-1/4 inches.
The Crumb Cake layer started out 4 inches by 5-1/4 inches. Then I cropped it using the Curvy dies. It was much easier to get the trees stamp to line up with this half of the cropped Crumb Cake, so that’s what I used. Then, I ran the cropped piece of cardstock through the Big Shot using the Subtles 3D embossing folder. (Will any of you ever get rid of this retired embossing folder? I can’t see myself doing that!)
The embossing buddy is the absolute most important tool for the embossing of the sentiment, trees, and star flourishes. I used the embossing buddy to clean off all pieces of cardstock. Remember, do not touch your fingers to the areas being embossed once you clean them! The oils from your fingers will pick up little tiny pieces of the embossing powder. It’s difficult, but not impossible, to get those stray pieces of powder off once they are on the cardstock.
The Stamp-aratus
The next most important tool? The Stamp-aratus, of course, and that’s especially true in this case. After arranging the stamp and paper just where I wanted the stamp to live, I stamped it twice using VersaMark.
Next, I sprinkled the embossing powder onto the VersaMark trees, flicked off the extra (from behind), then heat set it.
As I watched the magic happen, I realized I had inadvertently used CLEAR powder when I meant to use WHITE powder. Never fear, the Stamp-aratus was still set with the trees stamp. So, I lined up the cardstock and stamped directly over the clear set powder twice using VersaMark. Then, I made sure I used the WHITE powder, and repeated the process.
I repeated the process twice for the star flourishes in the sky. I just moved the cardstock very slightly to the left so the flourishes don’t exactly line up.
Then, I set up the Stamp-aratus for the Crumb Cake cardstock and sentiment. First, I stamped the sentiment using Cherry Cobbler ink. I cleaned off the stamped and stamped twice using VersaMark. I completely intended to use clear embossing powder for the sentiment, and, thankfully, that’s what I did.
Finishing Up
After I adhered the Crumb Cake cardstock to the Cherry Cobbler cardstock, I wrapped a length of the ribbon around and simply tied it in a square knot. I addded dimensionals under the Cherry Cobbler cardstock and then adhered all the pieces together.
There’s a piece of white cardstock for the inside panel, measuring 4 inches by 5-1/4 inches. I didn’t need to use the Stamp-aratus to stamp the sentiment and trees on the inside. I like the contrast between the Cherry Cobbler sentiment and Crumb Cake trees on the inside.
Finally, I stamped Crumb Cake trees along the bottom of the front side of the envelope. Then, I adhered and trimmed a piece of Cherry Cobbler DSP for the envelope, adhered and trimmed it down.
My Krafty Christmas card/envelope set was done! This card would be very easy to mass produce, and I think I may just have to do that for my family members up north.
Thank you so much for stopping by today.
I’d love to hear what you think, and greatly appreciate every comment.
Sign up NOW for the June Paper Pumpkin! Just Click on the Options Below:
Do you live in the U.S. and need a demonstrator? If so, I’d love to talk to you!
Do You Want to Place an Order?
Of course you do!
If you are ordering less than $150.00, please use the host code shown. If you are ordering more than $150.00, please contact me first so you can get your stamping rewards! Any order over $50 will earn a little surprise from me.
The HOST CODE through June 4, 2021 is ZM63ASKZ.
Again, thank you for stopping by my blog today! I appreciate your comments and your time.
Welcome to another Cardz 4 Guyz challenge! The theme for #271, create your own background, offers so much potential and an incredible number of options. For this challenge, I chose to create my own background using the shaving cream and reinker technique.
Here’s my card:
Yes, Shaving Cream, Reinkers, and Watercolor Paper
I’ve tried doing this technique using regular cardstock before, but it doesn’t hold up well to the shaving cream. Therefore, I have since used strictly watercolor paper. I trimmed a piece to 4-1/4 inches by 5-1/2 inches to start.
Next, I used the least expensive shaving cream in the store, and I think it came to 85 cents including tax. I grabbed half sheet of the thin cardboard used in the DSP packages and then spread out shaving cream on it.
Next, I dropped some Night of Navy ink drops and then some Crumb Cake ink drops on the shaving cream. I used my bone folder to kind of swirl around the ink. Here’s the way it looked before covering it with my watercolor paper:
Now all I had to do was lightly press the watercolor paper onto the “mess” and carefully lift it off.
HINT: one of the biggest reasons I started with 4-1/4 by 5-1/2 inches was so I had some room on the very ends to lift the paper off.
Then, I used the same bone folder to lightly skim the shaving cream off the watercolor paper.
Even though I didn’t do anything to change the swirls on the shaving cream, the second press is just a bit different than the first. Here’s a look at the second piece of watercolor paper:
Measurements and Assembly:
When the watercolor paper dried thoroughly, I trimmed it to 4 inches by 5-1/4 inches.
Then I stamped the vintage airplane from the Soar Confidently stamp set using Early Espresso on white cardstock. The plane was cropped using the nested label dies. I used the Night of Navy marker to outline the cropped sentiment panel.
I stamped the sentiment, from the Beautiful World stamp set in Night of Navy on white cardstock. Then, I cropped it using the stitched rectangle dies and outlined it using the Crumb Cake marker.
The Crumb Cake mat measures 4-1/8 inches by 5-3/8 inches.
I used Night of Navy for the base of the card. It measures 4-1/4 inches by 11 inches, scored at 5-1/2 inches, creating a landscape side-opening card.
I adhered the Crumb Cake mat to the front of the card using my fav, multipurpose glue.
Next, I used a length of the burlap ribbon to go across the front and very slightly wrap around to the back of the card. Sometimes that can be difficult to do and have it stay in place. Therefore, I used a piece of tear and tape from end to end on the burlap ribbon. When I removed the cover piece, I was easily able to wrap it around and feel confident that the ribbon will stay in place.
I popped both the plane and sentiment pieces up off the front using dimensionals, making sure I didn’t have dimensionals sitting on the ribbon.
Finally, I used a piece of white cardstock trimmed to my usual 4 inches by 5-1/4 inches for the inside panel. I used “Thank you for being part of mine” from Beautiful World and Happy Father’s Day from Soar Confidently sentiments. Both of these are stamped in Night of Navy ink.
With that, I had finished this card. Don’t be surprised if you see more shaving cream backgrounds in the next few weeks. It’s really a fun technique!
I can’t wait to see what you create and upload to the challenge! Have fun!
Do You Love Fun Folds?
If you do, please stop by a new challenge, Creative Creases from Debbie Mageed at The Secret Stamper! I am having a blast with her challenges and have learned some new fun folds! Join the fun at
Thank you so much for stopping by today.
I’d love to hear what you think, and greatly appreciate every comment.
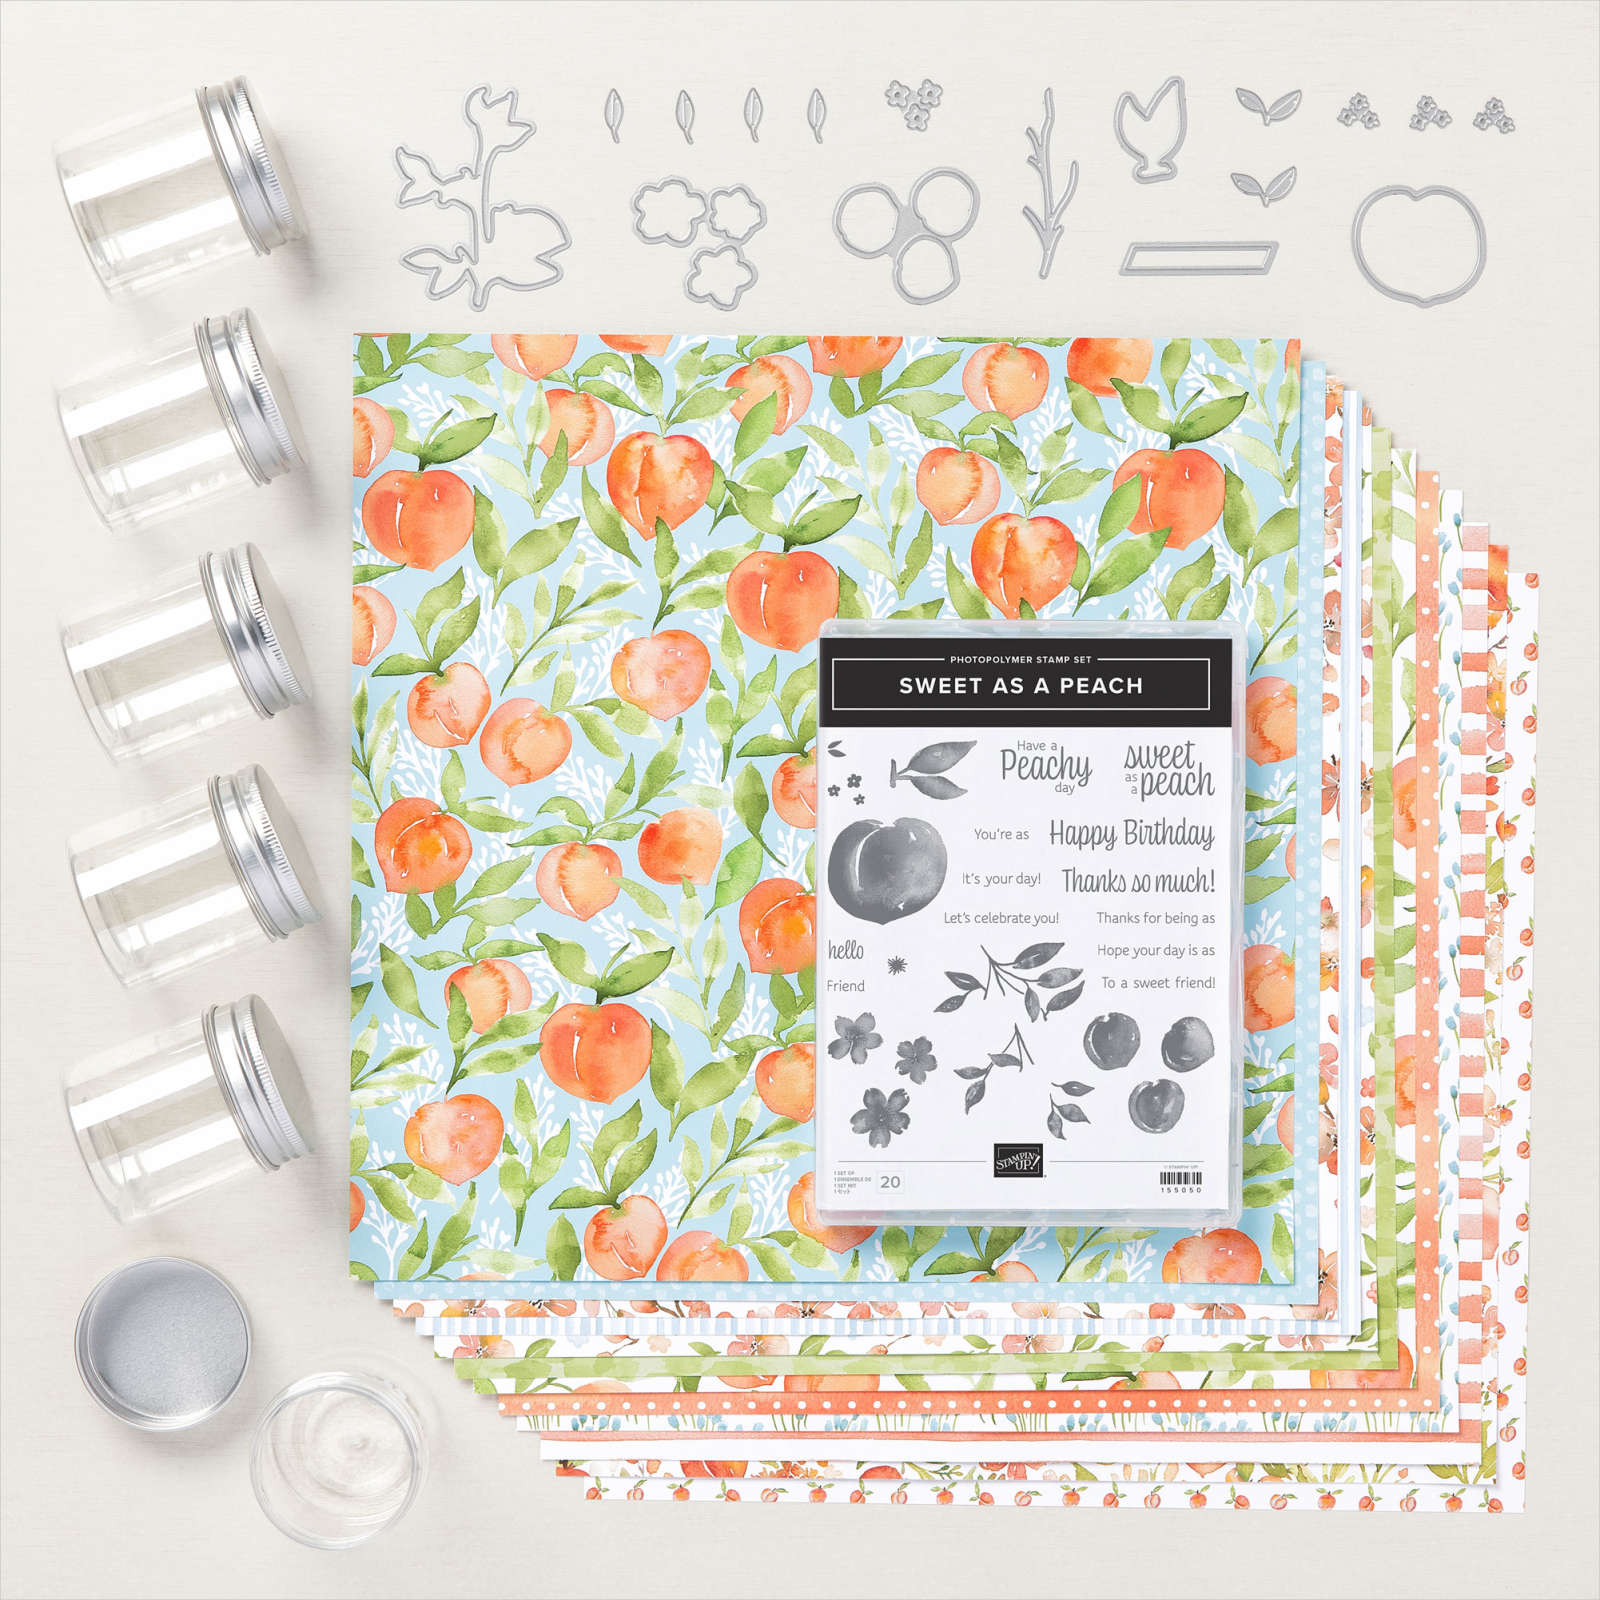
Of course, I purchased the You’re a Peach Suite on the First Day! Take a look at this fabulous suite!
I say “Have a Peachy day” to my kids (aka students) all. the. time. Hence, the Just Peachy Stamping name. Naturally this suite is a must have!
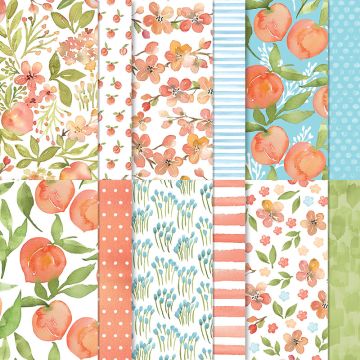
The picture doesn’t do the DSP justice, so here’s a look at just that:
Join the Fun!
It’s a fabulous time to join Stampin’ Up! New team members get even MORE FREE products in their customizable Starter Kit. From 4–31 May, new team members can get $155 USD worth of products for only $99 USD + free business supplies + free shipping + all the fun being a part of Stampin’ Up!
Do you live in the U.S. and need a demonstrator? If so, I’d love to talk to you!
Do You Want to Place an Order?
Of course you do!
If you are ordering less than $150.00, please use the host code shown. If you are ordering more than $150.00, please contact me first so you can get your stamping rewards! Any order over $50 will earn a little surprise from me.
The HOST CODE for May is ZM63ASKZ.
Again, thank you for stopping by my blog today! I appreciate your comments and your time.
Welcome to the Cardz 4 Guyz Challenge # 270! I hope you play along with the theme I picked for this two weeks, a monochromatic card or project.
Before I get into the card and the rest of the post, I need to thank each and every one of you reading my posts! Last Wednesday, I received this notification from WordPress:
Truly, thank you very much to each of you reading my blog! I was, and still am, extremely honored.
On to the challenge! Here’s my card:
When I decided on the elements for the card, I just went for it. Tonight I realized that the DSP, stamp set, and die set, as well as the Stitched Shapes dies are all retiring at midnight MDT. Actually, I don’t think I’ve used the map bundle before this.
Measurements:
I used Mossy Meadow for the card base. It’s trimmed to 5-1/2 inches by 8-1/2 inches, and scored it at 4-1/4 inches.
The DSP for the front of the card measures 4-1/8 inches by 5-3/8 inches. The striped DSP at the bottom measures 3-3/8 inches by 4-1/8 inches. Since I wanted to have some definition from the base, I used a nail file to distress all four sides. I think the distressing really works with this nautical DSP.
While I had the DSP out, I trimmed a piece of the striped DSP to 6 inches by 2-1/2 inches for the envelope flap. I’ve learned that I need to adhere the envelope flap piece to the envelope flap as soon as I cut it. If I don’t, I tend to use the strip for something else on the card.
I stamped the sentiment in Mossy Meadow and cropped it with one of the square dies from the Stitched Shapes die.
Then, I stamped the globe and the compass rose in Mossy Meadow. I used the 1-inch circle punch for the compass rose. I cropped the globe using the map die set.
This card is very monochromatic, so I cropped the globe stamp from Early Espresso 6 x 6 inch DSP. Thankfully, I had a piece of the woodgrain pattern, so that’s what I used.
Staying with the monochromatic theme, I used a piece of the Mossy Meadow braided trim. I wrapped it around the base of the card and tied it in a simple square knot.
Putting It Together
Since I wrapped the braided twine around the base, I popped it up using dimensionals.
I also used dimensionals under the compass rose, the globe and stand (mini-dimensionals), and the sentiment block.
This white panel on the inside of the card measures 4 inches by 5-1/4 inches.
I stamped the inside sentiment, “Thank you for being part of mine”, using Mossy Meadow ink.
Since I didn’t want the sentiment to just float in the middle of the inside, I stamped the opposite side of the globe over the sentiment. I used Early Espresso ink that I had stamped off twice so the sentiment is still the focal part.
That’s it. Easy Peasy. I hope you can use the layout of the card if you don’t already have these products. The layout is pretty classic.
Thank you so much for stopping by today.
I’d love to hear what you think, and greatly appreciate every comment.
Today’s the Day! The 2021 – 2022 Catalog is Live Today!
I already have an order started and just have to add the newly available products to the order and then submit it!
It’s a fabulous time to join Stampin’ Up! New team members get even MORE FREE products in their customizable Starter Kit. From 4–31 May, new team members can get $155 USD worth of products for only $99 USD + free business supplies + free shipping + all the fun being a part of Stampin’ Up!
Do you live in the U.S. and need a demonstrator? If so, I’d love to talk to you!
Do You Want to Place an Order?
Of course you do!
If you are ordering less than $150.00, please use the host code shown. If you are ordering more than $150.00, please contact me first so you can get your stamping rewards! Any order over $50 will earn a little surprise from me.
The HOST CODE for May is ZM63ASKZ.
Again, thank you for stopping by my blog today! I appreciate your comments and your time.
Welcome to Just Peachy Stamping by Sue Jackson: an independent Stampin' Up demonstrator.
Through Stampin' Up!, I happily share my love of papercrafting through sales, classes, small stamping group meet-ups and workshops. I think that being a teacher in my "real life", I have a unique approach to sharing my fantastic hobby. I look forward to connecting with you!


