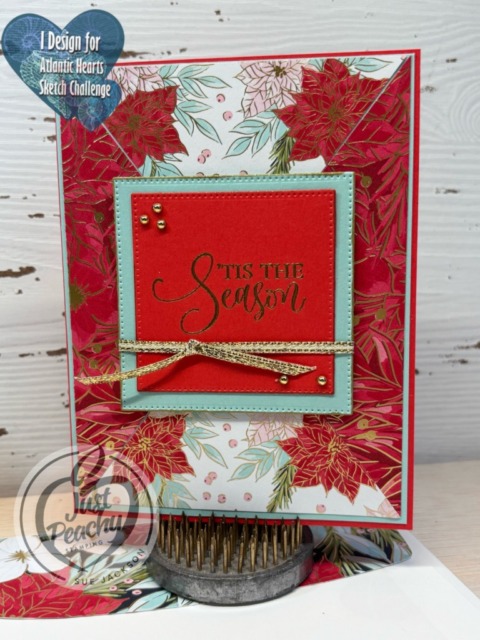
Melissa, our host for the Sparkles Christmas Challenge, chose Poinsettias for the theme. I used the AHSC #658 sketch for the layout.
Please check out the challenges pages for the creations by the other very talented design team members. When you’ve created your own card for either, or both, of the challenges, please don’t forget to upload them to the challenges. We’d love for you to play along.
Here’s my card:
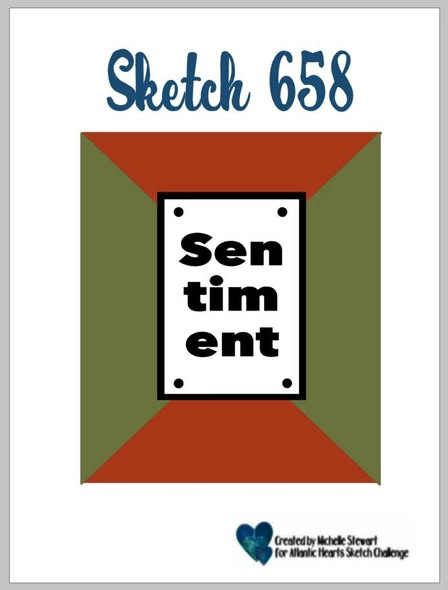
Here’s the AHSC sketch #658:
Measurements:
The Real Red base measures 8-1/2 by 5-1/2 inches, scored at 4-1/4 inches
The Pool Party mat measures 4-1/8 by 5-3/8 inches
I used two pieces of 4 by 5-1/4 inch pieces of DSP (designer series paper) for the front of the card, which will allow me to make another card using the same layout
Line up the top left corner to the bottom right corner diagonally on your trimmer for each piece of DSP, and trim
Carefully realign the DSP to be able to trim from the top right corner to the bottom left corner
If you want to just use the two sides of the DSP for the opposite sides of the layout, you do not need to trim another piece of DSP
I used scraps of the red and Pool Party cardstock to create the sentiment blocks, cropping them using squares from the Stylish Shapes die set
Trim a piece of white cardstock to 4 by 5-1/4 inches for the inside of the card
Trim a coordinating piece of DSP to 6 by 2-1/2 inches for the envelope flap
Punch a 1-inch circle from DSP and run it through your XYRON create-a-sticker for the envelope seal
What I Did:
Unless otherwise noted, I used multipurpose liquid glue to adhere pieces together
Adhere the Pool Party at to the red base
After dry fitting your DSP pieces, adhere to the Pool Party mat, permanently adhere the pieces
If the pieces do not line up perfectly, let the differences meet in the center because the sentiment block will cover any issues
Use your embossing buddy to wipe down the red cardstock and stamp the sentiment using Versa Mark ink
Cover the sentiment with gold embossing powder and heat set with your heat tool
Crop both the red sentiment panel and the Pool Party panel
I still have a gold Wink of Stella brush so I outlined both pieces
Adhere the red cardstock to the Pool Party panel
Wrap a piece of gold ribbon around the panels and tie in a square knot
Add dimensionals to the back of the sentiment blocks making sure they straddle the ribbon
Adhere the sentiment to the front of the card
Add small gold festive pearls to the sentiment panel
Stamp the inside sentiment using red ink and adhere to the inside of the card
You’ve asked, and we’ve answered! Get ready for our first-ever Black Friday sale with up to 40% off the most useful, needed, irresistible Stampin’ Up! products at deeper discounts than ever before. Shop between November 25 to December 1 so you can create more by spending less during this limited-time-only sale!
Promotion Details
Sales Period: November 25–December 1
Ordering Deadlines
Phone: December 1, 2025, at 6:59 p.m. (MT)
Online: December 1, 2025, at 11:59 p.m. (MT)
40% off
Stampin’ Blends
Paper Trimmer and blades
Ink refill bundles
25% off
Select adhesive
15% off
Select cardstock
Shop the full selection of discounted products online.
Products are available while supplies last.
Orders will likely arrive in time for the holidays.
Welcome to the weekly Atlantic Hearts Sketch Challenge! Challenge #656 is for Team B, which is my team. I love getting kickstarted with a sketch, then just letting the card come together. Sometimes, I know exactly what I want to do. Other times, like for this week’s challenge, the card evolves. Everyone on Team A and Team B would love for you to play along with the sketches and then post your creations to the challenge gallery. Don’t forget to come back tomorrow to see the creations of the design team. We hope our projects inspire you to play along with us.
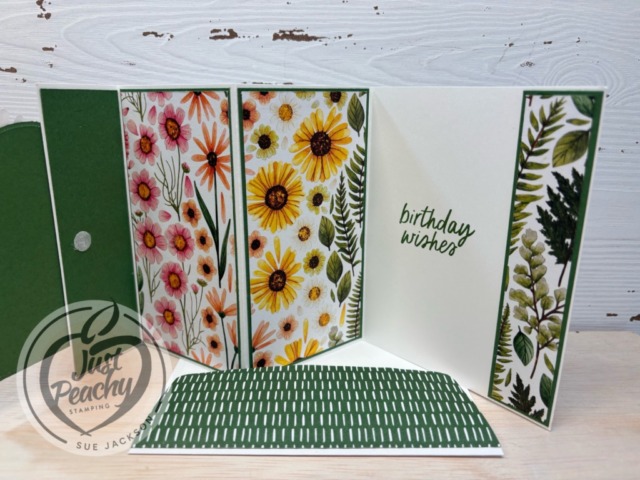
Here’s my card:
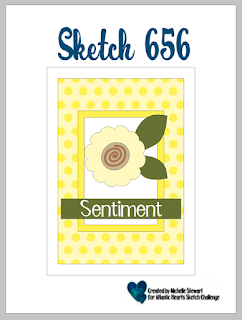
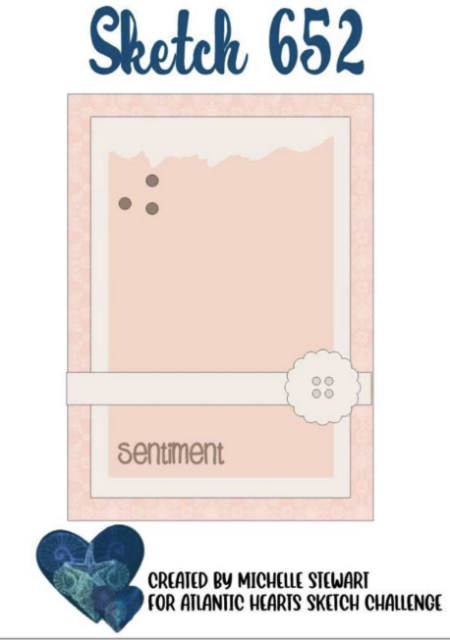
Here’s the Atlantic Hearts Sketch Challenge #656 layout sample:
It’s just a given that if I can create a fun fold card while using a sketch challenge, I will do it. It’s also a given that I will post fun folds to the Creative Creases Challenge, coordinated by Debbie Mageed at Secret Stamper. Hopefully, you will be inspired to upload your own fun fold project to the challenge!
I found this 4 panel accordion fold card on Connie Stewart’s, from Simply Simple Stamping, YouTube channel. You can find her video tutorial here. I was so happy to find this fold because I’ve been wanting to show the beauty of this DSP. This 4 panel card lets the DSP shine!
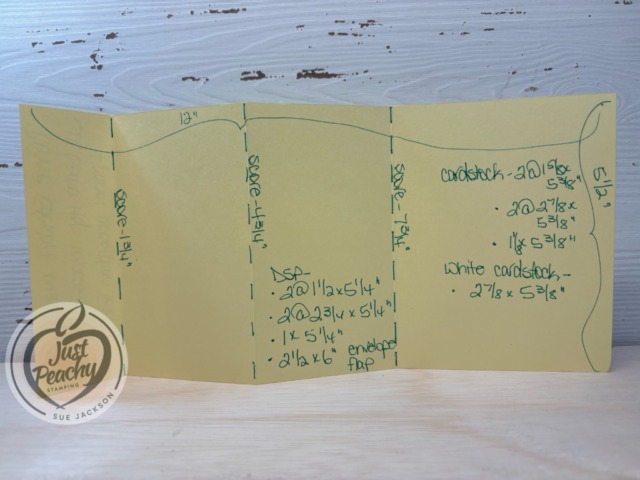
Template & Tips:
Of course, I created a template. My templates are handwritten because it’s easier and faster for me to do it that way than trying to make a pretty computerized template.
BIG TIP: When trimming your DSP (designer series paper) for this layout, place the side you want to show down on your paper trimmer! Trust me on that.
I also trimmed a piece of the Garden Green 6 x 6 inch DSP to 6 by 2-1/2 inches for the envelope flap.
Next, I punched a 1-inch circle out of the floral DSP and ran it through my XYRON create-a-sticker for the envelope seal. I started doing these seals during COVID and liked it so much, I have been do it since then.
Putting the Card Together:
Following Connie Stewart’s video, or the measurements on my template, would be much clearer than if I tried to type everything out for you
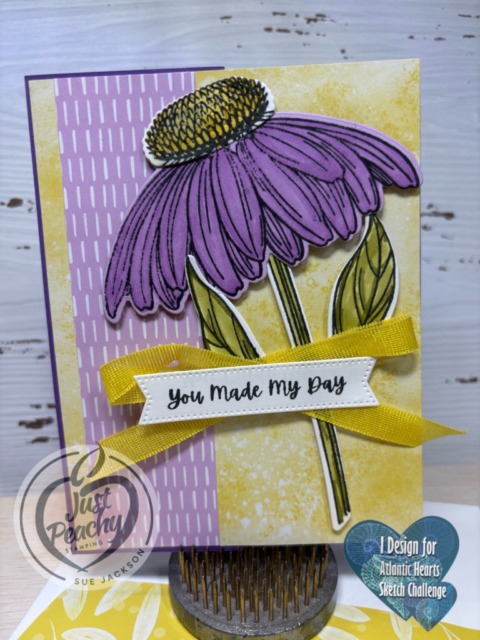
I used Garden Green, Strawberry Slush, and Basic White cardstock for the base, arches, and inside panel for this card
I cropped the leaves on the front from Garden Green cardstock using the Impressions Abloom die set
The flowers were stamped using Strawberry Slush, Peach Pie using the Impressions Abloom stamp set
I used Daffodil Delight and Crumb Cake for the centers of the flowers, stamping the Daffodil Delight ink first
The outside sentiment comes from the Coneflower Celebrations stamp set, which I cropped using the banner from the Stylish Shapes die set
The inside sentiment comes from the Simply Said stamp set
I stamped both sentiments in Garden Green ink
I added dimensionals under the outside sentiment banner and the two Strawberry Slush flowers
I used multipurpose liquid glue to adhere all the other pieces
While this card is bulky and will require extra postage, it will fit in a medium SU! envelope
With that, I’d finished this coordinated card, envelope, and envelope seal set
As a Stampin’ Up! demonstrator, I get to start pre-ordering products today from the upcoming mini-catalog which starts in January. As soon as I get my new products, I will make sure to start sharing cards made with new products.
Kits Make Crafting Simple, Fun, and Just Simply Fun!
Here’s a look at the two new kits available:
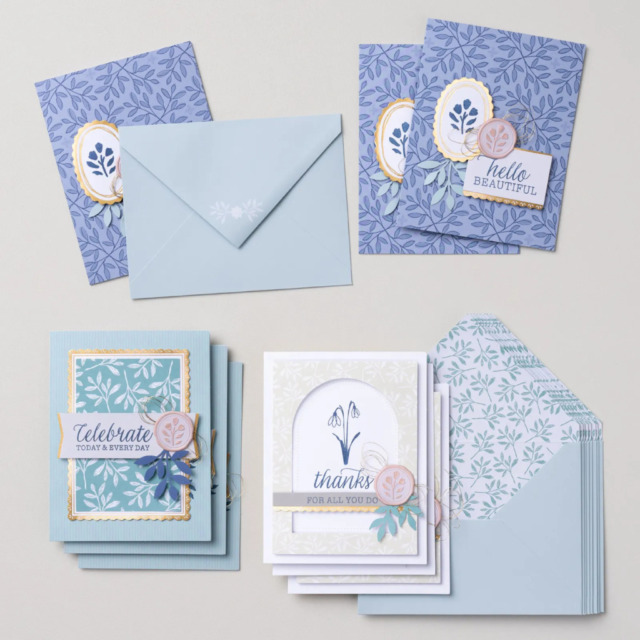
First, it’s the Everyday Beauty Kit, which retails for $25 USD.
Create the perfect card for any occasion using the all-inclusive Everyday Beauty Kit. This kit comes with everything you need to make three unique card designs: printed card bases and coordinating envelopes with lovely botanical patterns, precut paper pieces, timeless faux wax seals, shimmering metallic thread, and a versatile stamp set that you can use on countless other projects.
DETAILS – Makes 9 cards: 3 each of 3 designs – Folded card size: 5-1/2″ x 4-1/4″ (14 x 10.8 cm) – Colors: Basic Beige, gold, Gray Granite, Lost Lagoon, Night of Navy, Petal Pink – Also available in French
Kit includes one of each item listed below. – Everyday Beauty Photopolymer Stamp Set – Clear stamp block – Night of Navy Classic Stampin’ Spot – Step-by-step instructions – 9 printed envelopes – Faux wax seal stickers – Metallic thread – Adhesive
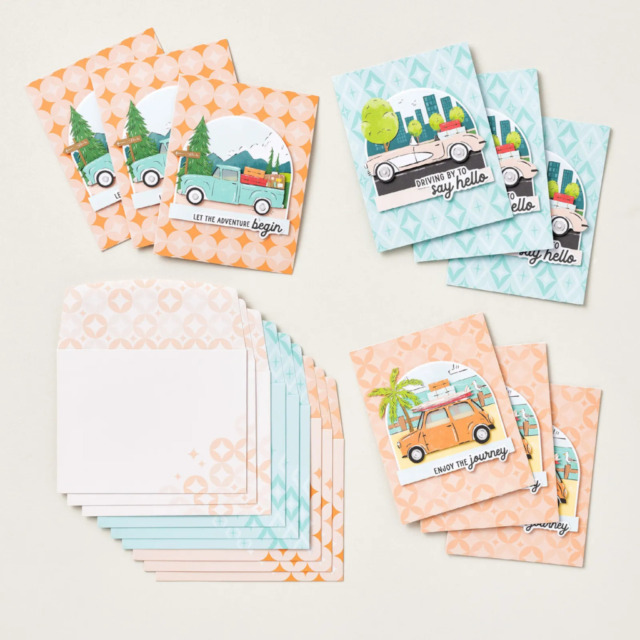
The second kit is the Adventure Awaits kit, which retails for $14 USD.
Let your creativity take the driver’s seat with the Adventure Awaits Kit. Coast in the retro colours and hand-drawn artwork that can be either feminine or masculine. With printed sentiments, precut paper, and vellum details, this kit comes with everything you need to make nine cute cards.
DETAILS – Makes 9 cards: 3 each of 3 designs – Folded card size: 5-1/2″ x 4-1/4″ (14 x 10.8 cm) – Colors: Basic Black, Coastal Cabana, Crushed Curry, Garden Green, Granny Apple Green, Pecan Pie, Petal Pink, Poppy Parade, Pretty Peacock, Timid Tiger – Sentiments printed in English, French, and German
Kit includes one of each item listed below. – Step-by-step instructions – 9 printed envelopes – Vellum – Adhesive
If you have any questions, or need a bit of a creative mojo boost, you can reach me at my [email protected].
If you live in the U.S. and don’t already have a Stampin’ UP! demo from whom you order, I would be honored to work with you.
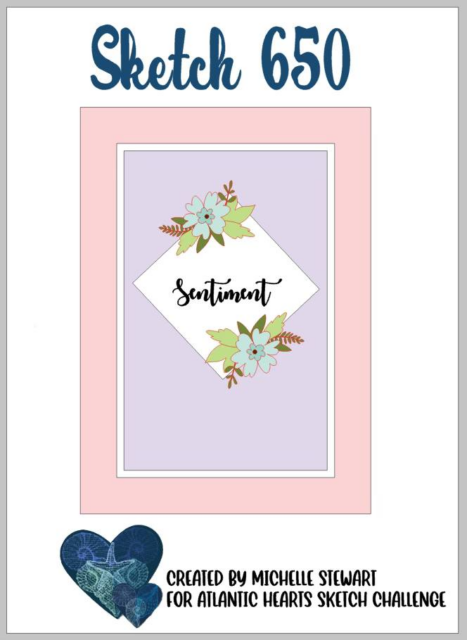
Welcome to Team B’s turn for the Atlantic Hearts Sketch Challenge #650! Starting the creative process with a sketch invites individual takes on the sketch, and this one is no different. This challenge is a weekly event, and we’d all love for you to play along with the sketches and then post your creations to the challenge gallery.
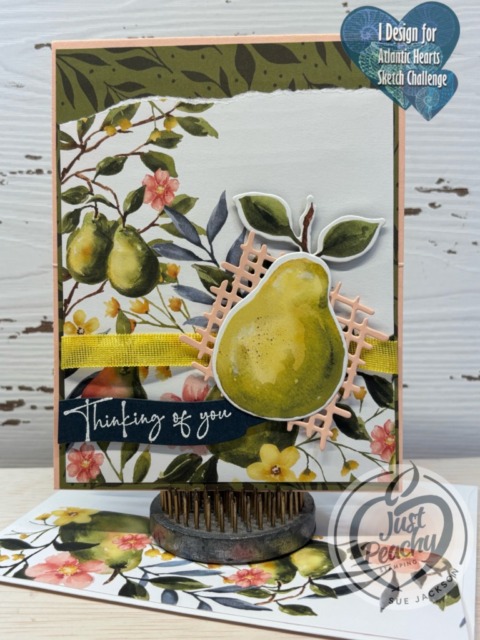
I needed a get well card that a group of people could sign, and I needed it fast. I used the Perfectly Pears bundle and DSP for my card.
First, here’s the challenge sketch:
Here’s the card:
I did add another piece of white cardstock on the top of the inside of the card. However, since it’s blank, I didn’t take a picture of it.
At first, I wasn’t going to get this online exclusive product suite. Then I started seeing gorgeous cards and knew I absolutely needed to get it! I’m so glad I did!
Measurements:
The Petal Pink base measures 11 by 4-1/4 inches, scored at 5-1/2 inches to create a tent card
Trim a piece of the Mossy Meadow patterned DSP (designer series paper) to 4-1/8 by 5-3/8 inches
I trimmed a piece of the pears pattern DSP to 4 by 5-1/4 inches, then tore across the top to follow the sketch
Trim a piece of DSP to 6 by 2-1/2 inches for the envelope flap
Punch a 1-inch circle of coordinating DSP and run it through a XYRON create-a-sticker for the envelope seal
Since this card was used for a co-worker, a group of us needed to sign the card, so I used two pieces of white cardstock trimmed to 4 by 5-1/4 for the inside of the base
I used scraps of Secret Sea and Petal Pink for the sentiment banner and checkerboard-ish square embellishment
One of the fabulous things about this DSP is that the dies crop images from the DSP – love that feature
Letting the Suite Do the Work:
Once I had all my papers trimmed to size, and the embellishments for the front cropped, putting the card together was a cinch
Unless otherwise noted, I used multipurpose liquid glue to adhere pieces together
After wiping down a scrap of Secret Sea cardstock using my embossing buddy, I stamped the sentiment using VersaMark ink
Next, I covered the stamped sentiment using WOW! Basic White embossing powder and heat set it
Then, I trimmed the sentiment to size
After adhering the pears DSP to the Mossy Meadow patterned DSP, I wrapped a piece of Darling Duckling ribbon around the combined DSP and adhered it in the back using tear & tape
I adhered the large pear and leaves together, then adhered that to the Petal Pink cropped piece
I added dimensionals under the pear and under the sentiment banner and adhered them to the front of the card
The inside sentiment was stamped with Secret Sea ink
Then, I adhered the pair of pears to the bottom of the white cardstock, and adhered both white cardstock pieces to the inside of the card
With that, I’d completed this coordinated card, envelope, and envelope seal set
Two Joining Promotion Options for the Month of October!
Join Our Community
Become a Stampin’ Up! demonstrator when you choose one of these amazing Starter Kit offers. (And did we mention your Starter Kit comes with FREE shipping, FREE business supplies, AND a bonus, FREE Paper Pumpkin kit?) Join from October 1 to 31 and experience all the amazing benefits that come with being a demonstrator.
Honestly, I saw this promotion banner and was stunned in a very good way! This deal is amazing, and what’s more there are no other purchase requirements!
Welcome to my combination of the Make My Monday #262 and the Atlantic Hearts Sketch Challenge # 650. Our host for MMM, Guylaine chose Fabrics &/or Textiles for this challenge’s theme. I combined that with the sketch for AHSC #650 and came up with one card. When you finish here, I hope you will visit both challenge sites, create your own card, and upload to the respective galleries.
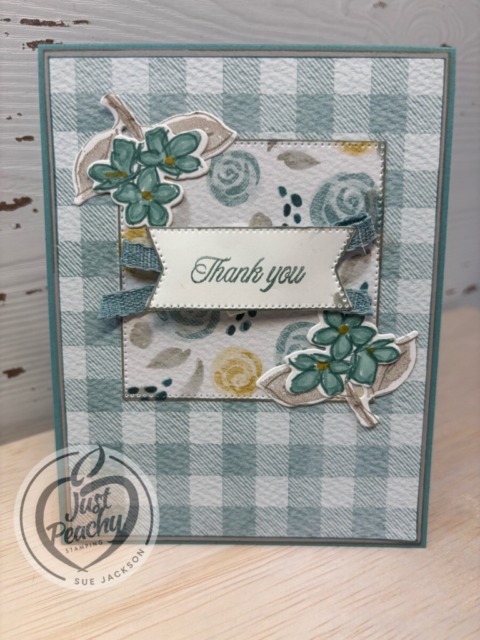
Here’s my card:
Here’s the AHSC #650 sketch:
Even though I turned the diamond to a square, the inspiration from the sketch is still very much evident.
I chose this Everyday Happiness DSP (designer series paper) because the texture of it looks like quilt fabric my very talented sister would use in one of her gorgeous quilts. While I don’t have any flower stamps that exactly match the flowers on the center square, these leaves and flowers from the Painterly Pears bundle worked by using the colors in the DSP.
Measurements:
The Lost Lagoon base measures 11 by 4-1/4 inches, scored at 5-1/2 inches to create a tent card
Trim a piece of Everyday Happiness DSP to 4-1/8 by 5-3/8 inches
Trim another piece of the DSP to 6 by 2-1/2 inches for the envelope flap
Punch a 1-inch circle from coordinating DSP and run it through the XYRON create-a-sticker for the envelope seal
Crop the largest square from another pattern of Everyday Happiness DSP
Trim a piece of white cardstock to 5-1/4 by 4 inches for the inside of the card
Use scraps of white cardstock for the sentiment, leaves and flowers
Easy-Peasy Assembly:
Unless otherwise noted, I used multipurpose liquid glue to adhere pieces together
Stamp the sentiment for the inside and the front of the card using Lost Lagoon ink
Crop the outside sentiment using a banner die from Stylish Shapes die set
Stamp the leaves using Gray Granite ink
Stamp the flowers using Lost Lagoon ink, color with the blends, and add the center dot using the light Wild Wheat blend
Crop the leaves and flowers
Adhere the DSP to the base of the card, then adhere the square to the background
Adhere the leaves and flowers to opposite corners of the square
Add a Loopy-Loop Bow to the middle of the square
Add dimensionals to the back of the sentiment banner so they straddle the bow and adhere to the square
Adhere the inside white cardstock to the base of the card
With that, I’d finished this coordinated card, envelope, and envelope seal set
Loopy-Loop Bow
I was able to watch Mary Deatherage’s, from Stamps -n- Lingers, Perfectly Pears tutorial. In that video, she showed her loopy-loop bow. That’s what I used for the front of my card. I’m bow-challenged and this technique allows me to relatively easily add ribbon without adding the bulk of a tied bow. If you’ve never seen her videos, you owe it to yourself to watch them. I think she’s the Queen of the Collage. Gorgeous cards!!
Become a Stampin’ Up! demonstrator when you choose one of these amazing Starter Kit offers. (And did we mention your Starter Kit comes with FREE shipping, FREE business supplies, AND a bonus, FREE Paper Pumpkin kit?) Join from October 1 to 31 and experience all the amazing benefits that come with being a demonstrator.
Honestly, I saw this promotion banner and was stunned in a very good way! This deal is amazing, and what’s more there are no other purchase requirements!
Welcome to Team B’s turn for the Atlantic Hearts Sketch Challenge #646! Starting the creative process with a sketch invites individual takes on the sketch, and this one is no different. This challenge is a weekly event, and we’d all love for you to play along with the sketches and then post your creations to the challenge gallery.
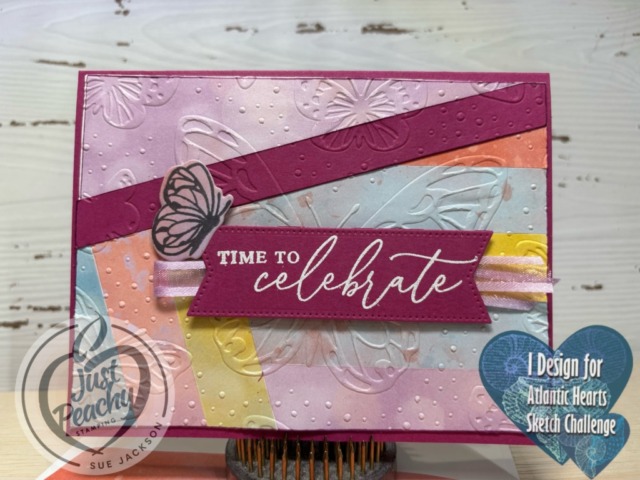
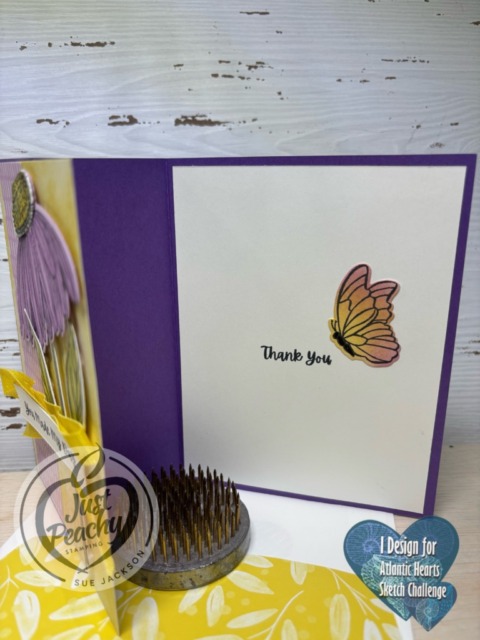
Here’s my Butterfly and Bokeh card:
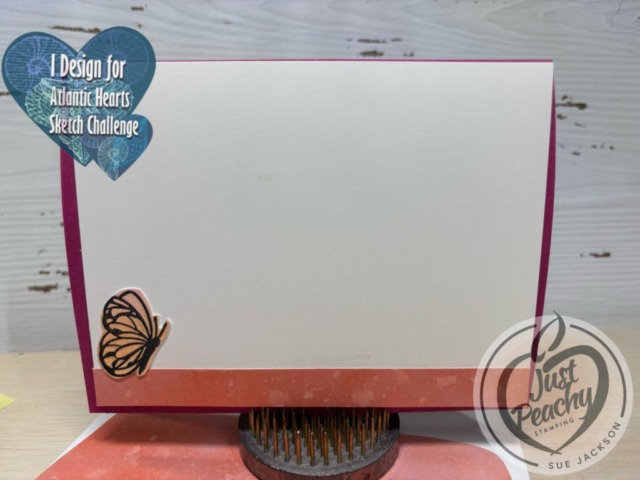
This sentiment allows the card to be an all-occasion card. When I figure out the recipient, I will add a sentiment to the inside. For now, the interior panel is temporarily adhered with removable tape, which will allow me to remove the cardstock, stamp the sentiment, then adhere it with multipurpose liquid glue.
Here’s the sketch from AHSC # 644:
Measurements and Adhering:
The Berry Burst base measures 8-1/2 by 5-1/2 inches, scored at 4-1/4 inches to create a landscape tent card
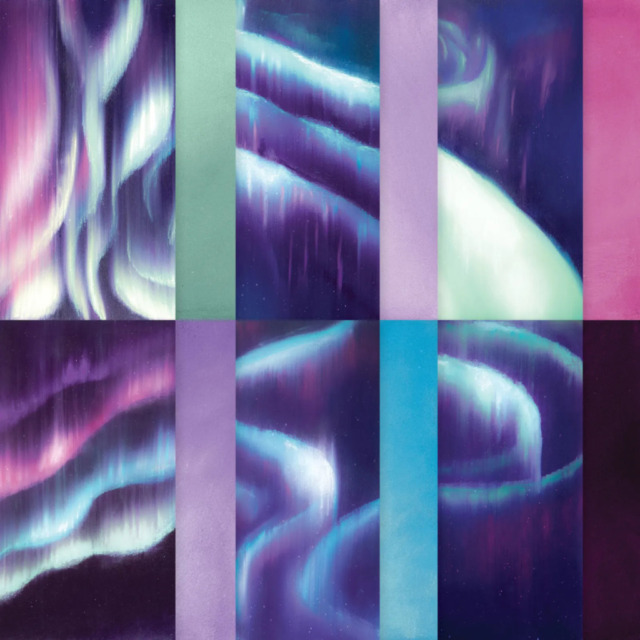
I trimmed a piece of Beautiful Bokeh DSP to 6 by 2-1/2 inches for the envelope flap
Each strip of Beautiful Bokeh DSP (designer series paper) adhered under the Berry Burst slanted cardstock measures 3/4 inch wide by 5 inches to allow for the strips from the sketch
I trimmed a variety of Beautiful Bokeh DSP to 3/4 by 5 inches
Trim a piece of white cardstock to 5-3/8 by 4-1/8 inches so you can adhere your strips to the white cardstock
Trust me, you don’t want to try to adhere the strips to the base of the card
You need another piece of white cardstock measuring 5-1/4 by 4 inches for the inside of the card
I added a piece of DSP trimmed to 1/2 by 5-1/4 inches to the bottom of the inside cardstock
After a couple of failed attempts, I decided the best way to create the stripes to follow the challenge design was to dry fit the strips under the Petunia Pop diagonal strip
I also trimmed a piece of Beautiful Bokeh to 5-3/8 by 1-1/2 inches on the top left going down to 3/4 inch on the right
After dry-fitting all the strips, I very carefully adhered them one at a time to the white cardstock mat
Then I adhered the Petunia Pop diagonal strip
Even with the gorgeous patterns on the DSP, I realized I needed something else on the front of the card – enter the Beautiful Butterflies embossing folder
Next, I used my embossing buddy on a scrap piece of Petunia Pop cardstock, then stamped the sentiment in VersaMark ink
After covering the sentiment in white embossing powder (don’t forget to flick the back of the card to remove excess embossing powder) I heat set it using my heat tool
I trimmed a length of Fresh Freesia ribbon and used glue dot to adhere it to the back of the sentiment
Then, I added dimensionals and adhere the sentiment to the front of the card
The last thing I did was stamp two butterflies on Beautiful Bokeh scraps, and cropped them with the coordinating die set
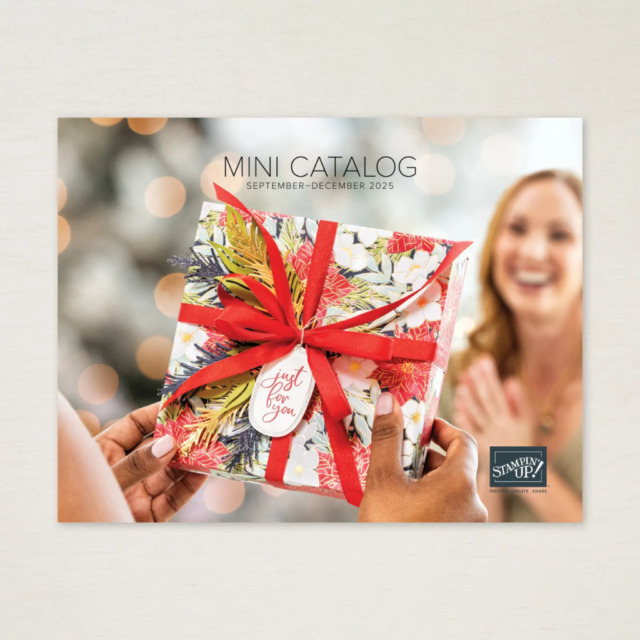
The September – December 2025 Mini-Catalog is now available!
As a demonstrator, I was able to pre-order some of these items. Take a look at the products I’ve already purchased:
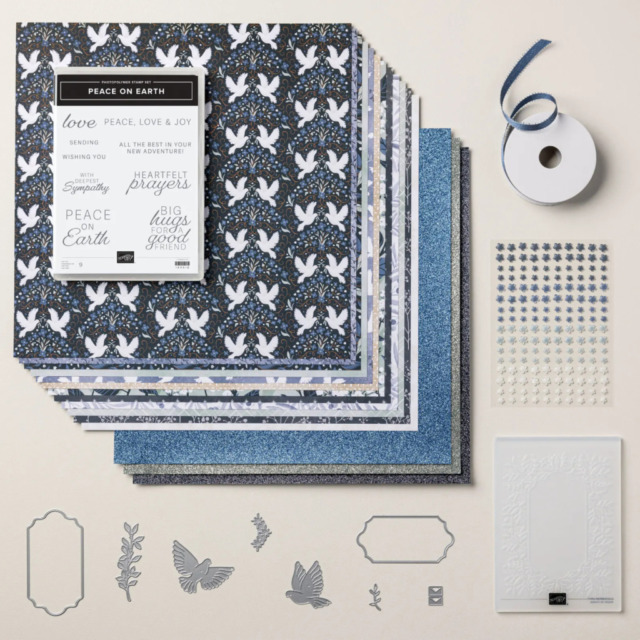
The first suite I purchased is this Peaceful Garden Suite Collection! You can see some cards using this suite here and here.
This DSP is stunning!
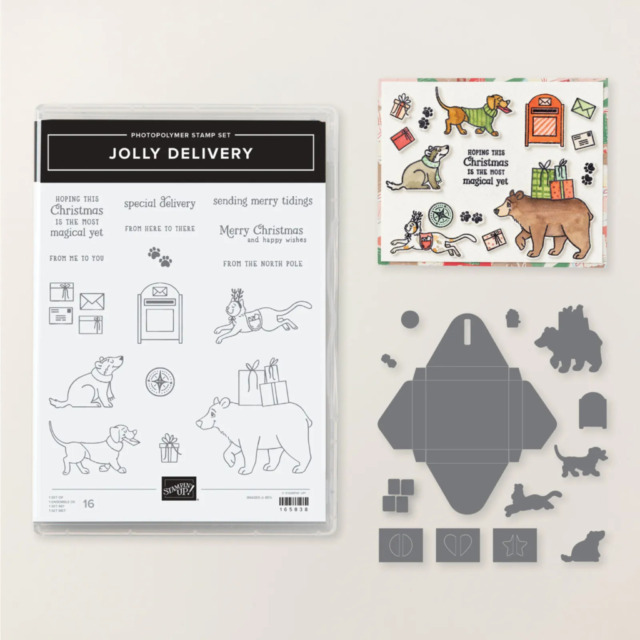
If you like Christmas Critters, this Jolly Delivery Bundle is for you!
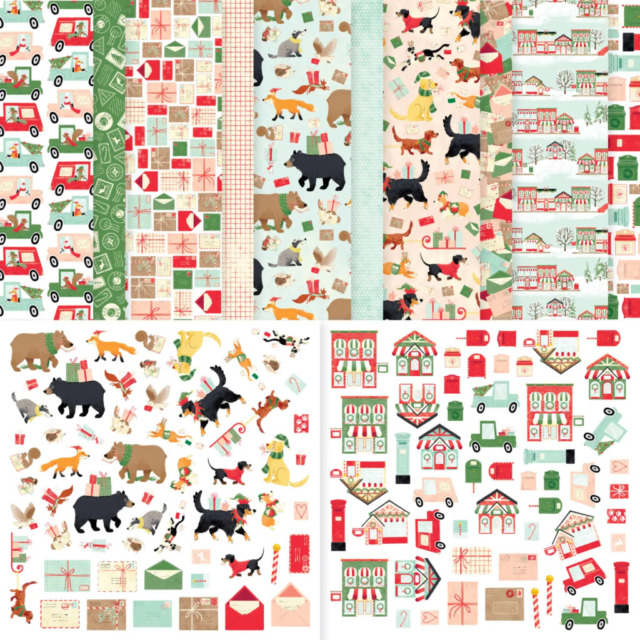
Don’t forget the matching 12 x 12 inch DSP:
Last Chance Stamping Write Markers!
While you are shopping, make sure you pick up the Last Chance Stamping Write Markers! These markers, including the 2025 – 2027 In Color markers, are being discontinued. I love using these markers when sending cards because I can coordinate the card with the writing color. Therefore, I have all the available sets ready and waiting in my SU! cart.
If you live in the U.S. and don’t already have a Stampin’ UP! demo from whom you order, I would be honored to work with you. You can reach me at my [email protected].
Welcome to Team B’s turn for the Atlantic Hearts Sketch Challenge #644! Starting the creative process with a sketch invites individual takes on the sketch, and this one is no different. This challenge is a weekly event, and we’d all love for you to play along with the sketches and then post your creations to the challenge gallery.
Here’s my Coneflower Celebrations card:
This is a pretty straightforward z-fold card. If you can score and trim paper, this fun fold is for you!
As always with a fun fold card, I will be adding this to the Creative Creases Challenge where the theme is always Anything Goes with a Fun Fold.
Measurements:
The Gorgeous Grape base measures 8-1/2 by 5-1/2 inches, scored at 2-1/8 and 4-1/4 inches
Trim a piece of Darling Duckling 6 x 6 inch DSP (designer series paper) to 4-1/8 by 5-3/8 inches for the card front
You need another piece of Darling Duckling DSP trimmed to 2-1/2 by 6 inches for the envelope flap, which needs to be adhered and trimmed
Punch a 1-inch circle from the Fresh Freesia DSP for the envelope seal, and run it through the XYRON create-a-sticker
Trim a piece of Fresh Freesia 6 x 6 inch DSP to 201/2 by 5-3/8 inches for the panel on the front of the card
Trim a piece of white cardstock to 4-1/8 by 5-2/8 inches for the inside of the card
You will also need another piece of white cardstock for the stem, leaves, center of the flower, and the sentiment
I already had the butterfly cropped for another project and decided to use it here.
Putting the Card Together:
I stamped everything using Momento Tuxedo Black ink
Unless otherwise noted, I used multipurpose liquid glue to adhere the pieces together
Stamp the flower on Fresh Freesia cardstock and color using the multiple layers of the Fresh Freesia blends combo
Stamp the stem and leaves, then color using the Old Olive blends combo
After stamping the center of the flower, I colored it using Daffodil Delight and Darling Duckling blends combos
The inside and outside sentiments come from the Coneflower Celebrations stamp set
Use the coordinating Coneflower Celebration dies to crop the flower, center, stem, and leaves
Crop the outside sentiment using a banner from the Stylish Shapes die set
Adhere the center to the top of the flower
Add dimensionals to the back of all the flower pieces and the senteiment banner
Adhere the Fresh Freesia DSP to the Darling Duckling DSP
Add glue to just the left back side of the Darling Duckling DSP, then adhere to the Gorgeous Grape base
Adhere the white inside cardstock to the base of the card
Adhere the butterfly near the sentiment
Position the coneflower pieces and adhere using the dimensionals
Add a loopy loop bow from Darling Duckling ribbon using mini-glue dots
Add the sentiment on top of the loopy loop bow
With that, I’d finished this coordinated card, envelope, and envelope seal
The Loopy Loop Bow:
I was able to watch Mary Deatherage’s, from Stamps -n- Lingers, Perfectly Pears tutorial. In that video, she showed her loopy-loop bow. That’s what I used for the front of my card. I’m bow-challenged and this technique allows me to relatively easily add ribbon without adding the bulk of a tied bow. If you’ve never seen her videos, you owe it to yourself to watch them. I think she’s the Queen of the Collage. Gorgeous cards!!
Time is running out for the 2025 – 2027 In Color SALE!
Who would love a sale on select In Color Merchandise?
We all would, right?
Here are the Promotion Details:
Sales Period: August 5–31
Ordering Deadlines
Phone: August 29, 2025, at 6:59 p.m. (MT)
Online: August 31, 2025, at 11:59 p.m. (MT)
Sale includes select inks, cardstock, Designer Series Paper, embellishments, and other products that include these new In Colors. Only products featured on the 2025–2027 In Colors page are included in this promotion.
Some products are excluded from the sale, including the Month by Month Album Retreat 2025 kit (167338).
Products are available only while supplies last.
Pre-Order for SU! Demos for the upcoming September – January Mini Catalog and the September online exclusives release is ongoing. I’ve already gotten some products, and just placed an order for more. In the meantime, here’s some sneak peek cards for you:
If you live in the U.S. and don’t already have a Stampin’ UP! demo from whom you order, I would be honored to work with you. You can reach me at my [email protected].
Welcome to Just Peachy Stamping by Sue Jackson: an independent Stampin' Up demonstrator.
Through Stampin' Up!, I happily share my love of papercrafting through sales, classes, small stamping group meet-ups and workshops. I think that being a teacher in my "real life", I have a unique approach to sharing my fantastic hobby. I look forward to connecting with you!