Welcome to the weekly Atlantic Hearts Sketch Challenge! Challenge #642 is for Team B, which is my team. I love getting kickstarted with a sketch, then just letting the card come together. Sometimes, I know exactly what I want to do, like for this week’s challenge. Other times, the card evolves. Everyone on Team A and Team B would love for you to play along with the sketches and then post your creations to the challenge gallery. Don’t forget to come back Wednesday to see the creations of the design team. We hope our projects inspire you to play along with us.
First, here’s a look at the challenge sketch:
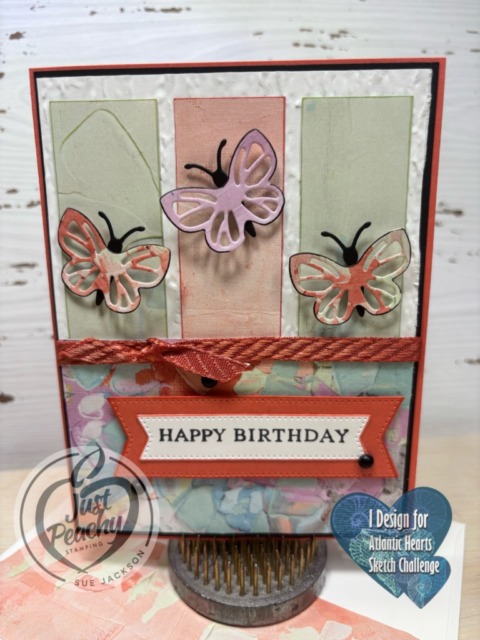
Here’s my Beautiful Butterflies and Fancy Flora DSP (retired) card:
Measurements:
Trim a piece of Calypso Coral cardstock to 8-1/2 by 5-1/2 inches, scored at 4-1/4 inches
Trim a piece of Basic Black cardstock to 5-3/8 by 4-1/8 inches for the mat on the front of the card
HINT: since the center of the mat won’t show, you can use a rectangle die to crop out the center of the mat to save cardstock
You need three pieces of DSP (designer series paper) for the top strips, each measuring 1-1/8 by 2-5/8 inches
The bottom piece of DSP measures 4 by 2-1/2 inches
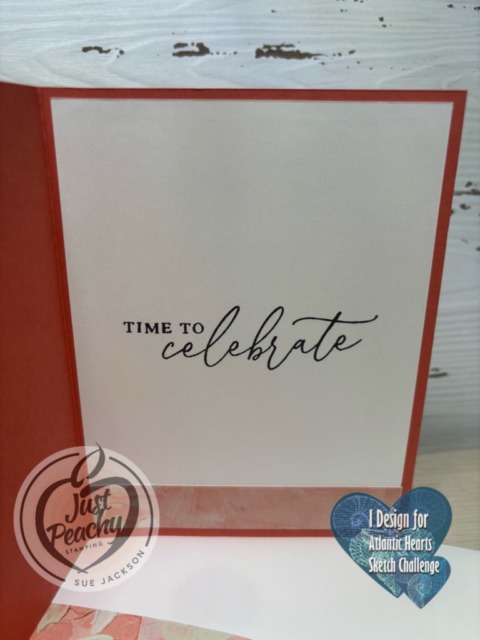
Trim a piece of DSP to 1/2 by 4 inches for the inside of the card
You will also need a piece of DSP trimmed to 6 by 2-1/2 inches for the envelope flap
Punch a 1-inch circle of coordinating DSP and run it through the XYRON create-a-sticker for the envelope seal
After running a piece of white cardstock through the Cut & Emboss machine using the Birchwood 3D embossing folder, trim it to 4 inches by 2-1/2 inches
HINT: Since 3D embossing folders give a deep emboss, the white cardstock needs to be embossed before trimming in order to ensure accurate measurements
Trim a piece of white cardstock to 4 by 5-1/4 inches for the inside of the card
I used scraps for the sentiment banners (many of which I get from cropping the center of mats on the front of the card)
Putting the Card Together:
Unless otherwise noted, the pieces were adhered together using multipurpose liquid glue
Adhere the white embossed cardstock to the top part of the black mat
Adhere the bottom piece of DSP to the black mat, slightly overlapping the white cardstock
After outlining the strips of DSP using a Subtle Stamping Write Marker, adhere them to the white embossed cardstock
Stamp the front sentiment in Tuxedo Black ink on a white cardstock scrap
Use the same ink to stamp the inside sentiment on the white cardstock and adhere to the inside of the card
Crop the Calypso Coral and front sentiment using two banners from the Stylish Shapes die set and outline both pieces with a Calypso Coral marker
Adhere the sentiment banner to the Calypso Coral layer, then adhere to the front using dimensionals
Crop three butterflies from the DSP and outline using a Basic Black marker
Crop three butterfly bodies from black cardstock and adhere to the back of the DSP butterfly bodies
Each butterfly has one mini-dimensional added to the body and was adhered to the strips of DSP
I used the dark Calypso Coral blend and colored a piece of the white diagonal ribbon to match the colors in the DSP
This ribbon duo of pink and white rolls of ribbon are on last chance for $5.00, so it’s a great time to stock up – I’ve colored so many lengths of this ribbon to match all kinds of color combos
Adhere the Calypso Coral colored ribbon using mini-glue dots and tie a square knot
Finish the front of the card by adding three enamel dots
With that, I’d completed this coordinated card, envelope, and envelope seal set
Who would love a sale on select In Color Merchandise?
We all would, right?
Here are the Promotion Details:
Sales Period: August 5–31
Ordering Deadlines
Phone: August 29, 2025, at 6:59 p.m. (MT)
Online: August 31, 2025, at 11:59 p.m. (MT)
Sale includes select inks, cardstock, Designer Series Paper, embellishments, and other products that include these new In Colors. Only products featured on the 2025–2027 In Colors page are included in this promotion.
Some products are excluded from the sale, including the Month by Month Album Retreat 2025 kit (167338).
Products are available only while supplies last.
If you live in the U.S. and don’t already have a Stampin’ UP! demo from whom you order, I would be honored to work with you. You can reach me at my [email protected].
Welcome to the weekly Atlantic Hearts Sketch Challenge! Challenge #640 is for Team B, which is my team. I love getting kickstarted with a sketch, then just letting the card come together. Sometimes, I know exactly what I want to do. Other times, like for this week’s challenge, the card evolves. Everyone on Team A and Team B would all love for you to play along with the sketches and then post your creations to the challenge gallery. Don’t forget to come back tomorrow to see the creations of the design team. We hope our projects inspire you to play along with us.
Here’s my butterflies and belated birthday card:
Here’s the sketch from AHSC #640:
Measurements:
The Petunia Pop base measures 5-1/2 by 8-1/2 inches, scored at 4-1/4 inches
Trim a piece of black cardstock to 41/8 by 5-3/8 inches
After dry embossing a piece of white cardstock with the Beautiful Butterflies 3D embossing folder, trim it to 4 by 5-1/4 inches
Trim another piece of white cardstock to 4 by 5-1/4 inches for the inside of the card
The Petunia Pop and Summer Splash DSP (designer series paper) each measure 4-3/4 by 2 inches
Trim a piece of DSP to 6 by 2-1/2 inches for the envelope flap
Punch a 1-inch circle for the envelope seal and run it through your XYRON create-a-sticker
You will need a piece of scrap paper for the sentiment panel on the front
Putting the Card Together:
Unless otherwise noted, I used multipurpose liquid glue to adhere elements together.
Stamp the outside sentiment from Coneflower Celebrations using Momento Tuxedo Black ink
The inside sentiment is also from the Coneflower Celebrations stamp set and is stamped in black ink
Wipe down some DSP using the embossing buddy from the embossing additions tool set
This is a very important step since it removes oils and dust from the DSP or cardstock
Stamp the butterflies on the wiped down DSP using VersaMark ink, then cover in black embossing powder and heat set with your heat tool
Crop the butterflies using the die from Beautiful Butterflies die set
Crop the outside sentiment using a die from the Textured Notes set
Adhere the front layers and the inside layer to the base of the card
Use a length of Petunia Pop ribbon to create a loopy loop (see below)
Add dimensionals to the back of the sentiment panel and the butterflies on the front of the card and adhere
I also adhered an embossed butterfly to the bottom of the inside panel
Finally, I added three Petunia Pop enamel dots to the front of the card
With that, I’d finished this coordinated card, envelope, and envelope seal set
The Loopy Loop Bow:
I was able to watch Mary Deatherage’s, from Stamps -n- Lingers, Perfectly Pears tutorial. In that video, she showed her loopy-loop bow. That’s what I used for the front of my card. I’m bow-challenged and this was a pretty easy way to add ribbon without adding the bulk of a tied bow. If you’ve never seen her videos, you owe it to yourself to watch them. I think she’s the Queen of the Collage. Gorgeous cards!!
Halloween in July? My daughter certainly thinks so!
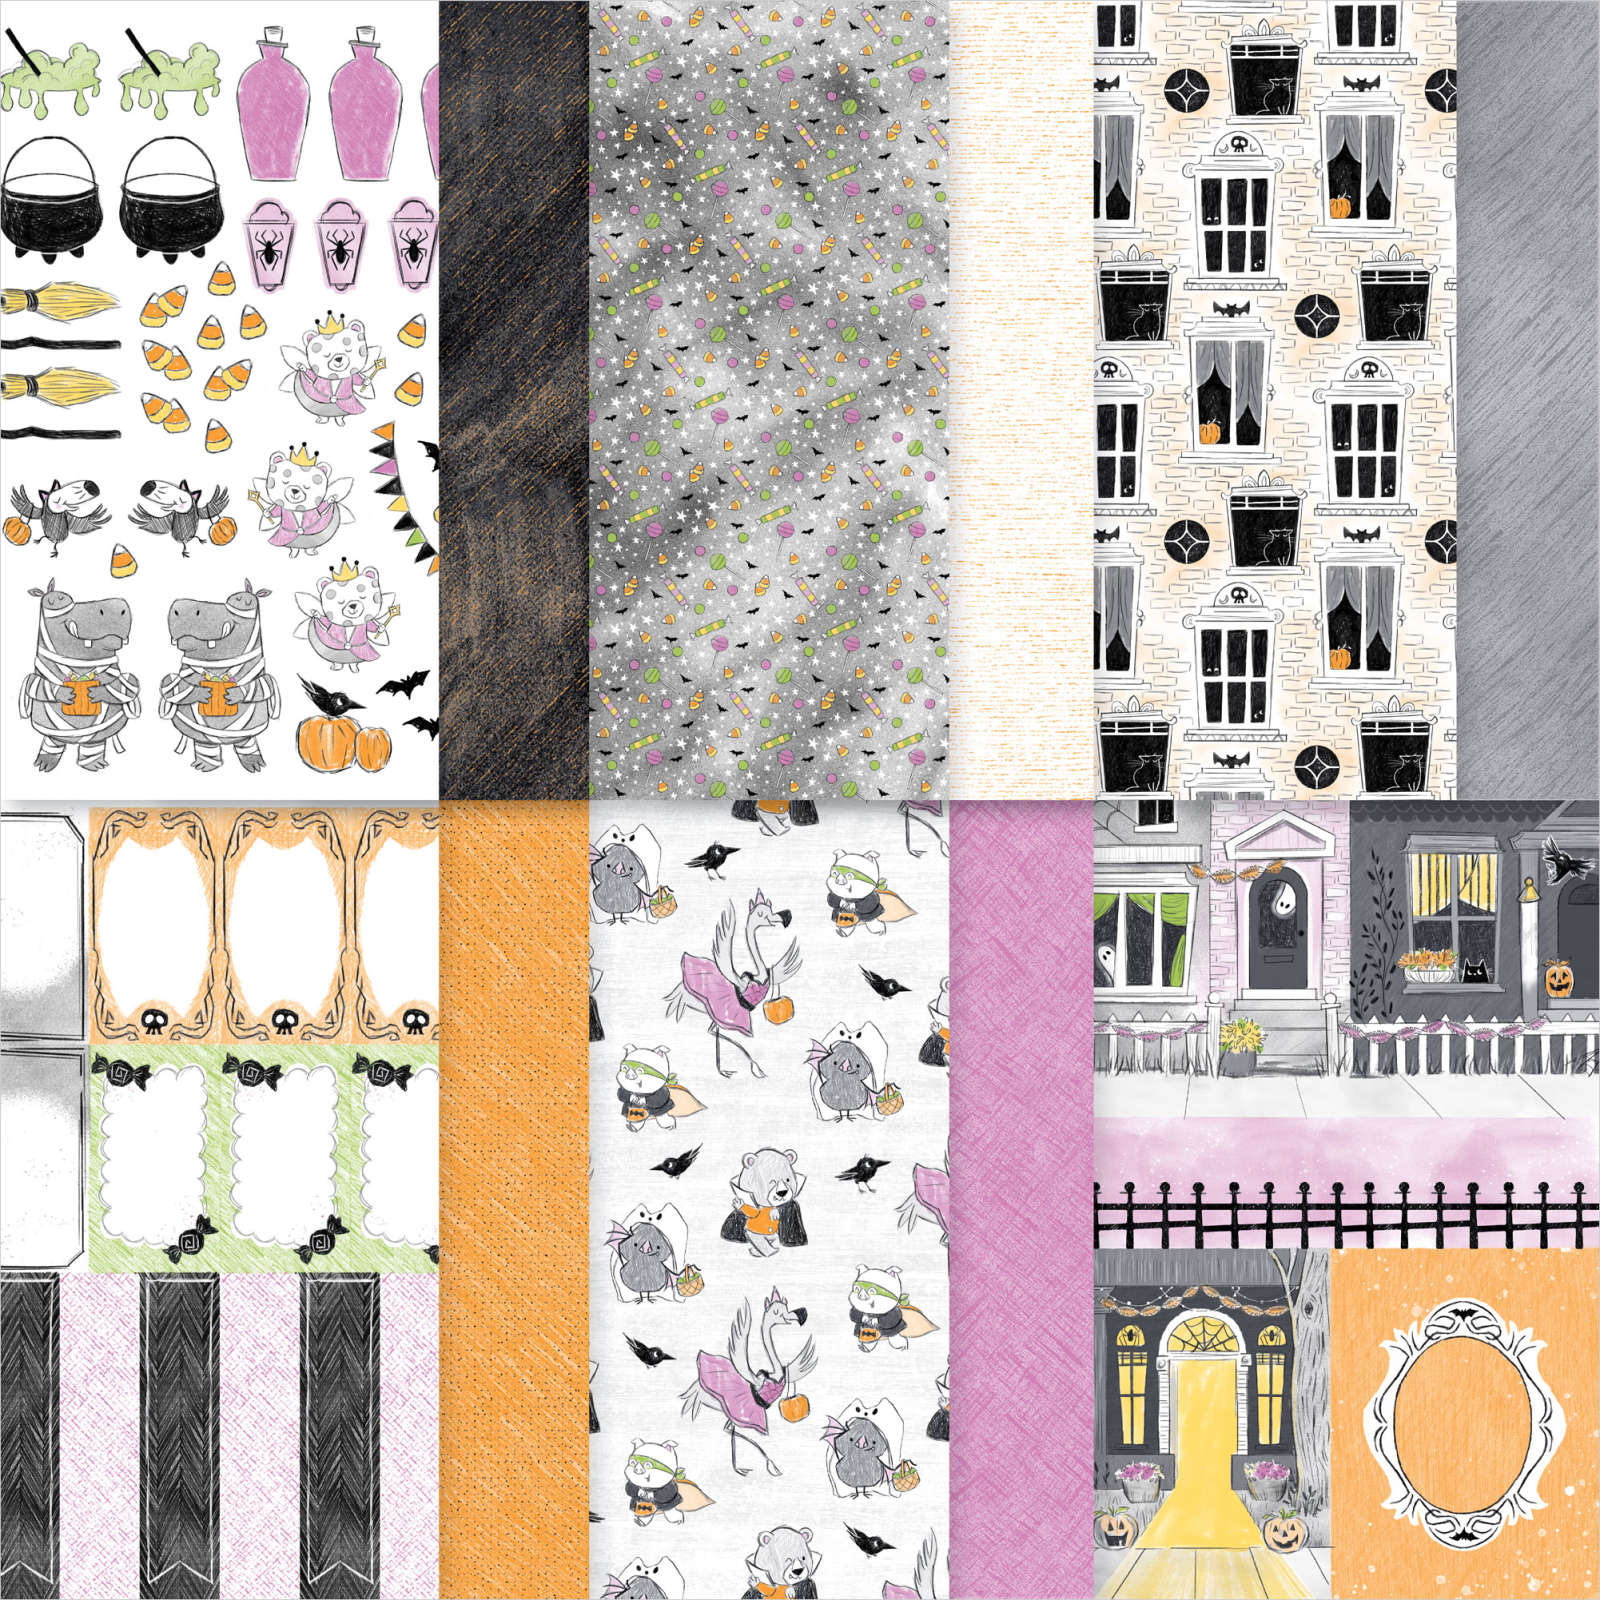
I normally do not need very much in the way of Halloween sets, but I just can’t help myself! I’ve already purchased this Spooky Sweet DSP pack, which includes patterned paper, precut images, and cut-apart scenes and elements. It’s perfect for creating tags and gift packaging for Halloween goodies, accents for scrapbooks, or other spooky-cute paper crafts.
Take a look at all this cuteness! The first page has all the precut images. So cute!
I could’ve stopped there, and would’ve had more than I needed for Halloween. However, I didn’t stop there. I got this Fright Night bundle as well.
If you live in the U.S. and don’t already have a Stampin’ UP! demo from whom you order, I would be honored to work with you.
Welcome to my first post as a design team member for the Atlantic Hearts Sketch Challenge! I’m honored to be joining this very creative group of designers, and am looking forward to posting for Team B’s challenges. This challenge is a weekly event, and we’d all love for you to play along with the sketches and then post your creations to the challenge gallery.
Here’s my Mediterranean Blooms DSP (designer series paper) card:
Here’s the AHSC sketch as a reminder:
Measurements:
The Early Espresso base measures 5-1/2 by 8-1/2 inches, scored at 4-1/4 to form a tent
Trim a piece of Daffodil Delight to 4-1/8 by 5-3/8 inches for the mat
Each of the three strips of DSP measure 1-1/4 by 5-1/4 inches
The DSP strip on the bottom of the inside measures 3/4 by 5-1/4 inches
Trim a piece of DSP to 6 by 2-1/2 inches for the envelope flap
Punch a 1-inch circle of the second DSP pattern and run it through the XYRON create-a-sticker for the envelope seal
Trim a piece of white cardstock to 4 by 5-1/4 inches for the inside of the card
I used scraps of white cardstock for the sentiment banner
The ribbon underneath the sentiment measures 4 inches long
Putting the Card Together:
Unless otherwise noted, multipurpose liquid glue
Stamp the sentiment for the front of the card in Early Espresso ink and crop using a Stylish Shapes die
Stamp the inside sentiment in Early Espresso ink
Outline the three DSP pieces for the front and the sentiment banner using the brush end of an Early Espresso Stamping Write Marker
Adhere the strips of the DSP to the Daffodil Delight cardstock to the base of the card
Adhere the piece of ribbon to the front of the card using glue dots
Add dimensionals to the back of the sentiment banner and attach to the front of the card
Adhere the DSP strip to the bottom of the white cardstock for the inside of the card
Adhere the white cardstock to the inside of the card
As an afterthought, I decided to add three of the Citrus Blooms opals to the sentiment on the front
With that, I’d finished this coordinated card, envelope, and envelope seal set.
Serve up a slice of celebration with the Birthday Fancy Kit! With layered cakes, teacups, florals, and doily details in soft pastels, these 12 cards (4 each of 3 designs) are like a birthday party in an envelope. Whether you’re crafting for birthdays or other sweet occasions, each design makes it easy to create something charming and full of cheer.
DETAILS – Makes 12 cards: 4 each of 3 designs – Folded card size: 5-1/2″ x 4-1/4″ (14 x 10.8 cm) – Colors: Darling Duckling, Fresh Freesia, gold, Lost Lagoon, Petal Pink, Strawberry Slush – Also available in French
Kit includes one of each item listed below. – Birthday Fancy Photopolymer Stamp Set – Clear stamp block – Lost Lagoon Classic Stampin’ Spot – Step-by-step instructions – 12 printed envelopes – Gold foil accents – Adhesive
Here’s the Stampin’ Up! video for the Birthday Fancy Kit:
Sweet & Spooky Kit:
Make Halloween gifting extra special with the Sweet & Spooky Kit! This kit makes 15 treat boxes (5 each of 3 playful designs) featuring cute ghosts, bats, pumpkins, and more in a fun palette of black, pink, orange, and iridescent. With matching tags and ribbon included, these sweet boxes are perfect for party favors, classroom treats, or spooky surprises.
DETAILS – Makes 15 treat boxes: 5 each of 3 designs – Colors: Basic Black, Bubble Bath, Fresh Freesia, iridescent, Pumpkin Pie
Kit includes one of each item listed below. – Step-by-step instructions – Printed and iridescent-foil precut pieces – Paper clips – Pressed wood picks – Baker’s twine – Adhesive-backed holographic stars – Adhesive
Here’s the Sweet & Spooky video from Stampin’ Up!:
If you live in the U.S. and don’t already have a Stampin’ UP! demo from whom you order, I would be honored to work with you.
Welcome back for another Atlantic Hearts Sketch Challenge #635. This sketch fit perfectly with my very new-to-me arches die set! There are multiple reasons why a sketch challenge works, one of which is that the sketch is open to interpretations. Another reason is that if your mojo is dragging a little, a sketch challenge can help get it going again.
Here’s my card:
I used the Terrific Toadstools stamp set and coordinating punch for this card. The DSP (designer series paper) is from the Sale-a-Bration promotion at the beginning of the year. However, this card can easily be recreated using the 6 x 6 inch DSP packs since the colors I used are current. The colors are Melon Mambo, Granny Apple Green, Fresh Freesia, Pumpkin Pie, and Early Espresso. This color combination is bold, bright, and whimsical.
The Melon Mambo base measures 8-1/2 inches by 5-1/2 inches, scored at 4-1/4 inches
I trimmed the background DSP to 5-3/8. by 4-1/8 inches
Using the arches die set, I cropped a Melon Mambo border, a smaller arch from the toadstool DSP, then an arch from white cardstock
I trimmed a piece of DSP to 6 by 2-1/2 inches for the envelope flap
Punch a 1-inch circle from coordinating DSP for the envelope seal
After punching, run the circle through the XYRON create-a-sticker to create the seal
Trim a piece of white cardstock to 4 by 5-1/4 inches for the inside of the card
Trim a piece of DSP to 3/4 by 4 inches for the bottom of the inside cardstock
Stamping & Assembly:
I am working my way through my Basic White cardstock scraps and used them to stamp the toadstool caps and stems using Melon Mambo, Pumpkin Pie, and Early Espresso ink
Punch out the pieces using the toadstool punch
HINT: It’s easier to punch the pieces individually rather than trying to line everything up when stamping
I was able to use three pieces of scraps for each of the stamped pieces I needed punched
The thicker stem needed to be fussy cut, but its not a complicated cut, even for this lefty.
Using the same ink pads, stamp the background toadstools on the white cardstock arch
Use Early Espresso ink to stamp the outside sentiment from the Terrific Toadstools stamp set, and crop using a Stylish Shapes banner die
I used a Pumpkin Pie marker to outline the sentiment banner
Unless otherwise noted, I used multipurpose liquid glue to adhere the pieces together
Stamp toadstools on the bottom of the inside of the card, then adhere the strip of DSP to the bottom
Stamp the sentiment, from the Spring Corners stamp set (which is available as one of the Online Exclusive products) in Early Espresso
Adhere the layers of the background, arches, including the white top layer, and Melon Mambo border to the front of the card
Adhere the stems to the toadstool caps
Add dimensionals to the back of the toadstools and adhere to the white cardstock arch
I needed to use ribbon as shown in the sketch, so I added Fresh Freesia ribbon using glue dots so it would be peeking out from the ends of the sentiment banner
Add dimensionals on the back of the sentiment banner so that they straddle the ribbon and adhere to the front of the card
Adhere the inside cardstock to the base of the card
With that, I’d finished this coordinated card, envelope, and envelope seal set
Thank you for stopping by today!
Have a Peachy Day!
Sue
Colors Used:
Supplies Used:
Just a couple more days ~ this promotion ends at 11:59 MT on June 30, 2025 for online orders!
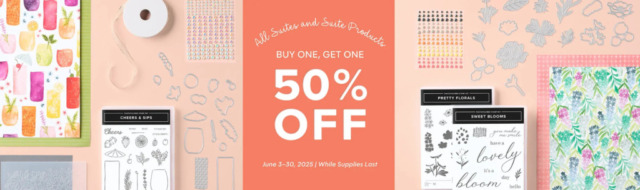
Buy One, Get One 50% Off
Our suite collections are known (and loved!) for their coordination, quality, and style. With stamps, tools, patterned paper, and embellishments in stunning colors and unique designs, suites make creativity simple and fun. Shop the individual products or buy as a full collection!
I have two orders making their way to me and I couldn’t be more excited! Some of the products are pre-orders for the upcoming additions to the Online Exclusives!
If you’d like some help getting the most out of your Buy One, Get One 50% OFF sale, please contact me for assistance.
Promotion Details
Sales Period: June 3–30, 2025
Ordering Deadlines
Phone: June 30, 2025, at 6:59 p.m. (MT)
Online: June 30, 2025, at 11:59 p.m. (MT)
All available suites and suite products from the 2025–2026 Annual Catalog and Online Exclusives are buy one, get one 50% off.
When you shop the sale, the 50% off discount will apply to the lower-priced item (for example, if you buy a suite collection and a stamp set from a suite, the suite would be full price, and the stamp set would be 50% off).
Suite collections are available if all items are in stock; if all items are not in stock, you can still shop the available suite products.
You don’t have to buy a suite and suite products all from the same suite collection for the discount to apply. You can buy any suite products from any suite.
The discount will appear in your cart once you’ve added two items within the sale parameters to your cart.
Products are available only while supplies last.
If you live in the U.S. and don’t already have a Stampin’ UP! demo from whom you order, I would be honored to work with you. If you’d like some help getting the most out of your Buy One, Get One 50% OFF sale, please contact me for assistance.
Welcome back to Just Peachy Stamping! My husband is out-of-town, my dogs are acting like magnets, my sleep schedule is all out of whack, and I stayed up way too late last night. However, that means I had plenty of time to search for different card challenges, and I found the current Atlantic Hearts Sketch Challenge # 572. Earlier, I’d seen the Paper Craft Crew #565 Challenge, which is to Case the Catty, with a Twist. When I combined them together, this is the card I created.
Here’s my card:
Here are the AHSC and PPC banners that inspired my card:
Measurements:
The AHSC and the January – April 2024 mini-catalog page 40 were my inspirations.
The Pretty Peacock cardstock base measures 5-1/2 by 8-1/2 inches, scored at 4-1/4 inches.
The Nature’s Sweetness DSP background layer measures 4-1/8 by 5-3/8 inches.
Then, I trimmed another pattern from the DSP set to 6 by 2-1/2 inches for the envelope flap.
I cropped both octagon focal shapes using the Countryside Corners die.
Before I adhered the background layer, I punched a 1-inch circle through the center of the DSP for the envelope seal. Next, I ran it through my XYRON create-a-sticker machine.
The white cardstock for the inside measures 4 by 5-1/4 inches.
Assembly:
I used the Nature’s Sweetness DSP (designer series paper) which did all the work for me. I paired it with Pretty Peacock cardstock and used the largest and second largest Countryside Corners dies to crop the focal image and mat.
The outside sentiment comes from the soon to be retired Framed Florets stamp set. I cropped it using the second smallest Countryside Corners die and outlined it with my Pretty Peacock marker.
I needed to add some length to the sentiment banner to meet that part of the AHSC sketch. Therefore, I used a banner die from the Stylish Shapes die set, cut it in half, and then adhered it to the back of the sentiment piece.
I used multipurpose liquid glue to adhere the cardstock and DSP pieces together. There are dimensionals under the sentiment.
I used the “I made you a card because you’re worth it” sentiment from the Here’s a Card stamp set for the inside. It is stamped in Pretty Peacock.
After stamping the inside sentiment, I adhered the white cardstock to the inside.
With that, I’d finished my coordinated card, envelope, and envelope seal set.
Welcome back to another biweekly Cardz 4 Galz challenge! Our host for #209, Johanna, chose green and cream for the theme. While I used Mossy Meadow and Very Vanilla for my green and cream, the possibilities for this challenge are endless! When you finish here, I hope you will visit the challenge site to see the creations from the rest of the design team. After you are inspired to play along, please be sure to add your project to our gallery.
Here’s my green and cream card:
This Hey Chuck bundle just makes me happy! I’ve been so busy making Thanksgiving cards, it was fun to go back to create a birthday card that is really appropriate for galz or guyz. I really think this guy is “Chuck”, mainly because he looks like he thinks all the other roosters in the set are just a tad off. I’ve already posted a number of Hey Chuck cards using Chuck and other roosters in this bundle. You can see three of them here, here, and here. As always, all my supplies can be found in the Stampin’ Up! annual catalog.
Luckily, I could use a number of scraps/leftover cardstock pieces!
I’ve found that it’s easier for me to gather all my supplies first before I start measuring, trimming, stamping, coloring, cropping, and finally assembling the card. My main desk is 2 feet wide by 5 feet long. However, I wind up working in a much smaller space for some strange and (not so) unknown reason. Please tell me I am not the only one.
The Mossy Meadow base measures 11 by 4-1/4 inches, scored at 5-1/2 inches to create a tent fold.
After I dry embossed a piece of Very Vanilla cardstock using one of the Basics Embossing folders, I trimmed it to 4-1/8 by 5-3/8 inches.
The Very Vanilla cardstock for the inside measures 4 by 5-1/4 inches.
I trimmed a piece of 6 x 6 inch Crumb Cake DSP to 6 by 2-1/2 inches for the envelope flap.
I punched a 1-inch circle from a piece of Mossy Meadow 6 x 6 inch DSP for the envelope seal. This needs to be run through your XYRON create-a-sticker to create the seal.
There’s a piece of Mossy Meadow cardstock under the grassy pieces on the front of the card. It measures 1/2 by 4-1/8 inches.
The only other piece of cardstock I needed was a 4-1/4 by 5-1/2 inch Crumb Cake cardstock for the circle of rays behind my scene.
As I said, I was able to get everything else stamped and/or cropped using leftover cardstock pieces.
Stamping & Coloring:
Coloring is completely relaxing to me, so I colored, stamped, and used blending brushes for these different elements.
I stamped the rooster and sentiment onto Very Vanilla cardstock using Early Espresso ink.
HINT: If you are not using Momento inks to stamp your outlines, but are using blends to color, you really need to let the ink dry before you start coloring or it will bleed.
I stamped the fence pieces onto Crumb Cake cardstock using Early Espresso ink.
Then, I used a blending brush and layers of Crumb Cake ink on the fence pieces so they look kind of weathered. Remember you can always add more ink as needed. However, if you start with a heavy hand while blending, you might wind up starting over.
HINT: After adding ink to the blending brush, tap it off on grid paper so you don’t wind up with blobs of color that you can never seem to fix.
Using the Rays of Light stamp set, I stamped Crumb Cake ink onto Crumb Card cardstock.
By this time, I could color the rooster. I used Crumb Cake and Cajun Craze blends combos for Chuck.
Finally, I stamped the inside sentiments and fence pieces using Early Espresso ink.
Cropping & Assembly:
I used the Hey Chuck die set to crop the Cajun Craze weather vane, Chuck, and the fence pieces.
The sentiment banner and the Rays of Light circle were cropped using the Stylish Shapes die set.
Then, I cropped the grassy pieces behind the fence from the Playing in the Rain die set.
To assemble, I used mostly multipurpose liquid glue, with the exception of dimensionals under Chuck and the front sentiment.
I adhered the Rays of Light circle first, then layers the strip of Mossy Meadow green cardstock and the grassy pieces on top.
Next, I added the fence pieces. I adhered the two outside fence pieces using liquid glue. Then, I used mini glue dots for the center fence piece.
After adhering the weather vane, I added the dimensional backed Chuck and sentiment.
This card turned out a bit bulky, so I will need to add extra postage to the envelope in order to mail it.
After adhering the inside panel, I’d finished this coordinated card, envelope, and envelope seal set.
I hope I’ve inspired you to play along with our challenge.
Welcome to Just Peachy Stamping by Sue Jackson: an independent Stampin' Up demonstrator.
Through Stampin' Up!, I happily share my love of papercrafting through sales, classes, small stamping group meet-ups and workshops. I think that being a teacher in my "real life", I have a unique approach to sharing my fantastic hobby. I look forward to connecting with you!