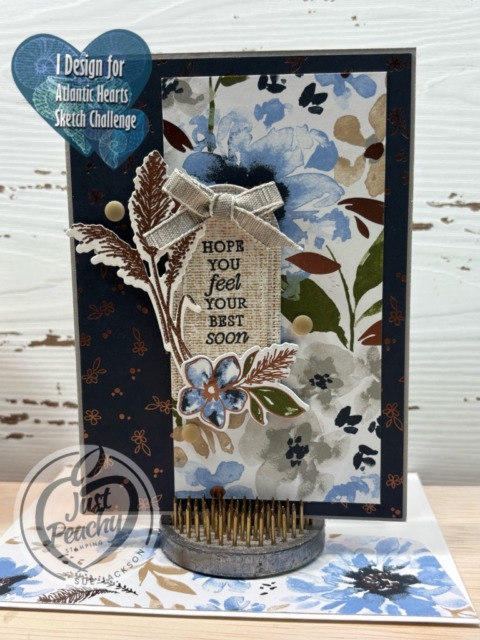
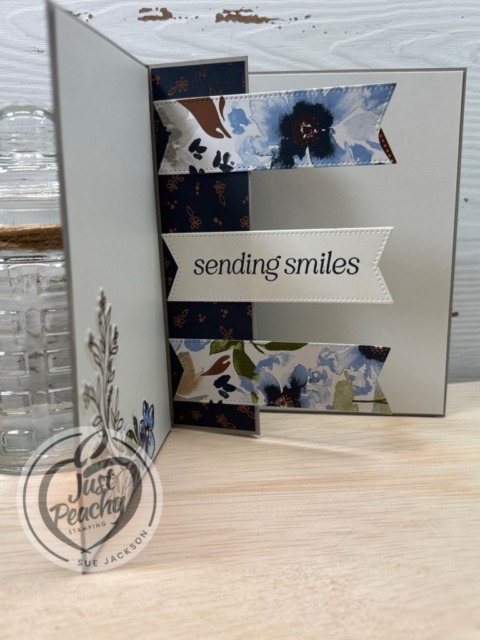
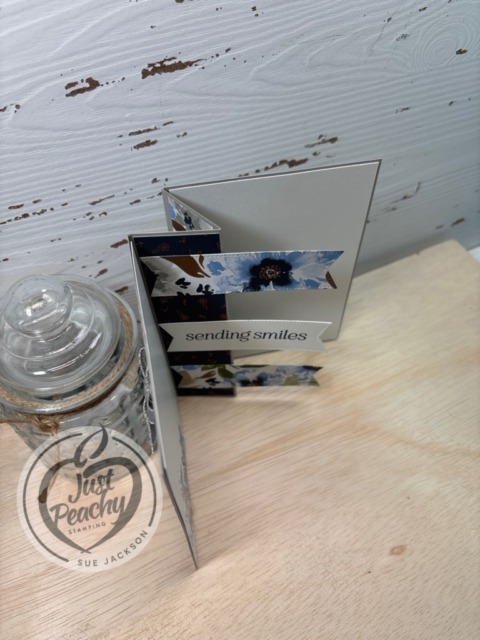
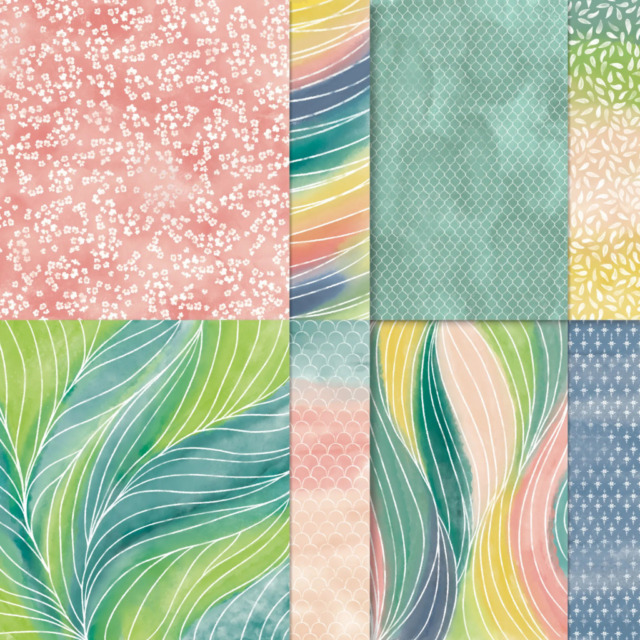
I used the Easter Basket bundle along with the Stampin’ Up! February Product of the Month, Painted Illusions DSP, which is still available for $5.00 with a $75.00 qualifying purchase.
Please check out the challenge’s page for the creations by the other very talented design team members. When you’ve created your own card for our challenge, please don’t forget to upload them to our gallery. We’d love for you to play along.
I wasn’t going to get this Easter Bunny bundle, but I am so incredibly happy I did! You can see two other cards using this bundle here and here.
Here’s my card:
Here’s the Atlantic Hearts Sketch Challenge banner:
I flipped the bottom two pieces so that the floral DSP and white cardstock so I could put the bunny on the right on the top.
Of course, since this is a fun fold, I’m also including it in the Creative Creases Challenge #113, where I am a guest designer for this month’s challenge.
Measurements:
The Flirty Flamingo base measures 8-1/2 by 5-1/2 inches, scored at 2-1/8 and 4-1/4 inches to create a z-fold card
The Flirty Flamingo mat for the front measures 4-1/8 by 5-3/8 inches
I trimmed two pieces of Painted Illusions DSP (designer series paper) for the front of the card measuring 2-7/8 by 1-3/8 inches and 1-7/8 by 2-3/8 inches
Trim another piece of DSP to 6 by 2-1/2 inches for the envelope flap
Punch a 1-inch circle from coordinating DSP and run it through the XYRON create-a-sticker for the envelope seal
The white pieces of cardstock for the front measure 1-7/8 by 2-3/8 inches, 1-3/8 by 3-7/8 inches and 1-1/8 by 1-3/8 inches
The white cardstock for the inside measures 3-7/8 by 5 inches
I used scraps of cardstock for the Flirty Flamingo bows, the critters, the Granny Apple Green and white cardstock sentiment pieces
What I Did:
I used dimensionals to adhere the bows and the sentiment panels
For the rest of the card I used multipurpose liquid glue
The flowers, bunny, and duck were stamped in Momento Tuxedo Black ink and colored with light and dark blends combos
I used the Stone and Vine embossing folder for the three pieces of white cardstock on the front, and used the debossed (reverse) side
I did all the coloring for the flowers before embossing since it wouldn’t be possible to do afterwards
All the white cardstock and DSP pieces on the front were outlined using the brush end of the dark Flirty Flamingo blend
I stamped the sentiment, carrot, and flowers on the inside using Momento Tuxedo Black ink
Then, I colored in the flowers and carrot using the blends combos
With that, I’d finished this coordinated card, envelope, and envelope seal set.
Welcome back to the monthly Stampin’ UP! Demonstrators Fun Fold Blog Hop. If you love fun folds, you’ve come to a hop filled with really great projects by some very talented fellow demonstrators. When you finish here, I hope you will hop along with the rest of the demos using the links below.
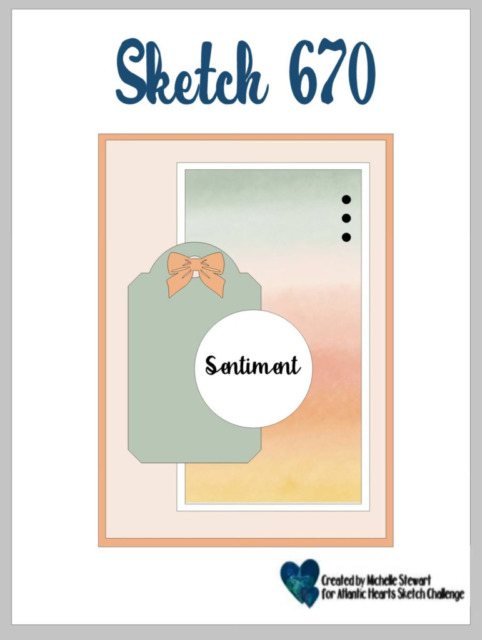
Here’s the sketch from the Atlantic Hearts Sketch Challenge:
As always with a fun fold card, I will be adding this to the Creative Creases Challenge where the theme is always Anything Goes with a Fun Fold.
The Inspiration:
I used a video tutorial from Susan Campfield to create this card. I did need to make some adjustments to her measurements on the inside so that about 12 people can sign it for a colleague who has been recovering from an injury. Sue gives all the measurements for this card, and other versions of it, in the video.
The major changes I made are on the inside of the card. I trimmed two pieces of white cardstock to 4-1/4 by 5-3/8 for the inside. I stamped the inside sentiment, from the Lovely Arrangements stamp set, using Secret Sea ink. Then, I used a Stylish Shapes banner die to crop the sentiment and two pieces of the Delightful Wishes DSP.
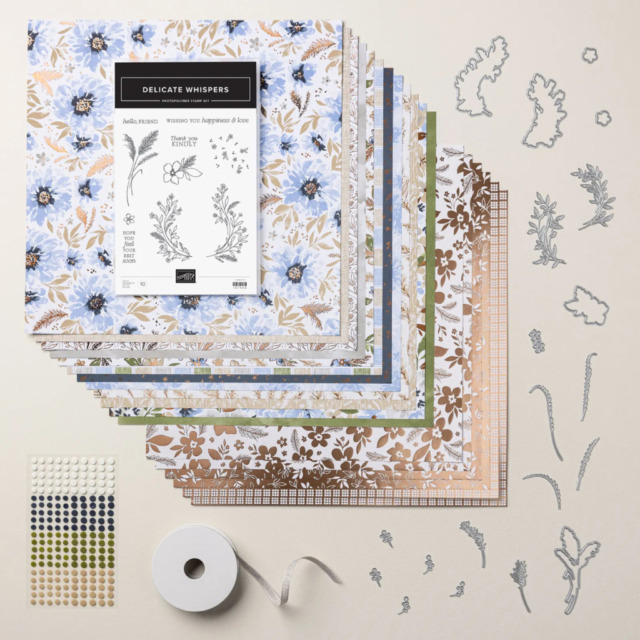
The SNEAK PEEK for this card will be available on the March Online Exclusives. The colors and DSP (designer series paper) patterns are stunning! The colors in this suite of products are Gray Granite, Secret Sea, Mossy Meadow, Crumb Cake, Bronze, and Hydrangea Hue. (HINT!)
Take a look at this gorgeous suite of products:
Back to the SU! Demos Fun Fold Blog Hop:
We all hope you will follow the links below and hop along with us. There’s so much inspiration to be found here. We’d love to see what inspires you to create a fun fold as well. Don’t forget to upload it to the Creative Creases challenge!
If you get lost along the way, you can always come back here to find the next demo in line.
It’s time to redeem the coupons you earned in January! Make sure you place your order before time runs out!
It’s Time for a Joining Bonus!
Crafting is even more fun with community, and there’s never been a better time to join Stampin’ Up! as a demonstrator. There’s no commitment beyond the initial joining quarter and you get to enjoy all the perks that come with that, like a 20–25% product discount, early access to the latest products and catalogs, the opportunity to earn a modest supplemental income, the chance to attend incredible training and crafting events, and so much more. And for a limited time, new demonstrators will receive our new Stampin’ Positioner tool FREE along with their Starter Kit!
It’s Time for the February Product of the Month!
Painted Illusions 12″ x 12″ (30.5 x 30.5 cm) Designer Series Paper
Beautiful watercolors and whimsical patterns make up this one-of-a-kind paper. Make a wide variety of projects with this paper that is sure to dazzle!
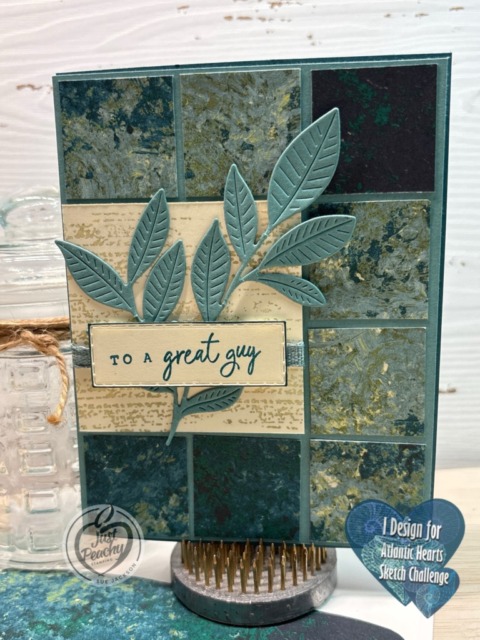
I used the Nature Walk DSP (designer series paper) for this challenge, and am so pleased with the color combination of Pretty Peacock, Lost Lagoon, and Secret Sea.
Please check out the challenges page for the creations by the other very talented design team members. When you’ve created your own card for our challenge, please don’t forget to upload them to our gallery. We’d love for you to play along.
Here’s my card:
It took me longer to figure out what I wanted to do than it did to create the card. I went through two different color combinations, DSP (designer series paper), and cardstock. I finally settled on this because I had the leaf spray.
Measurements:
The Pretty Peacock base measures 8-1/2 by 5-1/2 inches, scored at 4-1/4 inches
The Lost Lagoon mat measures 4-1/8 by 5-3/8 inches
After a false start, I figured out that it’s easier to trim the DSP squares, then figure out what size of cardstock is needed for the focal square
I trimmed the Nature’s Walk DSP squares measure 1-1/4 by 1-1/4 inches
The Very Vanilla cardstock square measures 2-5/8 by 2-5/8 inches
I needed another piece of Very Vanilla trimmed to 4 by 5-1/4 inches for the inside of the card
Don’t forget to trim a piece of DSP to 6 by 2-1/2 inches for the envelope flap
Then, punch a 1-inch circle of coordinating DSP and run it through the XYRON create-a-sticker for the envelope seal
What I Did:
Unless otherwise noted, I adhered pieces together using multipurpose liquid glue
I adhered the Lost Lagoon mat to the Pretty Peacock base
After dry-fitting the squares, I adhered them to the mat
I wanted to add texture to the Very Vanilla square, so I used the wood pattern from the Nature’s Symphony stamp set
To get the subtle images, I stamped off using Crumb Cake ink before stamping on the Very Vanilla
I had some retired Lost Lagoon ribbon and added it to the Very Vanilla square and adhered it on the back using tear & tape
To accommodate the ribbon, I added dimensionals to the back of the Very Vanilla square and adhered it to the card
Then, I slid the leaf branch die cut and adhered it using multipurpose liquid glue and a couple of dimensionals for the top leaves going off the Very Vanilla square
The sentiment, from the Nature’s Symphony stamp set, is stamped in Pretty Peacock ink and cropped using a Textured Notes Die
After outlining the sentiment using the Pretty Peacock marker and added dimensionals trimmed down to straddle the ribbon
I stamped the inside sentiment using Pretty Peacocck ink and adhered it to the inside of the card
Welcome back to the monthly Stampin’ UP! Demonstrators Fun Fold Blog Hop. If you love fun folds, you’ve come to a hop filled with really great projects by some very talented fellow demonstrators. When you finish here, I hope you will hop along with the rest of the demos using the links below.
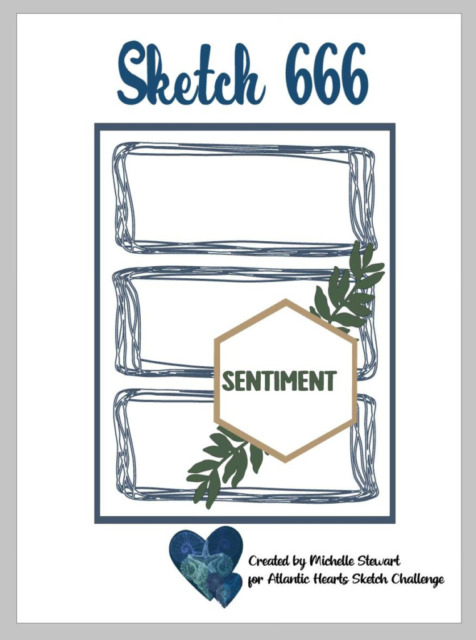
I’m also using this fun fold for the Atlantic Hearts Sketch Challenge #666, and here’s the sketch:
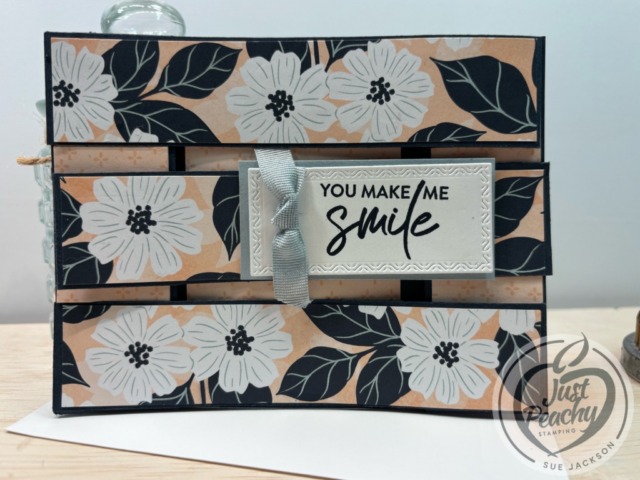
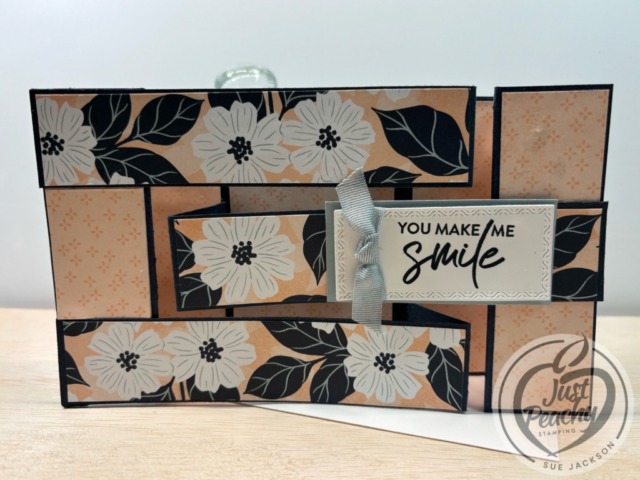
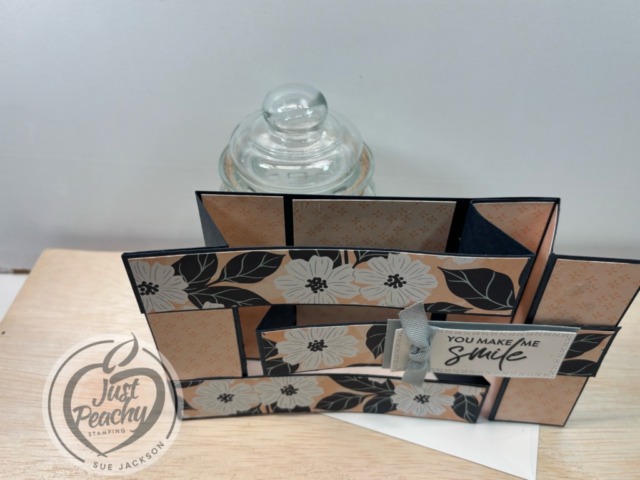
Without further ado, here’s my Triple Bridge Z-fold card:
As soon as I saw this Lovely Blossoms DSP (designer series paper) pattern on pre-order for the online exclusives, I knew I had to have it! The combination of Petal Pink, Secret Sea, pops of Cloud Cover, and the white flowers is absolutely gorgeous!
Connie Stewart’s Video:
I found this video posted by Connie Stewart for this card, and you can watch it here. I’ve watched it three times, once before doing anything with paper. The second time, I followed along and paused when I needed to do so to trim my pieces. When I had everything trimmed, I watched it a third and fourth time to help me put the pieces together. Please don’t let the number of times I watched the video scare you away because if you’ve ever made a z-fold card, you can do this.
In her video, Connie says that the more you play with the card, the easier it will fold back up properly. Even after burnishing each of the score lines as both a valley and as a mountain, I still need to play with the card to loosen up the folds.
I would strongly suggest making this for the first time using retired DSP, and I wish I had done so. I would rather have 1/8 inch borders around my DSP pieces. Connie’s measurements are for 1/4 inch borders. Therefore, I needed to adjust the sizes going up 1/8 inch for the length and width for each piece.
Back to the Stampin’ Up! Demos Fun Fold Blog Hop:
We all hope you will follow the links below and hop along with us. There’s so much inspiration to be found here. We’d love to see what inspires you to create a fun fold as well. Don’t forget to upload it to the Creative Creases challenge!
If you get lost along the way, you can always come back here to find the next demo in line.
What better way to earn the January Product of the Month? Bonus Days & Product of the Month – Yes, Please!
Versatility is key! With the Fabulous Sayings Stamp Set, you’ll always have the right words on hand—whether you’re creating birthday cards, thank-you notes, or a cheerful hello.
You can purchase the Product of the Month item for only $5 USD | $5 CAD when you spend $75 USD | $100 CAD or more in a single order. I’ve already ordered this item and am looking forward to adding these sentiments to my other sentiment stamp sets.
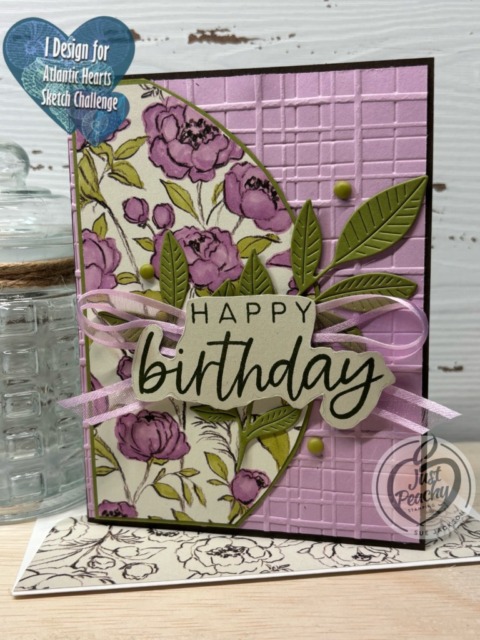
I used the Beautiful Gallery DSP (designer series paper) for this challenge, and am so pleased with the color combination of Basic Beige, Early Espresso, Fresh Freescia, and Old Olive!
Please check out the challenges page for the creations by the other very talented design team members. When you’ve created your own card for our challenge, please don’t forget to upload them to our gallery. We’d love for you to play along.
Here’s my card:
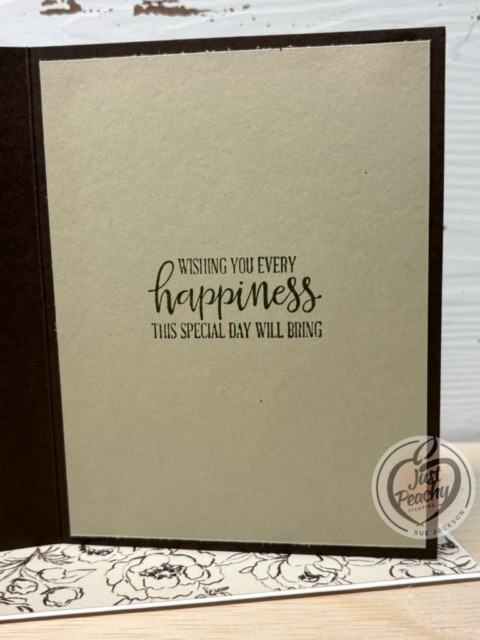
And the inside:
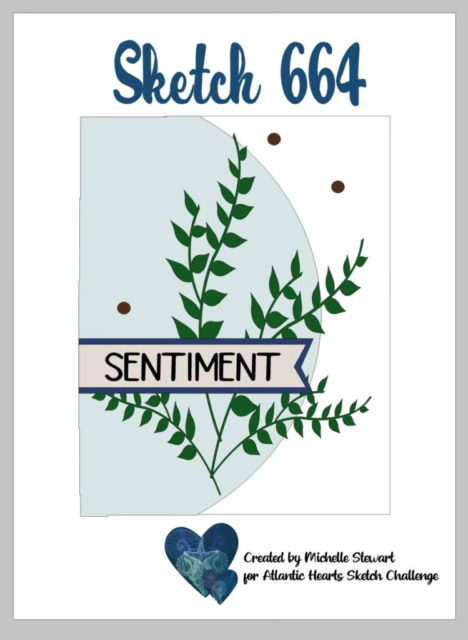
Here’s the challenge sketch:
Measurements:
The Early Espresso base measures 8-1/2 by 5-1/2 inches, scored at 4-1/4 inches
After embossing a piece of Fresh Freesia cardstock using the 3D Plaid embossing folder, I trimmed it to 4-1/8 by 5-3/8 inches
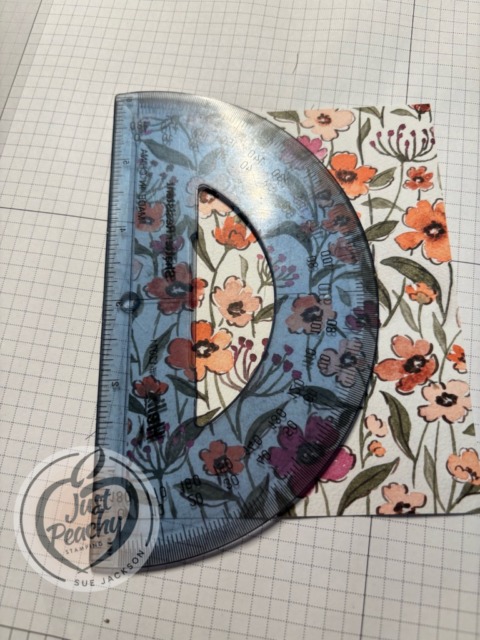
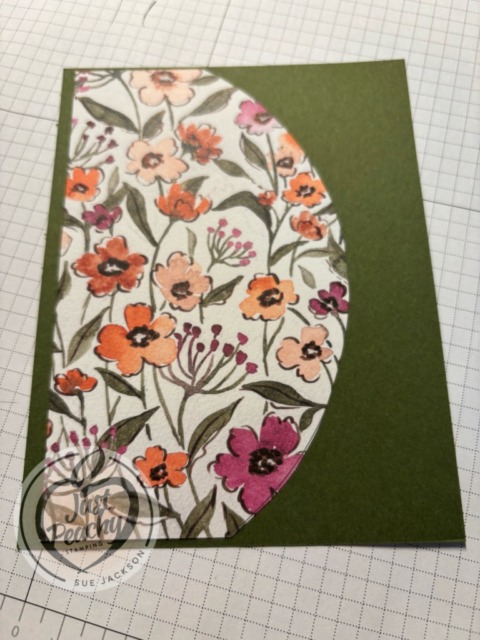
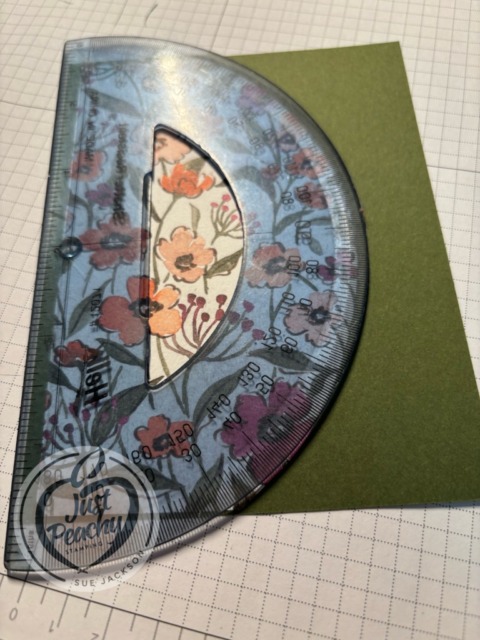
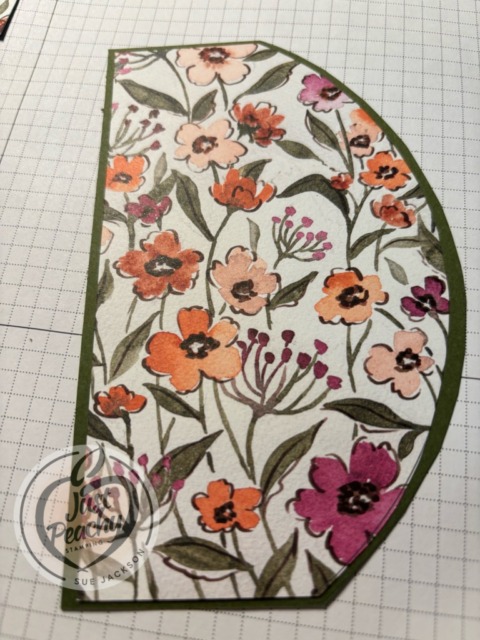
Next, I used a protractor to trace and fussy cut the circle parts of the Beautiful Gallery 6 x 6 inch DSP (designer series paper) and the Old Olive mat, as shown below (different DSP and cardstock, same process):
What I Did:
Unless otherwise noted, I used multipurpose liquid glue to adhere pieces together
I used the Fresh Freesia and Old Olive blends combos to color the flowers and the leaves
After fussy cutting the two layers, I adhered them as shown
Then, I adhered the fussy cut layers to the plaid embossed layer, then adhered the layers to the base of the card
I stamped the birthday sentiment for the front in Mossy Meadow ink and fussy cut that as well
HINT: After stamping the sentiment, I used the stamp to outline the shape I needed to cut
After cropping the foliage from Old Olive cardstock using a die from Nature’s Symphony die set, I adhered it to the front of the card
I used Fresh Freesia ribbon to make a loopy loop, which I adhered with glue dots, then added a glue dot to adhere it to the front of the card
Next, I added dimensionals to the underside of the birthday sentiment and adhered it over the ribbon
I stamped the sentiment for the inside using Mossy Meadow ink on Basic Beige cardstock and adhered it to the base
Finally, I added some Old Olive dots to the front of the card
With that, I’d finished this coordinated card, envelope, and envelope seal set
The Loopy Loop Bow:
I was able to watch Mary Deatherage’s, from Stamps -n- Lingers, Perfectly Pears tutorial. In that video, she showed her loopy-loop bow. That’s what I used for the front of my card. I’m bow-challenged and this technique allows me to relatively easily add ribbon without adding the bulk of a tied bow. If you’ve never seen her videos, you owe it to yourself to watch them. I think she’s the Queen of the Collage. Gorgeous cards!!
What better way to earn the January Product of the Month? Bonus Days & Product of the Month – Yes, Please!
Versatility is key! With the Fabulous Sayings Stamp Set, you’ll always have the right words on hand—whether you’re creating birthday cards, thank-you notes, or a cheerful hello.
You can purchase the Product of the Month item for only $5 USD | $5 CAD when you spend $75 USD | $100 CAD or more in a single order. I’ve already ordered this item and am looking forward to adding these sentiments to my other sentiment stamp sets.
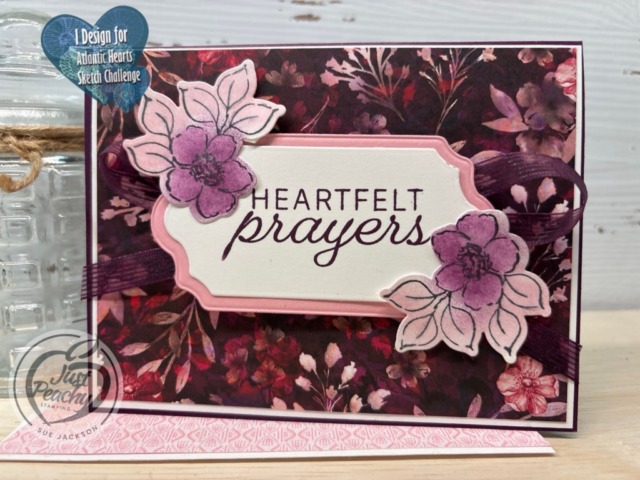
Welcome to the weekly Atlantic Hearts Sketch Challenge! Challenge #656 is for Team B, which is my team. I love getting kickstarted with a sketch, then just letting the card come together. Sometimes, I know exactly what I want to do. Other times, like for this week’s challenge, the card evolves. Everyone on Team A and Team B would love for you to play along with the sketches and then post your creations to the challenge gallery. Don’t forget to come back tomorrow to see the creations of the design team. We hope our projects inspire you to play along with us.
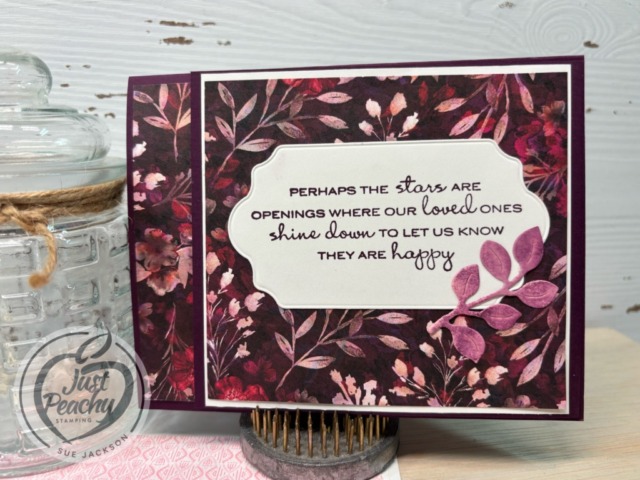
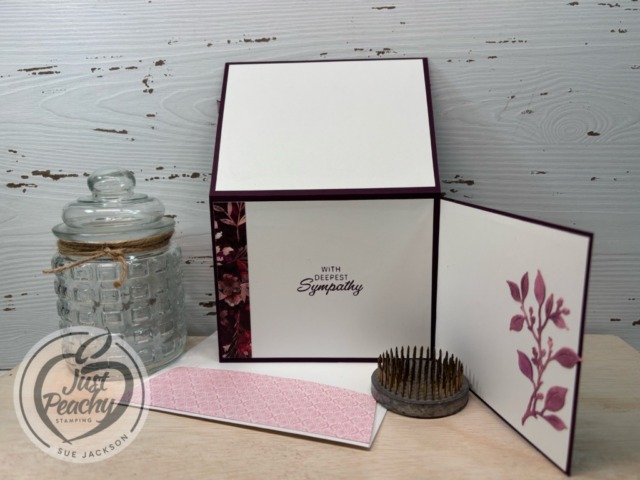
Sadly, a coworker’s brother passed away 10 days before Christmas. Therefore, I needed a card which our whole department can sign for her when we go back to school. Here’s my card:
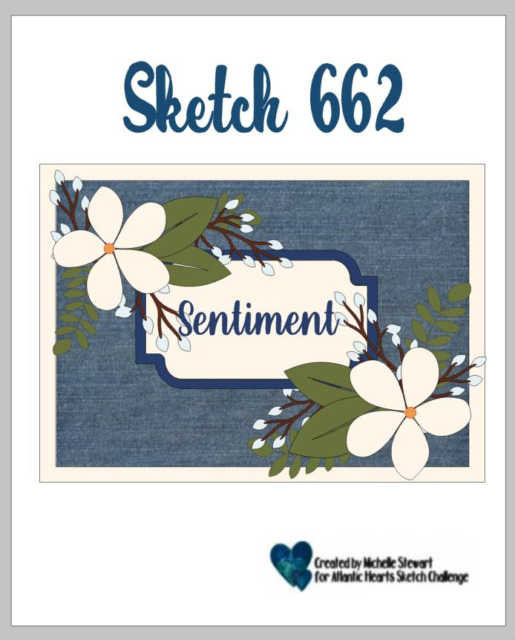
Here’s the Atlantic Hearts Sketch Challenge banner:
Measurements:
Trim a piece of Blackberry Bliss cardstock to 8-1/2 by 5-1/2, scored at 4-1/4 to create a tent fold
You will need an additional piece of Blackberry Bliss to 5-3/8 by 4-1/8 and score on the long side at 3/4 of an inch for the side flap
Trim two pieces of white cardstock to 5-1/4 by 4 for the inside of the card
You will need another piece of white cardstock measuring 4-1/2 by 4 inches for the side flap
The white cardstock for the front measures 4-1/8 by 5-3/8 inches, and I cropped out the center banner using the Peace on Earth die from the center of that piece
Next, I used a piece of white cardstock measuring 4-3/8 by 4-1/8 for the front of the flap
I cropped another sentiment label for the flap from the center of the white cardstock mat
There are three pieces of trimmed Regal Winter DSP which measure 4 by 5-1/4 inches, 4-1/4 by 3-7/8 inches, and 3/4 by 4 inches
Since I started with just one 6 by 12 inch piece of this DSP, I trimmed a piece of Pretty in Pink 6 x 6 inch DSP to 2-1/2 by 6 inches for the envelope flap
Don’t forget to punch a 1-inch circle from the DSP used on the card and run it through your XYRON create-a-sticker for the envelope seal
I used scraps of Pretty in Pink for the mat layer of the sentiment panel and the leaves/branches cropped for the right flap
The flowers were stamped on scraps of white cardstock and I used daubers to add ink to the flowers and leaves for a soft look
What I Did:
Unless otherwise noted, I used multipurpose liquid glue to adhere pieces together
After burnishing all the score lines, I adhered the 3/4 inch piece of the flap to the right side of the inside of the card
Adhere all three white pieces of cardstock
Next, adhere all the pieces of DSP as shown
Stamp the sentiments on the two white banners and the inside of the card using Blackberry Bliss ink
Adhere the flap sentiment
Adhere the front sentiment to the Pretty in Pink banner mat
Using ribbon, create a loopy loop bow (directions below) and secure and adhere with mini-glue dots
Add dimensionals to the back of the Pretty in Pink banner so that they will straddle the ribbon pieces and adhere on the front
Use dimensionals and liquid glue to adhere the flowers to the opposite corners of the sentiment banner
As a complete after-thought, I will probably go back when I am finished here and add some dot embellishments to the front of the card when I am finished here
The Loopy Loop Bow:
I was able to watch Mary Deatherage’s, from Stamps -n- Lingers, Perfectly Pears tutorial. In that video, she showed her loopy-loop bow. That’s what I used for the front of my card. I’m bow-challenged and this technique allows me to relatively easily add ribbon without adding the bulk of a tied bow. If you’ve never seen her videos, you owe it to yourself to watch them. I think she’s the Queen of the Collage. Gorgeous cards!!
It’s time for one of our favorite promotions—BONUS DAYS! Because do you know what’s a great deal? Getting rewarded for all the crafting supplies you’re already going to buy! When you shop between January 6 and February 2 and spend $50 USD | $60 CAD, you will earn a $5 USD | $6 CAD coupon! Make sure you save all your coupons because you can redeem them (and we mean ALL of them) between February 3 and 28. And don’t forget—each purchase earns you Stampin’ Rewards, so that’s even more bang for your buck!
There’s no limit to how many coupons you can earn! I already have a pretty substantial order in my cart, and knowing that I will earn Rewards and coupons on it makes me so happy!
Welcome to Just Peachy Stamping by Sue Jackson: an independent Stampin' Up demonstrator.
Through Stampin' Up!, I happily share my love of papercrafting through sales, classes, small stamping group meet-ups and workshops. I think that being a teacher in my "real life", I have a unique approach to sharing my fantastic hobby. I look forward to connecting with you!