When I saw the challenge colors for the Color Throwdown # 643 challenge, I instantly thought I’d try the alcohol and blends technique again. My first try at thie technique didn’t turn out at all the way I hoped. After doing some research, I found out what I did wrong: 1.) you must use at least 90% rubbing alcohol, and 2.) the key is to tap the alcohol on the blends, not paint with it.
Here’s my new and improved try:

Here’s just the layers of the butterfly:

Finally, here’s the challenge banner:

Creating the Background
- The challenge called for aqua, ice blue, and light green. I used the light Bermuda Bay, dark Mint Macaron, and Dark Pool Party blends.
- Since I really thought this would make a much bigger mess than it did, I used a chopping mat (from Dollar Tree) to protect my desk. Then, I put a piece of printer paper over the chopping mat. I also had an old washcloth to blot my water painter.
- Truly, if you can scribble, you can do this technique. Using one blend at a time, I simply colored random blocks using each of the blends, making sure to completely cover the 5-1/2 inches by 4-1/4 inches piece of cardstock vellum.
- Next, I used a pipette to fill the large, flat tipped water painter with alcohol. While I was doing that, I felled a Stampin’ Spritzer with alcohol as well. (You can find the pipettes here.)
- Using the water/alcohol painter, I simply tapped all of one color blend scribbles, blotted the painter to remove that color, and repeated for the other two colors. So easy-peasy!!
- At this point, the result was pretty smooth and there was veining where the colors met. After the colors dried, and just to see what would happen, I lightly spritzed the whole piece of vellum with alcohol. That’s how I got the more mottled look, and I am really pleased with how it turned out.
Measurements:
- I used Coastal Cabana for the base of the card measuring 4-1/4 inches by 8-1/2 inches, scored at 4-1/4 inches to form a tent card.
- Then, I trimmed a piece of white cardstock and the colored vellum to 4-1/8 inches by 5-3/8 inches. Using Stampin’ Seal, I adhered the vellum to the cardstock. Just make sure you really seal the edges as the vellum will tend to roll after it dries.
- While I had the white cardstock out, I trimmed a piece to 5-1/4 inches by 4 inches for the inside of the card.
- I created a three layer butterfly using the Brillant Wings die set. The layers from bottom to top are Bermuda Bay (for contrast, which is still aqua), Pool Party, and Mint Macaron.
- Next, I wrapped a piece of retired Bermuda Bay ribbon around the card and tied it in a bow. I attached the bow using a couple of glue dots.
- Any sentiment for the front would work, so I chose to use the birthday sentiment from Here’s a Card. Then, I cropped the sentiment using the Stitched So Sweetly die set.
- I did use dimensionals under the sentiment and under the whole vellum/cardstock layer.
- Finally, I used three middle sized Coastal Cabana resin dots to create a triangle connecting the sentiment to the butterfly. Embellishments in a triangle pattern help move the eyes across the card.
- I used a piece of Coastal Cabana 6 x 6 inch DSP for the envelope flap. The piece measures 6 inches by 2-1/2 inches and is attached using multipurpose glue.
- Using the DSP, I punched a 1-inch circle and ran it through the create a sticker XYRON machine to create an envelope seal.
- Finally, after trimming the envelope flap, I’d completed the card set.
Do You Love Fun Folds?
If you do, please stop by a new challenge, Creative Creases from Debbie Mageed at The Secret Stamper! I am having a blast with her challenges and have learned some new fun folds! Join the fun at her website! Hope to see your entry in the gallery soon! My card for the current challenge is just waiting for a blog post!
Thank you so much for stopping by today.
I’d love to hear what you think, and greatly appreciate every comment.
Have a Peachy Day!
Sue
Colors Used:
Supplies Used:
The 2021 – 2022 Catalog is Live!
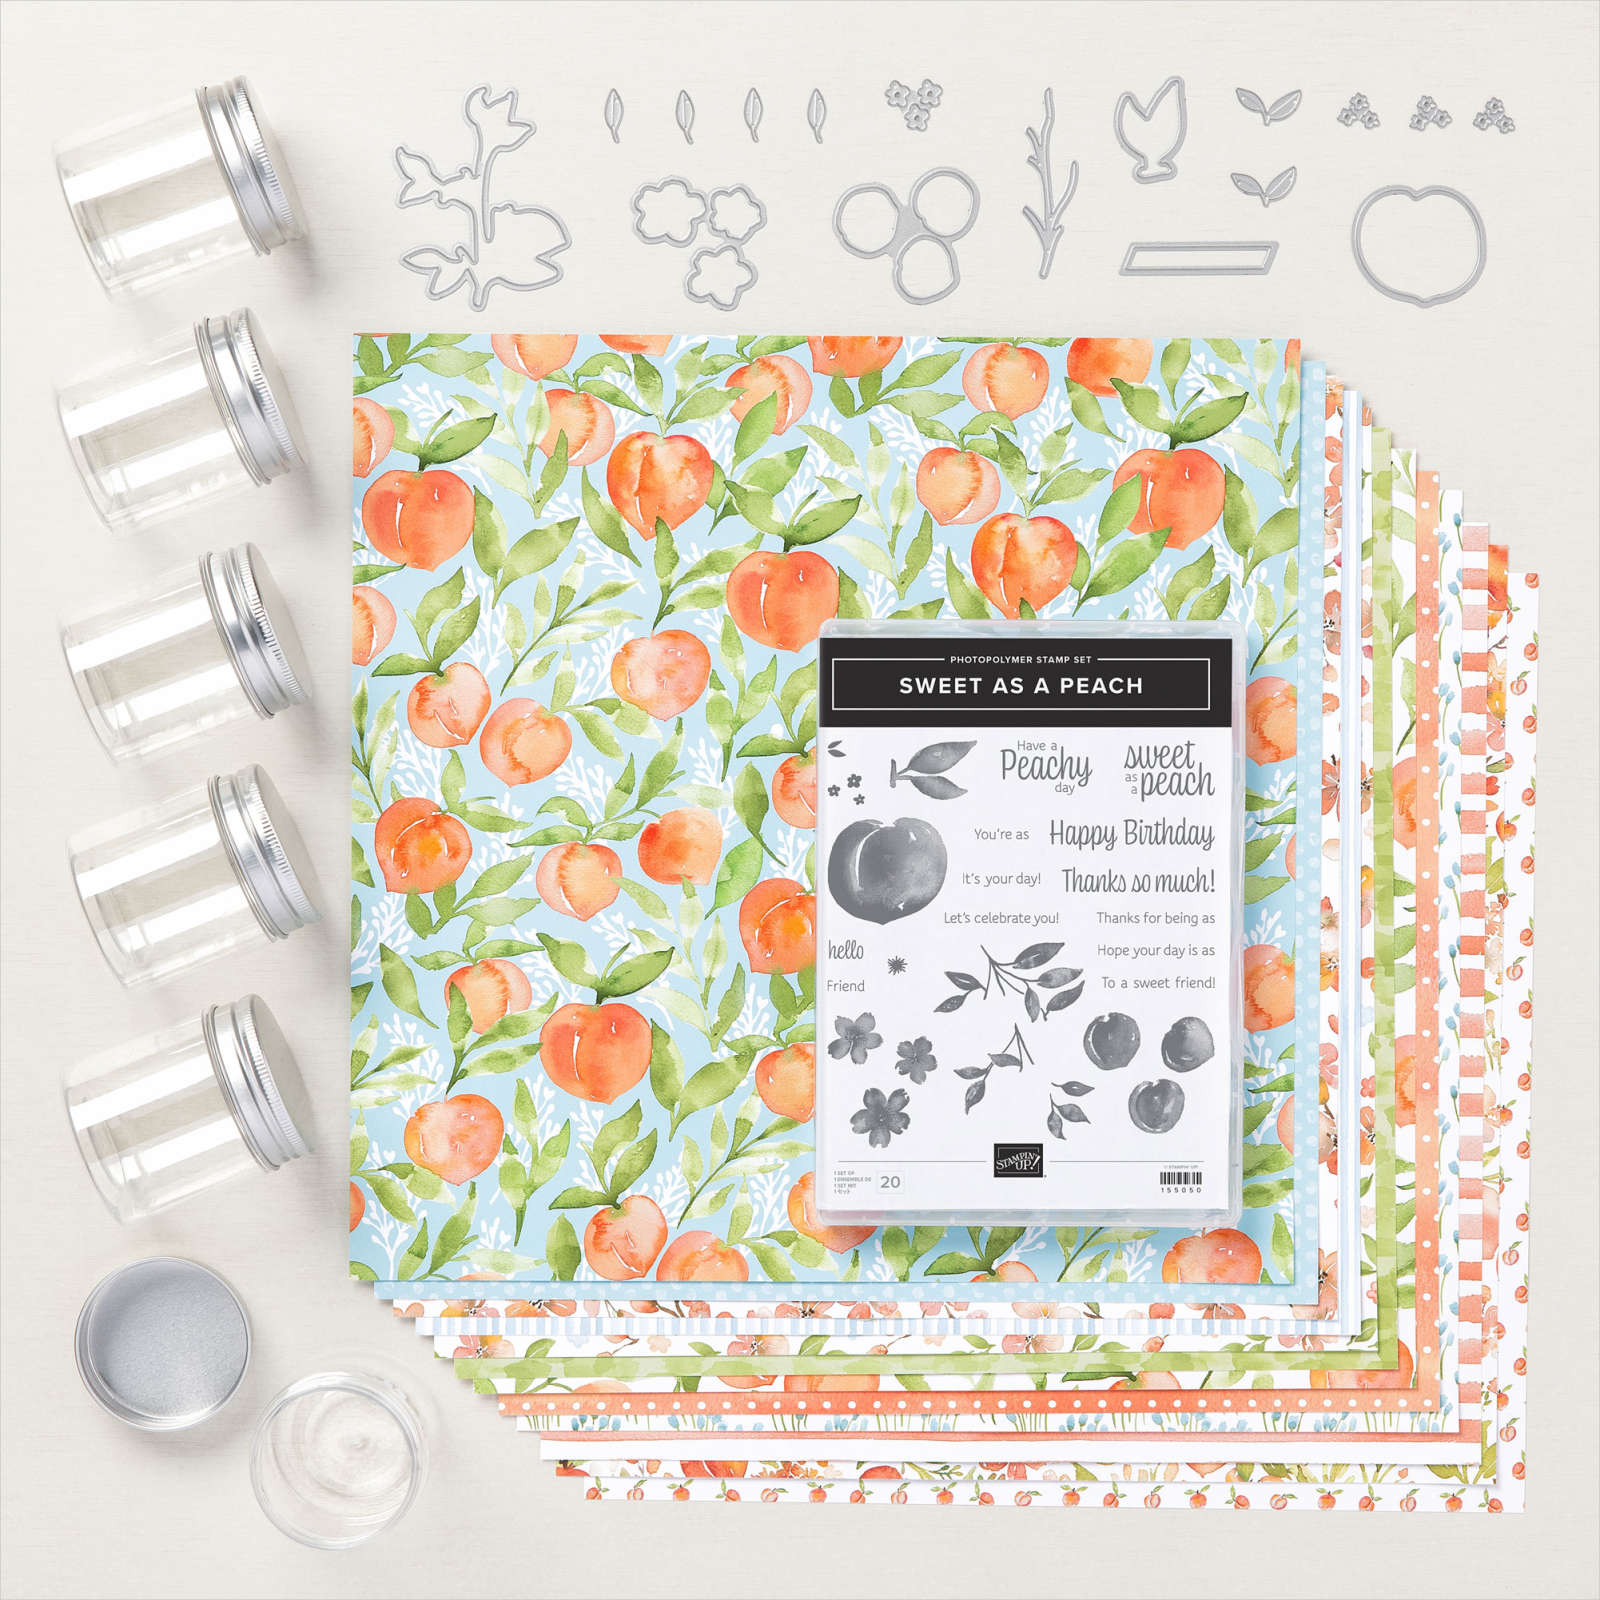
Of course, I purchased the You’re a Peach Suite on the first day of ordering! Take a look at this fabulous suite!
I say “Have a Peachy day” to my kids (aka students) all. the. time. Hence, the Just Peachy Stamping name. Naturally this suite is a must have!
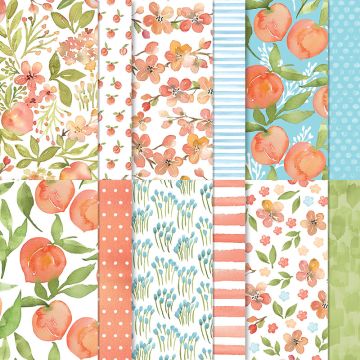
The picture doesn’t do the DSP justice, so here’s a look at just that:
Join the Fun!

It’s a fabulous time to join Stampin’ Up! New team members get even MORE FREE products in their customizable Starter Kit. From 4–31 May, new team members can get $155 USD worth of products for only $99 USD + free business supplies + free shipping + all the fun being a part of Stampin’ Up!
Do you live in the U.S. and need a demonstrator? If so, I’d love to talk to you!
Do You Want to Place an Order?
Of course you do!
If you are ordering less than $150.00, please use the host code shown. If you are ordering more than $150.00, please contact me first so you can get your stamping rewards! Any order over $50 will earn a little surprise from me.


This is absolutely beautiful, Sue! I love the mix of colors, and you’ve executed this technique flawlessly. ♥
What a fabulous card. The background is gorgeous! Thanks for playing along with us at Color Throwdown this week!