As of this month’s challenge, I am honored to be a regular member on the design team for the Creative Creases Challenge #115. The designers on this challenge are extremely talented and I am so glad to join this team. As always, the theme for the challenge is Anything Goes with a Fun Fold, and if you’ve been following my blog you already know I love finding new fun folds! Here’s the link to theCreative Creases Challenge # 115! I hope you will play along with the challenge, then upload your creations to the challenge site.
Here’s my card:
I found this expanding z-fold card on Connie Stewart’s YouTube channel, which you can find here.
I’m including the measurements for my card and all the score lines. I love any kind of z-fold variation, and this one looks like it is complicated, but it’s really just trimming and scoring. I watched the video once through and (should’ve) used her measurements to trim all my pieces. Then I made the card while watching and pausing the video as needed.
BIG HINT: I adjusted Connie’s measurements thinking I like thinner margins. Don’t make that same mistake for your first expanding z-fold card. Trust me! For this reason, I am including Connie’s original measurements.
This card will be hand-delivered so mailing it won’t be an issue. However, it is a tight fit in the medium Stampin’ Up! envelopes and will definitely require extra postage.
Measurements:
Secret Sea cardstock o 8 ½” x 5 ½”, score at 4 ¼” (card base) o 2 ½” x 2 ½” (front layer) o 3” x 3” (front layer) o (2) Keeping Tab punches
Delicate Wishes DSP: 12” x 6” (landscape) o Cut to 12” x 5 ¼” (z-folds) ▪ Score at 2 ½”, 5”, 6”, 7”, and 9 ½” – Cut in half at 6” o Cut the 12” x ¾” into (4) 2 ½” x ¾” (layers)
I cropped two of the flowers/leaves for the tabs from the DSP
Don’t you just love when the DSP and dies match up!
Delicate Wishes DSP for the front background: 4-1/8 by 5-3/8 inches
Secret Sea Delicate Wishes DSP for the large arch
Crumb Cake DSP for the smaller arch
I did use the Stone and Vine 3D embossing folder before cropping the arch
Be careful – using both the 3D embossing folder and the die will make the cardstock very delicate
Basic White: o 7 ½” x 7 ½” – score at 2 ½” and 5” ▪ Cut in half at 3 ¾” (inside z-folds) o 2 ¼” x 2 ¼” (stamped greeting)
Trim a piece of Delicate Wishes DSP to 6 by 2-1/2 inches for the envelope flap
Punch a 1-inch circle of coordinating DSP and run it through the XYRON create-a-sticker for the envelope seal
Crumb Cake, Old Olive cardstock and Delicate Wishes DSP for the cropped pieces
Secret Sea ribbon
2026 – 2028 In Color Butterflies (available on May 5, 2026 when the new catalog goes live)
Hints:
Don’t forget to watch Connie Stewart’s video for directions
Make a practice card using retired DSP – I wish I had
I only used dimensionals under the flower and the sentiment on the front to cut down a little bit on the bulk of the card
Make sure you fully open the DSP on the inside flaps before adhering the white cardstock flaps
Let removable tape (my favorite is Adtech removable tape) be your friend, especially when dry-fitting the inside pieces of the card
I used two recently retired stamp sets for the sentiments, but have Susan Campfield’s 1 Million Sales bundle of Phrases & Frames in my cart for next week’s order – it’s a must have!
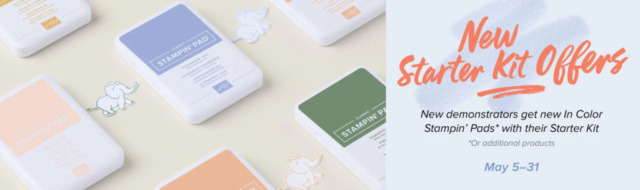
New team members who purchase their Starter Kit from May 5–31 will be able to choose between these two offers:
Free 2026–2028 In Color Stampin’ Pads with Starter Kit
$160 USD | $215 CAD worth of products in their Starter Kit for just $99 USD | $135 CAD (that’s an extra $35 USD | $50 CAD value!)
New demonstrators who submit their Independent Demonstrator Agreement (IDA) before May 5 or after May 31 will not be eligible for these offers.
The February and April Products of the Month Are Still Available!
If you love exclusive products, you’re going to love Product of the Month, a promotion centered around a special product release every month. The Product of the Month items are specially designed to be some of the best items Stampin’ Up! has to offer that aren’t available in any of our catalogs or our Online Exclusives. Every month we’ll release a new item that is only available for purchase once per account. These items will be limited quantity and are likely to sell out quickly—once they’re sold out, they’re gone for good!
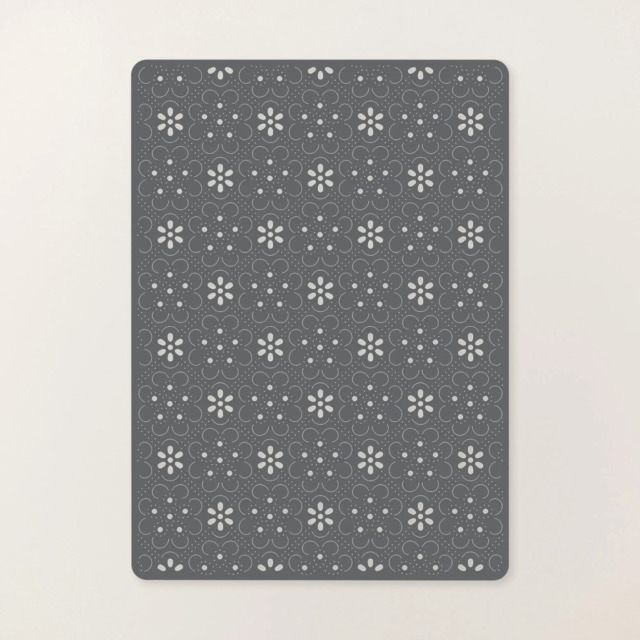
Eyelet Blooms Die for April!
The Eyelet Blooms Die is the finishing touch you didn’t know you needed. Whether you’re crafting a card or creating a scrapbook page, it transforms the space with soft texture and refined detail. Its intricate pattern creates a full background that fills large areas beautifully for a polished, handcrafted look in one easy cut.
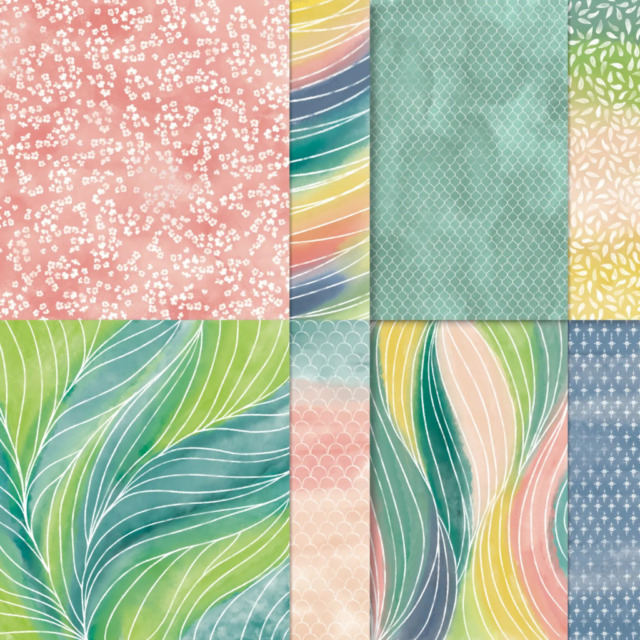
February’s Painted Illusions 12″ by 12″ DSP
Add color and whimsy to your paper crafting with the Painted Illusions 12″ x 12″ (30.5 x 30.5 cm) Designer Series Paper! This craft paper features soft watercolor gradients in pink, green, blue, teal, and yellow, with white patterns that flow over the background. Layer with other Stampin’ Up! products in coordinating colors to create your own harmonious card making and scrapbooking designs.
If you live in the U.S. and don’t already have a Stampin’ UP! demo from whom you order, I would be honored to work with you.
Welcome back to the bi-weekly Cardz 4 Galz bi-weekly challenge #254. Our fearless leader/admin for this challenge, Caz, chose Wedding or Anniversary for the theme. When you finish here, please visit the challenge site to see what the rest of the very talented design team members created. Then, don’t forget to upload your creations to our gallery. We look forward to seeing your creations there!
My wedding anniversary is coming up next week so I chose to create an anniversary fun fold card. My card uses current, last chance, and retired products.
Here’s my card:
I’ve already made at least 15 of the landscape criss-cross card using Terri Gaines’ tutorial. You can see a few of those posts here, here, and here (please ignore the typo in the title).. I knew I could figure out the measurements for the portrait version, but was so happy to find her video tutorial. Her measurements, with my papers, can be found below. Her video is wonderful for explaining how to put the card together. However, once you have the measurements and a picture for reference, you can pretty much put it together yourself.
I’m also going to be uploading this card to the Creative Creases Challenge, where the theme is always Anything Goes with a Fun Fold. I am honored to be a guest designer for the current edition of the challenge, and you can see that card here. I always find inspiration from the design team, and I’m sure you will as well. Please remember to upload your fun fold to the challenge.
Measurements:
Card base: 10-3/4 x 5-1/2 score at 1-5/8, 3-1/4, 7-1/2 & 9-1/8 (Pecan Pie cardstock)
Panel 1 Layer #1: 3 x 5 (Irresistible Designs DSP colored with Basic Gray ink and a blending brush)
Panel 1 Layer #2: 2-3/4 x 4-3/4 (Nature’s Sweetness DSP with the writing on it)
Panel 2 Layer #1: 2-1/2 x 4-1/2 ( another piece of the Irresistible Designs DSP colored with Basic Gray ink and a blending brush)
Inside Layer #1: 3 x 4-1/4 ( more of the Irresistible Designs DSP)
Inside Layer #2: 2-3/4 x 4 (white cardstock)
Optional: two panels for the sides of the front measuring 5-3/8 by 1-5/8 inches (mini-corrugated embossed Pecan Pie cardstock)
Trim a piece of DSP to 6 by 2-1/2 inches for the envelope flap
Punch a 1-inch circle of coordinating DSP for the envelope seal and run it through the XYRON create-a-sticker machine
Scraps of Pecan Pie for the sentiment banner
Pebbled Path cardstock for the floral spray
A length of white diagonal ribbon colored with the dark Pecan Pie dark blend
My Hints & Such:
Since I wanted the layers to really stand out, I outlined each piece with a Stamping Write Marker
The Irresistible Designs DSP comes already embossed and ready to be colored with a blending brush
I colored another piece of this DSP for this card using Secret Sea ink
After coloring ribbon using the blends it will be stiff, so you will need to do something to break down the stiff fibers
I used a bone folder and rubbed it back and forth on the ribbon so I could make it easier to use
I saw Mary Deatherage from Stamps-n-Lingers for a live video using the new Painterly Pears suite recently and she showed how to use a loop-d-loop bow, with which I fell in love
I linked the short video for the loop-d-loop bow
The sentiment on the front of the card comes from the Blooming Phrases stamp set, which I embossed using white powder and heat set it
The sentiment banner was cropped using a die from the Stylish Shapes die set
I used the retired Everyday Greetings stamp set for the inside sentiment
Finally, I added three Pecan Pie ribboned dots to help balance out the weight on the right side of the card
With that, I’d finished this coordinated card, envelope, and envelope seal set
Welcome back to the bi-weekly Cardz 4 Galz challenge # 224. Our host, Pamela picked Celebrations (baby, graduation, Mother’s Day, etc) for the theme. When you finish here, please visit the challenge site to see what the rest of the very talented design team members created. Then, don’t forget to upload your creations to our gallery. We look forward to seeing your creations there!
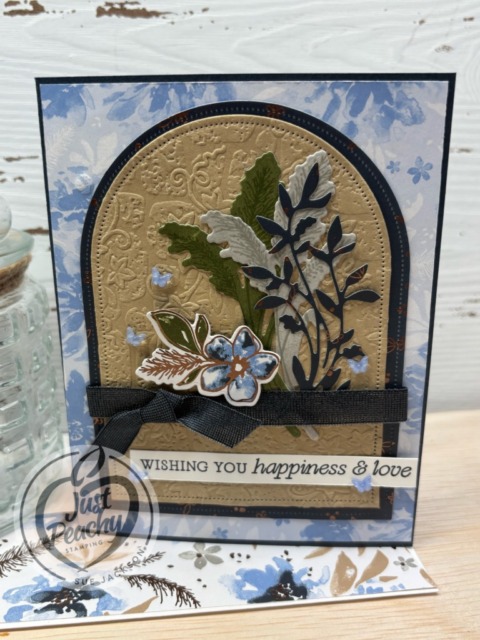
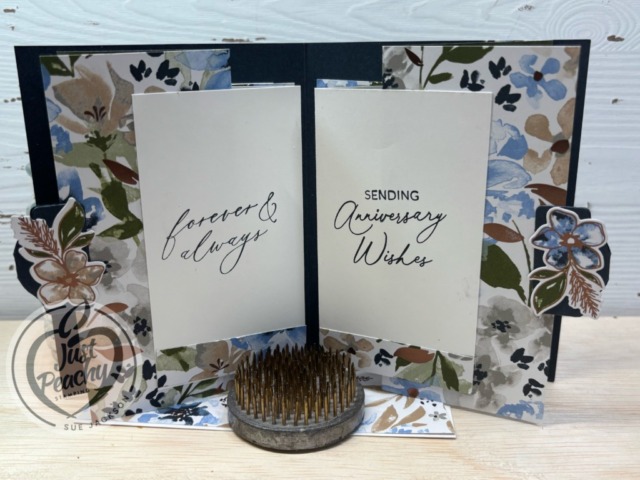
Here’s my celebrations fun fold anniversary card:
The layout for the front of this card meets the Try a Sketch on Tuesday (TSOT) challenge # 645.
Since it evolved into a fun fold, I will also be adding it to the gallery for the Creative Creases challenge.
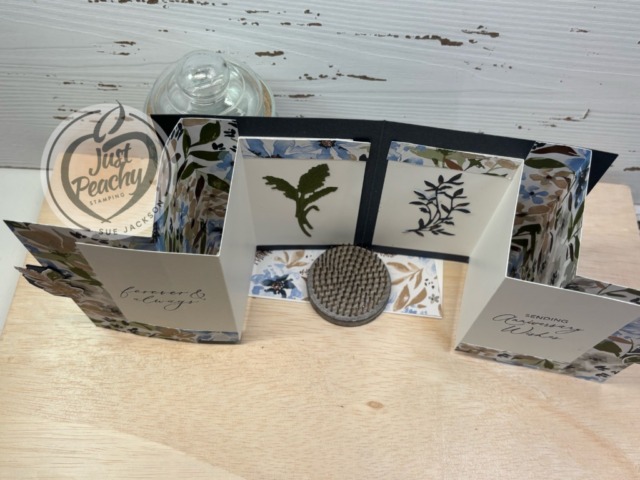
Basically, this card started out as a regular fold anniversary card. However, the person who ordered the card wanted to emphasize that it’s his parents’ 40th anniversary. Therefore, I added the inside flap. Truly, if you can create a regular fold card, you can do this added flap card.
Measurements:
The Pebbled Path base measures 8-1/2 by 5-1/2 inches, scored at 4-1/4 inches.
The Pebbled Path flap part measures 4-1./2 by 4 inches, scored at 1/2 inch.
I used the Nature’s Sweetness 12 x 12 DSP (designer series paper) for all parts of the card.
The script background measures 4-1/8 by 5-3/8 inches.
Next, I cut a piece of the splattered DSP to 4 by 4 inches. Then I traced out a partial circle from the corner of the DSP and trimmed it down.
HINT: If you don’t have a handy dandy tool, you can use trace a bowl for the size you need, then trim it down.
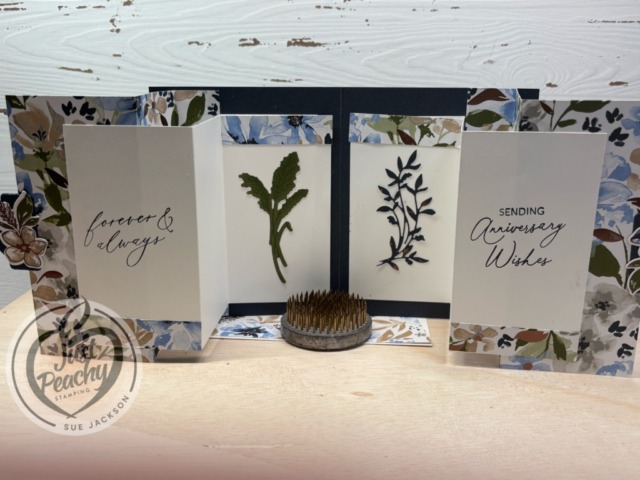
The splatter DSP for the inside flap measures 3-3/4 inches square.
I trimmed a piece of white cardstock to the same 3-3/4 inches square for the inside sentiment part of the card.
The gold and white DSP on the inside of the card measures 4-1/8 by 5-3/8 inches.
Finally, I trimmed a piece of the DSP to 6 by 2-1/2 inches for the envelope flap. Then, I punched a 1-inch circle from the splatter DSP for my envelope seal and ran it through my XYRON create-a-sticker.
That’s it for the measurements.
Stamping, Heat Embossing, & Assembly:
After wiping down a scrap of white cardstock for the front sentiment, the floral spray and the piece for the inside sentiment using my embossing buddy, I stamped the all the pieces using VersaMark ink.
Then, I covered each with gold embossing powder and heat set it using my heat tool.
Next, I cropped the floral spray using the Lovely & Sweet coordinating die set.
Then, I trimmed the front sentiment down and cut it so it formed the banner end.
I added dimensionals to the sentiment banner and the floral spray to adhere them to the front of the card.
The “40” was cropped using the retired, but still well used, die set for the large numbers.
I used multipurpose liquid glue to adhere all the DSP and cardstock pieces.
Make sure that you add the inside flap to the inside of the card before you adhere the gold and white DSP to the inside.
I wanted the very inside to be covered by the flap, which explains why that white cardstock is off-center.
I stamped another floral spray from the Lovely & Sweet stamp set on the inside white cardstock.
Finally, I added three gold pearls to the top, right-hand corner of the card.
With that, I’d finished this coordinated card, envelope, and envelope seal set.
Everyone loves new products, and there are some very special new products in the 2024 – 2025 catalog!
I already have some of these products since demonstrators were able to pre-order, especially all of the new InColor 2-24 – 2026 products. However, here are some of my must-haves on my wish list:
If you live in the U.S. and don’t already have a Stampin’ UP! demo from whom you order, I would be honored to work with you.
When prompted, please enter the following HOST CODE:
Welcome to Cardz 4 Galz #164, our first challenge of 2022. For this challenge, Claudia chose the theme of lace and pearls. When you finish here, I hope you will hop over to the challenge page to see the creations by the rest of the design team. I always find it so interesting to see the wide variety of inspiring projects, and I hope you find inspiration there as well.
Here’s my lace and pearls card using the Elegantly Said stamp set and Simply Elegant DSP:
Measurements:
The Basic Grey base measures 4-1/4 inches by 11 inches, scored at 5-1/2 inches to create a tent card.
I used the diagonal dotted DSP (designer series paper) for the background of the card. It measures 4-1/8 inches by 5-3/8 inches. I popped it up on dimensionals to accommodate the ribbon wrapped around the DSP. At this point, I also trimmed a piece of the DSP to 2-1/2 inches by 6 inches for the envelope flap.
The vanilla and gray DSP measures 2-3/4 inches by 3-7/8 inches.
I used scrap vanilla for the sentiment banner on the front of the card. The Very Vanilla cardstock for the inside measures 4 inches by 5-1/4 inches.
What I Did:
My heat tool was the key to creating this lacy card.
After using my embossing buddy on the basic gray DSP, I stamped the filigrees in opposite corners using VersaMark. After covering the stamps with Smoky Slate embossing powder, I heat set them.
While I had all the embossing supplies out, I again used the embossing buddy, but this time on a scrap piece of vanilla cardstock Then, I stamped the sentiment in VersaMark and heat set it.
Next, I used the triple banner punch to create the triangular ends of the banner. I popped the banner up on dimensionals..
The most elegant ribbon I had for this card was the Gray Granite shimmer ribbon. After wrapping it around the DSP and the sentiment, I successfully tied it in a bow with which I was relatively happy.
I used the dark smoky slate blend to color 7 mini basic pearl jewels. When coloring the pearls, it’s imperative to let each layer dry before applying another layer. If you don’t wait, you will just remove the color you just applied.
There are 3 pearls in opposite diagonal corners on the front of the card. I also added one to the dot over the i .
I stamped the Happy Anniversary stamp in the middle of the vanilla cardstock for the inside of the card. Then, I added a 1-/2 inch wide piece of DSP on the bottom and stamped the border print from the stamp set on the top.
Here’s the inside of the card:
Finally, I trimmed the DSP on the envelope flap, punched a 1 inch circle from DSP and ran it through the XYRON create-a-sticker for the envelope seal. With that, I’d finished this coordinated card/envelope/seal anniversary card set.
Again, thank you for stopping by my blog today! I appreciate your comments and your time.
About Me
Welcome to Just Peachy Stamping by Sue Jackson: an independent Stampin' Up demonstrator.
Through Stampin' Up!, I happily share my love of papercrafting through sales, classes, small stamping group meet-ups and workshops. I think that being a teacher in my "real life", I have a unique approach to sharing my fantastic hobby. I look forward to connecting with you!