A Modern Christmas Accordion Fold for the Creative Creases Challenge # 110

Once again, I am honored to be a guest designer for the December Creative Creases Challenge #110. As always, the theme for the challenge is Anything Goes with a Fun Fold, and if you’ve been following my blog you already know I love finding new fun folds! Here’s the link to the Creative Creases Challenge #110! I hope you will play along with the challenge, then upload your creations to the challenge site.
Initially, I wasn’t going to get the Modern Christmas Suite of products because I already had what I thought I needed for Christmas card. Then I started seeing projects created with these gorgeous products and knew I had to have it.
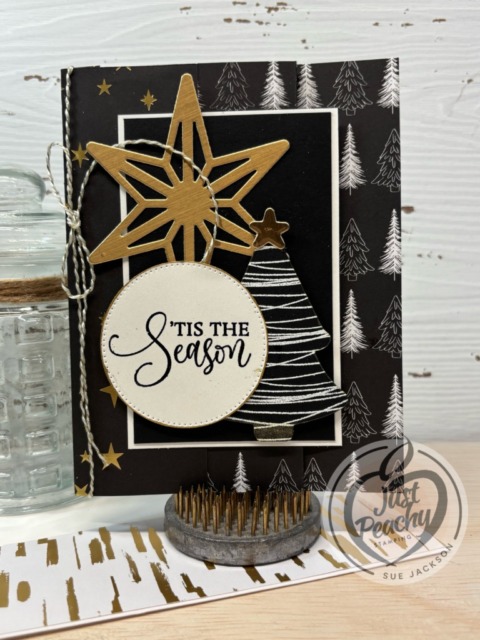
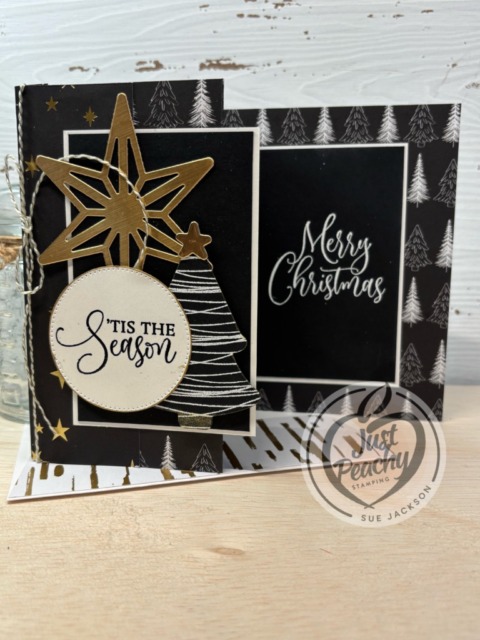
Here’s my 4 panel accordion fun fold card using the Modern Christmas Suite:
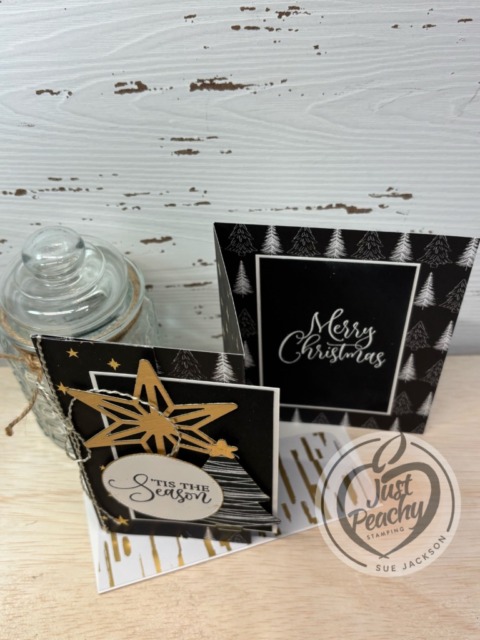
I just posted another 4 panel accordion fold card using the Modern Christmas Suite on Monday. You can find that post here. However, I really love this card and want to make as many of them with the black DSP patterns as possible! Stay tuned!
Measurements:
I used the template I created following Connie Stewart’s tutorial from April 3, 2025. You can find another challenge card I created using this template here.
Here’s the template I used:
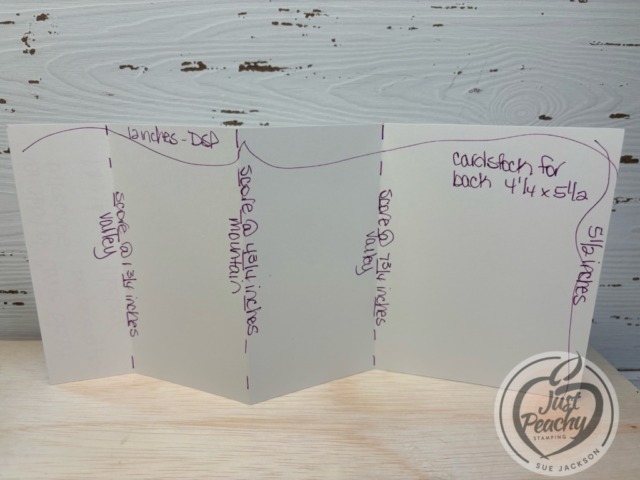
The extra cardstock piece for the back isn’t necessary because the card will stand up without it. However, I just wanted extra stability.
I added two pieces of 1/2 by 5-1/4 inches strips on either side of the first score line at 1-3/4 inches so I could add the baker’s twine without worrying about it tearing the DSP.
Don’t forget to trim a piece of coordinating DSP to 6 by 2-1/2 inches for the envelope flap.
I also punched a 1-inch circle from another DSP pattern and ran it through my XYRON create-a-sticker.
The two white cardstock panels for the mats on the front and inside measure 3 by 4-1/8 inches.
The black cardstock panels measure 2-7/8 by 4 inches.
I used scraps of black and white cardstock for the Christmas tree and the front sentiment circle.
I cropped the large star and tiny gold stars using the dies from the suite of products. The star on the back of the card is actually covering a smudge of black ink, but that can just be our secret.
What I Did:
- I added dimensionals on the back of the Christmas tree on the front and the glue dot to hold the baker’s twine bow in place
- For everything else, I used multipurpose liquid glue to adhere pieces together since this card is already bulky
- This will fit in a medium SU! envelope, but it will require additional postage
- I adhered the front flap down so the extra pieces of cardstock I used for the baker’s twine support to be covered
- I used embossing white and black embossing powder for the tree and sentiments on the inside and front
- For all areas to be embossed, make sure you wipe down the papers using your embossing buddy
- Cover the areas with either black or white embossing powder and heat set using your heat tool
- Make sure to allow the embossed images to cool before cropping to prevent smudging
- Crop the tree using the Ornamental Christmas die included in the suite of products
- Adhere both sentiment panels together
- Add liquid glue on the left half of the front sentiment panel and adhere it to the front flap
- Adhering to just the front flap is especially important if you are not going to glue the flap down
- After adhering the front sentiment, open the card and position the inside sentiment face down on the back of the front sentiment
- This will allow you to make sure you line up both sentiment pieces so the inside doesn’t show when the card is closed
- Add liquid glue to the back of the inside sentiment panel, then fold the back of the card over the panel
- TA-DA! Perfect placement!
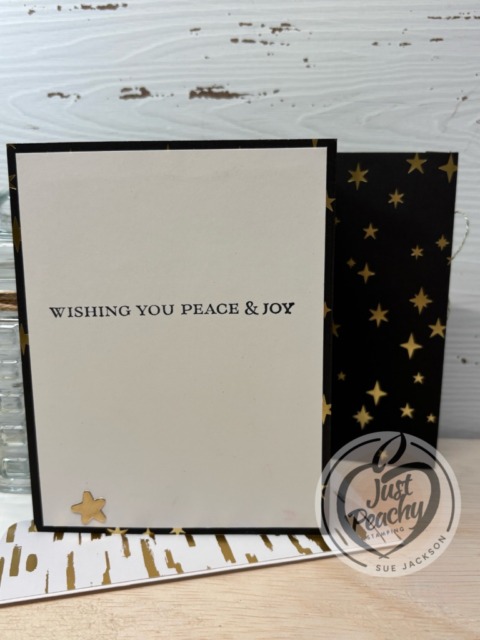
- I did add another holiday sentiment on the back of the card, which has room for a personal message as well
With that, I’d completed this coordinated card, envelope, and envelope seal set.
Thank you for stopping by today!
Have a Peachy Day!
Sue
Colors Used:
Supplies Used:
LAST CHANCE PRODUCTS HAVE BEEN UPDATED!

Last Chance Products
Browse our selection of Last Chance paper crafting products. Additional items are added every other month. These products are available only while supplies last so be sure to buy them before they are discontinued! Discounts vary and are subject to change.
CLICK ON THIS LINK TO SEE ALL THE NEW ADDITIONS!


