Modern Christmas Cards for the December Pals’ Blog Hop
Welcome to the Stampin’ Pretty Pals’ Blog Hop!
This month, the Pals have been busy creating cozy, frosty, whimsical card ideas and paper crafts for our Winter Wonderland theme — using our favorite Stampin’ Up! goodies. Each project brings a different twist, and that’s what makes the hop feel like a stroll through a creative winter village. If you’re looking for inspiration (or maybe a reason to stay inside with your craft supplies), this hop is for you!
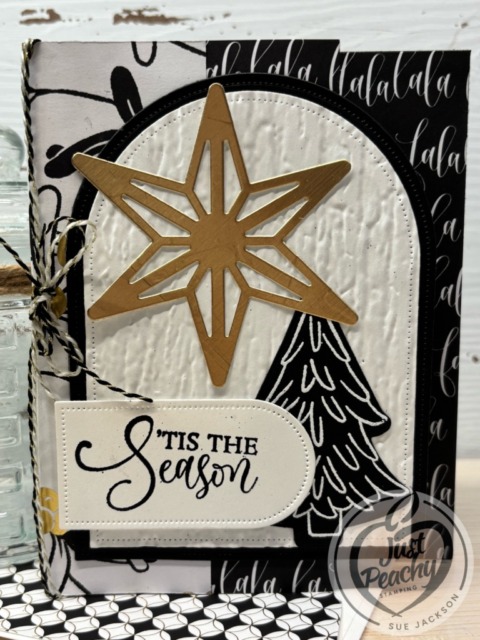
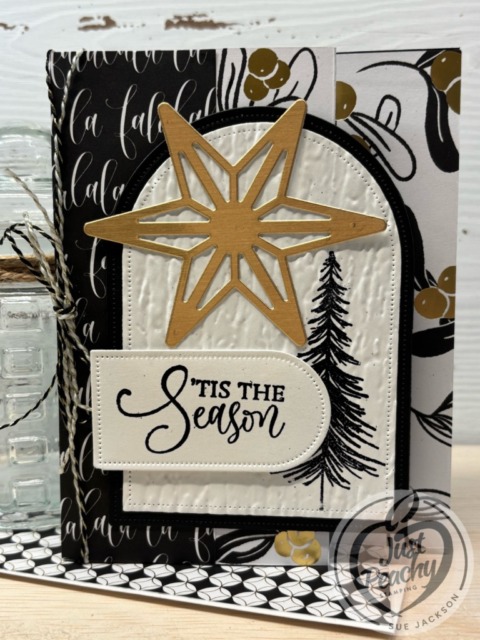
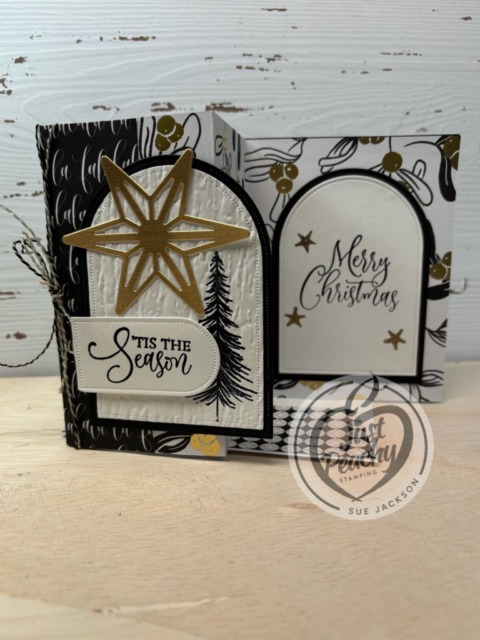
Once again, I chose to use the Modern Christmas Suite of products to create two 4-panel accordion cards. I am thoroughly enjoying this fun fold and for this hop I used one 12″ by 12″ piece of DSP for these two cards.
Here are my cards:
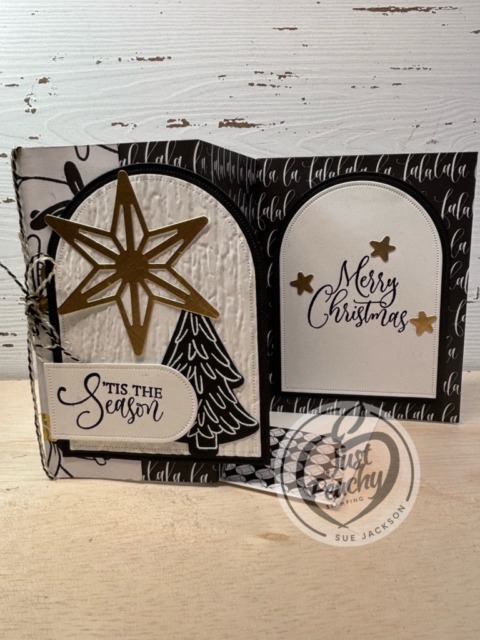
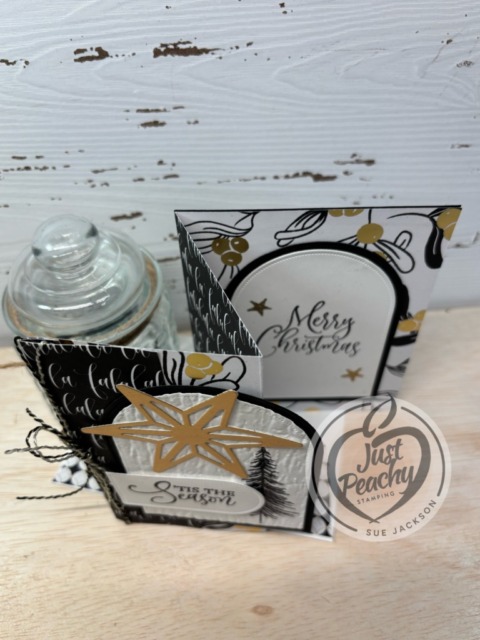
I’ve already posted two other 4-panel accordion fold Christmas cards using the same suite of products. You can see those posts here and here. I am looking forward to making many more cards using this suite of products and fun fold.

As always with a fun fold card, I will be adding this to the Creative Creases Challenge where the theme is always Anything Goes with a Fun Fold.
Measurements:
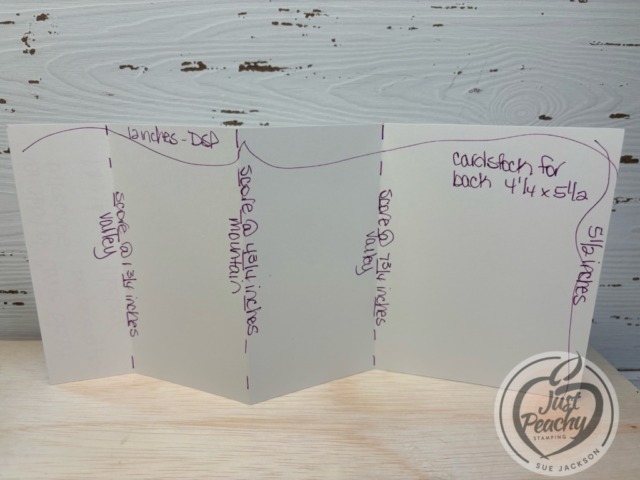
The extra cardstock piece for the back isn’t necessary because the card will stand up without it. However, I just wanted extra stability.
I added two pieces of 1/2 by 5-1/4 inches strips on either side of the first score line at 1-3/4 inches so I could add the baker’s twine without worrying about it tearing the DSP. Since I used the two 1/2 inch strips of DSP left after trimming each half to 5-1/2 inches. When everything was said and done, I only had two little pieces of leftover DSP, each measuring 1/2 inch by 1 inch.
I needed to crop 4 black arches and 4 white arches. I just realized that the arches on the card with the white on black tree are larger than the other card. I think I like the larger arches, but the smaller set shows more of the DSP on the front.
I embossed the white cardstock arches for the fronts of the cards using the Birchwood embossing folder.
I used the smaller arch die for the sentiments.
Don’t forget to trim a piece of coordinating DSP to 6 by 2-1/2 inches for the envelope flap.
I also punched a 1-inch circle from another DSP pattern and ran it through my XYRON create-a-sticker.
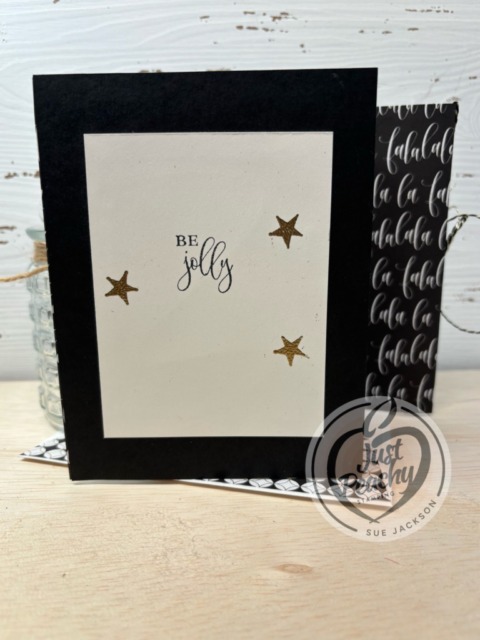
I cropped the large star and tiny gold stars using the dies from the suite of products. The star on the back of the card is actually covering a smudge of black ink, but that can just be our secret.
What I Did:
- I added dimensionals on the back of the cropped sentiments on the front and glue dost to hold the baker’s twine bow in place
- For everything else, I used multipurpose liquid glue to adhere pieces together since this card is already bulky
- This will fit in a medium SU! envelope, but it will require additional postage
- I adhered the front flap down so the extra pieces of DSP I used for the baker’s twine support are covered
- I used embossing white and black embossing powder for the tree and sentiments on the inside and front
- For all areas to be embossed, make sure you wipe down the papers using your embossing buddy
- Cover the areas with either black or white embossing powder and heat set using your heat tool
- Make sure to allow the embossed images to cool before cropping to prevent smudging
- Crop the tree using the Ornamental Christmas die included in the suite of products
- Adhere both sentiment panels together
- Add liquid glue on the left half of the front sentiment panel and adhere it to the front flap
- Adhering to just the front flap is especially important if you are not going to glue the flap down
- After adhering the front sentiment, open the card and position the inside sentiment arches face down on the back of the front sentiment
- This will allow you to make sure you line up both sentiment pieces so the inside doesn’t show when the card is closed
- Add liquid glue to the back of the inside sentiment panel, then fold the back of the card over the panel
- TA-DA! Perfect placement!
- I did add another holiday sentiment on the back of the card, which has room for a personal message as well
With that, I’d completed this coordinated card, envelope, and envelope seal set.
Back to the Stampin’ Pretty Pals’ Blog Hop:
Keep the inspiration going! Follow the lineup below to hop through each blog and enjoy every beautifully frosty idea.
And stick around — next month we’re creating for the “Something New” theme, and you won’t want to miss it!
Stampin’ Pretty Pals Blog Hop Lineup
- Mary Fish at Stampin’ Pretty
- Sue Jackson at Just Peachy Stamping. <<<— YOU ARE HERE!
- Stesha Bloodhart at Stampin’ Hoot
- Mary Hanson at Up North Stampin’
- Debbie Mageed at Secrets to Stamping
- Su Mohr at Aromas And Art
- Windy Ellard at Windy’s Wonderful Creations
- Peggy Noe at Pretty Paper Cards
- Rae Burnet at Wild West Paper Arts
- Beth McCullough at Stamping Mom
- Lisa Ann Bernard at Queen B Creations
- Karen Hallam at Karen’s Stamping Habit
- Tricia Chuba at ButterDish Designs
Thank you for stopping by today!
Have a Peachy Day!
Sue
Colors Used:
Supplies Used:
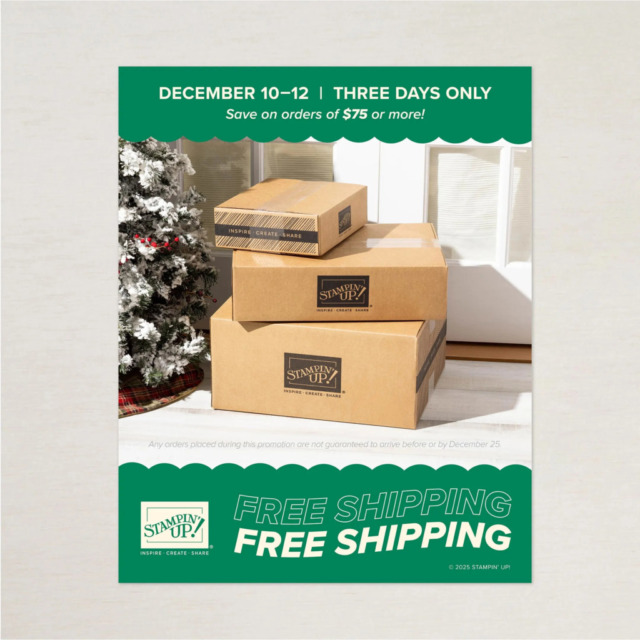
Who Doesn’t Love Free Shipping?
Now, what to get….check this out!
LAST CHANCE PRODUCTS HAVE BEEN UPDATED!

Last Chance Products
Browse our selection of Last Chance paper crafting products. Additional items are added every other month. These products are available only while supplies last so be sure to buy them before they are discontinued! Discounts vary and are subject to change.
CLICK ON THIS LINK TO SEE ALL THE NEW ADDITIONS!


