As soon as I got the Peaceful Poppies DSP I fell in love. The gorgeous colors include Blackberry Bliss. I’m sad that the DSP is retiring, especially since I loved it so much I ordered another pack. However, the stamp sets and dies are carrying over.
Tone on Tone
As part of the Make My Monday design team, I needed to create a tone on tone card for the current challenge. You can see that card here. I used a sponge brayer to create the Pool Party background. The shading is subtle, but it is darker on the left than on the right. Using the brayer was so much fun and I was so thrilled, I wanted to use it for another card.
Here’s that card:
The Magical Tool – The Sponge Brayer
First, I used a removable tape dispenser to temporarily adhere the white cardstock to my stamping grid paper. To use the sponge brayer, I simply rolled it on the ink pad. Then, I started at the bottom of the cardstock, making sure to start and end my rolls off the cardstock. This helps to keep the ink lines from being on the cardstock since they are on the grid paper. I just kept rolling and rolling until I was happy with the saturated color. The result looks like cardstock on the picture, but in person you can see a very light texture. I just love this! Best part – I can simply wash the sponges and use them again. Once washed, the staining will not transfer over to other ink pads.
In order to keep a tone on tone card, I used Blackberry Bliss, Basic Black, and Whisper White cardstock. I did run the white cardstock through the Big Shot in the Subtle 3D embossing folder. Using the Poppy Moments die set, I cropped the poppies and leaf stem from Blackberry Bliss. I used black for the centers of the poppies, and topped the large one with a white center.
Pulling It Together
I knew I needed to add definition and an anchor for the poppies and sentiment. Therefore, I added a strip of vellum cardstock behind the poppies. As always, adhering vellum is challenging. For this piece, I ran very, very, very light strokes from the fine tip glue pen, then adhered the vellum down. Now, I could say this resulted in a mistake or a happy accident. I choose happy accident when the fine tip glue pen created some texture for the vellum. Yeah, that’s my story and I’m sticking to it.
The Painted Labels die set provided the sentiment block, on which I stamped the sentiment. I really like these dies because they crop and emboss an outline at the same time.
Originally, I had small black rhinestones on the bottom left corner. My DH told me it needed something standing out down there. So, I changed the rhinestones out for the smallest pearls. My DH was correct, it is better.
Finally, I adhered the card front to a piece of white cardstock, and then on black. I stamped some Blackberry Bliss poppies on the back of the envelope and part of the poppy stems and flowers stamp, which is colored in Blackberry Bliss as well.
As always, thank you so much for stopping by my blog today. I’d love to hear what you think, and greatly appreciate every comment.
Please stay safe, healthy, during the reopenings going on around us all. Let’s keep the curve relatively flat.
Of course you do! Even more so because of the products in the mini-catalog, the clearance rack, and the retiring products.
The HOST CODE for MAY is WW6HSM6A. If you are ordering less than $150.00, please use the host code shown. If you are ordering more than $150.00, please contact me first so you can get your stamping rewards! Just look at this gorgeous suite of Ornate Garden products, which is available now!
Remember, any order over $50 qualifies for a FREE gift from me AND a free catalog for the 2020 – 2021 calendar year! I’ve seen it, it is fabulous, and I have a rather extensive wishlist for the pre-order available to demos NOW! Here’s a preview of the front cover, which is all I can show you right now! My pre-order arrives this afternoon/evening before 9 pm. That means card creating time is tomorrow night! Stay tuned!
Ask me how you can not only see it NOW, but also place a pre-order as well!
Again, thank you for stopping by my blog today! I appreciate your time.
Stampin’ Up! released a pdf of sentiments for the current COVID pandemic. These sentiments create current cards to send to friends and family with a bit of humor. The sentiments are fabulous. I’ve already made and mailed cards to my family. You can see those cards here.
Here is the card I created using another #Share Sunshine set of sentiments:
If You Recognize the Layout
Once again, I missed a challenge deadline, but no worries, I can still blog about it. I created this for the Case This Sketch #369 challenge, which closed about a day ago. However, all is well and life is good.
I have the perfect recipient in mind for this card; my daughter. I’ve seen her in person once since our spring break in the middle of March. We’ve facetimed and texted (a lot!!) but I miss seeing her and hugging her. Soon though, at least I hope so.
This beautiful DSP can be found in the Tropical Oasis DSP pack, whic is retiring at the end of the month. I really like the floral patterns and the more neutral patterns, such as the Pool Party background above.
The colors in this DSP are stunning. In this card, I used Pool Party DSP, the floral DSP, Real Red and Soft Suede cardstock. The red really adds a pop of bold color while also emphazing the red in the flowers.
I finished off this coordinating card and envelope set by adhering a strip of the floral DSP to the flap of the white envelope.
As always, thank you so much for stopping by my blog today. I’d love to hear what you think, and greatly appreciate every comment.
Please stay safe, healthy, and isolated as much as possible. I miss my high school kids and the relationships we’ve formed. My heart breaks for my seniors. But, by working together and following the CDC guidelines, we can all help to flatten the curve.
Of course you do! Even more so because of the products in the mini-catalog, the clearance rack, and the retiring products.
The HOST CODE for MAY is WW6HSM6A. If you are ordering less than $150.00, please use the host code shown. If you are ordering more than $150.00, please contact me first so you can get your stamping rewards!
Remember, any order over $50 qualifies for a FREE gift from me AND a free catalog for the 2020 – 2021 calendar year! I’ve seen it, it is fabulous, and I am anxiously awaiting its arrival! Here’s a preview of the front cover, which is all I can show you right now!
Ask me how you can not only see it NOW, but also place a pre-order as well!
Again, thank you for stopping by my blog today! I appreciate your time.
A friend’s husband has been in and out of the hospital since March 19th, unrelated to COVID. He is getting ready to have his third surgery since the 19th. Visiting hours for the hospital have been very, very limited. I made him a card to try to lift his spirits while he’s alone.
Sadly, I didn’t take a staged picture of the card before I put it in the mail. I have the one I took while the card was sitting on my well-loved piece of grid paper. Whatever works, I guess.
Here’s my card:
Tropical Oasis DSP
At first, I really didn’t plan to purchase this DSP. Then, I started seeing cards on my uplines’ facebook groups and started to think maybe I really did need it. When my DSP paper share from the mini-catalog arrived, I knew I had to have it. Like, immediately. I’m glad I ordered it when I did. It is now on the retiring list from the January – June mini-catalog. That means, when it is gone, it is gone. If you like this whole set of papers, you need to order it ASAP. This DSP has a coordinating stamp set and die set bundle. While you won’t be able to get the 10% off bundle in the new catalog, you will be able to get the sets individually.
Anyway, I needed a masculine get well card for a friend’s husband. Finding an appropriate sentiment turned out to be challenging, but I finally think I solved it. The front sentiment came from the Sending You Thoughts stamp set in the mini-catalog. For the inside, I used Sorry for Everything, specifically “I’m so very Sorry to hear you’re not feeling well.” I handwrote “STILL” before not because he’s been feeling awful for so long.
I asked my DH if the paper would fit for a masculine card. He responded that it would be if I could get rid of the pink cars. First, they are red, not pink. Second, I like the way they create a diagonal line across the front of the card.
Decisions, Decisions
Once I had the DSP cut into strips and the mat and base colors chosen, I cropped out the sentiment using the Stitched Rectangle Die. Then, I hit a creative wall.
I tried playing with different types of masculine ribbon, struggling to find something I liked. Another problem I faced was the embellishments I would use. Finally, I decided that I needed to leave it alone and come back to it another day.
The Tropical Chic dies coordinate with the tropical stamp set, which will retire at the end of the current catalog. I finally decided to try the fronds from the dies. Using the colors on the fronds on the DSP, I colored some Whisper White cardstock using Stampin’ Blends. The colors I used are Dark and Light Old Olive, Dark Pretty Peacock, and Dark Daffodil Delight. I just kept coloring in wide strips until I liked what I had. Then, I used the fronds die and cropped three fronds.
I put the three fronds between the sentiment block and the burlap ribbon on the front of the card. I used dimensionals to pop up the sentiment, with double dimensionals under the top of the sentiment block.
Truth be told, I still don’t know if I am happy with the palm fronds, especially now that I am typing this post. I might just have to go back and find something else before I mail the card.
Finally, I added a strip of DSP on the envelope flap and the card set was done and ready to be mailed.
As always, thank you so much for stopping by my blog today. I’d love to hear what you think, and greatly appreciate every comment.
Please stay safe, healthy, and isolated as much as possible. I miss my high school kids and the relationships we’ve formed. My heart breaks for my seniors. But, by working together and following the CDC guidelines, we can all help to flatten the curve.
Have a Peachy Day!
Sue
Supplies Used:
You Know You Want to Place an Order…..
Of course you do! Even more so because of the products in the mini-catalog and the Sale-a-Bration FREE items! The HOST CODE for MAY is WW6HSM6A. If you are ordering less than $150.00, please use the host code shown. If you are ordering more than $150.00, please contact me first so you can get your stamping rewards!
Remember, any order over $50 qualifies for a FREE gift from me AND a free catalog for the 2020 – 2021 calendar year! I’ve seen it, and it is fabulous! I am afraid to start a wish list because I want it all! Pre-order for demos starts tomorrow morning, May 5th. YEAH!! Ask me how you can see the catalog NOW as well!
Again, thank you for stopping by my blog today! I appreciate your time.
When I first saw the Honey Bee cling stamp set and dies, which are retiring, and the coordinating Sale-a-Bration DSP (Designer Series Paper), Golden Honey, I knew I must have it! I even earned a second set of the DSP papers knowing I would put everything to very good use!
How did I know this? Because the school’s colors where I teach are Black and Gold, and the mascot is a hornet. Perfection! This is one of the retiring bundles which I will keep long after they have retired.
Hornets for a Sick Student
As if virtual learning isn’t enough of a change, one of my “kids” has been seriously ill during this time. I created this card tolet her know that I am thinking about her and I wish her a speedy recovery.
Here’s my card:
I didn’t want to cover up any of the DSP with a sentiment. However, I wanted to use a beehive, so I decided to combine the two elements. Using a gold Wink of Stella pen to outline the hive created a very subtle barrier between the hive and the white DSP.
I already had the large and small bees in my stash for this set. At first, I thought that I would use a strip of coordinating DSP for the border between the stripes and bees. After I used dimensionals to pop all the elements up, I realized that I had four elements on the card. My sense of balance kept telling me I needed something else.
Enter the Bow Easy
In order to appease my out of balance feeling, I grabbed the black shimmer ribbon and used my Bow-Easy to create a small bow. There are times I can make a pretty decent bow, and there are times I truly can not. This card was a can not make a bow card.
I’ve had the Bow-Easy for a few years, but am finally getting the hang of it. Mary Deatherage with Stamps-n-Lingers, used it on a card for her Saturday night live fb a couple of weeks ago. I’ve been practicing. If you are left-handed, this tool is pretty tricky. I really have to think about what I am doing because the directions and Mary’s demo are both right-handed. When I created this bow, I was very thankful to be alone in my “blue room” aka craft room. Anyone listening would’ve thought that I had someone else in here because I was talking up a storm.
Finishing Up
The base of my card is Basic Black folded to a traditional A2 card size. I added a piece of white cardstock to the inside of the card, shown below:
Since I want to have more than enough room to write a note, I place the sentiment towards the top.
Next, I had to figure out what to do about my name stamp and the SU! copyright statement because I knew ink wasn’t going to show on the black. I came up with a pretty good idea, at least I think so, and you can see it below:
This stamp is just one of the ones I have gotten from Bossy Joscie at Joscie.com. I love the font she uses for my name and a girl just has to have different stamps for different cards.
After I added some black and gold striped DSP to the envelope flap, this coordinating set was complete.
As always, thank you so much for stopping by my blog today. I’d love to hear what you think, and greatly appreciate every comment.
Please stay safe, healthy, and isolated as much as possible. I miss my high school kids and the relationships we’ve formed. My heart breaks for my seniors. But, by working together and following the CDC guidelines, we can all help to flatten the curve.
Of course you are! Even more so because of the products in the mini-catalog and the Sale-a-Bration FREE items! The HOST CODE for APRIL is WW6HSM6A. If you are ordering less than $150.00, please use the host code shown. If you are ordering more than $150.00, please contact me first so you can get your stamping rewards!
Remember, any order over $50 qualifies for a FREE gift from me AND a free catalog for the 2020 – 2021 calendar year! I’ve seen it, and it is fabulous! Ask me how you can see it NOW as well!
Just an FYI ~~
I included the two links to the stores just because I’ve been pleased with the products. I am not recieving any compensation for these referrals.
Again, thank you for stopping by my blog today! I appreciate your time.
The color challenge for the Paper Players #486 challenge consists of Seaside Spray, So Saffron, and Gray Granite. I thought those soft, subtle colors would pair very well with the Fab Friday 187 sketch challenge.
Here’s my card:
Here are the challenge banners that inspired my card:
Can I just tell you how stinking thrilled I am that I was able to get these banners next to each other??
A Rather Easy Card with an Updated Blog Site
There’s a very good reason I put off updating my blog site. Everything changes with an update and I need to learn how to use it. Therefore, this is going to be very short and sweet.
I used the Flowering Foils DSP cropped with the second largest Stitched Nesting Label die for the center panel. This pattern really caught my attention and I thought that it would make a beautiful floral pattern. I decided to use the dark Seaside Spray blend and the light So Saffron blend to color the petals. The only problem is that I kept losing the pattern as I was coloring. Hindsight is 20/20, and looking at it now, I will color the petals differently next time.
The base of the card is Gray Granite, followed by a layer of Seaside Spray. I ran the top piece of So Saffron through the Big Shot using the Subtle 3D embossing folder.
While I did use the Gray Granite marker to outline the stitches in the ditch, it looks like I used silver, which also works. The card really needed a little something to finish it off, so I used the Gray Granite textured weave ribbon tied in a square knot.
Finishing Up
Finally, I had to figure out something to do with the sentiment. I really did not want to cover up the DSP because it does all the work. Therefore, I used one of the smallest Stitched Label diesto crop the birthday sentiment stamped in Gray Granite. I trimmed the label so it would show just up to the ribbon.
Now, all I had to do was use dimensionals to pop up the DSP and the sentiment block. After adding a piece of the Subtle 6 x 6 inch DSP to the envelope flap, finished this card/envelope set.
If you like this color combo, feel free to copy the image below:
As always, thank you so much for stopping by my blog today. I’d love to hear what you think, and every comment is greatly appreciated!
Please stay safe, healthy, and isolated as much as possible. I miss my high school kids and the relationships we’ve formed. My heart breaks for my seniors. But, by working together and following the CDC guidelines, we can all help to flatten the curve.
Have a Peachy Day!
Sue
Supplies Used:
Thinking About Placing an Order?
Of course you are! Even more so because of the products in the mini-catalog and the Sale-a-Bration FREE items! The HOST CODE for APRIL is WW6HSM6A. If you are ordering less than $150.00, please use the host code shown. If you are ordering more than $150.00, please contact me first so you can get your stamping rewards!
Remember, any order over $50 qualifies for a FREE gift from me.
Don’t do what I have done, and put off ordering from my wish list, especially from the mini-catalog. I seem to miss out because when these items run out, they are gone!
The Ornate Garden Suite is now available as a pre-order from the new 2020 – 2021 catalog. The suite also previews a new In Color, Bumblebee. Just look at all this gorgeousness!
The May Paper Pumpkin will contain new In-Colors! Sign up is going on now!
Again, thank you very much for stopping by my blog today!
As if you didn’t already know, I am smitten with the poppies. Initially, I wanted to try the whitewash technique for this card. However, it didn’t work and I obviously need to go back and rewatch the tutorial.
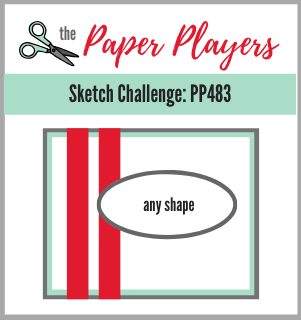
Here’s my card for The Paper Players 483 challenge:
Here’s the challenge banner:
It’s All About the Poppies
From the beginning, I knew I wanted to emboss the poppies. I did remember to use my embossing buddy before I started stamping. Thankfully! After randomly stamping the poppies on the Crumb Cake cardstock, I used the white embossing powder and my heat tool to set the powder.
Since my original whitewashing idea turned out so badly, I decided to use the Poppy Parade ink refill, some water drops, and an aqua painter. Just for reference, I used 5 Poppy Parade ink drops and five drops of water to watercolor. That combination created enough ink to cover this card. I thoroughly enjoyed my watercoloring time, especially with all this craziness surrounding us now.
The more poppies I watercolored, the more I liked the results. However, I found, by trial and error (mosty error) that the blends just made a mess. Using just the Poppy Parade marker did not create the same kind of deep color that the watercoloring created. I did try to create a darker shadowing in the center of the poppies, and that didn’t work either.
Here’s a look at my mistakes:
Now What?
Once I finished coloring, I decided that I did not want to cover up the poppies at all. However, I knew that I couldn’t just float the sentiment in the middle of the card. That’s when I thought of using vellum, which I cropped using the Stitched Rectangle dies. I also cropped some Crumb Cake cardstock, onto which I stamped the sentiment, using the same die set. Of course, adhering vellum is a challenge. In this case, I used the multipurpose glue under the inside ribbon, and under the sentiment. Since I wound up with a tiny smudge at the end of the sentiment, I decided to use a basic pearl to cover the smudge. Happy accident. That gave me a way to put drops of adhesive in the corners of the vellum under the pearls.
While I could have used the Poppy Parade ribbon, I chose the linen ribbon from the Magnolia Lane ribbon combo pack. I really like the neutrality of this ribbon against the bright poppies. The resulting card doesn’t look like the picture I had in my head at the beginning, but I love the result.
Finishing Touches
The layers on the front of the card are Crumb Cake, Basic Black, vellum, Crumb Cake, and Basic Black. I kept the pattern going and used a Crumb Cake card base.
That just left the envelope I could’ve used some Poppy Parade 6 x 6 DSP, but there is already quite a bit of bulk in the card. Therefore, I masked off the envelope flap and randomly stamped poppies on the flap. I also stamped a poppy on the lower, left-hand corner of the front of the envelope.
With that completed, this set was completed as well.
As always, thank you so much for stopping by my blog today. I’d love to hear what you think, and every comment is greatly appreciated!
Please stay safe, healthy, and isolated as much as possible. We were on Spring Break last week, and should have gone back today. Instead, faculty has many virtual meetings over the next few days in order to be transitioned when our “kids” start on Monday. I have one daughter, but many hundreds of “kids” and I miss this year’s kids greatly.
Have a Peachy Day!
Sue
Supplies Used:
Clicking on the products below will take you directly to my store 24/7.
Sale-a-Bration’s Third Release is Just a Few Short Hours Away! I Can’t Wait to See the New Items!
Again, thank you very much for stopping by my blog today!
Welcome to Just Peachy Stamping by Sue Jackson: an independent Stampin' Up demonstrator.
Through Stampin' Up!, I happily share my love of papercrafting through sales, classes, small stamping group meet-ups and workshops. I think that being a teacher in my "real life", I have a unique approach to sharing my fantastic hobby. I look forward to connecting with you!