Paper Craft Crew’s challenge this week calls for a horizontal card paired with their sketch. Tic-tac-toe’s challenge has a middle, vertical row that helped guide my card: green, square, and die cut. Match made in card heaven!
Here’s my card:
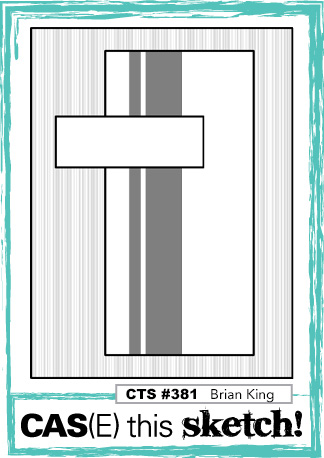
Here are the challenge banners:
Tomorrow is my first day back at a brick and mortar school since the middle of March. Therefore, this post needs to be short and sweet.
What I Did
I chose a Granny Apple Green base for me card which measures 5-1/2 inches by 8-1/2 inches, scored at 4-1/4 inches. This horizontal card opens up.
After cutting the white cardstock background to 4-1/8 inches by 5-3/8 inches, I ran it through the Big Shot using the Seabed 3D embossing folder. BIG HINT: the embossing on the white cardstock is very prominent. Don’t try to trim the cardstock after you’ve embossed it because it will tear. Trust me on that.
I chose two different patterns of the Whale of a Time DSP for my squares. I already knew I wanted to use the Granny Apple Green turtle that appears to be looking right at the viewer. Therefore, I picked two patterns with those green colors. I cropped the DSP using the Stitched Shapes large and medium squares.
Then I fussy cut the turtle. As many lefties will tell you, fussy cutting can be a challenge because it’s difficult to see the borders. When I realized my borders weren’t even, I simply adhered the turtle to some white cardstock and very slowly and carefully fussy cut the turtle again.
Stamping
In order to get splotches on the white background, I used the splotch stamp from the Forever Fern stamp set. These splotches were stamped in Pool Party. They are barely visible, but they do give some additional dimension to the white cardstock.
I stamped the sentiment in Pretty Peacock, then cropped it using a stitched rectangle die.
The Bumblebee DSP I used for the banner in the background coordinates so well because it’s in the Whale of a Time DSP pack. I trimmed the piece and used the triple banner punch for the ends.
I trimmed a piece of the turtle DSP to 6 inches by 2-5/8 inches for the envelope flap. While I was working on the envelope, I stamped three Granny Apple Green turtles on the bottom, left corner of the envelope. I added some Pool Party splotched for bubbles as well.
Next, I trimmed the inside panel to 4 inches by 5-1/4 inches. Then, I stamped some splotches around the center and a Granny Apple Green turtle in the bottom, left-hand corner. I used Pretty Peacock ink for the sentiment “Whale Done!” in the center of the white cardstock.
Putting it Together
There are dimensionals under the sentiment block and the turtle. Doesn’t he fit perfectly in the open space on the square? In addition, his front flipper looks like it was just made to rest on the corner of the sentiment block.
I adhered the layers of white cardstock, the Bumblebee banner and the large square using the multipurpose liquid glue. I didn’t try to adhere the small square with just the glue since the left side of the square would lay funny because of the layers under it. Therefore, I glued the right side and used glue dots on the left. The glue dots gave the left side just enough of a pop for the whole square to lay flat.
The PPC sketch calls for three pieces of bling, if you will. I chose to use three of the large, clear elegant faceted gems placed in a triangle shape for balance.
With that, I’d completed this card/envelope coordinated set. The longest part of this whole card was when I had to pick out the DSP patterns.
As always, thank you so much for stopping by my blog today. I’d also love to hear what you think, and greatly appreciate every comment.
I always enjoy creating a two-fer card, and this one is no different. As a matter of fact, once I saw the tic-tac-toe banner for this week’s Paper Craft Crew 385 challenge, everything fell into place for Case This Sketch #381. When I sat down to start creating, the card just about created itself. I chose the left vertical column using the birthday theme, tropical feel, and distressed element.
Here’s my card:
Here are the challenge banners:
Timeless Tropical
Honestly, this DSP wasn’t a top favorite when it came out for the mini-catalog from January – June. Then I started seeing cards using the DSP and it really grew on me very quickly. I combined this retired DSP with the current Timeless Tropical cling stamp set for these challenges.
Even picking the combination of the DSP patterns went fairly quickly. Once I had those, the rest just fell into place, as I said before.
Measurements
The Soft Suede card base measures 4-1/4″ by 11″, scored at 5-1/2″.
I chose the Pear Pizzazz grass cloth pattern for the largest mat of the card. I cut the mat to 4-1/8″ by 5-3/8″. In order to achieve a distressed look, I used the large nail file I keep specifically for crafts to sand all four sides.
Next, I cut the tropical flower DSP to 3-3/4″ by 4-7/8″. There really wasn’t a special reason for this size, I just liked the way it looked.
Using the Soft Suede brush tip marker, I outlined and distressed the floral DSP piece. While I’ve used the markers to outline DSP before, I needed to achieve a distressed look so I wasn’t careful about just coloring the edges.
Cutting the Pool Party stripes took a little bit of trial and error to find what I wanted. Each stripe is just about 1/2″ wide and 4-7/8″ long. HINT: I’ve found it is much easier to trim thin stripes on the paper trimmer by using a Post-It note. I put the sticky side of the Post-It on one of the long sides in order to be able to trim it so thin.
Directions
Using the brush end of the Pool Party marker, I outlined and distressed both thin stripes.
I love the script font in the Timeless Tropical stamp set and happily used the birthday stamp for the sentiment. I didn’t want a bold palm tree on the left side of the scrap piece of white cardstock I used for the sentiment. Therefore, I second generation stamped the palm tree using Pear Pizzazz. Next, I used Soft Suede to stamp the sentiment. After cropping the sentiment using a rectangle stitched die, I added dimensionals to the back.
As long as I had the Soft Suede stamp pad out, I stamped the Rest and Relax, You deserve it stamp for the inside sentiment. I also used the Pear Pizzazz to second generation palm trees on the bottom, right-hand corner. The inside white cardstock panel is 4″ by 5-1/4″ and adhered onto the card base.
I also stamped the palm trees on the bottom, left-hand corner on the front of the envelope. Then I made sure to close the stamp pad and moved it to the side. I may or may not have had some issues with open stamp pads.
Then, I went back to the front sentiment panel and cropped it using the rectangle stitched dies. I put dimensionals on the back of the sentiment and adhered it to the front of the card. Since I wanted the sentiment to stand out, I only used dimenstionals for that for the sentiment. I used the multipurpose liquid glue to adhere all the other elements to the card.
After adhering a piece of the Pear Pizzazz grass cloth DSP to the envelope flap, this card/envelope set was finished. A very quick card!
As always, thank you so much for stopping by my blog today. I’d also love to hear what you think, and greatly appreciate every comment.
Guess What’s Going On Now, but only until June 30th!
Bonus Days! Earn a $5 coupon for every $50 in product for the month of July. Spend your coupons in August!
The new mini-catalog goes live in August! Coupons and new products; a match made in heaven!
Do You Want to Place an Order?
Of course you do! Even more so because of the products in the NEW catalog. This NEW catalog is FABULOUS!! Wait until you see the new MINI-CATALOG!! Stay tuned for sneak peeks of those items! I’ll be using some new mini-catalog items for the InKing Royalty blog hop on Wednesday!
If you are ordering less than $150.00, please use the host code shown so YOU can take advantage of the STAMPIN REWARDS YOU EARN. If you are ordering more than $150.00, please contact me first so you can get your stamping rewards! I want YOU to get the stamping rewards you earn for your order over $150.00 Any order over $50 will earn a gift from me and an August – December mini-catalog. Just take a look at the gorgeousness of this cover:
Even though I can’t show you the inside pages until August 4th, I can show you sneak peeks!
The HOST CODE for JULY is K6NND3UU.
Again, thank you for stopping by my blog today! I appreciate your time, and enjoy reading, and responding to, comments.
Paper Craft Crew’s sketch last week was horizontal, this week’s is vertical. I decided I wanted to use the Sail Away suite of DSP, stamp set, and dies.
Here’s my card:
Here’s the challenge banner:
DSP, Stamps, and Dies – oh my!
This DSP will retire when the new catalog goes live on June 3rd. However, the stamp set and dies will carryover. Yeah!
I tried to keep the card clean for this challenge. Instead of the splatters on the challenge sketch, I chose the sailboats DSP. The boats are cleanly sailing along and give the same kind of movement as the splatters on the challenge sketch. Instead of the splatters on the top third, I ran the white cardstock through my Big Shot using the Subtle 3D embossing folder. I made sure that the texture is horizontal so it stays in line with the sailing boats on the DSP and the front frontal circle.
The colors in the DSP set determined the colors I chose for this card. Definitely navy and white, which I used in the bordering strip running across the top of the DSP. Since I did not want to dry emboss that strip, I chose to add two die cut white ropes. I think it works to keep the horizontal elements going, but is also clean.
Adding Elements
Balmy Blue appears in other DSP patterns in this pack, so I chose it for the sea water. It works for the sea water on the front focal circle and on the bottom of the inside of the card. The boat and the sentiment were both stamped in black. After I cropped out the sailboat, I carfeully stamped some more Balmy Blue over the water on the boat stamp. I cropped the white circle using the Stitched Shapes dies and the Night of Navy circle mat using the Layered Circles die.
Dimensionals provide some height under the sentiment banner and the sailboat. I also wanted some height under the focal circle, but not that of a full dimensional. Therefore, I grabbed some of my large 1/2 inch glue dots and put three under the circle. These provide just a bit of height, and enough to even out the height of the navy strip and white rope.
I used the same Balmy Blue for the sea water on the inside, and cropped the sailboat using the die set. Since the stamp set is a cling set, I had to be careful with the placement of the inside sentiment. It would have been easier to get it straight if I used my Stamp-a-ratus.
Finally, I adhered a piece of the same DSP to the flap of the envelope. With that, I’d finished this card/envelope set.
As always, thank you so much for stopping by my blog today. I’d love to hear what you think, and greatly appreciate and respond to every comment.
Do you love a great deal? Join as a demonstrator and pick $125 of products for $99! Score!!
THEN, for a limited time, when you become a Stampin’ Up! demonstrator, you can choose any stamp/tool bundle from the new 2020–2021 Annual Catalog for FREE. That means you can choose the most expensive bundle/tool and get it FREE!
There could not be a better time to make your dreams of having your own Stampin’ Up! business come true.
Contact me to find out how you can join my team!
Do You Want to Place an Order?
Of course you do! Even more so because of the products in the mini-catalog, the clearance rack, and the retiring products.
The HOST CODE for MAY is WW6HSM6A. If you are ordering less than $150.00, please use the host code shown. If you are ordering more than $150.00, please contact me first so you can get your stamping rewards! Just look at this sneak peek into June’s Paper Pumpkin kit from Sara!
Again, thank you for stopping by my blog today! I appreciate your time.
The new Celebrate Sunflowers cling stamp set, available now on pre-order for Stampin’ Up! demos, is beautiful! The intricate details make each stamp in the set spectacular! I’ve been practicing coloring the flowers using different combinations of yellow blends, but haven’t found anything I really like yet. There are so many gorgeous colored sunflowers all over Pinterest and various Facebook groups just begging to be copied, so I will keep practicing.
Paper Craft Crew #377
Let’s just jump to the card and challenge banner.
Here’s my card:
Here’s the challenge banner:
When I usually create a card from a sketch challenge I first read the challenge post, look at the cards the Design Team created. Then I have the sketch tumbling around in my head for a few days until a card falls into place in my mind. That isn’t exactly how it worked this week.
The InKing Royalty Blog Hop is Wednesday and I used this bundle for my card. Here’s a little sneak peak of that card:
The whole time I was working on the card for the Blog Hop I kept thinking that I needed a simpler version to go with it. That’s when everything rolling around in my head for PCC377 came together.
#simplestamping
I wanted to make sure that everything I did for this card would qualify as #simplestamping. The Celebrate Sunflowers stamp set is the only new thing for this card. I used minimal supplies because I wanted to showcase the clean and simple sketch and resulting card.
I could’ve cropped both sunflowers using the coordinating die set. However, I actually did fussy cut both of them to stay with #simplestamping. Fussy cutting for a lefty tends to be a bit of a problem. These sunflowers proved to be some of the easiest fussy cuts I’ve done.
I stamped the large sunflower using Basic Gray. In order to let the large one shine, I used Smoky Slate on the smaller flower.
The strips of Neutrals 6 x 6 DSP from the current catalog in Night of Navy and Basic Gray allowed me to fill that element on the sketch. I also used Night of Navy as the base of the front of the card, and for the sentiment. This “thanks a bunch” sentiment also comes from the Celebrate Sunflowers cling stamp set.
I used the rectangle stitched die set to crop the sentiment block. It could have easily been cut on the paper trimmer. I intentionally cropped the sentiment on the reverse side because it has more texture and I thought the clean part of the card needed a little texture.
It shouldn’t be a surprise that I used the Subtle 3D embossing folder for the white background. Since all the lines run vertically, I also embossed the white cardstock so the texture runs vertically.
That’s All It Took
The challenge sketch called for a clean and simple card. I think this card fits the challenge.
The only thing I still needed to do was to add a piece of the Night of Navy DSP to the envelope flap. I stamped part of the large sunflower in the lower left corner of the envelope. With that, the coordinating set was complete.
As always, thank you so much for stopping by my blog today. I’d love to hear what you think, and greatly appreciate every comment.
Of course you do! Even more so because of the products in the mini-catalog, the clearance rack, and the retiring products.
The HOST CODE for MAY is WW6HSM6A. If you are ordering less than $150.00, please use the host code shown. If you are ordering more than $150.00, please contact me first so you can get your stamping rewards! Just look at this sneak peek into June’s Paper Pumpkin kit from Sara!
Remember, any order over $50 qualifies for a FREE gift from me AND a free catalog for the 2020 – 2021 calendar year! I’ve seen it, it is fabulous, and I have a rather extensive wishlist for the pre-order available to demos NOW! Here’s a preview of the front cover, which is all I can show you right now!
Ask me how you can not only see it NOW, but also place a pre-order as well!
Again, thank you for stopping by my blog today! I appreciate your time.
It’s late on Monday night and the PPC371 closes tomorrow. Therefore, this post will be short and sweet.
This week’s sketch at Paper Craft Crew Challenge 371 called for splatters on the background. While it really could have been a multitude of different combinations, I chose to stick with the Peaceful Poppies DSP and the Painted Poppies stamp set to create my card.
Here’s my card:
Here’s the challenge banner:
Peaceful Poppies
I am absolutely in love with this DSP and have been creating cards with it exclusively since the middle of last week. Not even the cuteness of the ladybugs or the Welcome Easter stamp set has deterred me.
Once I chose the DSP pattern I wanted this time, the rest fell into place. First, I used the large splatter stamp from Painted Poppies for the Poppy Parade and Old Olive splatter stamps. In order to get the various depths of color that I wanted, I stamped each color three times without re-inking.
While I didn’t plan to do the sentiment next, it needed to be done. As you know, I am all about cropping/punching out the layers to conserve paper. This time was no different. Because of the way I stamped the splatters, I could crop out the sentiment block from the middle of the card stock covered by the center circle.
I cropped the DSP circle using the Stitched Shapes die set. The Old Olive scalloped circle came from the Layering Circles die set. I also used the Basic Black Stampin’ Marker to outline the scallops and the stitches in the ditch.
Once I cut out the sentiment mat and cropped the scalloped trim from the Painted Labels die set, it was time to put the card together.
Once I stamped the front of the envelope with a poppy and added the DSP to the flap, this set was done.
As always,
Thank you so very much for stopping by my blog today. I appreciate your the time you take to read, and comment, on my blog.
Have a Peachy Day!
Sue
Thinking About Placing an Order?
Of course you are! Even more so because of the products in the mini-catalog and the Sale-a-Bration FREE items! The HOST CODE for February is WW6HSM6A. If you are ordering less than $150.00, please use the host code shown. If you are ordering more than $150.00, please contact me first so you can get your stamping rewards and FREE SAB items!
Remember, any order over $50 qualifies for at least one FREE SAB item AND some blog candy from me.
Don’t do what I have done, and put off ordering from my wish list. I seem to miss out because when these items run out, they are gone!
Paper Craft Crew challenges are always interesting and inspiring. This week’s is no different. Since I absolutely LOVE the Golden Honey DSP I just ordered my second FREE pack with a qualifying order. For this challenge, I once again turned to that happy DSP and the Honey Bee bundle.
Here’s the challenge banner:
Here’s the card I created:
The Short Version
I tried to follow the sketch as much as possible for this card. The placement of the gold foil honeycombs and the beehive very closely match the sketch.
The sentiment strip on the challenge contained just a strip, but I added the two bees on the end. A honeycomb and a beehive need bees, right? The DSP for the beehive is from the DSP pack. I thought it needed a little bling added, so I used my clear Wink of Stella on the white strips. While Wink of Stella doesn’t show up well in pictures, I promise it’s there. The placement of the sentiment strip was completely based on the sketch.
I pulled out some of my last remaining retired black dots and placed them around my collage. I used a very liberal amount of dimensionals when adhering everything down. In the case of the bees on the end of the sentiment strip, I actually used a double stack of mini-dimensionals.
Multiple Dry-fitting Attempts are a Good Thing
Attaching the beehive took just a bit of planning. I wanted the height of the beehive to be consistent. Therefore, I placed a number of mini-dimensionals inside the empty honeycomb cut outs. Then I carefully placed some on the top of the back of the beehive. After some dry-fitting trials, I felt pretty sure I had everything where I needed.
While I was dry-fitting, I decided that just the Whisper White cardstock needed to have some texture. I turned to my favorite embossing folder: the Subtle 3D embossing folder. I love the hints of texture this folder gives. It has gained #1 choice out of all my folders.
At that point, I thought I had finished. I set the card up for a picture, and realized I’d left a too big of gaping white space at the bottom right of the card. If I used the little bees, I’d have to put two more on the card to keep the odd number going. I finally thought that one of the big bees stamped and cropped would work, so that’s what I did. The card feels more balanced, at least to me.
With that, I was done. No coordinating envelope this time because I ran out of them yesterday. What?!? I couldn’t find a single one, and usually I have a stash on hand. So, I quickly ordered some last night, along with enough product to get the FREE Golden Honey DSP. $50 order = FREE Sale-a-Bration items.
As always,
Thank you so very much for stopping by my blog today. I appreciate your the time you take to read, and comment, on my blog. I have work bright and early in the morning, and I still need to finish my lesson plans.
Welcome to Just Peachy Stamping by Sue Jackson: an independent Stampin' Up demonstrator.
Through Stampin' Up!, I happily share my love of papercrafting through sales, classes, small stamping group meet-ups and workshops. I think that being a teacher in my "real life", I have a unique approach to sharing my fantastic hobby. I look forward to connecting with you!