This month’s theme is “Something New.” If you’re looking for inspiration and a reason to play with your craft supplies, this hop is for you! The Pals hope to inspire you with card ideas and paper craft creations using Stampin’ Up! products. Links to the participant’s blogs can be found at the end of each post to help you “hop” along!
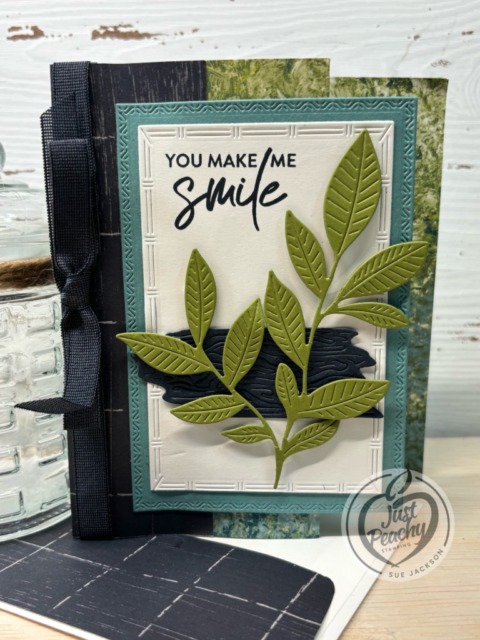
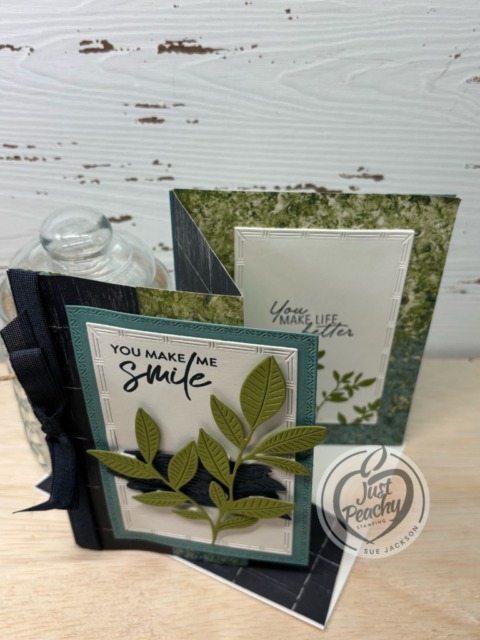
I used the new Nature’s Walk suite for my card. The colors and patterns used in this DSP is stunningly gorgeous! I don’t know if I would’ve used Secret Sea, Old Olive, and Lost Lagoon together, but I just love this color combination.
Here’s my accordion fold card:
I’ve already posted two other 4-panel accordion fold Christmas cards using the Modern Christmas suite of products. You can see those posts here and here. I am looking forward to making many more cards using fun fold since it’s quickly become one of my absolute favorite fun folds.
As always with a fun fold card, I will be adding this to the Creative Creases Challenge where the theme is always Anything Goes with a Fun Fold. I know I’ve already posted cards using this fold to Creative Creases, but it’s such an easy fold and it makes very good use of the 12 x 12 inch DSP (designer series paper).
Template with Measurements:
As I have done with most of my other fun fold posts, I’ve followed a template, which follows:
Since I wanted to use Secret Sea ribbon on the front of the card, I need to stabilize the first fold. Therefore, I trimmed two pieces of cardstock trimmed to 1/2 by 5-1/2 inches. Then I adhered them to the either side on the two interior sides of the first fold. In order to hide the cardstock pieces, I adhered the first panel closed. I used a mini-glue dot to adhere the ribbon to the front panel of the card.
What I Did:
Unless otherhwise noted, I used multipurpose liquid glue to adhere the pieces together
I cropped the Lost Lagoon and Very Vanilla panels for the front , inside, and back of the card using the Textured Notes die set
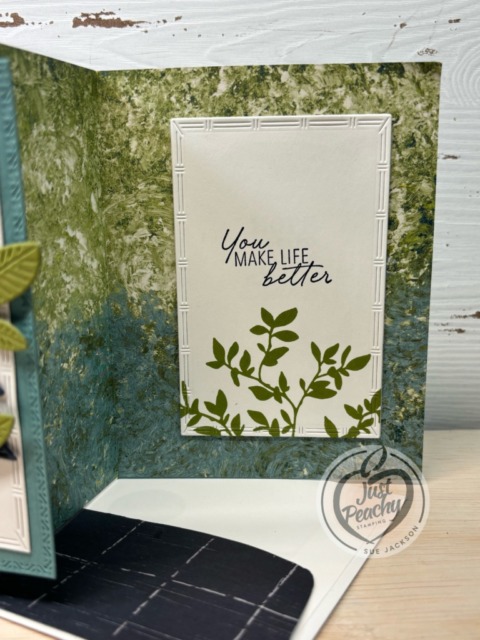
The sentiments are stamped with Secret Sea ink, then I used Old Olive to stamp the foliage on the bottom of the inside panel
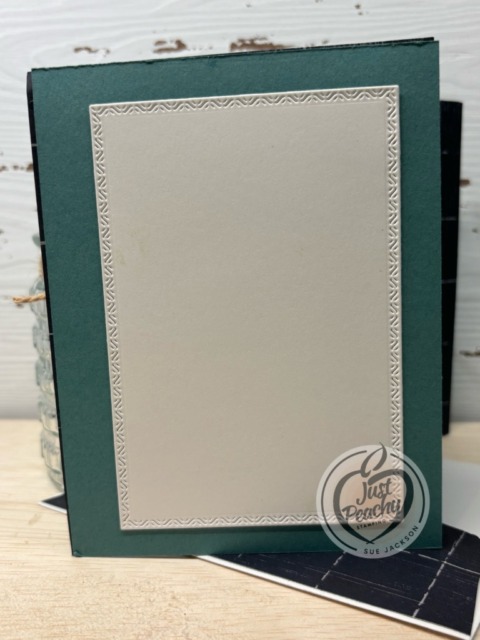
I haven’t stamped anything on the back yet, but will do so when I have a specific recipient
In the meantime, I have used removable adhesive to hold the panel in place
After cropping the Secret Sea & Old Olive pieces using the Nature’s Symphony dies, I adhered the Secret Sea piece to the Very Vanilla panel
The only place I used dimensionals was on the back of the Old Olive foliage since the card is already bulky
Since the 5-1/2 by 12 inch piece of DSP does all the work, there’s no need for additional layering
With that, I’d finished this coordinated card, envelope, and envelope seal set.
Back to the Pals’ Blog Hop:
Keep the inspiration going! Follow the lineup below to hop through each blog and enjoy every beautifully frosty idea. And next month we’re creating for the “Language of Love” theme. You won’t want to miss it!
What better way to earn the January Product of the Month? Bonus Days & Product of the Month – Yes, Please!
Versatility is key! With the Fabulous Sayings Stamp Set, you’ll always have the right words on hand—whether you’re creating birthday cards, thank-you notes, or a cheerful hello.
You can purchase the Product of the Month item for only $5 USD | $5 CAD when you spend $75 USD | $100 CAD or more in a single order. I’ve already ordered this item and am looking forward to adding these sentiments to my other sentiment stamp sets.
This month, the Pals have been busy creating cozy, frosty, whimsical card ideas and paper crafts for our Winter Wonderland theme — using our favorite Stampin’ Up! goodies. Each project brings a different twist, and that’s what makes the hop feel like a stroll through a creative winter village. If you’re looking for inspiration (or maybe a reason to stay inside with your craft supplies), this hop is for you!
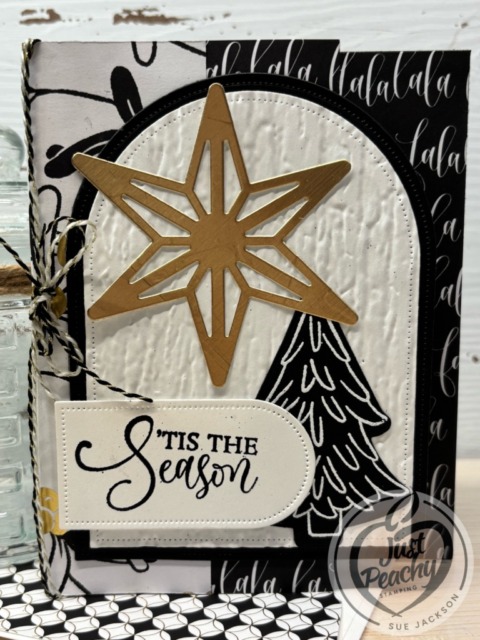
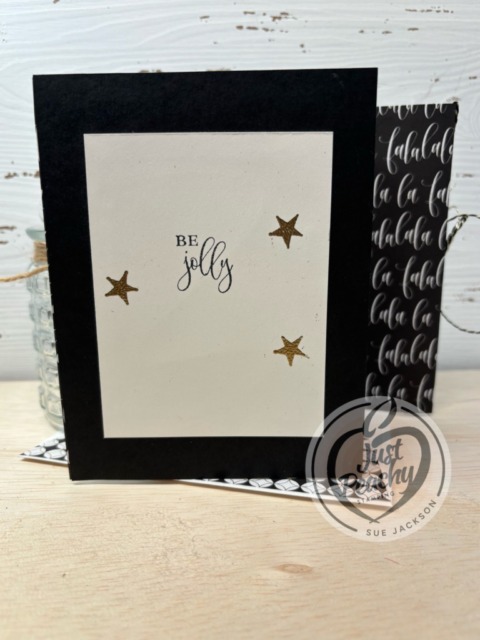
Once again, I chose to use the Modern Christmas Suite of products to create two 4-panel accordion cards. I am thoroughly enjoying this fun fold and for this hop I used one 12″ by 12″ piece of DSP for these two cards.
Here are my cards:
I’ve already posted two other 4-panel accordion fold Christmas cards using the same suite of products. You can see those posts here and here. I am looking forward to making many more cards using this suite of products and fun fold.
As always with a fun fold card, I will be adding this to the Creative Creases Challenge where the theme is always Anything Goes with a Fun Fold.
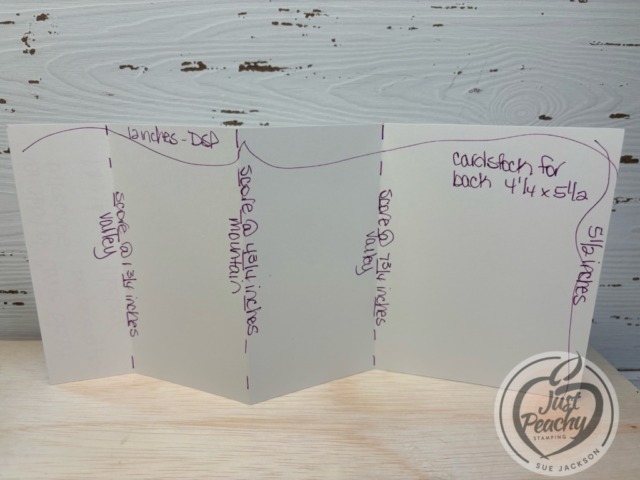
Measurements:
The extra cardstock piece for the back isn’t necessary because the card will stand up without it. However, I just wanted extra stability.
I added two pieces of 1/2 by 5-1/4 inches strips on either side of the first score line at 1-3/4 inches so I could add the baker’s twine without worrying about it tearing the DSP. Since I used the two 1/2 inch strips of DSP left after trimming each half to 5-1/2 inches. When everything was said and done, I only had two little pieces of leftover DSP, each measuring 1/2 inch by 1 inch.
I needed to crop 4 black arches and 4 white arches. I just realized that the arches on the card with the white on black tree are larger than the other card. I think I like the larger arches, but the smaller set shows more of the DSP on the front.
I embossed the white cardstock arches for the fronts of the cards using the Birchwood embossing folder.
I used the smaller arch die for the sentiments.
Don’t forget to trim a piece of coordinating DSP to 6 by 2-1/2 inches for the envelope flap.
I also punched a 1-inch circle from another DSP pattern and ran it through my XYRON create-a-sticker.
I cropped the large star and tiny gold stars using the dies from the suite of products. The star on the back of the card is actually covering a smudge of black ink, but that can just be our secret.
What I Did:
I added dimensionals on the back of the cropped sentiments on the front and glue dost to hold the baker’s twine bow in place
For everything else, I used multipurpose liquid glue to adhere pieces together since this card is already bulky
This will fit in a medium SU! envelope, but it will require additional postage
I adhered the front flap down so the extra pieces of DSP I used for the baker’s twine support are covered
I used embossing white and black embossing powder for the tree and sentiments on the inside and front
For all areas to be embossed, make sure you wipe down the papers using your embossing buddy
Cover the areas with either black or white embossing powder and heat set using your heat tool
Make sure to allow the embossed images to cool before cropping to prevent smudging
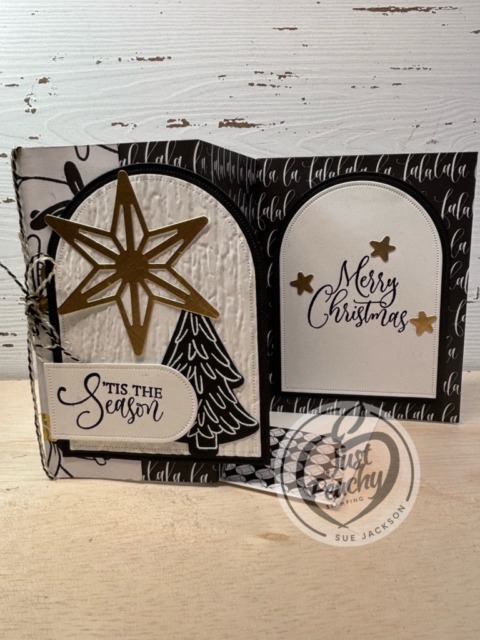
Crop the tree using the Ornamental Christmas die included in the suite of products
Adhere both sentiment panels together
Add liquid glue on the left half of the front sentiment panel and adhere it to the front flap
Adhering to just the front flap is especially important if you are not going to glue the flap down
After adhering the front sentiment, open the card and position the inside sentiment arches face down on the back of the front sentiment
This will allow you to make sure you line up both sentiment pieces so the inside doesn’t show when the card is closed
Add liquid glue to the back of the inside sentiment panel, then fold the back of the card over the panel
TA-DA! Perfect placement!
I did add another holiday sentiment on the back of the card, which has room for a personal message as well
With that, I’d completed this coordinated card, envelope, and envelope seal set.
Back to the Stampin’ Pretty Pals’ Blog Hop:
Keep the inspiration going! Follow the lineup below to hop through each blog and enjoy every beautifully frosty idea. And stick around — next month we’re creating for the “Something New” theme, and you won’t want to miss it!
Browse our selection of Last Chance paper crafting products. Additional items are added every other month. These products are available only while supplies last so be sure to buy them before they are discontinued! Discounts vary and are subject to change.
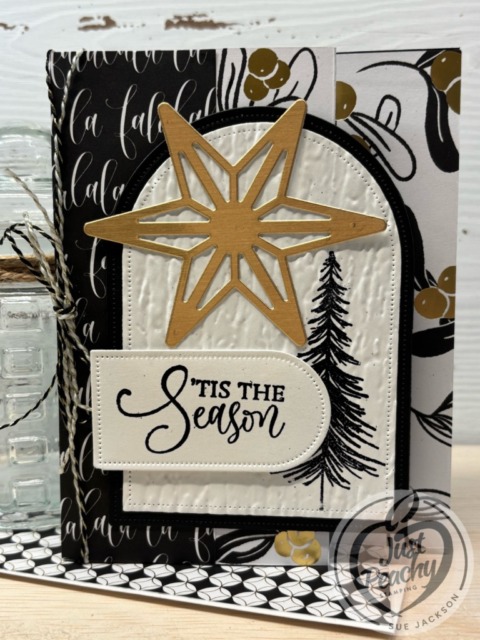
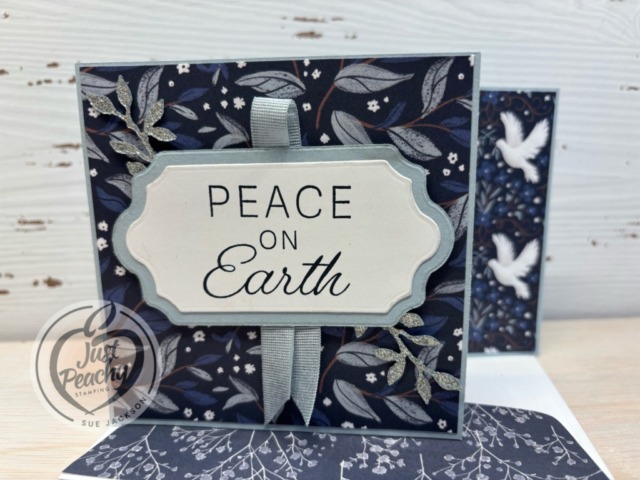
Welcome to the Stampin’ Pretty Pals’ Blog Hop! Ready to sprinkle some holiday magic into your crafting this season?This month’s theme, Season’s Greetings, is all about celebrating the joy of handmade creations. The Stampin’ Pretty Pals have come together to share festive cards and paper craft ideas using our favorite Stampin’ Up! products — each project designed to inspire your creativity and help you capture the spirit of the season.
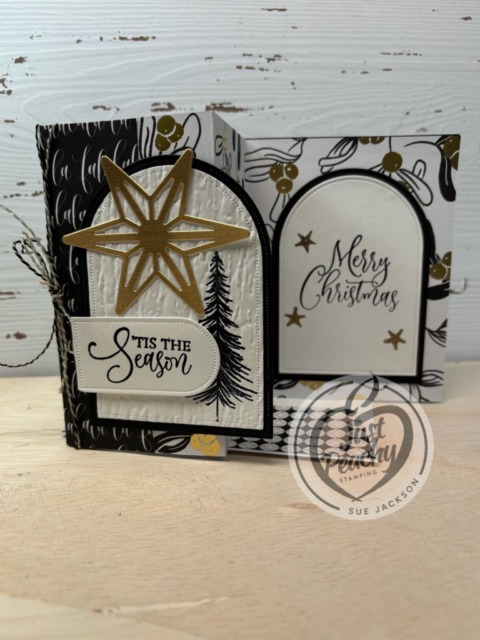
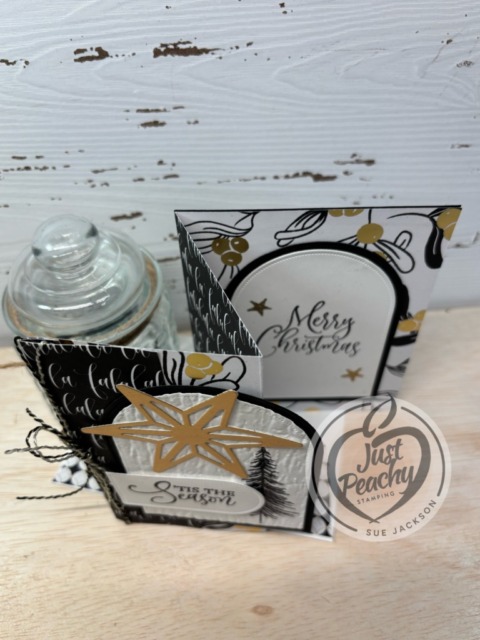
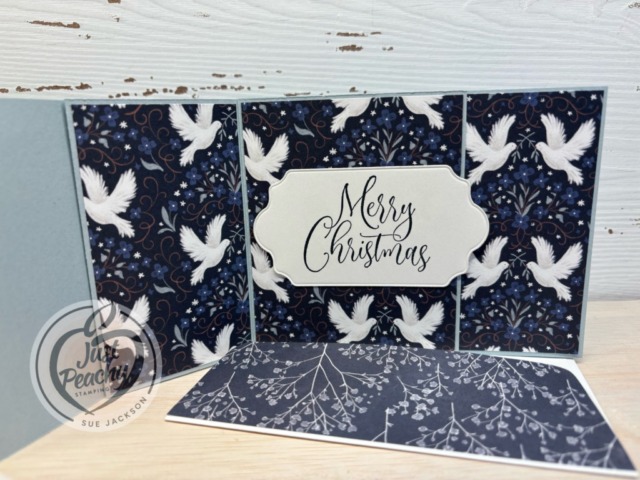
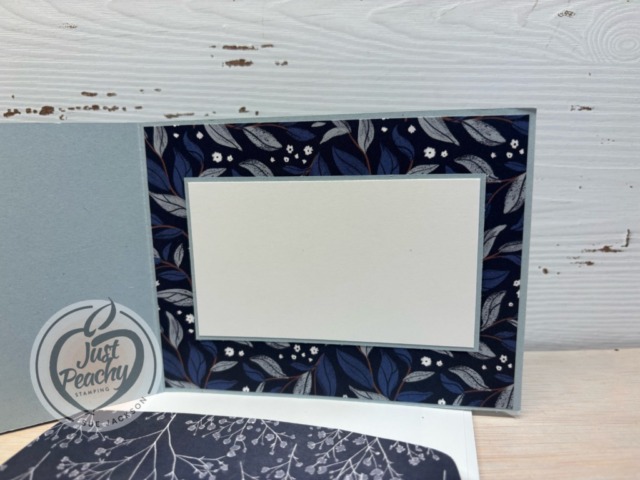
Here’s my double opening fun fold card:
As always, I’ll be uploading this card to the Creative Creases Challenge, where it’s always everything goes with a fun fold.
I found this fun fold on Pinterest from Heidi Collins from On Y Go Stamping for her Double Opening Fun Fold card. Her post includes a link to a YouTube tutorial and a free project sheet. Heidi uses 1/4 inch margins, so I did change that so that all my measurements were 1/8 inch wider and higher. Basically, it’s a regular card base measuring 11 by 4-1/4 inches, scored at 5-1/2 inches. The top fun fold is an adjusted size z-fold card. But them together, and you get a fabulous new-to-me fun fold.
Some Hints:
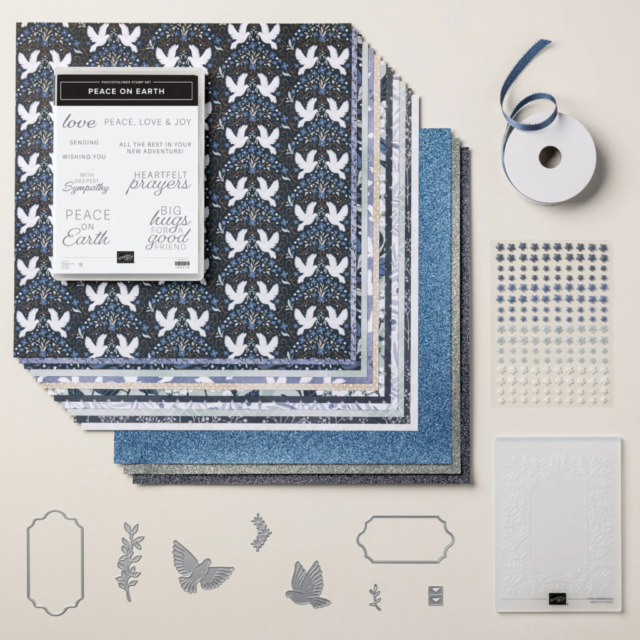
I knew I wanted to use the label dies from the Peace on Earth for my sentiment, so I increased the size of the front piece of cardstock to 4-1/4 by 4-1/4 inches
The DSP for this piece of cardstock measures 4-1/8 by 4-1/8 inches
I used the larger label die and a stamp from the Ornamental Christmas stamp set to add a sentiment to the middle of the card
I cropped two leave sprays from the silver glimmer paper to add behind the front label sentiments
HINT: I’ve found it’s easier to crop the glimmer paper using dies by putting the face size down on the cutting pad
Since I wanted to add a bit more silver sparkle to the card, I used the clear Wink of Stella brush to outline both labels on the front and the one on the inside
This card will require additional postage, but it will still fit into a Stampin’ Up! medium envelope
In addition to the measurements Heidi listed, I trimmed a piece of DSP (designer series paper) to 6 by 2-1/2 inches for the envelope flap
I punched a 1-inch circle from a coordinating piece of DSP and ran it through the XYRON create-a-sticker for the envelope seal
With that, I’d finished this coordinated card, envelope, and envelope seal set
Back to the Pals’ Fun Fold Hop:
I hope today’s project sparked some holiday cheer and crafting inspiration! There’s so much more to see — keep the fun going by following the lineup below to visit the rest of the Pals. And be sure to join us next month when we create our own Winter Wonderland!
Kits Make Crafting Simple, Fun, and Just Simply Fun!
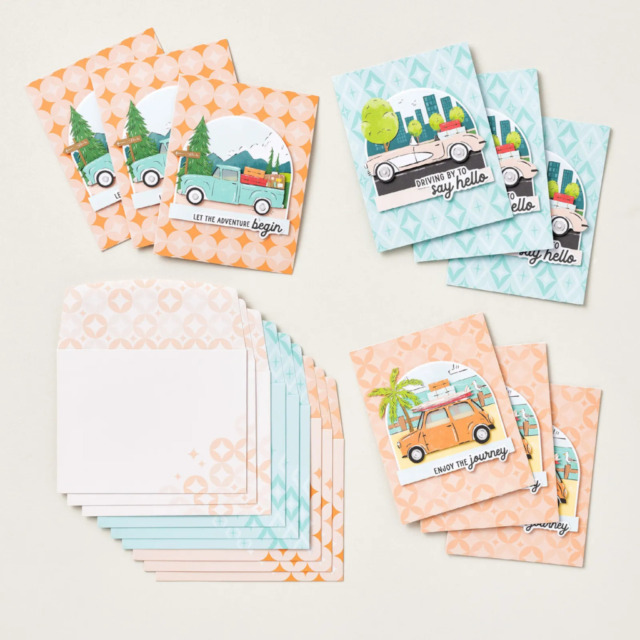
Here’s a look at the two new kits available:
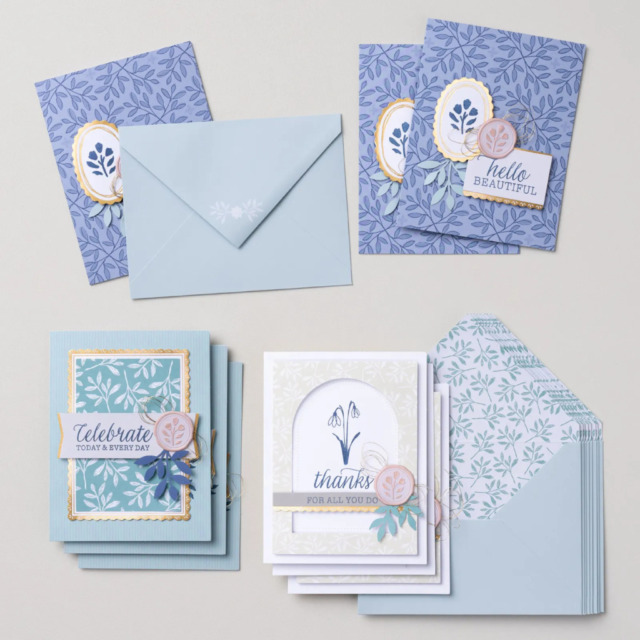
First, it’s the Everyday Beauty Kit, which retails for $25 USD.
Create the perfect card for any occasion using the all-inclusive Everyday Beauty Kit. This kit comes with everything you need to make three unique card designs: printed card bases and coordinating envelopes with lovely botanical patterns, precut paper pieces, timeless faux wax seals, shimmering metallic thread, and a versatile stamp set that you can use on countless other projects.
DETAILS – Makes 9 cards: 3 each of 3 designs – Folded card size: 5-1/2″ x 4-1/4″ (14 x 10.8 cm) – Colors: Basic Beige, gold, Gray Granite, Lost Lagoon, Night of Navy, Petal Pink – Also available in French
Kit includes one of each item listed below. – Everyday Beauty Photopolymer Stamp Set – Clear stamp block – Night of Navy Classic Stampin’ Spot – Step-by-step instructions – 9 printed envelopes – Faux wax seal stickers – Metallic thread – Adhesive
The second kit is the Adventure Awaits kit, which retails for $14 USD.
Let your creativity take the driver’s seat with the Adventure Awaits Kit. Coast in the retro colours and hand-drawn artwork that can be either feminine or masculine. With printed sentiments, precut paper, and vellum details, this kit comes with everything you need to make nine cute cards.
DETAILS – Makes 9 cards: 3 each of 3 designs – Folded card size: 5-1/2″ x 4-1/4″ (14 x 10.8 cm) – Colors: Basic Black, Coastal Cabana, Crushed Curry, Garden Green, Granny Apple Green, Pecan Pie, Petal Pink, Poppy Parade, Pretty Peacock, Timid Tiger – Sentiments printed in English, French, and German
Kit includes one of each item listed below. – Step-by-step instructions – 9 printed envelopes – Vellum – Adhesive
If you have any questions, or need a bit of a creative mojo boost, you can reach me at my justpeachystamping@gmail.com.
If you live in the U.S. and don’t already have a Stampin’ UP! demo from whom you order, I would be honored to work with you.
This month’s theme is all about Acts of Kindness, Gratitude, and Thanksgiving! The Pals are here to inspire you with heartfelt card ideas and creative paper crafts made with Stampin’ Up! products. Be sure to visit each participant’s blog — you’ll find the full list at the end of this post so you can easily hop along and enjoy all the inspiration!
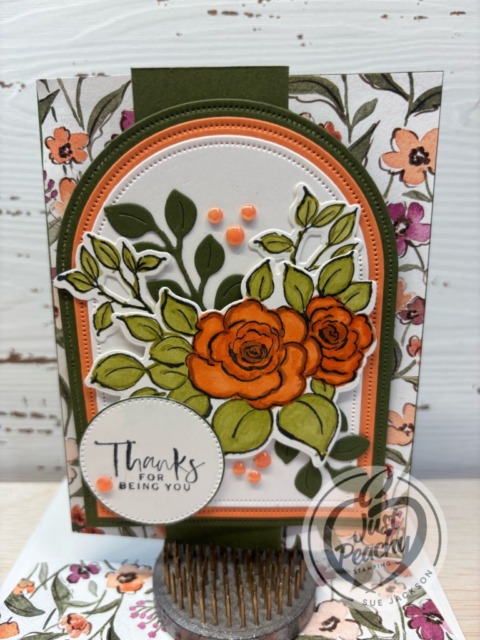
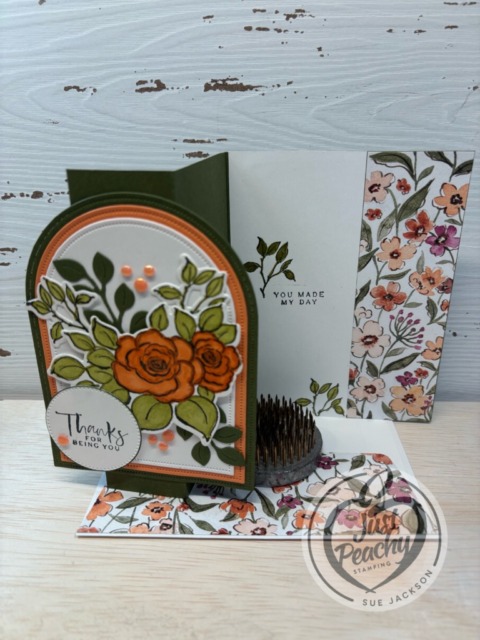
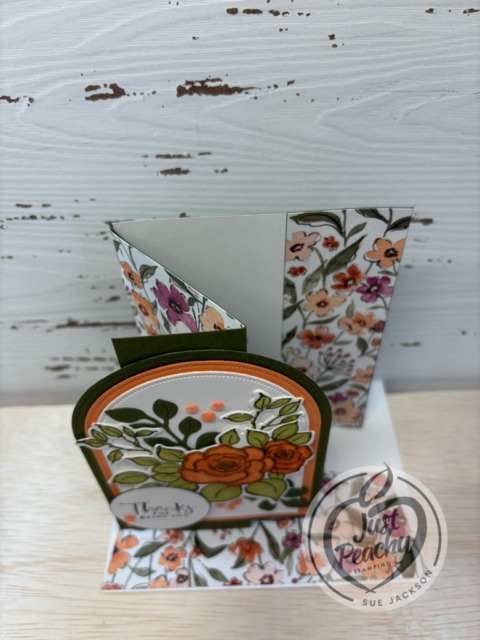
Here’s my modified z-fold card:
I came across this modified z-fold card on Pinterest created by Patti Dolan from P. S. Paper Crafts. Her post includes a video and a PDF document of directions. I modified the measurements just a tad, and then created a template, shared below:
It’s just a given that fun fold cards also post to the Creative Creases Challenge. Debbie Mageed at Secret Stamper coordinates both this hop and the challenge. Hopefully, you will be inspired to upload your own fun fold project to the challenge!
Creating the Card:
I used the Charming Day bundle and the coordinating Floral Charm 12 x 12′ DSP (designer series paper)
After trimming the DSP pieces, I decided that I would use 3 layers of arches so I could incorporate more of the Timid Tiger color
Therefore, my three main colors are Timid Tiger, Mossy Meadow, and Basic White
With careful planning, I stamped all the images to be colored then cropped and the sentiment on one piece of white cardstock measuring 4-1/4 by 5-1/2 inches
I stamped all the floral stamps and the sentiment stamps in Momento Tuxedo Black ink
I used layers of the Old Olive blends combo for the leaves
Then, I colored the flowers using the Timid Tiger blends combo and the Light Pecan Pie blend
I cropped two of the leaf sprays from Mossy Meadow and all the other floral/leaf pieces using the Charming Day die set
The sentiment was cropped using the Stylish Shapes circle die
I used multipurpose liquid glue to adhere all the cardstock, the DSP, arches, and leaf images to the base of the card
Then, I added dimensionals under the flowers and leaves focal image to adhere it to the arches
Next, I added dimensionals to the bottom half of the sentiment circle and adhere the top of it to the leaves with multipurpose liquid glue
Finally, I added seven Timid Tiger dots
After adhering the DSP to the envelope flap and trimming it, I punched a 1-inch circle for the envelope seal, which I ran through the XYRON create-a-sticker
With that, I’d finished this coordinated card, envelope, and envelope seal set
Back to the Pals’ Blog Hop:
The creativity doesn’t stop here! Be sure to hop along using the lineup below to explore even more inspiring projects from the Pals. And mark your calendar — next month, we’re spreading holiday cheer with our “Season’s Greetings” theme!
Become a Stampin’ Up! demonstrator when you choose one of these amazing Starter Kit offers. (And did we mention your Starter Kit comes with FREE shipping, FREE business supplies, AND a bonus, FREE Paper Pumpkin kit?) Join from October 1 to 31 and experience all the amazing benefits that come with being a demonstrator.
Honestly, I saw this promotion banner and was stunned in a very good way! This deal is amazing, and what’s more there are no other purchase requirements!
Welcome to the Stampin’ Pretty Pals’ Blog Hop! The Pals are “Ready for Fall” and hope to inspire you with card and paper craft creations using Stampin’ Up! products. Links to the participant’s’ blogs can be found at the end of each post to help you “hop” along!
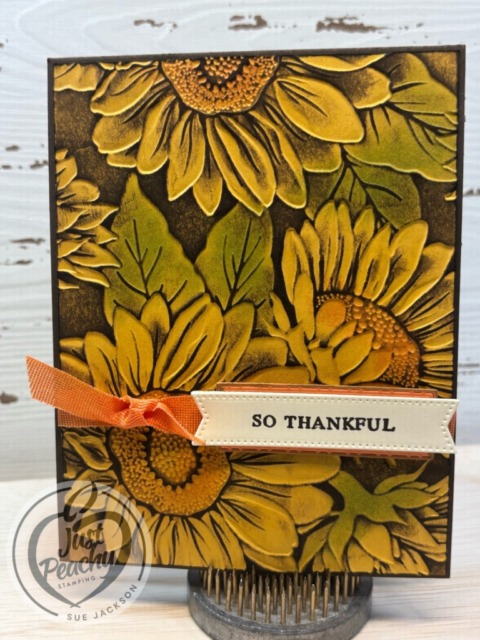
Here’s my Ready for Fall card:
As soon as I saw the Sunflowers 3D embossing folder, I knew I would be using it to create all my Thanksgiving cards for this year. I usually make about 20 of them for family, and am planning to use a variety of colors and card folds to make the cards individually special.
Measurements:
Trim a piece of Early Espresso cardstock to 11 by 4-1/4 inches and score at 5-1/2 inches to create a tent card for the base
Start with a piece of Crushed Curry cardstock measuring 4-1/4 by 5-1/2 inches for the front
After running the cardstock through your Cut & Emboss Machine using the Sunflowers 3D embossing folder, trim it to 4-1/8 by 5-3/8 inches
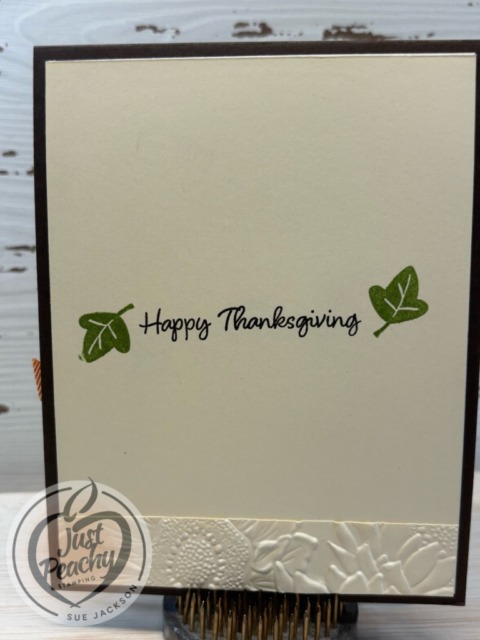
After using the Sunflower embossing folder for a piece of Very Vanilla cardstock, trim the cardstock to 3/4 by 4 inches for the bottom of the inside of the card
Trim a piece of Timid Tiger 6 x 6 inch DSP (designer series paper) to 6 by 2-1/2 inches for the envelope flap
Punch a 1-inch circle of coordinating DSP and run it through the XYRON create-a-sticker for the envelope seal
Trim a piece of Very Vanilla cardstock to 4 by 5-1/4 inches for the inside of the card
Adding Color and Finishing the Card:
Using the debossed side of the cardstock (meaning it the side with the sunflowers lower than the background), swipe your Early Espresso ink pad over the cardstock
You can add as much or as little ink as you want
I used daubers for Crumb Cake ink (centers of flowers), Timid Tiger (outer ring of centers) and Old Olive (leaves)
Then I used a dauber with Crushed Curry ink to highlight the petals
The color is barely visible, but it did lighten up the petals just a bit
Stamp the inside sentiment and outside sentiment on Very Vanilla cardstock using Early Espresso ink
The outside sentiment comes from the Beautiful Butterflies
The inside sentiment is from the long retired Banner Year stamp set, but it’s the only one I have that says Happy Thanksgiving
Add a piece of Timid Tiger ribbon around the Crushed Curry cardstock and tie it in a square knot
Unless otherwise noted, I used multipurpose liquid glue to adhere pieces together
Crop a scrap piece of Timid Tiger cardstock and the outside sentiment using Stylish Shapes banner dies
Adhere the sentiment on top of the Timid Tiger cardstock, then add dimensionals onto the back of the Timid Tiger cardstock so it straddles the ribbon
Adhere the embossed and colored Sunflowers front to the base of the card
After adhering the strip of the embossed Very Vanilla to the bottom of the inside of the card, adhere it to the inside of the card
With that, I’d finished this coordinated card, envelope, and envelope seal
I really hope you give this a try! I’ve been playing around with ink colors on white cardstock and have been having a great time. Try swiping the colors on both sides of the embossed cardstock because the effects are so different.
Back to the Stampin’ Pretty Pals’ Blog Hop:
This month’s projects have been full of ideas you can use—whether you’re making cards, gifts, or just adding a little sparkle to your everyday creativity. The Pals have their own projects ready to share, and trust me, you don’t want to miss them! Click through the lineup below to see everyone’s creations, then mark your calendar for next month’s theme: “thanks.” We’ll be making Random Acts of Kindness projects, thank you cards, and even some Thanksgiving ideas you’ll love.
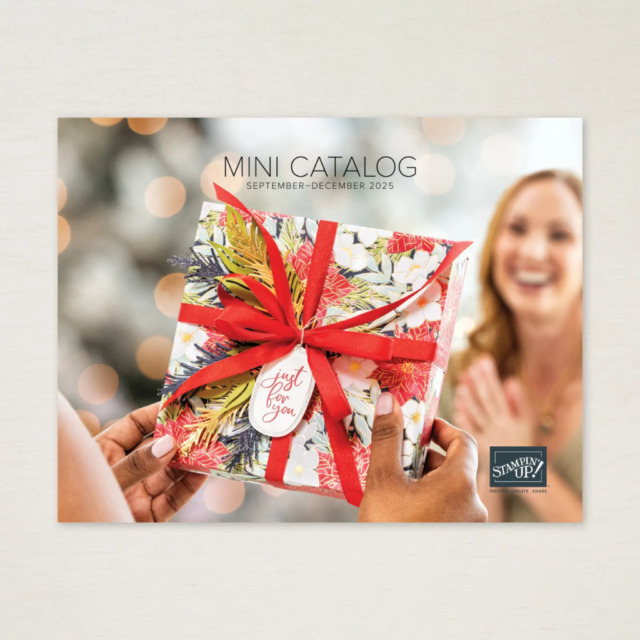
The September – December 2025 Mini-Catalog is now available!
Of course, this means there are new Online Exclusives as well! Here are some examples:
This Peaceful Garden Suite Collection is beautiful, and I love non-traditional colors for Christmas. I thought I would be able to use this suite for all my Christmas cards.
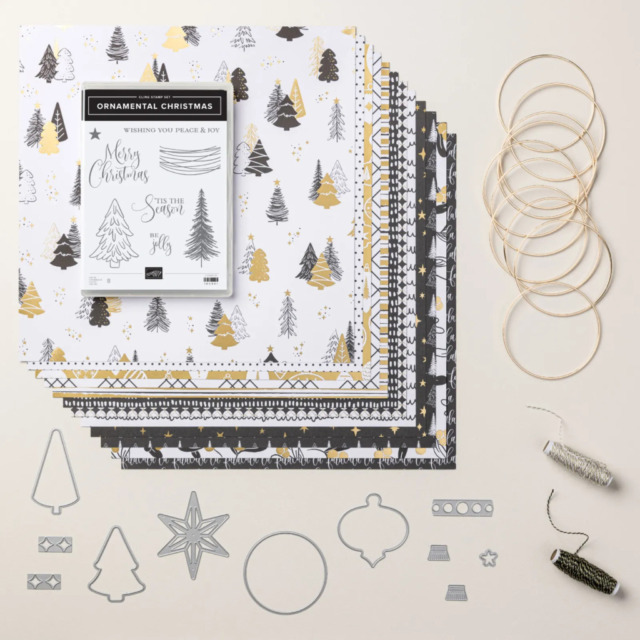
This Modern Christmas Suite Collection is absolutely gorgeous! I told myself that I wouldn’t need anything other than the Peaceful Garden Suite Collection. I was wrong. This suite is already in my cart:
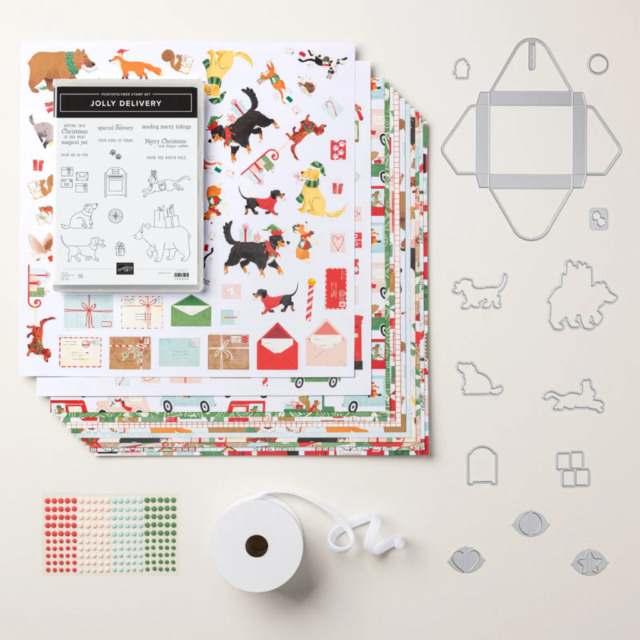
Of course, I had to get a cute Christmas critters set of products. This Jolly Delivery Suite fit the bill perfectly:
Last Chance Stamping Write Markers!
While you are shopping, make sure you pick up the Last Chance Stamping Write Markers! These markers, including the 2025 – 2027 In Color markers, are being discontinued. I love using these markers when sending cards because I can coordinate the card with the writing color. Therefore, I have all the available sets ready and waiting in my SU! cart.
If you live in the U.S. and don’t already have a Stampin’ UP! demo from whom you order, I would be honored to work with you. You can reach me at my justpeachystamping@gmail.com.
This month’s theme is Animal House—and the Pals are here to inspire you with a parade of paw-some card ideas and paper craft creations, all featuring Stampin’ Up! products. At the end of each post, you’ll find links to all the participant blogs so you can “hop” along and gather ideas to make your own projects roar with personality.
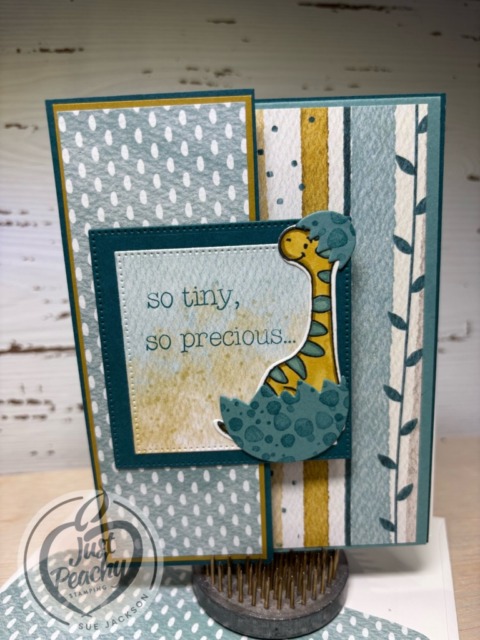
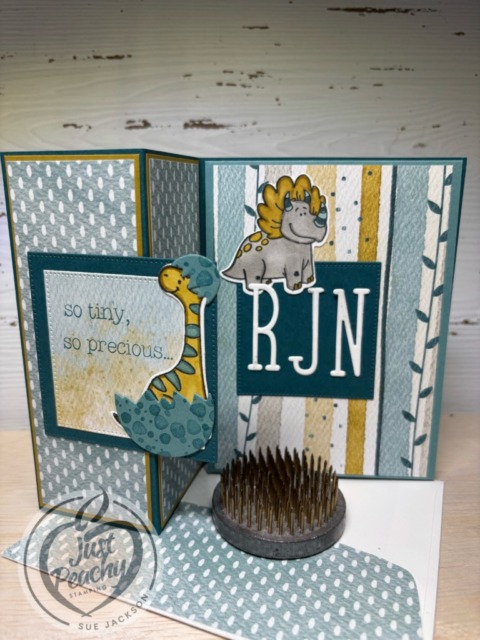
I used Darling Dinos stamp and die set and the Everyday Happiness DSP (designer series paper) for my baby card. I need to say that this card was made specifically for a work colleague and I forgot to take pictures before some of us signed it. I did ask everyone if it was ok to take pictures after they signed it, so they all knew what I’d forgotten to do.
That being said, he’s the card:
As always with a fun fold card, I will be adding this to the Creative Creases Challenge where the theme is always Anything Goes with a Fun Fold.
Measurements:
The card is a modified z-fold card
The Pretty Peacock base measures 5-1/2 by 8-1/2 inches, scored at 2-1/8 and 4-1/4 inches on the long side
Trim two pieces of Wild Wheat cardstock to 2 by 5-3/8 inches
Trim two pieces of DSP to 1-7/8 by 5-1/4 inches
The Lost Lagoon flap opening upwards measures 4 by 10-3/4 inches, scored at 5-3/8 inches
The DSP on the front of the flap measures 3-3/4 by 5-1/4 inches
Trim a piece of coordinating DSP to 1/2 by 5-1/4 inches for the bottom of the inside of the flap
Trim another piece of DSP to 6 by 2-1/2 inches for the envelope flap
Punch a 1-inch circle from coordinating DSP and run it through the XYRON create-a-sticker for the envelope seal
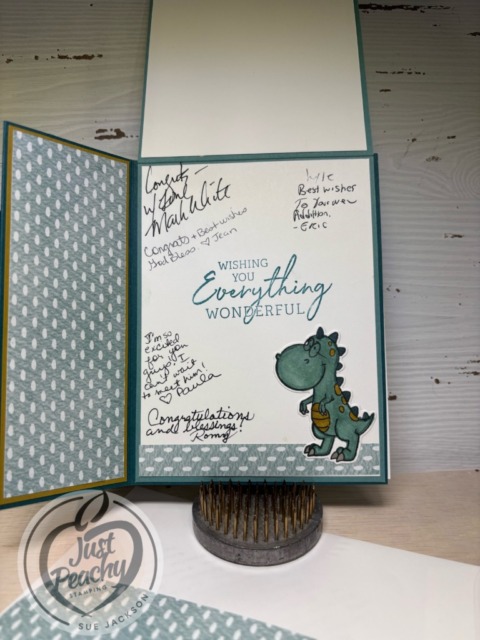
You need two pieces of white cardstock measuring 3-7/8 by 5-1/4 inches
Trim another piece of white cardstock for the back to 5-3/8 by 4-1/8 inches, if needed and since there are 16 of us who need to sign this card, I definitely needed it
The front sentiment square of Pretty Peacock and the DSP were cropped using two of the square Stylish Shapes dies
Crop another piece of Pretty Peacock cardstock using the same size square die as the DSP on the front I used as many scrap pieces of white cardstock as possible for all the dinosaurs and initials on this card
Stamping, Coloring, Cropping, & Assembly:
Stamp the sentiments using Pretty Peacock ink, I used sentiments from the retired Charming Sentiments stamp set
Stamp all the dinosaurs using Tuxedo Black ink
I cropped three pieces of each of the initials and layered them on top of each other to add height without dimensionals
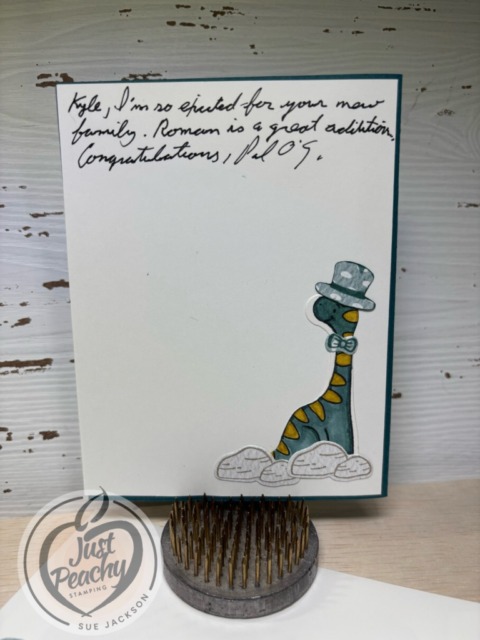
I used the colors on the DSP to color the dinosaurs using the blend combos of Pretty Peacock, Lost Lagoon, Wild Wheat, and Gray Granite – aren’t they all adorable!
The stamped pattern on the Lost Lagoon egg pieces was stamped in Pretty Peacock ink
I stamped the rocks for the back of the card using Gray Granite ink on a scrap of the DSP and cropped them using one of the Darling Dino dies
Thankfully, the Darling Dinos die set includes all the dies needed to crop these adorable images.
Because of the bulk of the card, I only used multipurpose liquid glue to adhere all the pieces and layers together
With that, I’d finished this coordinated card, envelope, and envelope seal set
Back to the Stampin’ Pretty Pals’ Blog Hop:
We have more inspiration to share, so use the lineup below to visit the rest of the Pals. Next month we will create beautiful inspiration for a “Ready for Fall” theme and hope you will join us.
Who would love a sale on select In Color Merchandise?
We all would, right?
Here are the Promotion Details:
Sales Period: August 5–31
Ordering Deadlines
Phone: August 29, 2025, at 6:59 p.m. (MT)
Online: August 31, 2025, at 11:59 p.m. (MT)
Sale includes select inks, cardstock, Designer Series Paper, embellishments, and other products that include these new In Colors. Only products featured on the 2025–2027 In Colors page are included in this promotion.
Some products are excluded from the sale, including the Month by Month Album Retreat 2025 kit (167338).
Products are available only while supplies last.
If you live in the U.S. and don’t already have a Stampin’ UP! demo from whom you order, I would be honored to work with you. You can reach me at my justpeachystamping@gmail.com.
Welcome to Just Peachy Stamping by Sue Jackson: an independent Stampin' Up demonstrator.
Through Stampin' Up!, I happily share my love of papercrafting through sales, classes, small stamping group meet-ups and workshops. I think that being a teacher in my "real life", I have a unique approach to sharing my fantastic hobby. I look forward to connecting with you!