Welcome to the newest Make My Monday bi-weekly challenge #265. Our host, Pamela, chose Gratitude or Thankful for the theme. I used a piece of DSP (designer series paper) from the Gathering Together 12 x 12 inch DSP, which can be found in the online exclusives.
When you finish here, please visit the challenge site to see what the rest of the very talented design team members created. Then, don’t forget to upload your creations to our gallery. We look forward to seeing your creations there!
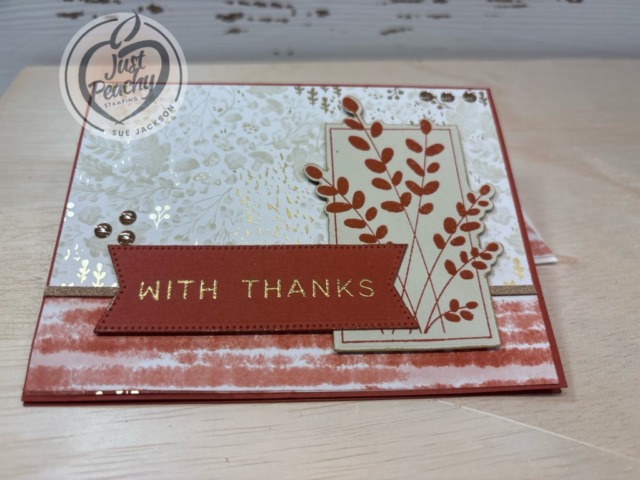
Here’s my card:
I needed to take the picture with the card almost laying down in order to have the gold embossed sentiment show up in the picture.
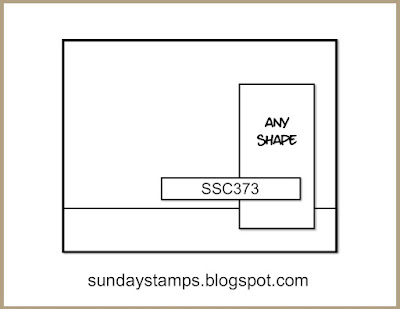
I’ve already posted a card using this sketch, which you can find here.
As I was enjoying all the cards entered into the MMM # 264 challenge, I came across Bonnie Lynn’s card and found a new-to-me challenge: Never-Before-Used-Schtuff! Since I’ve never used the Friendly Foliage bundle, I am going to be adding this card to that challenge. How fun!
Measurements:
Trim a piece of Cajun Craze cardstock to 8-1/2 by 5-1/2 inches, and score at 4-1/4 inches to create a tent card
Choose a background DSP and trim it to 4-1/8 by 5-3/8 inches
I used a strip of the Cajun Craze 6 x 6 inch DSP for the bottom, and I trimmed that piece to 1 by 5-3/8 inches
I find it easier to adhere strips like this over the bottom of the background DSP rather than try to fuss with measurements to create the size I need
Trim a piece of coordinating DSP to 1 by 5-3/8 inches for the bottom of the inside of the card
I trimmed a piece of the Cajun Craze DSP to 6 by 2-1/2 inches for the envelope flap
Then I punched a 1-inch circle of the background Gathering Together DSP and ran it through my XYRON create-a-sticker for the envelope seal
Trim a piece of Basic Beige cardstock to 4 by 5-1/4 inches for the inside of the card
I used scraps of Cajun Craze and Basic Beige cardstock for the foliage rectangle & sentiment banner on the front of the card
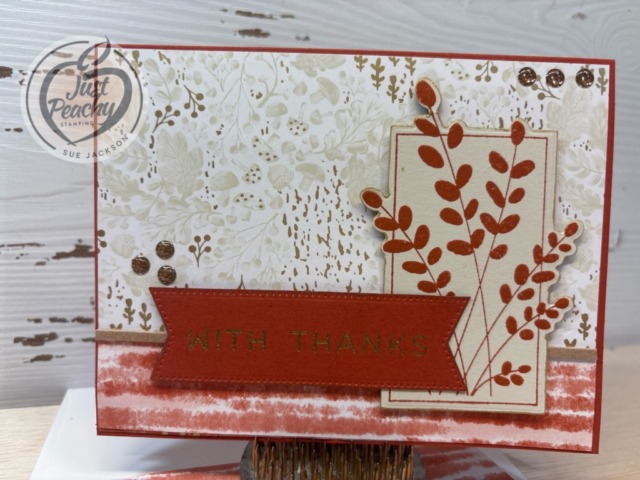
Another Quick Card:
Since I’d already created a card using the Sunday Stamps template, this card fell into place quickly.
I stamped the foliage from the Friendly Foliage stamp set using Cajun Craze ink on the Basic Beige cardstock
After wiping down a scrap of Cajun Craze cardstock with my embossing buddy, I stamped from last year’s September Paper Pumpkin kit in VersaMark ink
Then, I covered the ink with WOW! metallic embossing powder and heat set it with my heat tool
Next, I cropped the sentiment using one of the Stylish Shapes banners and the foliage with the coordinating Friendly Foliage die
Unless otherwise noted, I used multipurpose liquid glue to adhere pieces together
First, I adhered the background DSP, then added the striped Cajun Craze DSP to the bottom
HINT: I just barely missed lining up the striped DSP perfectly with the background DSP, so I used my Cajun Craze marker to add some color to the tiny piece of the background DSP showing on the bottom
I have some of the gold faux leather trim left, so I adhered it to the line where the two DSP patterns meet
In order to add more gold to the two cardstock pieces, I used my (almost dry) gold Wink of Stella brush to outline both the sentiment and the foliage, which created subtle gold edges
I added dimensionals to the back of the foliage box and the sentiment and added them to the front of the card, using liquid glue to adhere the overlapping sentiment banner
Once those pieces were adhered to the front, I finished the car with some (retired) ribboned enamel dots
I stamped the sentiment for the inside in Cajun Craze ink, added the strip of the Cajun Craze DSP to the bottom, and adhere the inside of the card
With that, I’d finished this coordinated card, envelope, and envelope seal set
Kits Make Crafting Simple, Fun, and Just Simply Fun!
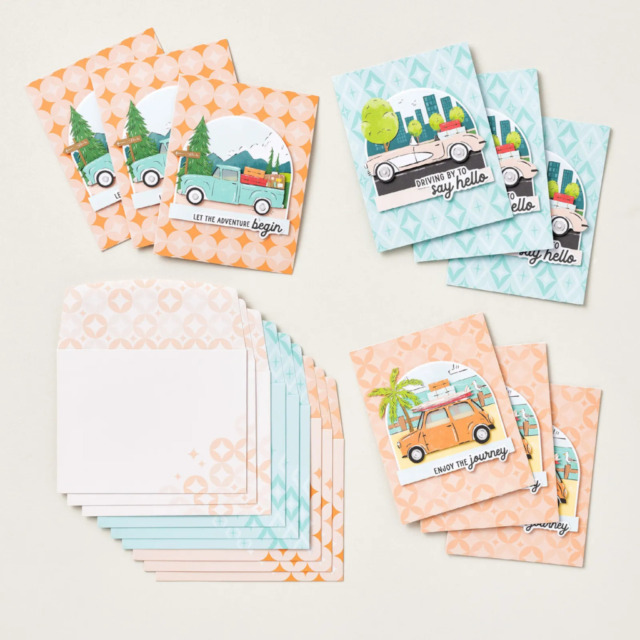
Here’s a look at the two new kits available:
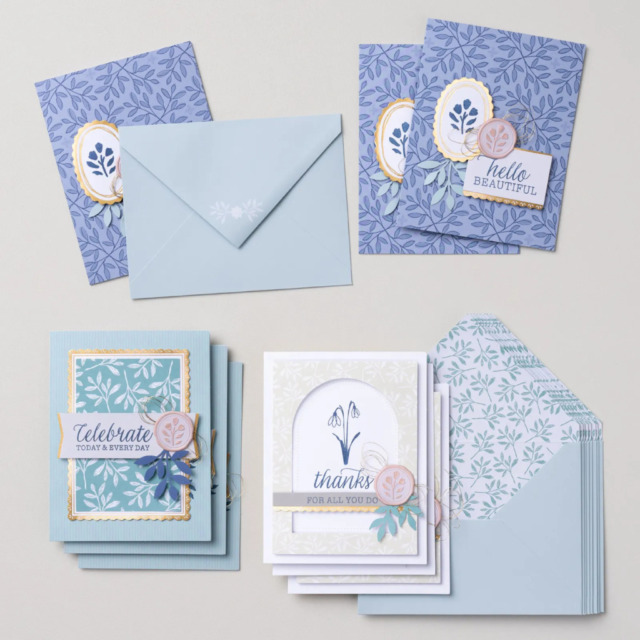
First, it’s the Everyday Beauty Kit, which retails for $25 USD.
Create the perfect card for any occasion using the all-inclusive Everyday Beauty Kit. This kit comes with everything you need to make three unique card designs: printed card bases and coordinating envelopes with lovely botanical patterns, precut paper pieces, timeless faux wax seals, shimmering metallic thread, and a versatile stamp set that you can use on countless other projects.
DETAILS – Makes 9 cards: 3 each of 3 designs – Folded card size: 5-1/2″ x 4-1/4″ (14 x 10.8 cm) – Colors: Basic Beige, gold, Gray Granite, Lost Lagoon, Night of Navy, Petal Pink – Also available in French
Kit includes one of each item listed below. – Everyday Beauty Photopolymer Stamp Set – Clear stamp block – Night of Navy Classic Stampin’ Spot – Step-by-step instructions – 9 printed envelopes – Faux wax seal stickers – Metallic thread – Adhesive
The second kit is the Adventure Awaits kit, which retails for $14 USD.
Let your creativity take the driver’s seat with the Adventure Awaits Kit. Coast in the retro colours and hand-drawn artwork that can be either feminine or masculine. With printed sentiments, precut paper, and vellum details, this kit comes with everything you need to make nine cute cards.
DETAILS – Makes 9 cards: 3 each of 3 designs – Folded card size: 5-1/2″ x 4-1/4″ (14 x 10.8 cm) – Colors: Basic Black, Coastal Cabana, Crushed Curry, Garden Green, Granny Apple Green, Pecan Pie, Petal Pink, Poppy Parade, Pretty Peacock, Timid Tiger – Sentiments printed in English, French, and German
Kit includes one of each item listed below. – Step-by-step instructions – 9 printed envelopes – Vellum – Adhesive
If you have any questions, or need a bit of a creative mojo boost, you can reach me at my justpeachystamping@gmail.com.
If you live in the U.S. and don’t already have a Stampin’ UP! demo from whom you order, I would be honored to work with you.
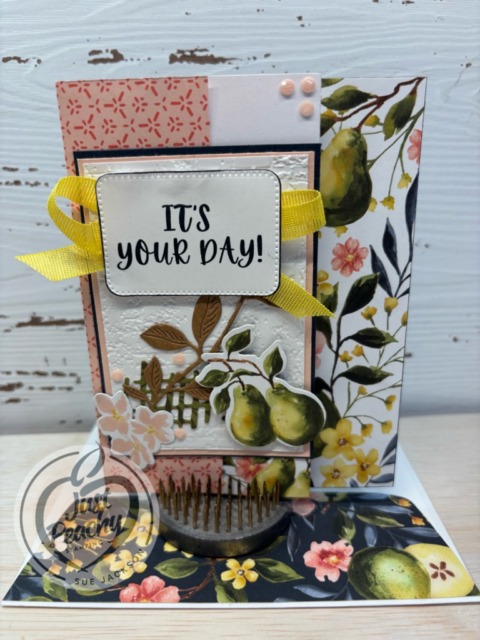
Welcome to the newest Make My Monday bi-weekly challenge #264. Our host, Billie A., chose Add at Least One Flower for the theme. I used border print from the Perfectly Pears DSP, which already has many flowers, but did add more to the front of the card.
When you finish here, please visit the challenge site to see what the rest of the very talented design team members created. Then, don’t forget to upload your creations to our gallery. We look forward to seeing your creations there!
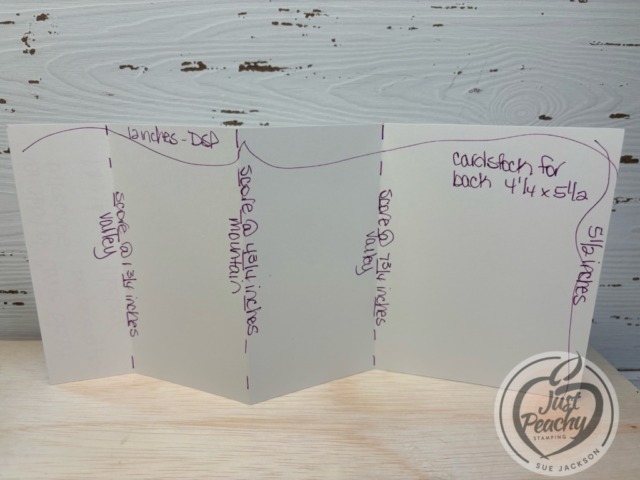
I know I had seen a video for a 4 panel accordion fold using a piece of DSP measuring 5-1/2 by 12 inches. I used it for this card, and for some strange and unknown reason, didn’t write down the source, even though I am fairly certain it was a video tutorial from the annual catalog DSP.
Since the base of this card is DSP, I added a piece of 4-1/4 by 5-1/2 inches piece of cardstock to the back of the last panel of the DSP
You will need a piece of DSP measuring 6 by 2-1/2 inches for the envelope flap
Punch a 1-inch circle from coordinating DSP and run it through the XYRON create-a-sticker for the envelope seal
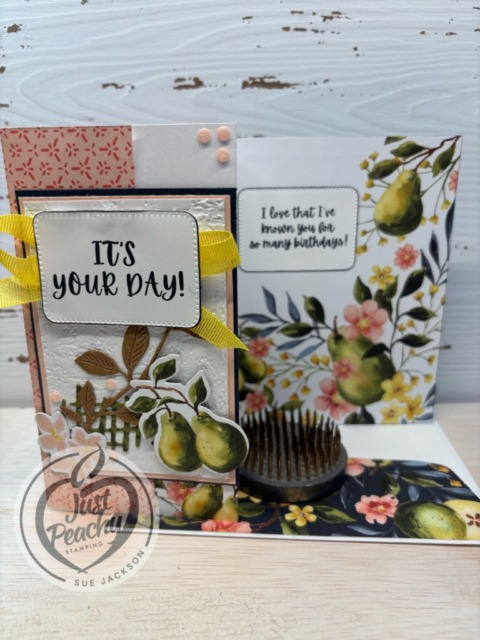
For this card, I did adhere the front flap to the second flap
I used scraps of Secret Sea and Petal Pink cardstock for the front sentiment layers
I used the exposed brick embossing folder for the white background layer
One of the fabulous features of this pack of DSP is that the dies will crop out the pears and trio of flowers so I didn’t color anything for this card
I cropped the lattice die from a scrap piece of the DSP
Some of the branches in the DSP are Pecan Pie, so I cropped a branch from that cardstock for the front
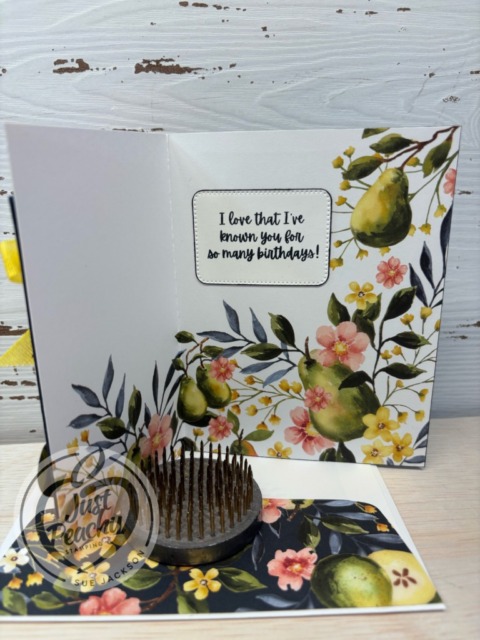
Both of the sentiments come from the Perfectly Pears stamp set and were stamped using Secret Sea ink
I used one of the Nested Essentials die to crop both of the sentiments and outlined them using the Secret Sea marker
The Loopy Loop Bow:
I was able to watch Mary Deatherage’s, from Stamps -n- Lingers, Perfectly Pears tutorial. In that video, she showed her loopy-loop bow. That’s what I used for the front of my card. I’m bow-challenged and this technique allows me to relatively easily add ribbon without adding the bulk of a tied bow. If you’ve never seen her videos, you owe it to yourself to watch them. I think she’s the Queen of the Collage. Gorgeous cards!!
It doesn’t get much more southern than to say y’all. I still remember the look of astonishment on the faces of my many relatives on Long Island, where I was born and raised, the first time I’d said it in front of them. Of course, I’d lived here three or four years by then. Can you imagine saying y’all with a Long Island accent? Yes, it was that interesting, to say the least.
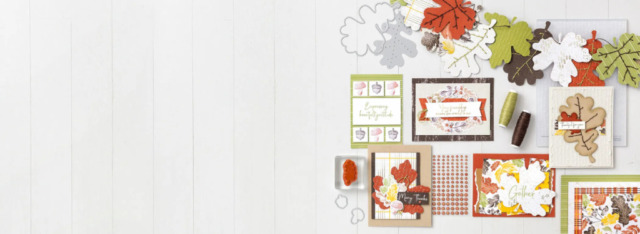
Stampin’ Up! has a fabulous suite for all your Happy Fall projects and cards. While the whole suite is a must-have, the DSP is stunning! I miss real falls, even raking leaves!
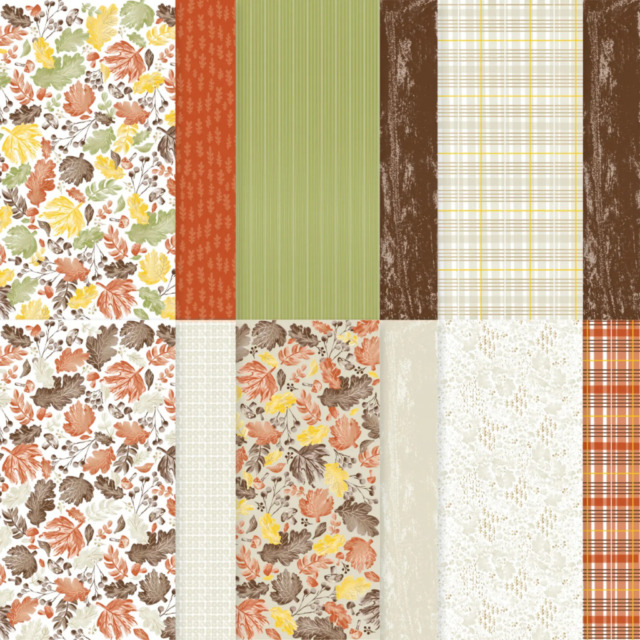
Here’s a close-up of the DSP:
I’ll be posting a slimline card using the plaid DSP pattern on the top row tomorrow. Make sure you come back to see the beautiful gold foil, Basic Beige, and Crushed Curry plaid. Such pretty paper!
If you have any questions, or need a bit of a creative mojo boost, you can reach me at my justpeachystamping@gmail.com.
If you live in the U.S. and don’t already have a Stampin’ UP! demo from whom you order, I would be honored to work with you.
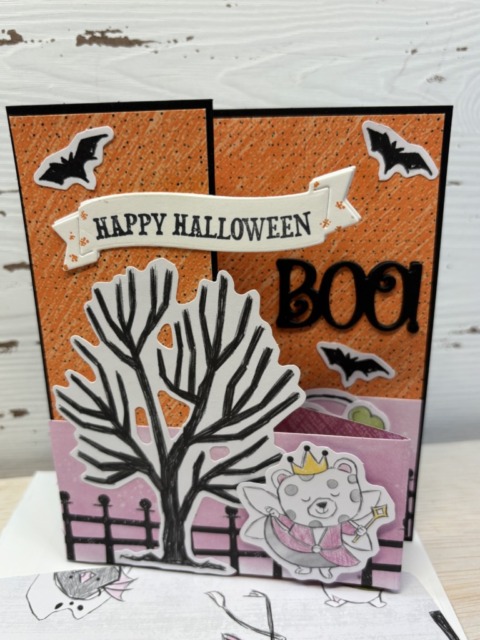
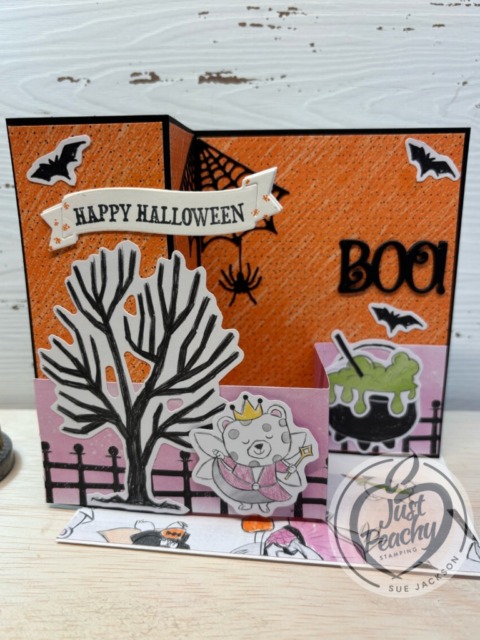
Welcome to the newest Make My Monday bi-weekly challenge #263. Our host, Pamela, chose (Halloween) Colors of Black, Purple, and Orange for the theme. For my purple, I used Petunia Pop mainly because of the DSP I wanted to use, so I am calling it a light shade of purple.
When you finish here, please visit the challenge site to see what the rest of the very talented design team members created. Then, don’t forget to upload your creations to our gallery. We look forward to seeing your creations there!
The Fright Night bundle and the Spooky Sweet DSP (designer series paper) are absolutely fabulous and I’m having so much fun playing with all the papers, stamps, dies, and punch out pieces.
Here’s my double-z fold Halloween card for my great-niece:
I’ve already posted two other Halloween cards using this suite of products which you can see here, here, and here. My great-nephew’s card goes live tomorrow, October 21, for the Cardz 4 Guyz challenge # 379. Please come back to see it then!
Two Joining Promotion Options for the Month of October!
Join Our Community
Become a Stampin’ Up! demonstrator when you choose one of these amazing Starter Kit offers. (And did we mention your Starter Kit comes with FREE shipping, FREE business supplies, AND a bonus, FREE Paper Pumpkin kit?) Join from October 1 to 31 and experience all the amazing benefits that come with being a demonstrator.
Honestly, I saw this promotion banner and was stunned in a very good way! This deal is amazing, and what’s more there are no other purchase requirements!
Welcome to my combination of the Make My Monday #262 and the Atlantic Hearts Sketch Challenge # 650. Our host for MMM, Guylaine chose Fabrics &/or Textiles for this challenge’s theme. I combined that with the sketch for AHSC #650 and came up with one card. When you finish here, I hope you will visit both challenge sites, create your own card, and upload to the respective galleries.
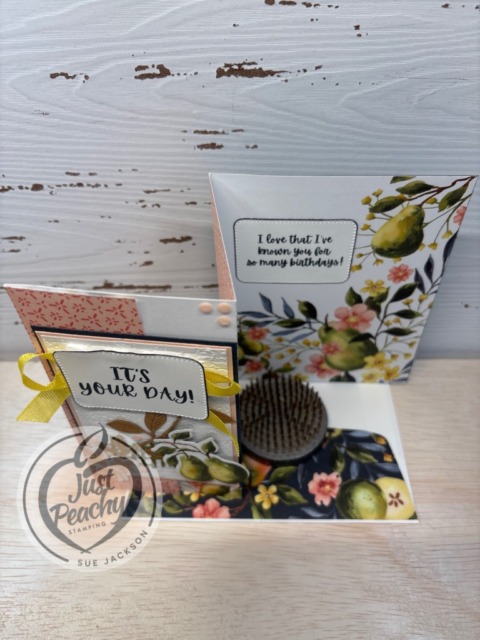
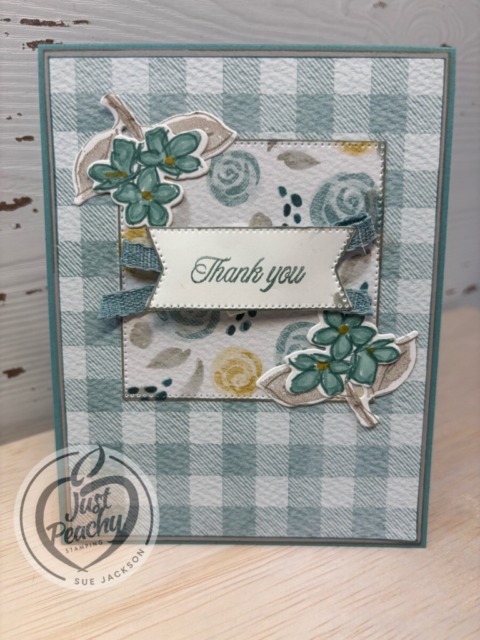
Here’s my card:
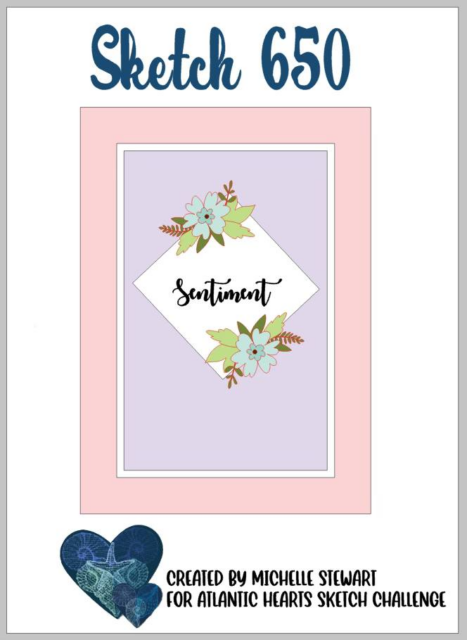
Here’s the AHSC #650 sketch:
Even though I turned the diamond to a square, the inspiration from the sketch is still very much evident.
I chose this Everyday Happiness DSP (designer series paper) because the texture of it looks like quilt fabric my very talented sister would use in one of her gorgeous quilts. While I don’t have any flower stamps that exactly match the flowers on the center square, these leaves and flowers from the Painterly Pears bundle worked by using the colors in the DSP.
Measurements:
The Lost Lagoon base measures 11 by 4-1/4 inches, scored at 5-1/2 inches to create a tent card
Trim a piece of Everyday Happiness DSP to 4-1/8 by 5-3/8 inches
Trim another piece of the DSP to 6 by 2-1/2 inches for the envelope flap
Punch a 1-inch circle from coordinating DSP and run it through the XYRON create-a-sticker for the envelope seal
Crop the largest square from another pattern of Everyday Happiness DSP
Trim a piece of white cardstock to 5-1/4 by 4 inches for the inside of the card
Use scraps of white cardstock for the sentiment, leaves and flowers
Easy-Peasy Assembly:
Unless otherwise noted, I used multipurpose liquid glue to adhere pieces together
Stamp the sentiment for the inside and the front of the card using Lost Lagoon ink
Crop the outside sentiment using a banner die from Stylish Shapes die set
Stamp the leaves using Gray Granite ink
Stamp the flowers using Lost Lagoon ink, color with the blends, and add the center dot using the light Wild Wheat blend
Crop the leaves and flowers
Adhere the DSP to the base of the card, then adhere the square to the background
Adhere the leaves and flowers to opposite corners of the square
Add a Loopy-Loop Bow to the middle of the square
Add dimensionals to the back of the sentiment banner so they straddle the bow and adhere to the square
Adhere the inside white cardstock to the base of the card
With that, I’d finished this coordinated card, envelope, and envelope seal set
Loopy-Loop Bow
I was able to watch Mary Deatherage’s, from Stamps -n- Lingers, Perfectly Pears tutorial. In that video, she showed her loopy-loop bow. That’s what I used for the front of my card. I’m bow-challenged and this technique allows me to relatively easily add ribbon without adding the bulk of a tied bow. If you’ve never seen her videos, you owe it to yourself to watch them. I think she’s the Queen of the Collage. Gorgeous cards!!
Become a Stampin’ Up! demonstrator when you choose one of these amazing Starter Kit offers. (And did we mention your Starter Kit comes with FREE shipping, FREE business supplies, AND a bonus, FREE Paper Pumpkin kit?) Join from October 1 to 31 and experience all the amazing benefits that come with being a demonstrator.
Honestly, I saw this promotion banner and was stunned in a very good way! This deal is amazing, and what’s more there are no other purchase requirements!
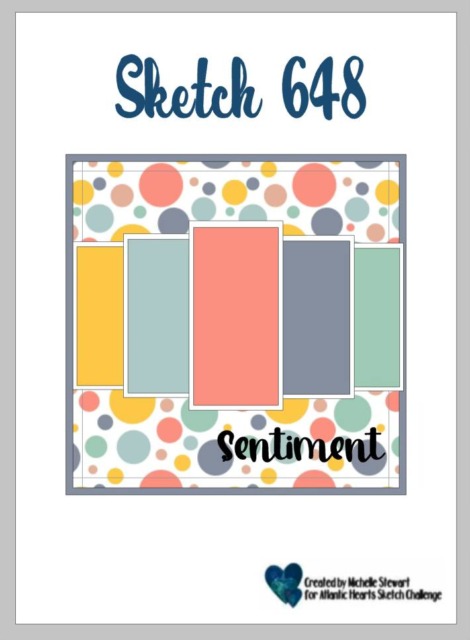
Welcome to Team B’s turn for the Atlantic Hearts Sketch Challenge #648! Starting the creative process with a sketch invites individual takes on the sketch, and this one is no different. This challenge is a weekly event, and we’d all love for you to play along with the sketches and then post your creations to the challenge gallery.
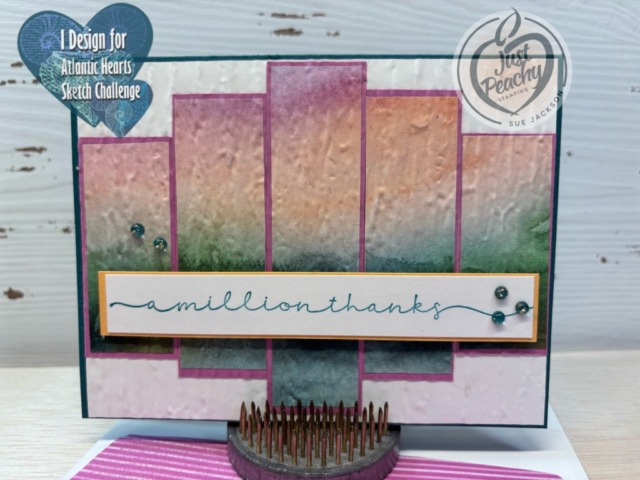
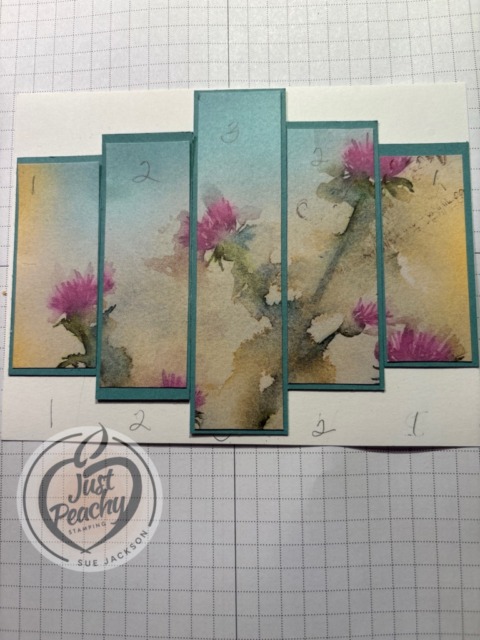
Here’s my card:
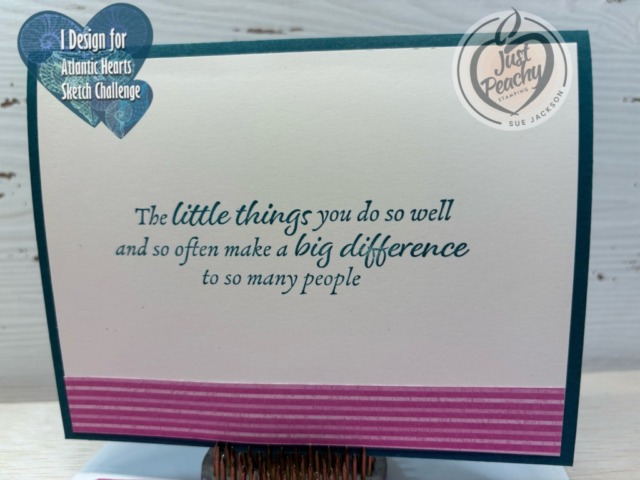
Here’s the inside and the inspiration sketch:
I knew Jan B of JanB cards had done a card using this format a few years ago, so I went back to her video, rewatched it, and then made some adjustments.
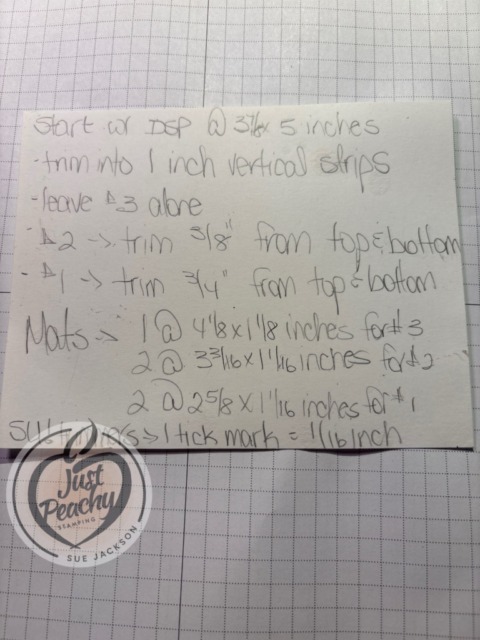
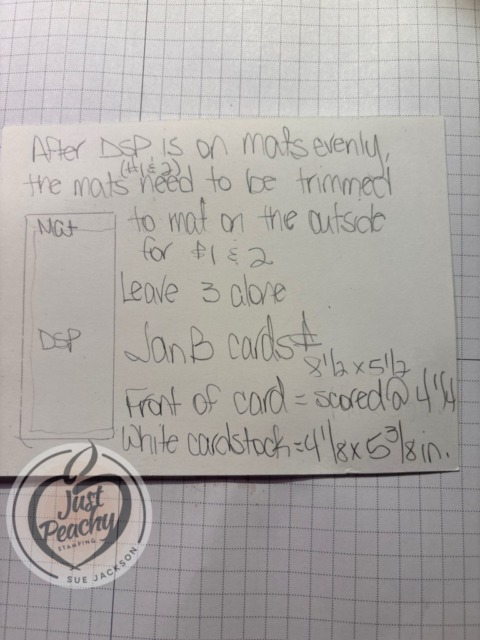
Measurements:
Here’s the draft card I created and my own template to be able to create this again:
I’ve included all the measurements for the DSP (designer series paper paper) and mats for the front of the card in the templates shown
The Pretty Peacock base measures 8-1/2 by 5-1/2, scored at 4-1/4 inches to create a tent fold
After dry embossing a piece of white cardstock using the Bark 3D embossing folder, trim it to 4-1/8 by 5-3/8 inches for the background of the front of the card
Trim a piece of white cardstock to 4 by 5-1/4 inches for the inside of the card
I trimmed a piece of the Petunia Pop 6 x 6 inch DSP to 6 by 2-1/2 inches for the envelope flap and another piece to 3/4 x 5-1/4 inches for the bottom of the inside of the card
Punch 1 1-inch circle from the Petunia Pop DSP and use the reverse side for the envelope seal by running the punched circle through the XYRON create-a-sticker
I used a scrap of white cardstock for the sentiment and a scrap of Peach Pie for the sentiment mat
Hints:
This card would’ve been much easier if I used different patterns of DSP instead of trying to line everything up so it flows from one side to the other
Use Jan B’s tips for figuring out how to decide what part of the DSP you want to use
Patience is the key for this card but it’s worth every minute spent creating it
Creating a draft version is especially helpful when using scenic DSP
The outside sentiment comes from the Sweetly Scripted (retired) stamp set
I used a sentiment from the retired Happy Thoughts stamp set for the inside sentiment
I can’t be the only one who keeps retired sentiment stamp sets, right?
Without using this piece of DSP, I wouldn’t have put Pretty Peacock and Petunia Pop together, but I love the combination
I have another card already completed using this color combination and it will be posted for another challenge soon – personally I think blending these two colors for a large butterfly turned out to be gorgeous
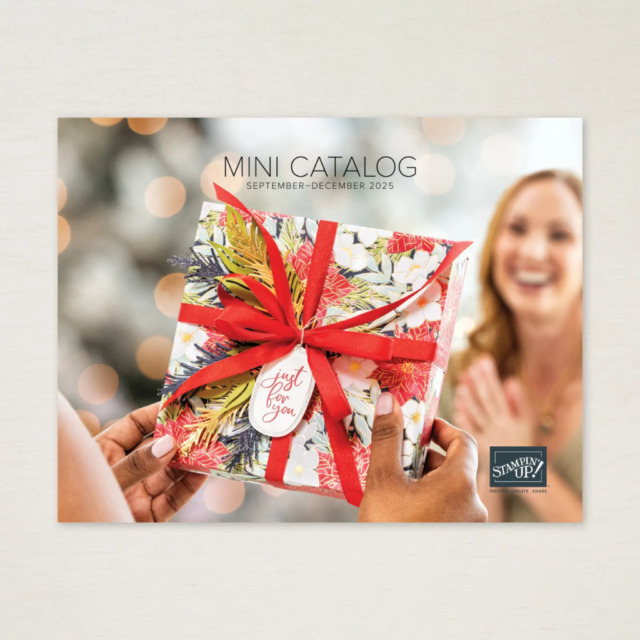
The September – December 2025 Mini-Catalog is now available!
Of course, this means there are new Online Exclusives as well! Here are some examples:
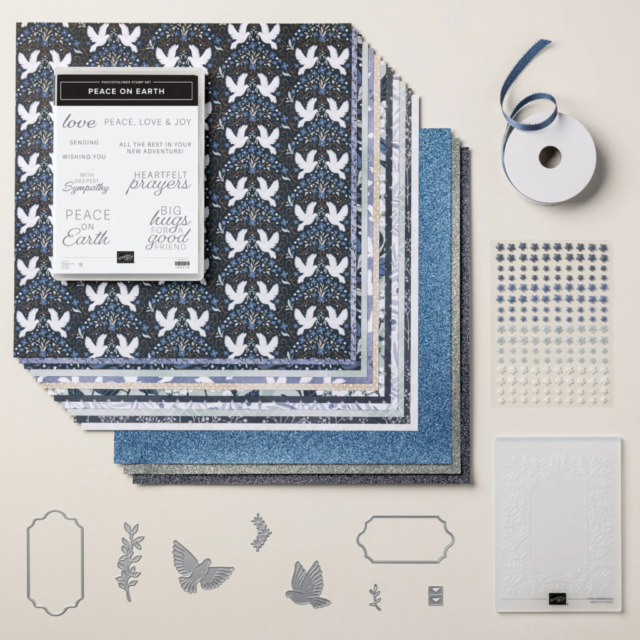
This Peaceful Garden Suite Collection is beautiful, and I love non-traditional colors for Christmas. I thought I would be able to use this suite for all my Christmas cards.
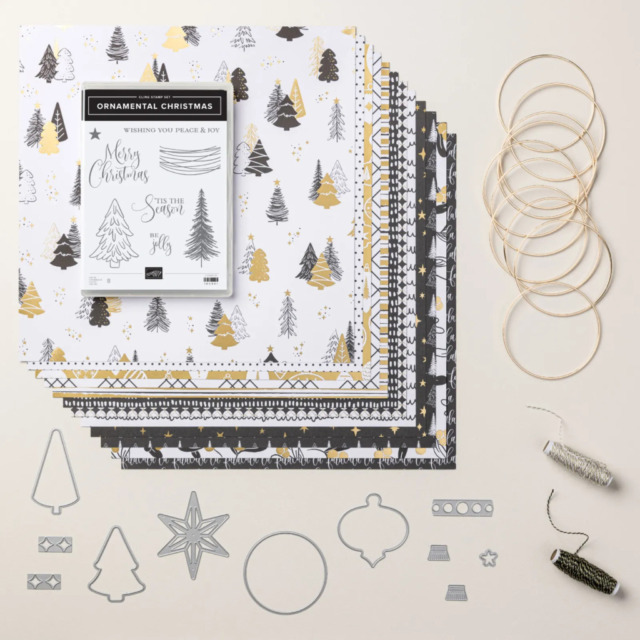
This Modern Christmas Suite Collection is absolutely gorgeous! I told myself that I wouldn’t need anything other than the Peaceful Garden Suite Collection. I was wrong. This suite is already in my cart:
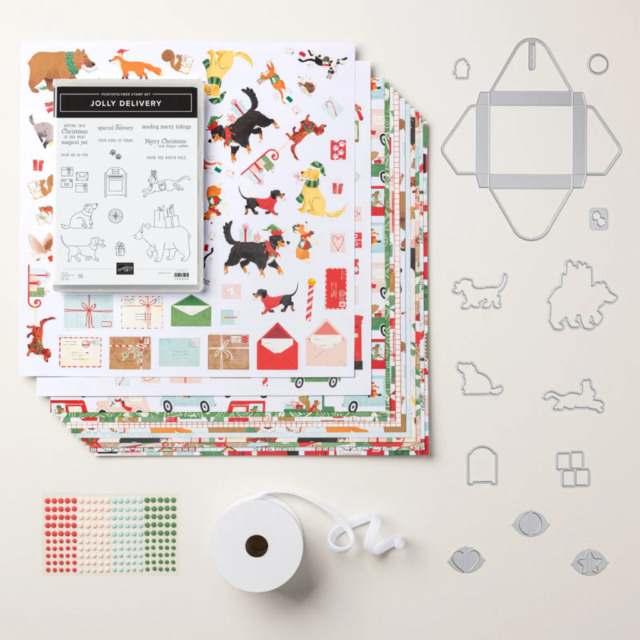
Of course, I had to get a cute Christmas critters set of products. This Jolly Delivery Suite fit the bill perfectly:
Last Chance Stamping Write Markers!
While you are shopping, make sure you pick up the Last Chance Stamping Write Markers! These markers, including the 2025 – 2027 In Color markers, are being discontinued. I love using these markers when sending cards because I can coordinate the card with the writing color. Therefore, I have all the available sets ready and waiting in my SU! cart.
If you live in the U.S. and don’t already have a Stampin’ UP! demo from whom you order, I would be honored to work with you. You can reach me at my justpeachystamping@gmail.com.
Welcome to the newest Make My Monday bi-weekly challenge #261. Our host, Dawn, chose Autumn Harvest or Fall for the theme. When you finish here, please visit the challenge site to see what the rest of the very talented design team members created. Then, don’t forget to upload your creations to our gallery. We look forward to seeing your creations there!
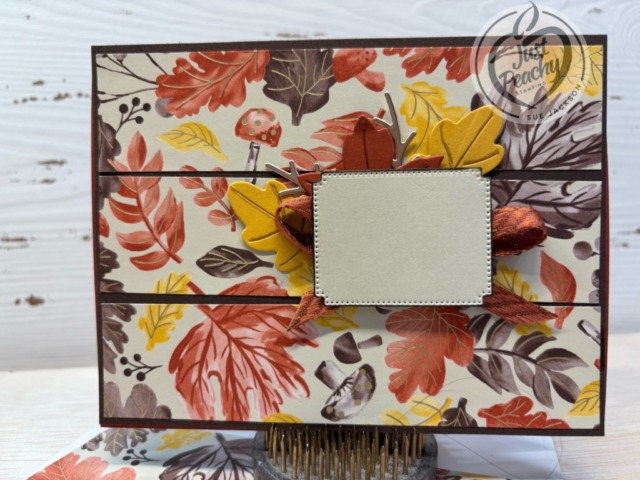
Here’s my card, and an explanation of the blank sentiment block follows.
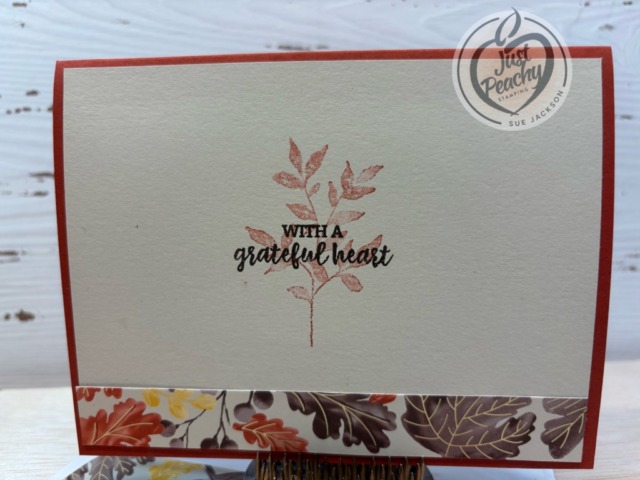
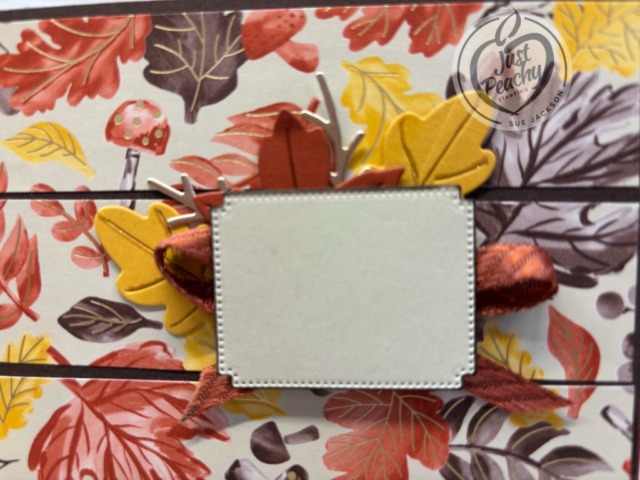
in addition, here’s the inside and a close-up of the leaves and ribbon behind the blank sentiment block:
Here’s my explanation for the blank sentiment block on the front:
I used the online exclusives Gathering Together DSP (designer series paper) and paired it with the retired Autumn Leaves photopolymer stamp set and coordinating dies. The die was made to go with a sentiment that says “Autumn teachers us that change can be beautiful”. I had the stamp on my desk, I fit the stamp into the die to make sure it would fit perfectly. My desk was a mess, as was the desk where I have my Cut & Emboss machine. I cropped the block from Basic Beige cardstock.
When I went to stamp the sentiment, I realized the stamp that was on my desk (!) was missing. Gone. I’ve looked everywhere, pulled everything out that I used and put away all kinds of stuff. Still missing. I’m down to pulling apart everything in my very full wastebasket. This was meant to be a Thanksgiving card, so I have some time to find it. In the meantime, I have a blank sentiment die cut.
Measurements:
The Cajun Craze base measures 8-1/2 by 5-1/2 inches, scored at 4-1/4 inches to create a tent fold card
Trim a piece of Early Espresso cardstock to 4-1/8 by 5-3/8 inches
Next, trim 3 strips of the Gathering Together DSP to 5-1/4 by 1-1/4 inches
HINT: I trimmed a piece of the DSP to 5-1/4 inches, then trimmed the 1-1/4 inch strips so the patterns flowed together
Be sure to check twice for the matching pieces before you adhere them to the Early Espresso cardstock
Trim another piece of the DSP to 6 by 2-1/2 inches for the envelope flap
I also trimmed a piece of the DSP to 5-1/4 inches by 3/4 inches for the inside of the card
While I used scrap Basic Beige cardstock for the sentiment block, I trimmed a piece of the cardstock to 5-1/4 by 4 inches for the inside of the card
Punch 1 1-inch circle from coordinating DSP and run it through the XYRON create-a-sticker for the envelope seal
HINT: I started doing this during COVID and really like the way the seals finish off the envelope flap, so I am still including them
I used scraps of Cajun Craze, Crushed Curry, and gold foil for the leaves and branches behind the sentiment and ribbon
Since there’s gold in the veining on some of the leaves in the DSP, I used a gold Wink of Stella brush to add gold veining on the cropped leaves
What I Did:
Unless otherwise noted, I used multipurpose liquid glue to adhere pieces together
Adhere the Early Espresso cardstock to the front of the base of the card
Make sure that your DSP strips are aligned correctly, then adhere to the Early Espresso mat leaving space between the strips
Crop the leaves and the gold foil branches using the Autumn Leaves dies
Dry fit your leaves and gold foil branches, then adhere to the center strip of the DSP on the front
Color both sides of a length of white ribbon using the dark Cajun Craze blend
HINT: Believe me, you really want to allow the ribbon time to dry before trying to use it on your card; I made that mistake once and learned my lesson
After letting the ribbon dry, create a loopy-loop bow and adhere it using glue dots
In a world in which you didn’t misplace the sentiment stamp, stamp it in Early Espresso ink on the scrap of Basic Beige cardstock
Crop the cardstock and outline it with your Early Espresso marker
Check on the placement of your sentiment block so it straddles the leaves and ribbon
Add a double layer of mini-dimensionals to the back of the sentiment block to adhere it to the front of the card
Using the leave spray from the Textured Notes stamp set, add Cajun Craze ink to the stamp and stamp it off twice before stamping on the Basic Beige cardstock for the inside
Stamp the sentiment over the leaves using Early Espresso ink
Adhere the strip of DSP for the inside of the card to the bottom of the Basic Beige cardstock
Adhere the Basic Beige cardstock to the inside of your card
With that, I’d (almost) completed this coordinated card, envelope, and envelope seal set
The Loopy-loop Bow:
I was able to watch Mary Deatherage’s, from Stamps -n- Lingers, Perfectly Pears tutorial. In that video, she showed her loopy-loop bow. That’s what I used for the front of my card. I’m bow-challenged and this technique allows me to relatively easily add ribbon without adding the bulk of a tied bow. If you’ve never seen her videos, you owe it to yourself to watch them. I think she’s the Queen of the Collage. Gorgeous cards!!
The September – December 2025 Mini-Catalog is now available!
Of course, this means there are new Online Exclusives as well! Here are some examples:
This Peaceful Garden Suite Collection is beautiful, and I love non-traditional colors for Christmas. I thought I would be able to use this suite for all my Christmas cards.
This Modern Christmas Suite Collection is absolutely gorgeous! I told myself that I wouldn’t need anything other than the Peaceful Garden Suite Collection. I was wrong. This suite is already in my cart:
Of course, I had to get a cute Christmas critters set of products. This Jolly Delivery Suite fit the bill perfectly:
Last Chance Stamping Write Markers!
While you are shopping, make sure you pick up the Last Chance Stamping Write Markers! These markers, including the 2025 – 2027 In Color markers, are being discontinued. I love using these markers when sending cards because I can coordinate the card with the writing color. Therefore, I have all the available sets ready and waiting in my SU! cart.
If you live in the U.S. and don’t already have a Stampin’ UP! demo from whom you order, I would be honored to work with you. You can reach me at my justpeachystamping@gmail.com.
Welcome to Just Peachy Stamping by Sue Jackson: an independent Stampin' Up demonstrator.
Through Stampin' Up!, I happily share my love of papercrafting through sales, classes, small stamping group meet-ups and workshops. I think that being a teacher in my "real life", I have a unique approach to sharing my fantastic hobby. I look forward to connecting with you!