I’ve only played along with Colour Inkspiration a few times, mainly because I don’t seem to see the posts on my Facebook feed. You know how that goes with the FB algorithm. I will definitely have to get better about checking it out on a more regular basis. Especially since the color inspiration photo for CI#82 is absolutely gorgeous!
Here’s my card:
Here’s the inspiration photo. Mind you, I only looked at the photo and not the color combo underneath. Therefore, I chose Bermuda Bay instead of Just Jade and Magenta Madness instead of Melon Mambo. Even though I totally see those colors, looking at the combo might have been a good thing to do. OOPS!
Here’s the color inspiration photo:
Gorgeous, right?!?!
A Pretty Basic Layout
The base of the card is Bermuda Bay and it measures 4-1/4 inches by 11 inches, scored at 5-1/2 inches.
I cut the white mat to 4-1/8 inches by 5-3/8 inches. I stamped the sentiment, from the Forever Fern stamp set, in Magenta Madness. Then, I cropped the sentiment block out of this mat using the stitched rectangle dies. I put dimensionals in each of the four corners.
The Bermuda Bay background measures 4 inches by 5-1/4 inches.
Black and white stripes seem very classic to me and they ground this fairly bright card. I trimmed this piece to 1-1/2 inches by 3-7/8 inches.
Thankfully, I had some scrap Whisper White cardstock onto which I stamps two daisies from Daisy Lane. After I punched them out using the large daisy punch, I used the light Magenta Madness blend to shade in the bottom of the petals. I did make sure that no two petals look the same. Random is much better, for me at least. I added one dimensional under the center of the daisy.
I dry-fit the stems, cut from the sunflower dies. and daisy on the left side of the card. When I found an arrangment that worked for me, I very carefully adhered the stems using liquid adhesive. I adhered just the bottom portion of the stems in order to get some movement in them
After tying a length of Magenta Madness ribbon in a square knot over the border between the striped and DSP papers, I adhered the sentiment block so it straddles the ribbon.
Inside and the Envelope
For another card, I’d cropped a piece of Whisper White cardstock using the largest stitched rectangle die. I used that piece for the inside of the card. In order to add some interest to the inside, I stamped the small, full daisy from Daisy Lane in two diagonal corners. While I had the stamp and ink pad out, I also stamped those daisies in the bottom, left-hand corner of the front of the envelope.
Finally, I trimmed a piece of the Bermuda Bay DSP to 6 inches by 2-5/8 inches, adhered it to the envelope flap and trimmed it down.
With that, I’d finished another card/envelope coordinating set.
As always, thank you so much for stopping by my blog today. I’d also love to hear what you think, and greatly appreciate every comment.
Have a Peachy Day!
Sue
Supplies Used:
Focus on Bundles for Bonus Days savings!
There’s a bundle I really, really want and have decided I am going to use my bonus day coupons toward the purchase of this Blossoms in Bloom bundle! It’s so gorgeous, and the cards I’ve seen using it are all stunning. Check this out:
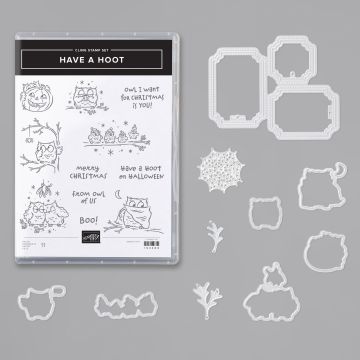
Have a Hoot Cling Stamp Set
Just look at all this adorableness!
How in heaven’s name did I miss the die set when I ordered the stamp set? An order will be placed ASAP!!!!
Do You Want to Place an Order?
Of course you do! Even more so because of the products in the NEW catalog. This NEW catalog is FABULOUS!! Wait until you see the new MINI-CATALOG!! Stay tuned for sneak peeks of those items! I’ll be using some new mini-catalog items for the InKing Royalty blog hop on Wednesday!
If you are ordering less than $150.00, please use the host code shown so YOU can take advantage of the STAMPIN REWARDS YOU EARN. If you are ordering more than $150.00, please contact me first so you can get your stamping rewards! I want YOU to get the stamping rewards you earn for your order over $150.00 Any order over $50 will earn a gift from me and an August – December mini-catalog.
The HOST CODE through August 8th is K6NND3UU.
Again, thank you for stopping by my blog today! I appreciate your time, and enjoy reading, and responding to, comments.
This is about it for the night. I’m off to the airport…… and it’s storming pretty badly tonight.
Crushed Curry, Call Me Clover, Crumb Cake, and Whisper White
First, let’s start with the Colour Inspriation photo so you can see my inspiration.
I really love everything about this photo: daisies, burlap, twine, and white lace. The color combination is classic, and did you notice the alliteration of the colors? I would thoroughly enjoy this little glass jar of happiness on my desk at school. I might just have to do that, and soon.
Here’s the card I created:
As you can see, I took all the elements of the inspiration photo and included them into my card. I used the Daisy Lane bundle of the stamp set and medium daisy punch, as well as the large daisy punch.
The Process
I created the circle of fern leaves using the stamp and Call Me Clover in. To create the variation of colors, I inked up the stamp, stamped then pivoted without picking up the bottom end of the stamp. I repeated the process again to get the third generation stamp. The different intensity of the same color helps to create depth and texture without adding anything extra.
Moving on to stamp the flowers, I decided that I didn’t want Crushed Curry stamps and blends coloring. Therefore, I stamps all the layers in Crumb Cake and let them thoroughly dry. While they were drying, I used the Painted Harvest trio of leaves outline stamp in Call Me Clover on Crumb Cake. The leaf punch made short work of cropping them out.
After the daisies completely dried, I needed to fudge a bit and used the Daffodil Delight blends combo to color flowers. As of right now, there are not Crushed Curry blends, but the Daffodil Delight ones definitely worked. If you have not tried the blends yet, please add some to your must have list. At first glance, they look difficult to use. However, they are so easy and I am so happy I only have a few sets left to purchase. If you are hesitant, I would suggest ordering three combo sets in your favorite color combinations. Once you watch a couple of how-to videos, you will find out just how fabulous they are!
The only thing left to stamp for the card was the sentiment, which I did using Crumb Cake ink on Whisper White. There is also a layer of Crumb Cake cardstock under it.
Assembly Required
I have learned the that dry fitting is essential when creating a collage card. Dry fitting also allows me to play around with ribbon options before I need to adhere anything down. In this case, I decided on the Polka Dot Tulle Ribbon under some linen thread, which is wrapped three times around the white cardstock. While very subtle, I thought the polka dot tulle would help incorporate the lace from the inspiration photo.
This double loop bow, also known as the Billy Moan bow, is the first time I’ve created one with which I am completely happy. I learned how to create this bow by watching Mary Deatherage’s Stamps-n-Lingers FaceBook lives. I’ve linked one of her videos here so you can see how easily you can recreate the bow. The ribbon and linen twine were attached first.
After I figured out where I wanted to place everything, I started adhering using Tombow for all of the flat pieces. I popped up the two smaller daisies and the sentiment on dimensionals.
When I finished, I sat back and thought there was something definitely missing. There are times I just need to walk away and come back to it later. That’s exactly what I did for this card, and when I came back I decided to used some clear Wink of Stella. I put down multiple layers on the daisy centers, then decided I needed to add some to the Crumb Cake layer under the sentiment.
Here’s a close-up of the Wink of Stella daisy centers:
I finished with some simple stamping on the envelope and this envelope and card combination was complete.
Thank you for stopping by today.
Have a Peachy day!
Sue
You Know You Want to…….
If you would like to order the bundle, stamp set, and/or punches, and live in the U.S., please use the icon above to be connected to my store. With just a few simple supplies, you, too, can create fabulous cards, and I would be honored to help you do so.
IF you are placing an order (you know you want to do so) over $150, please contact me so you can earn all the Host Rewards to which you are entitled. If your order is less than $150, please use YYX6FBEC for the host code.
Wednesday was a HUGE day for Stampin’ Up! Not only did the Holiday Catalog go live for customers, the Buy 3, get 1 Free DSP sale from the annual catalog starts! I already have my FOUR sets of DSP picked out! Get yours now!
Supply list:
Daisy Lane bundle of the photopolymer stamp set and medium daisy punch, item # 15118
I came across this card posted on FaceBook by Stampincronelia – Corine van Wijk for the Colour Inkspiration Card Challenge, #159. Obviously it’s been around for a long time, but Corine’s stunning card using the colors were a fabulous combination. Therefore, I did some searching and found the challenge information on Facebook. ci#159’s color combination is Seaside Spray, Smokey Slate, Early Espresso, and Very Vanilla. Gorgeous colors and the combination is stunning.
At first, I thought that I would use this colors to create a sympathy card, which I think are difficult to create. Instead, I decided to use the Colorful Seasons bundle, especially the “just breathe” sentiment. The card I created follows:
The Elements
I went through all kinds of ideas, and first thought I wanted to create a window flap card. However, the retired Smokey Slate DSP is one of my all time favorite DSPs and I am getting low on the color choices left in my stash. Finally, I decided on a faux window card. The top piece of Smoky Slate cardstock was first run through the Subtle TIEF, and then cropped using the largest square in the Stitched Shapes die set. My dimensionals got a workout for this card because I popped the top cardstock up from the DSP panel. This same set of dimensionals also allowed the whole front to be popped up from the Whisper White cardstock.
I stamped the sentiment in Early Espresso on Very Vanilla and then cropped it using the Rectangle Stitched die set. I also cropped the branch from Early Espresso using the Seasonal Layers die set. Once again, dimensionals added the depth I wanted for the sentiment.
The final color, Seaside Spray, in my mind, was always going to be for the flowers. Originally, I had just four flowers on the front, but the even number bothered my sense of balance. The fifth flower did not quite fit, which explains why I cropped it off the side. I thought I still needed something, so I added the new In Color Faceted Dots to the center of the flowers and for the dot on the “j”.
Life is a Beautiful Thing, Even with Happy Accidents
For some reason, the inside sentiment did not want to stamp well at all. Thankfully, I used my Stamparatus so I could stamp multiple times until I liked the result. However, a problem arose when I microscopically moved the card and my final stamp was just barely off. I’d already glued the DSP on the bottom of the inside and had attached the front to the white cardstock. What to do? My happy accident created a beautiful focal point on the inside. I cropped a piece of Smoky Slate using the same large square die from Stiched Shapes. Then I just had to repeat the stamping process, again using my Stamparatus.
Finally, I decorated the envelope using the flowers and branch from the Colorful Seasons stamp set.
When I started writing this blog post, I realized I would just need to change the sentiments and this could be a sympathy card. I will remember this card next time I need one.
Thank you so much for stopping by my blog today.
Have a Peachy Day!
Sue
Supplies:
Colorful Seasons stamp set – #143726
Seasonal Layers – #143751
2019-2021 In Color Faceted Dots – #149607
Stamparatus – #146276
Whisper White Medium Envelopes – # 107301
If you live in the U.S. and would like to shop with me, CLICK HERE to be connected to my store.
About Me
Welcome to Just Peachy Stamping by Sue Jackson: an independent Stampin' Up demonstrator.
Through Stampin' Up!, I happily share my love of papercrafting through sales, classes, small stamping group meet-ups and workshops. I think that being a teacher in my "real life", I have a unique approach to sharing my fantastic hobby. I look forward to connecting with you!