
Welcome back to the bi-weekly Cardz 4 Galz challenge #271. Our host for this edition of our bi-weekly challenge, Debbie, chose Dry or Heat Embossing for the theme. When you finish here, please visit the challenge site to see what the rest of the design team members created. Then, don’t forget to upload your creations to our gallery. We look forward to seeing your creations there!
I used the new Delicate Wishes product suite, including the Delicate Dreams DSP, along with items from the Lovely Arrangements die set.
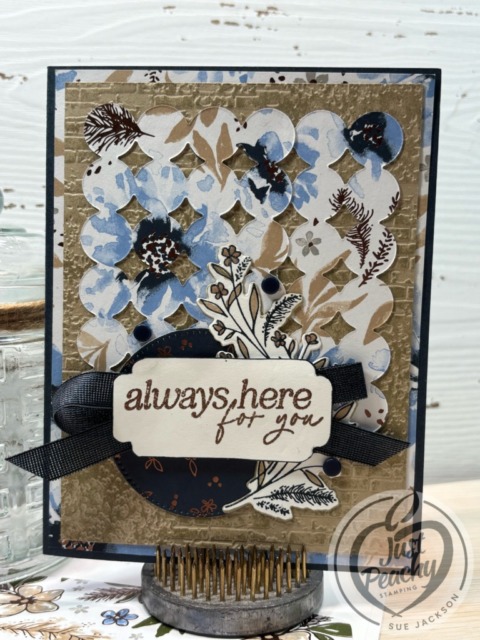
Here’s my card:
I combined the Cardz 4 Galz theme with the current Try a Sketch on Tuesday challenge. I thoroughly enjoy playing along with this challenge and have been honored to have been chosen as a Top Pick multiple times. I’ve forgotten to upload multiple projects before the deadline, but I am determined to do so today!
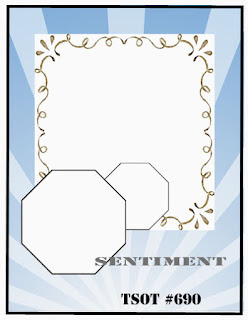
Here’s the TSOT #690 sketch:
Measurements:
- The Secret Sea base measures 8-1/2 by 5-1/2 inches, scored at 4-1/4 inches
- I trimmed a piece of Delicate Dreams DSP to 4-1/8 by 5-3/8 inches for the front of the card
- The coordinating piece of DSP for the envelope flap measures 6 by 2-1/2 inches
- Then, I punched a 1-inch circle from a scrap of DSP and ran it through my create-a-sticker for the envelope seal
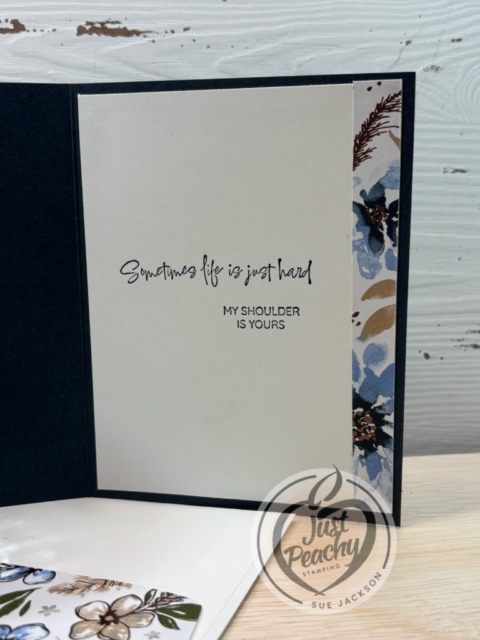
- I also trimmed a piece of DSP to 1/2 by 5-1/4 inches for the inside of the card
- After dry embossing a piece of Crumb Cake cardstock using the distressed brick embossing folder, I trimmed it to 3-7/8 by 5-1/8 inches
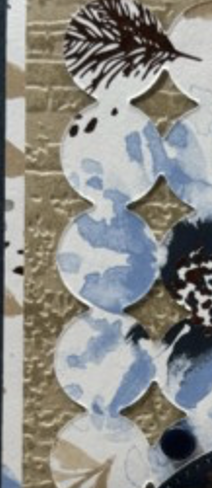
- Crop two pieces of the Delicate Dreams DSP (designer series paper) using the bubble die from the Lovely Arrangements die set
- I overlapped these dies and adhered them with liquid glue so they’d fit on the trimmed DSP
- Crop one Stylish Shapes circle from the Secret Sea/Bronze DSP
- Trim a piece of white cardstock to 4 by 5-1/4 inches for the inside of the card
- I used scrap of white cardstock for the floral swag and outside sentiment
Using a Brayer:
I’ve been unlucky enough to catch the pretty nasty germs going around and have had too much time to “doom scroll”, but with a purpose. While scrolling through Instagram, I came across a reel posted by Heidi Collins from On Y Go Stamping using a brayer on a dry embossed piece of cardstock. You can see that video here. I had to try it asap, and used it for the front of this card. After dry embossing a piece of Crumb Cake cardstock using the distressed brick embossing folder, I used Crumb Cake ink and a applied it with a brayer.
Here’s a close-up:
What I Did:
- Unless otherwise noted, I used multipurpose liquid glue to adhere layers or pieces together
- Since the ugly won’t show, I used a Textured Notes die to crop the inside of the background DSP so I can use it on a different project
- Then, I adhere the cardstock to the DSP, then adhered those layers to the card base
- After overlapping the bubble die cuts, I adhered them to the embossed cardstock
- I stamped the floral spray using the Delicate Wishes stamp set in Secret Sea ink
- Then I colored the flowers using the bronze blend and added a layer of clear Wink of Stella
- I used the dark Crumb Cake blend to color the leaves
- Then, I cropped it using the coordinating die
- I adhered the floral spray to the die-cut DSP circle and adhered to the front of the card
- After rubbing down a scrap piece of white cardstock using my embossing buddy, I stamped the sentiment from Lovely Arrangements stamp set in VersaMark ink
- Using Secret Sea ribbon, I created a loopy-loop bow, which you can see here, and adhered it together and to the card front using mini-glue dots
- Next, I covered the ink using copper embossing powder (close enough to bronze) and heat set it
- After scouring my label dies, I came across a die from the retired Cheerful Daises die set
- The die was just a bit to small, so I traced the outline of it around the sentiment and fussy-cut it
- I added dimensionals to the back of the sentiment label making sure to straddle the ribbon and adhered it
- I finished the front by adding three Secret Sea Natural Matte Dots
- After adhering the strip of DSP to the inside of the card, I used two sentiments from the Prairie Grass stamp set using Secret Sea ink and adhered it to the inside of the card
With that, I’d finished this coordinated card, envelope, and envelope seal set.
Thank you for stopping by today!
Have a Peachy Day!
Sue
Colors Used:
Supplies Used:
New March Products!


Notes of Spring Stamp Set
Create an adorable card with this stamp set and send it to some-bunny you love! Or use it to craft a scrapbook spread of a moment you hold deer. Whatever you choose to create, this stamp set with woodland friends and useful sentiments is sure to add some springtime joy!
New March OnLine Exclusives:
In addition to the Delicate Dreams product suite I used for this card, there are so many new Online Exclusives which became available on Tuesday, 03/03/2026. Here’s a sampling of my favorites:


Gorgeous textures, layers, and colors in this card, Sue! Your attention to details really elevates your design. Thank you so much for sharing your card with us at TSOT.
Beautiful card with all the textures and layers! Love that DSP!! Thanks for sharing with us at TSOT!
Loving the demension, texture and colors of your beautiful card and nice interpretation of sketch. Thank you for sharing with us at TSOT.
I’m really liking all the texture on this, and all the different layers. Wonderful take on the sketch. Thanks for playing over at TSOT!
I love all the textures and layers on this card. Wonderful use of the sketch! Thanks for playing over at TSOT!