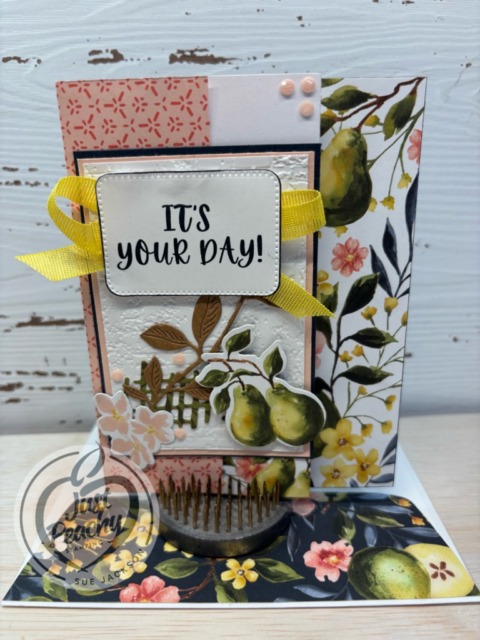
Welcome to the newest Make My Monday bi-weekly challenge #264. Our host, Billie A., chose Add at Least One Flower for the theme. I used border print from the Perfectly Pears DSP, which already has many flowers, but did add more to the front of the card.
When you finish here, please visit the challenge site to see what the rest of the very talented design team members created. Then, don’t forget to upload your creations to our gallery. We look forward to seeing your creations there!
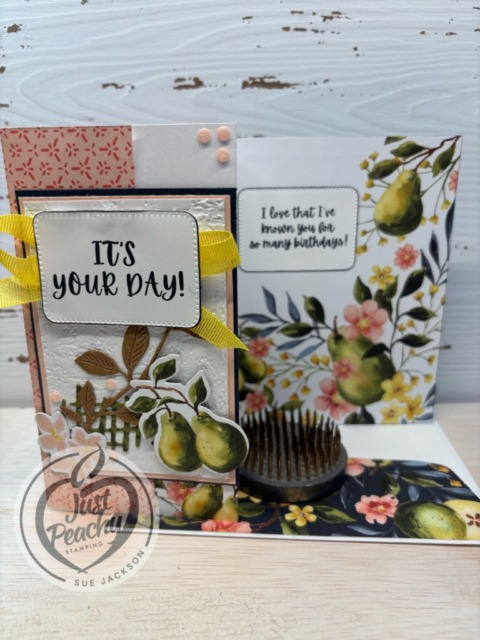
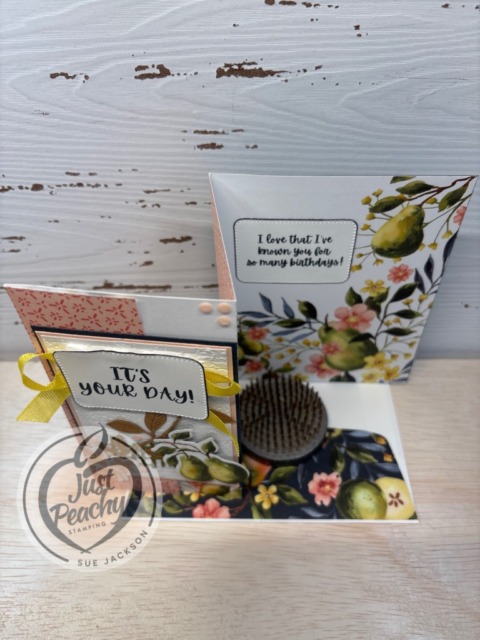
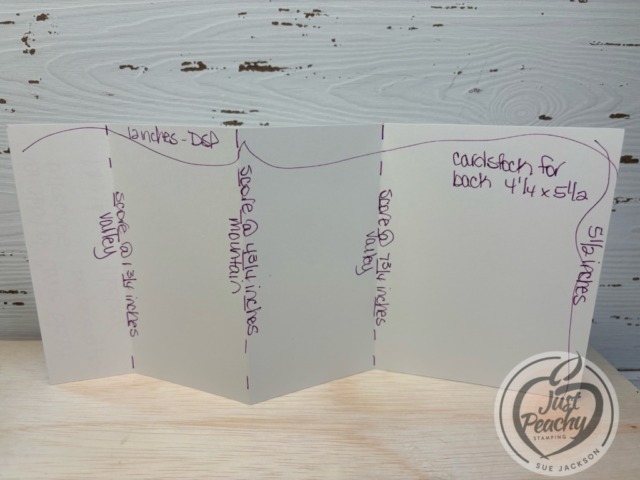
I know I had seen a video for a 4 panel accordion fold using a piece of DSP measuring 5-1/2 by 12 inches. I used it for this card, and for some strange and unknown reason, didn’t write down the source, even though I am fairly certain it was a video tutorial from the annual catalog DSP.
Since the base of this card is DSP, I added a piece of 4-1/4 by 5-1/2 inches piece of cardstock to the back of the last panel of the DSP
You will need a piece of DSP measuring 6 by 2-1/2 inches for the envelope flap
Punch a 1-inch circle from coordinating DSP and run it through the XYRON create-a-sticker for the envelope seal
For this card, I did adhere the front flap to the second flap
I used scraps of Secret Sea and Petal Pink cardstock for the front sentiment layers
I used the exposed brick embossing folder for the white background layer
One of the fabulous features of this pack of DSP is that the dies will crop out the pears and trio of flowers so I didn’t color anything for this card
I cropped the lattice die from a scrap piece of the DSP
Some of the branches in the DSP are Pecan Pie, so I cropped a branch from that cardstock for the front
Both of the sentiments come from the Perfectly Pears stamp set and were stamped using Secret Sea ink
I used one of the Nested Essentials die to crop both of the sentiments and outlined them using the Secret Sea marker
The Loopy Loop Bow:
I was able to watch Mary Deatherage’s, from Stamps -n- Lingers, Perfectly Pears tutorial. In that video, she showed her loopy-loop bow. That’s what I used for the front of my card. I’m bow-challenged and this technique allows me to relatively easily add ribbon without adding the bulk of a tied bow. If you’ve never seen her videos, you owe it to yourself to watch them. I think she’s the Queen of the Collage. Gorgeous cards!!
It doesn’t get much more southern than to say y’all. I still remember the look of astonishment on the faces of my many relatives on Long Island, where I was born and raised, the first time I’d said it in front of them. Of course, I’d lived here three or four years by then. Can you imagine saying y’all with a Long Island accent? Yes, it was that interesting, to say the least.
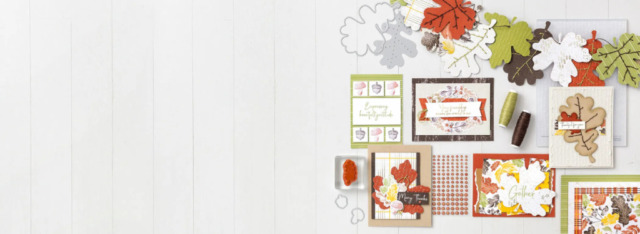
Stampin’ Up! has a fabulous suite for all your Happy Fall projects and cards. While the whole suite is a must-have, the DSP is stunning! I miss real falls, even raking leaves!
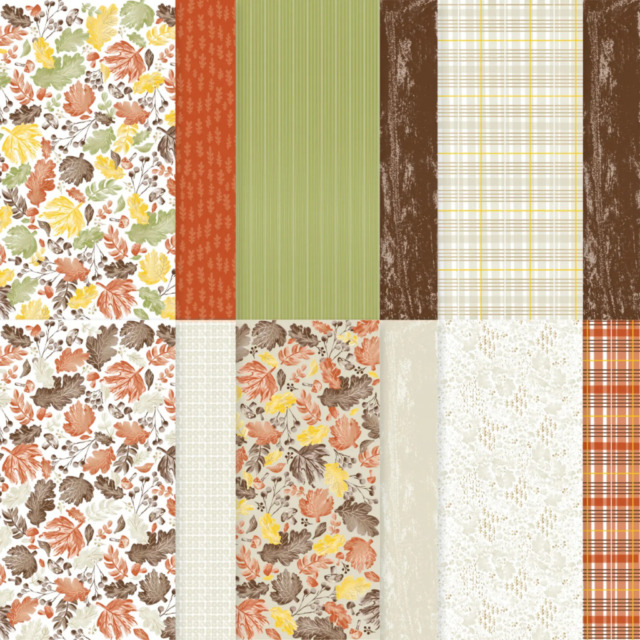
Here’s a close-up of the DSP:
I’ll be posting a slimline card using the plaid DSP pattern on the top row tomorrow. Make sure you come back to see the beautiful gold foil, Basic Beige, and Crushed Curry plaid. Such pretty paper!
If you have any questions, or need a bit of a creative mojo boost, you can reach me at my justpeachystamping@gmail.com.
If you live in the U.S. and don’t already have a Stampin’ UP! demo from whom you order, I would be honored to work with you.
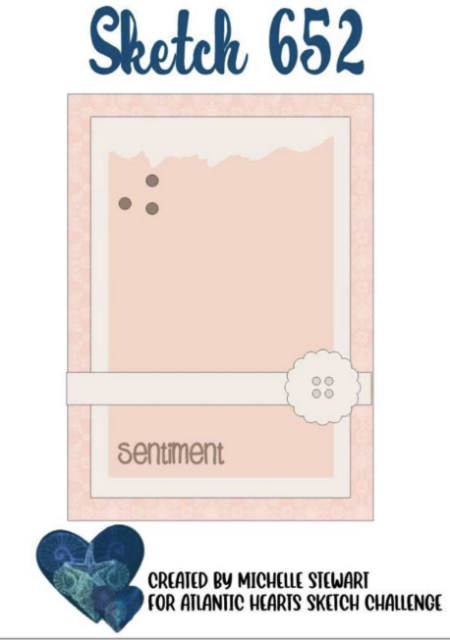
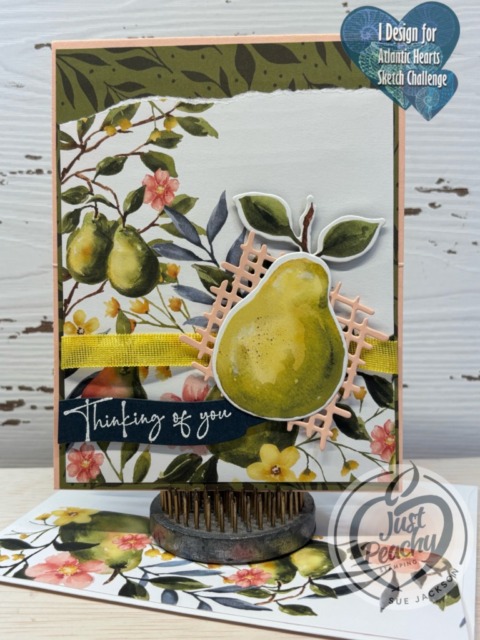
Welcome to Team B’s turn for the Atlantic Hearts Sketch Challenge #650! Starting the creative process with a sketch invites individual takes on the sketch, and this one is no different. This challenge is a weekly event, and we’d all love for you to play along with the sketches and then post your creations to the challenge gallery.
I needed a get well card that a group of people could sign, and I needed it fast. I used the Perfectly Pears bundle and DSP for my card.
First, here’s the challenge sketch:
Here’s the card:
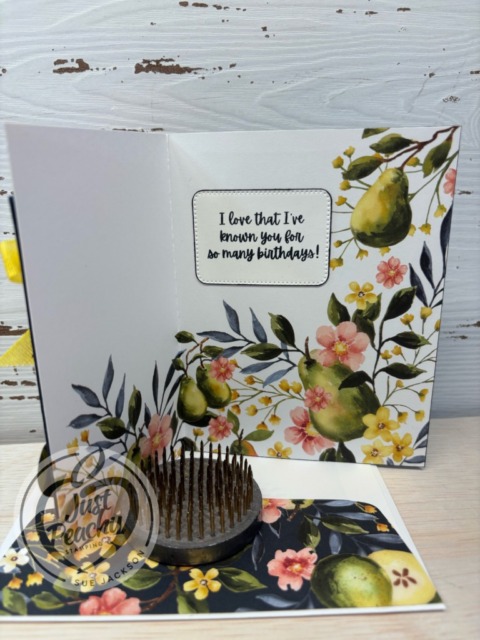
I did add another piece of white cardstock on the top of the inside of the card. However, since it’s blank, I didn’t take a picture of it.
At first, I wasn’t going to get this online exclusive product suite. Then I started seeing gorgeous cards and knew I absolutely needed to get it! I’m so glad I did!
Measurements:
The Petal Pink base measures 11 by 4-1/4 inches, scored at 5-1/2 inches to create a tent card
Trim a piece of the Mossy Meadow patterned DSP (designer series paper) to 4-1/8 by 5-3/8 inches
I trimmed a piece of the pears pattern DSP to 4 by 5-1/4 inches, then tore across the top to follow the sketch
Trim a piece of DSP to 6 by 2-1/2 inches for the envelope flap
Punch a 1-inch circle of coordinating DSP and run it through a XYRON create-a-sticker for the envelope seal
Since this card was used for a co-worker, a group of us needed to sign the card, so I used two pieces of white cardstock trimmed to 4 by 5-1/4 for the inside of the base
I used scraps of Secret Sea and Petal Pink for the sentiment banner and checkerboard-ish square embellishment
One of the fabulous things about this DSP is that the dies crop images from the DSP – love that feature
Letting the Suite Do the Work:
Once I had all my papers trimmed to size, and the embellishments for the front cropped, putting the card together was a cinch
Unless otherwise noted, I used multipurpose liquid glue to adhere pieces together
After wiping down a scrap of Secret Sea cardstock using my embossing buddy, I stamped the sentiment using VersaMark ink
Next, I covered the stamped sentiment using WOW! Basic White embossing powder and heat set it
Then, I trimmed the sentiment to size
After adhering the pears DSP to the Mossy Meadow patterned DSP, I wrapped a piece of Darling Duckling ribbon around the combined DSP and adhered it in the back using tear & tape
I adhered the large pear and leaves together, then adhered that to the Petal Pink cropped piece
I added dimensionals under the pear and under the sentiment banner and adhered them to the front of the card
The inside sentiment was stamped with Secret Sea ink
Then, I adhered the pair of pears to the bottom of the white cardstock, and adhered both white cardstock pieces to the inside of the card
With that, I’d completed this coordinated card, envelope, and envelope seal set
Two Joining Promotion Options for the Month of October!
Join Our Community
Become a Stampin’ Up! demonstrator when you choose one of these amazing Starter Kit offers. (And did we mention your Starter Kit comes with FREE shipping, FREE business supplies, AND a bonus, FREE Paper Pumpkin kit?) Join from October 1 to 31 and experience all the amazing benefits that come with being a demonstrator.
Honestly, I saw this promotion banner and was stunned in a very good way! This deal is amazing, and what’s more there are no other purchase requirements!
Welcome to Just Peachy Stamping by Sue Jackson: an independent Stampin' Up demonstrator.
Through Stampin' Up!, I happily share my love of papercrafting through sales, classes, small stamping group meet-ups and workshops. I think that being a teacher in my "real life", I have a unique approach to sharing my fantastic hobby. I look forward to connecting with you!