Welcome back to the bi-weekly Cardz 4 Galz challenge #261. Debbie, our host for this bi-weekly challenge, chose For a Little Girl for the theme. When you finish here, please visit the challenge site to see what the rest of the design team members created. Then, don’t forget to upload your creations to our gallery. We look forward to seeing your creations there!
My great-niece is 7 years old, so that makes her a little girl, right? I’ve made Halloween cards for her and her 5 year old brother, which will be my design team member post for Cardz 4 Guyz #379 on Tuesday, October 25. After it goes live, I will back link it here.
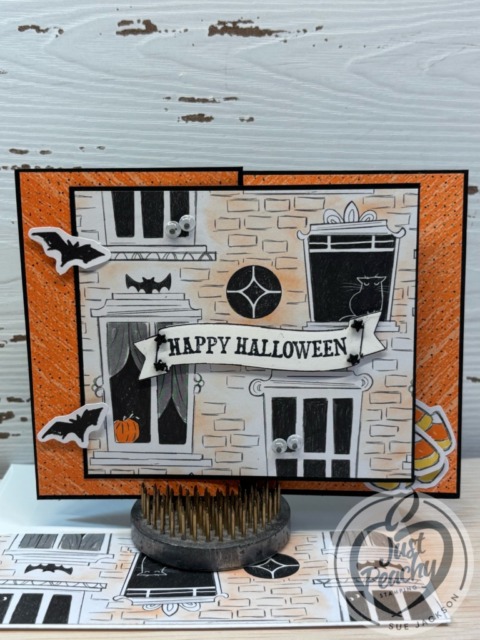
Here’s my double z-fold Halloween card for a 7 year old girl:
I’ve already posted two other Halloween cards using this suite of products which you can see here and here.
As always with a fun fold card, I will be adding this to the Creative Creases Challenge where the theme is always Anything Goes with a Fun Fold.
Here’s My Template:
In addition, I needed to trim a piece of Spooky Sweet DSP (designer series paper) to 6 by 2-1/4 inches for the envelope flap
Next, I punched a 1-inch circle from DSP and ran it through my XYRON create-a-sticker for the envelope seal
Tips & Tricks for Assembly:
I used multipurpose liquid glue to adhere all the pieces together except for the sentiment banner and bats on the front of the card, and the top layer of candy corn pieces on the inside
The bats and candy corn pieces also come from the Spooky Night DSP pack
There’s two 12 x 12 pages of punch-outs for this set ~ cuteness abounds
Googly eyes makes everything cuter, and I used those for the two pairs of eyes on the DSP for the front of the card
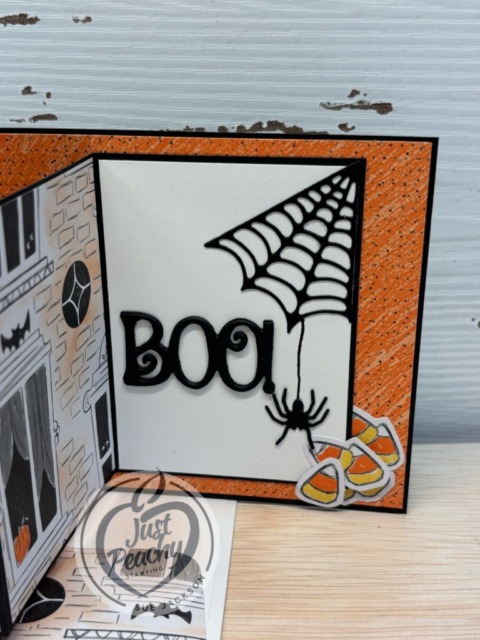
I cropped three layers of the “BOO!” sentiment from black cardstock and layered them together for the inside of the card
The web and spider are also cropped from black DSP and adhered to the inside
I used a black Stamping Write Marker to connect the spider to the web
The black stars on the sentiment banner come from the same suite of products
Since this card would require extra postage, is bulky, and has the googly-eyes, I will be mailing this card and her brother’s card in a padded manila envelope
With that, I’d finished this coordinated card, envelope, and envelope seal set
Two Joining Promotion Options for the Month of October!
Join Our Community
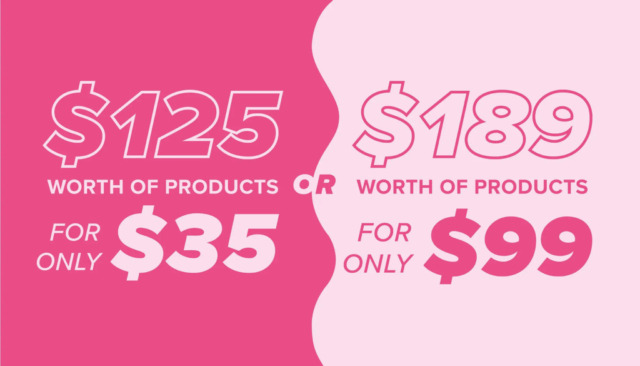
Become a Stampin’ Up! demonstrator when you choose one of these amazing Starter Kit offers. (And did we mention your Starter Kit comes with FREE shipping, FREE business supplies, AND a bonus, FREE Paper Pumpkin kit?) Join from October 1 to 31 and experience all the amazing benefits that come with being a demonstrator.
Honestly, I saw this promotion banner and was stunned in a very good way! This deal is amazing, and what’s more there are no other purchase requirements!
Welcome back to the bi-weekly Cardz 4 Galz challenge. Diane, our host for this #256 challenge, chose Create a Scene for the theme. Since I am obsessed with all things fun fold I was so pleased to create a card with new products. When you finish here, please visit the challenge site to see what the rest of the very talented design team members created. Then, don’t forget to upload your creations to our gallery. We look forward to seeing your creations there!
I used the Spooky Sweet DSP (designer series paper) to create my scene. Here’s my card:
In addition to the Spooky Sweet DSP, I used the Fright Night bundle, both of which are available in the Online Exclusives. I’ve already posted a card using these products, and you can see that card here.
Take a look at this DSP pack:
The first two sheets of this pack are all punch-out images you can use on cards. I used the princess and the bat for my card.
The Fright Night bundle, is just as adorable.
As always with a fun fold card, I will be adding this to the Creative Creases Challenge where the theme is always Anything Goes with a Fun Fold.
Measurements:
Trim a piece of Petunia Pop cardstock to 8-1/2 by 5-1/2 inches, scored at 2-1/8 and 4-1/4 inches to create a z-fold card
Next, trim a piece of Basic Black cardstock to 4-1/8 by 5-3/8 inches for the mat on the front of the card
Trim a piece of white cardstock to 4-1/8 by 5-3/8 inches for the inside of the card
The Spooky Sweet scene DSP measures 4 by 5-1/4 inches
I trimmed the checked DSP for the inside to 1/2 inch by 4 inches
I trimmed a piece of Spooky Sweet DSP to 6 by 2-1/2 inches for the envelope flap
Finally, I punched a 1-inch circle of DSP and ran it through my XYRON create-a-sticker for the envelope seal
Stamping & Adhering:
Unless otherwise noted, I used multipurpose liquid glue to adhere pieces together
Adhere the scenic DSP to the black cardstock mat
Add liquid glue to the left side of the black cardstock mat and adhere it to the front flap of the base of the card
Make sure you only adhere the left half of the cardstock mat or you won’t be able to open the card
Using the Fright Night stamp set, stamp the front sentiment on a scrap of white cardstock
Crop it using the Fright Night banner die
Punch out the princess and bat from the sheet of pre-made images
Add dimensionals on the backside of the princess and the banner and adhere to the scene
Add one dimensional to the backside of the bat based on its position on the banner and adhere
Using the Fright Night stamp set, stamp the inside image on the trimmed white cardstock
Adhere the strip of DSP to the bottom of the white cardstock
Adhere the white cardstock to the base of the card
With that, I’d finished this easy-peasy not so spooky Halloween card
Who would love a sale on select In Color Merchandise?
We all would, right?
Here are the Promotion Details:
Sales Period: August 5–31
Ordering Deadlines
Phone: August 29, 2025, at 6:59 p.m. (MT)
Online: August 31, 2025, at 11:59 p.m. (MT)
Sale includes select inks, cardstock, Designer Series Paper, embellishments, and other products that include these new In Colors. Only products featured on the 2025–2027 In Colors page are included in this promotion.
Some products are excluded from the sale, including the Month by Month Album Retreat 2025 kit (167338).
Products are available only while supplies last.
If you live in the U.S. and don’t already have a Stampin’ UP! demo from whom you order, I would be honored to work with you. You can reach me at my justpeachystamping@gmail.com.
I am honored to be a guest designer for the July, 2025 edition of the Creative Creases Challenge, where it’s always Everything Goes with a Fun Fold. When you are finished here, please visit the challenge site. Each and every design team member is extremely talented and there’s always new inspiration with each challenge. I hope you play along and then post your creation in the gallery.
Here’s my Pop-up Shelf Card:
This DSP (designer series paper) is fantastic in and of itself, but it also includes two
sheets of pop-out die cuts, like the two on the inside shown next. Also, did you notice the googly-eyes? How stinking cute are they!
I saw the tutorial reel on FaceBook posted by the West Coast Papercrafter. You can see her video here.
Measurements:
The Westcoast Papercrafter’s video gives all the measurements and directions needed.
I made a template to store in my mini-binder with all my other fun fold templates. You can see my template below:
I trimmed a piece of DSP to 6 by 2-1/2 inches for the envelope flap
Next, I punched a 1-inch circle of coordinating DSP and ran it through my XYRON create-a-sticker for the envelope seal
Things I Learned:
The video linked above to the West Coast Papercrafter’s video is easy to follow and will allow you to follow along to create the card.
Here’s somethings I learned or changed along the way:
I added mats to the DSP pieces for contrast and the Granny Apple Green and Pumpkin Pie colors coordinate with the DSP patterns
The measurements for the mats are on my template
I had to add googly-eyes to the little eyes in the windows on the DSP, and I will include the link to the Amazon set of googly-eyes below
This card will be hand-delivered, so I didn’t need to worry about extra postage, but with the added bulk of the mats, googly-eyes, and the few dimensionals I used I would definitely have to add extra postage
I always use Adtech removable tape to dry-fit card pieces together, however I did mess up when I adhered the white cardstock to the base
It’s important to remember that the card will not lay flat when opened
Using multipurpose liquid glue will give you a few seconds to move the white cardstock
However, if you don’t realize that you made a mistake until after the glue has settled (not that I am saying I did that), remember that you can use your heat tool to loosen the adhesive then use a crafting/thin spatula to very, very carefully lift the white cardstock off the base of the card
If you do need to do that, you might need to add a strip of DSP measuring 5/8 by 4 inches to the bottom of the inside of your card – just saying
For the EEK! on the front, I cropped the word three times and stacked them together instead of using dimensionals
I had so much fun creating this coordinated card, envelope, and envelope seal set!
Who would love a sale on select In Color Merchandise?
We all would, right?
Here are the Promotion Details:
Sales Period: August 5–31
Ordering Deadlines
Phone: August 29, 2025, at 6:59 p.m. (MT)
Online: August 31, 2025, at 11:59 p.m. (MT)
Sale includes select inks, cardstock, Designer Series Paper, embellishments, and other products that include these new In Colors. Only products featured on the 2025–2027 In Colors page are included in this promotion.
Some products are excluded from the sale, including the Month by Month Album Retreat 2025 kit (167338).
Products are available only while supplies last.
If you live in the U.S. and don’t already have a Stampin’ UP! demo from whom you order, I would be honored to work with you.
Click here for the Amazon link for the googly-eyes set.
Again, thanks for stopping by!
About Me
Welcome to Just Peachy Stamping by Sue Jackson: an independent Stampin' Up demonstrator.
Through Stampin' Up!, I happily share my love of papercrafting through sales, classes, small stamping group meet-ups and workshops. I think that being a teacher in my "real life", I have a unique approach to sharing my fantastic hobby. I look forward to connecting with you!