Welcome to Team B’s turn for the Atlantic Hearts Sketch Challenge #644! Starting the creative process with a sketch invites individual takes on the sketch, and this one is no different. This challenge is a weekly event, and we’d all love for you to play along with the sketches and then post your creations to the challenge gallery.
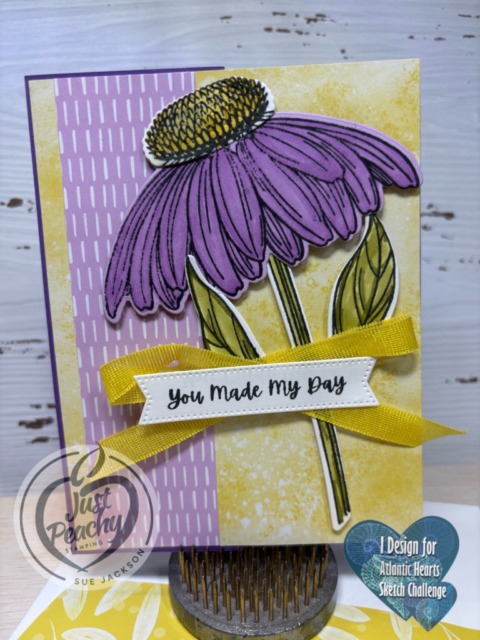
Here’s my Coneflower Celebrations card:
This is a pretty straightforward z-fold card. If you can score and trim paper, this fun fold is for you!
As always with a fun fold card, I will be adding this to the Creative Creases Challenge where the theme is always Anything Goes with a Fun Fold.
Measurements:
The Gorgeous Grape base measures 8-1/2 by 5-1/2 inches, scored at 2-1/8 and 4-1/4 inches
Trim a piece of Darling Duckling 6 x 6 inch DSP (designer series paper) to 4-1/8 by 5-3/8 inches for the card front
You need another piece of Darling Duckling DSP trimmed to 2-1/2 by 6 inches for the envelope flap, which needs to be adhered and trimmed
Punch a 1-inch circle from the Fresh Freesia DSP for the envelope seal, and run it through the XYRON create-a-sticker
Trim a piece of Fresh Freesia 6 x 6 inch DSP to 201/2 by 5-3/8 inches for the panel on the front of the card
Trim a piece of white cardstock to 4-1/8 by 5-2/8 inches for the inside of the card
You will also need another piece of white cardstock for the stem, leaves, center of the flower, and the sentiment
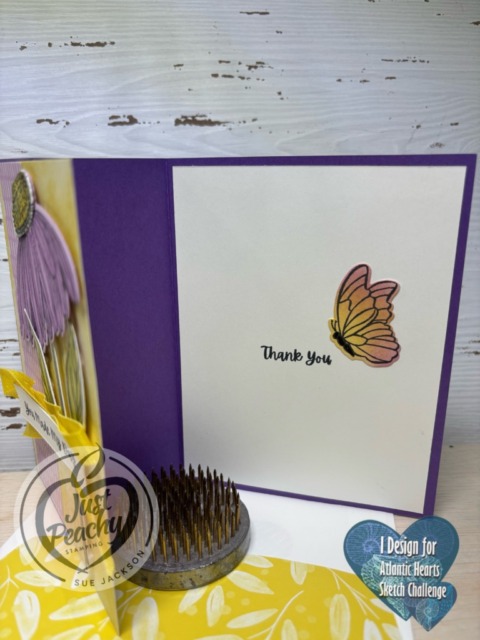
I already had the butterfly cropped for another project and decided to use it here.
Putting the Card Together:
I stamped everything using Momento Tuxedo Black ink
Unless otherwise noted, I used multipurpose liquid glue to adhere the pieces together
Stamp the flower on Fresh Freesia cardstock and color using the multiple layers of the Fresh Freesia blends combo
Stamp the stem and leaves, then color using the Old Olive blends combo
After stamping the center of the flower, I colored it using Daffodil Delight and Darling Duckling blends combos
The inside and outside sentiments come from the Coneflower Celebrations stamp set
Use the coordinating Coneflower Celebration dies to crop the flower, center, stem, and leaves
Crop the outside sentiment using a banner from the Stylish Shapes die set
Adhere the center to the top of the flower
Add dimensionals to the back of all the flower pieces and the senteiment banner
Adhere the Fresh Freesia DSP to the Darling Duckling DSP
Add glue to just the left back side of the Darling Duckling DSP, then adhere to the Gorgeous Grape base
Adhere the white inside cardstock to the base of the card
Adhere the butterfly near the sentiment
Position the coneflower pieces and adhere using the dimensionals
Add a loopy loop bow from Darling Duckling ribbon using mini-glue dots
Add the sentiment on top of the loopy loop bow
With that, I’d finished this coordinated card, envelope, and envelope seal
The Loopy Loop Bow:
I was able to watch Mary Deatherage’s, from Stamps -n- Lingers, Perfectly Pears tutorial. In that video, she showed her loopy-loop bow. That’s what I used for the front of my card. I’m bow-challenged and this technique allows me to relatively easily add ribbon without adding the bulk of a tied bow. If you’ve never seen her videos, you owe it to yourself to watch them. I think she’s the Queen of the Collage. Gorgeous cards!!
Time is running out for the 2025 – 2027 In Color SALE!
Who would love a sale on select In Color Merchandise?
We all would, right?
Here are the Promotion Details:
Sales Period: August 5–31
Ordering Deadlines
Phone: August 29, 2025, at 6:59 p.m. (MT)
Online: August 31, 2025, at 11:59 p.m. (MT)
Sale includes select inks, cardstock, Designer Series Paper, embellishments, and other products that include these new In Colors. Only products featured on the 2025–2027 In Colors page are included in this promotion.
Some products are excluded from the sale, including the Month by Month Album Retreat 2025 kit (167338).
Products are available only while supplies last.
Pre-Order for SU! Demos for the upcoming September – January Mini Catalog and the September online exclusives release is ongoing. I’ve already gotten some products, and just placed an order for more. In the meantime, here’s some sneak peek cards for you:
If you live in the U.S. and don’t already have a Stampin’ UP! demo from whom you order, I would be honored to work with you. You can reach me at my justpeachystamping@gmail.com.
Welcome back to the monthly Stampin’ UP! Demonstrators Fun Fold Blog Hop. If you love fun folds, you’ve come to a hop filled with really great projects by some very talented fellow demonstrators. When you finish here, I hope you will hop along with the rest of the demos using the links below.
It’s just a given that fun fold cards also post to the Creative Creases challenge. Debbie Mageed at Secret Stamper coordinates both this hop and the challenge. Hopefully, you will be inspired to upload your own fun fold project to the challenge!
Here’s my double-easel fun fold card:
The Thinking of You sentiment is so versatile and I don’t know yet what I will need for the reverse sentiment. Therefore, I left the back panel blank so I can add that sentiment later.
This card was inspired by a card posted to Pinterest by Mikaela Titheridge, a UK Stampin’ Up! Demo. Here’s her gorgeous card:
Mikaela’s Pinterest post said she was inspired by a card from Emma Goddard, another UK Stampin’ Up! Demo. It just so happens that my upline, Brian King from Stamp with Brian, knows Emma and he was able to get her card and dimensions for me. Woo-Hoo!
Here’s Emma’s card:
Measurements:
Here are the measurements I received for Emma’s card:
Cardstock & DSP: Blackberry Bliss 11″ x 4 1/4″ Blackberry Bliss 5 1/2″ x 4 1/4″ Blackberry Bliss 3 1/2″ x 2 3/8″ Basic White 3 3/8″ x 2 1/4″ DSP Scene Design 5 1/4″ x 4″ DSP Blackberry Bliss 5 1/4″ x 4″ Thick Basic White 6″ x 2 1/8″ (scored at 1 1/2″ & 3″) Thick Basic White 3″ x 2 1/8″ Garden Green – Die cut with flower stems x1 DSP Scene Design 7cm x 5cm or 2 7/8″ x 2″ DSP Blackberry Bliss 7cm x 5cm or 2 7/8″ x 2″ Basic Black – Scrap for sentiment
Double-eas
What I Did:
I used the floral Irresistible Designs 12 x 12 Specialty DSP (designer series paper) for the front and inside smaller easel
Using a blending brush and the Secret Sea ink pad, I added color to the floral DSP
HINT: I really wanted more of a Cloud Cover color, so I added light layers of ink first and then darkened as I went
Don’t forget to wipe down the DSP as you color so the white pattern shines through as it resists the ink
I did color the inside easel DSP darker so I’d have a contrast with the front of the card
The three colors I used are Basic White, Cloud Cover, and Secret Sea
I used the Impressions Abloom dies for the white and Secret Sea sprays of leaves, as well as cropping the front ovals
The butterfly comes from the Coneflower Celebrations stamp and die set
The sentiment comes from the Beautiful Motifs stamp set, which I cropped using the Stylish Shapes banner die
Back to the SU! Demos Fun fold Blog Hop:
We all hope you will follow the links below and hop along with us. There’s so much inspiration to be found here. We’d love to see what inspires you to create a fun fold as well. Don’t forget to upload it to the Creative Creases challenge!
Our suite collections are known (and loved!) for their coordination, quality, and style. With stamps, tools, patterned paper, and embellishments in stunning colors and unique designs, suites make creativity simple and fun. Shop the individual products or buy as a full collection!
I have two orders making their way to me and I couldn’t be more excited! Some of the products are pre-orders for the upcoming additions to the Online Exclusives!
If you’d like some help getting the most out of your Buy One, Get One 50% OFF sale, please contact me for assistance.
Promotion Details
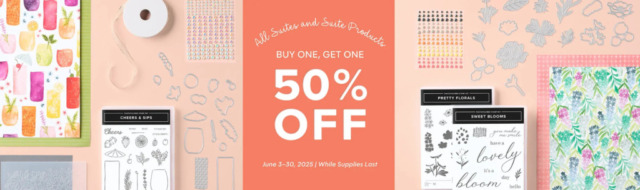
Sales Period: June 3–30, 2025
Ordering Deadlines
Phone: June 30, 2025, at 6:59 p.m. (MT)
Online: June 30, 2025, at 11:59 p.m. (MT)
All available suites and suite products from the 2025–2026 Annual Catalog and Online Exclusives are buy one, get one 50% off.
When you shop the sale, the 50% off discount will apply to the lower-priced item (for example, if you buy a suite collection and a stamp set from a suite, the suite would be full price, and the stamp set would be 50% off).
Suite collections are available if all items are in stock; if all items are not in stock, you can still shop the available suite products.
You don’t have to buy a suite and suite products all from the same suite collection for the discount to apply. You can buy any suite products from any suite.
The discount will appear in your cart once you’ve added two items within the sale parameters to your cart.
Products are available only while supplies last.
If you live in the U.S. and don’t already have a Stampin’ UP! demo from whom you order, I would be honored to work with you. If you’d like some help getting the most out of your Buy One, Get One 50% OFF sale, please contact me for assistance.
Welcome back to the bi-weekly Cardz 4 Galz # 252. Our host for this edition of the challenge, Debbie , chose Easel Card for the theme. Since I am obsessed with all things fun fold I was so pleased to create a card with new products. When you finish here, please visit the challenge site to see what the rest of the very talented design team members created. Then, don’t forget to upload your creations to our gallery. We look forward to seeing your creations there!
Here’s my Coneflower Celebrations easel card:
I’m also going to enter this card in the Creative Creases Challenge, where it’s always Anything Goes with a Fun Fold.
Measurements:
The Secret Sea base measures 11 by 4-1/4 inches, scored at 2-3/4 and 5-1/2 inches
Trim a piece of the Cloud Cover 6 x 6 inch DSP (designer series paper) to 5-3/8 by 4-1/8 inches
Trim a piece of white cardstock to 4-1/8 by 5-3/8 inches
I have scraps of all sizes of white cardstock and was able to use scraps to stamp all of the images on the front from scraps
Punch a 1-inch circle from Secret Sea 6 x 6 inch DSP and run it through the XYRON create-a-sticker for the envelope seal
Trim a piece of Secret Sea cardstock to 4-1/8 by 3/4 inch for the inside easel stop piece
What I Did:
Stamping, Coloring, & Cropping:
I used the Coneflower Celebration bundle for all of the stamped images
After stamping all of the coneflower pieces, I colored them using the blends combos in Darling Duckling, Old Olive, and Pecan Pie
Stamp the on a scrap of white cardstock for the front and on the white cardstock piece for the inside
Using Secret Sea ink, randomly stamp splotches using first and second generation stamping around both sentiments
Stamp splotches using first and second generation stamping on the envelope flap
Crop the sentiment using a Nested Essentials die
Crop the coneflower pieces for the front
Trim and add a piece of the adhesive foam strip to the back of the Secret Sea cardstock for the easel stopper
Crop the stopper piece using the circles die from the Coneflower Celebration die set
HINT: When you poke out the circles from the cardstock/adhesive foam piece, keep the circles because they form perfectly sized dimensionals for the flower pieces
Assembly:
Use multipurpose liquid glue to adhere the flower pieces together
Add dimensionals to the back of the flower pieces
Add Secret Sea faux linen ribbon to the card
HINT: to save on ribbon and bulk, use the images below to help you adhere the ribbon using tear-&-tape
Adhere the Cloud Cover DSP to the bottom half of the base of the card
HINT: Do not adhere the top half of the DSP or you won’t be able to create the easel
Adhere the coneflower to the front of the card making sure the dimensionals straddle the ribbon
Adhere the sentiment making sure to straddle the coneflower
Add three Secret Sea flat pearls to the front of the card
Adhere the white cardstock to the inside of the card using multipurpose liquid glue
The placement of the easel stopper depends on your desired steepness of the front easel part
HINT: I usually like to place the stopper about an inch from the crease of the base
With that, I’d finished this coordinated card, envelope, and envelope seal set
Our suite collections are known (and loved!) for their coordination, quality, and style. With stamps, tools, patterned paper, and embellishments in stunning colors and unique designs, suites make creativity simple and fun. Shop the individual products or buy as a full collection!
I already have my next order ready to go, and I’m definitely taking advantage of the sale!
Here are All the Details:
Sales Period: June 3–30, 2025
Ordering Deadlines
Phone: June 30, 2025, at 6:59 p.m. (MT)
Online: June 30, 2025, at 11:59 p.m. (MT)
All available suites and suite products from the 2025–2026 Annual Catalog and Online Exclusives are buy one, get one 50% off.
When you shop the sale, the 50% off discount will apply to the lower-priced item (for example, if you buy a suite collection and a stamp set from a suite, the suite would be full price, and the stamp set would be 50% off).
Suite collections are available if all items are in stock; if all items are not in stock, you can still shop the available suite products.
You don’t have to buy a suite and suite products all from the same suite collection for the discount to apply. You can buy any suite products from any suite.
The discount will appear in your cart once you’ve added two items within the sale parameters to your cart.
Products are available only while supplies last.
If you live in the U.S. and don’t already have a Stampin’ UP! demo from whom you order, I would be honored to work with you.
Welcome to Just Peachy Stamping by Sue Jackson: an independent Stampin' Up demonstrator.
Through Stampin' Up!, I happily share my love of papercrafting through sales, classes, small stamping group meet-ups and workshops. I think that being a teacher in my "real life", I have a unique approach to sharing my fantastic hobby. I look forward to connecting with you!