Welcome to the February Sparkles Christmas Challenge #181! I can’t believe it’s already February ~ what happened to January and the somewhat good weather for Central Florida? The wind chills this weekend are in the teens so we are under severe weather/freeze warnings. Craziness!
Please check out the challenges page for the creations by the other very talented design team members. When you’ve created your own card using our theme, please don’t forget to upload them to the challenges. We’d love for you to play along.
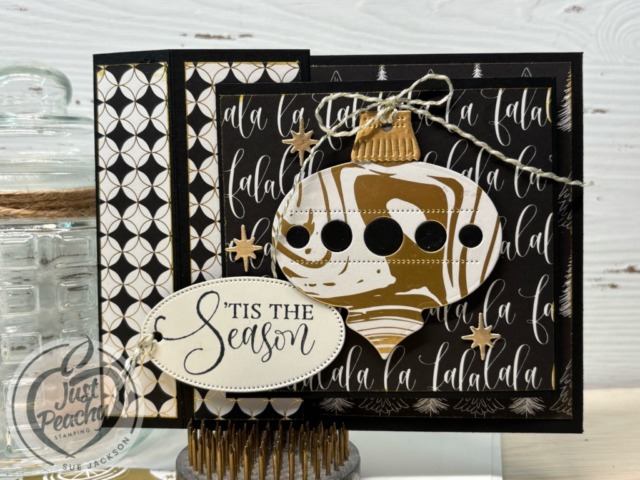
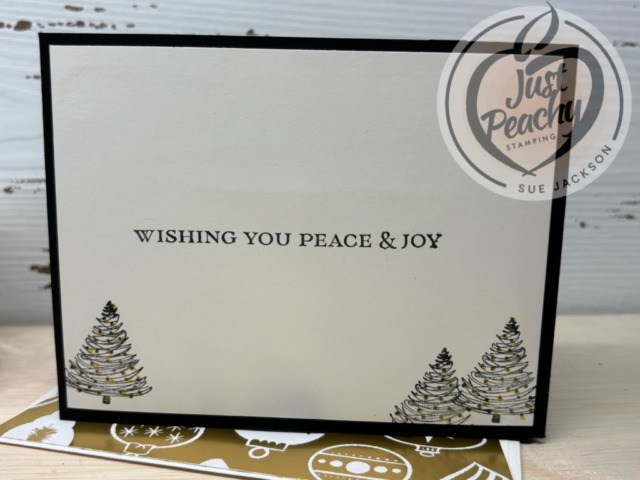
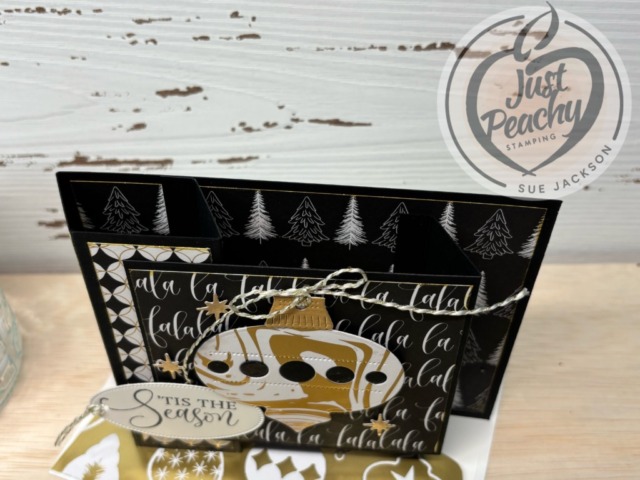
Dawn, our host for the Sparkles Christmas Challenge, chose Baubles for the theme. I used the Modern Christmas suite and created a double box fold card.
Here’s my card:
I’ve already posted cards using this same fold, and you can see them here, here and here.
I originally found this card on the Wandering Stamper’s YouTube channel. You can see that tutorial here.
As always with a fun fold card, I will be adding this to the Creative Creases Challenge where the theme is always Anything Goes with a Fun Fold.
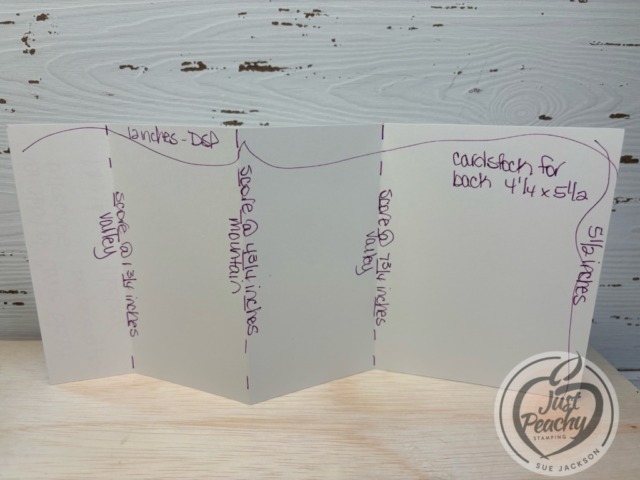
Template:
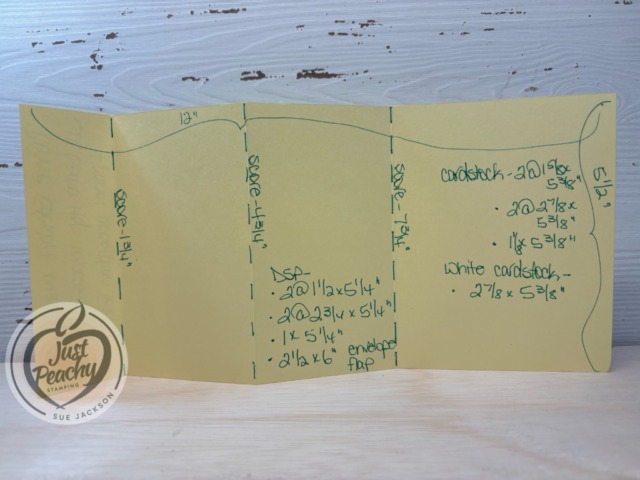
Of course, I had to make a template for this fun fold, which you can see below:
Hints:
I find it much easier to watch a video than trying to follow written directions, so I highly recommend you watch the Wandering Stamper’s video after you use the above template to trim your papers
Another thing I find that works for me is to trim all my papers before starting anything else on the card
Once all the pieces are trimmed, I can add the DSP (designer series paper) to the envelope flap and put all the pieces in the envelope until I can finish it
Since this card will be hand-delivered, I didn’t need to worry too much about the bulkiness of the card
If you do need to mail the card, you very well might have to use extra postage even without using any dimensionals., ribbon, or enamel dots
I’ve been making class sets of Valentine’s Day cards for my current second-grade great-niece and current kindergarten great-nephew for a few years. This year, I will be using the Endless Love Suite. Even though the DSP is currently unavailable, the bundle is still available and I will be busy using it for the next 10 days or so. It’s so much easier to figure out a couple of designs for each class and just mass-produce the cards. I use the Basic White Note Cards & Envelopes, and cut each notecard in half for a mini-postcard Valentine.
Here’s a look at the bundle and note cards:
This is a Two-Step Stampin’ set; it allows you to layer two or more images to create one final image with extra texture and dimension in the colors you want.
DETAILS – Includes the Endless Love Stamp Set and Endless Love Dies – 16 photopolymer stamps – Suggested clear blocks (sold separately): b, c, d, h – Two-Step – Also available in French – 13 dies – Largest die: 3-3/4″ x 4-1/4″ (9.5 x 10.8 cm) – Use with a Stampin’ Cut & Emboss Machine (sold separately)
If you live in the U.S. and don’t already have a Stampin’ UP! demo from whom you order, I would be honored to work with you. You can reach me at my justpeachystamping@gmail.com.
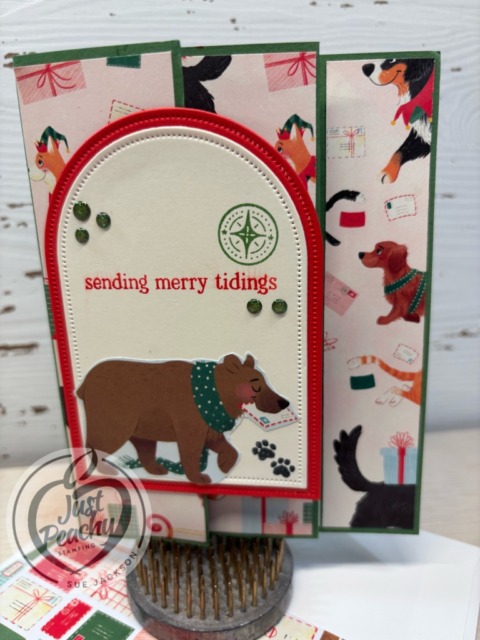
Billie A., our host for the Sparkles Christmas Challenge, chose Animals & a Tree for the theme. I used the same fun fold I’ve already used so many times for Christmas and New Year’s cards, but I just love it for using 5-1/2 by 12 inch pieces of DSP (designer series paper).
Please check out the challenges page for the creations by the other very talented design team members. When you’ve created your own card using our theme, please don’t forget to upload them to the challenges. We’d love for you to play along.
Here’s my card:
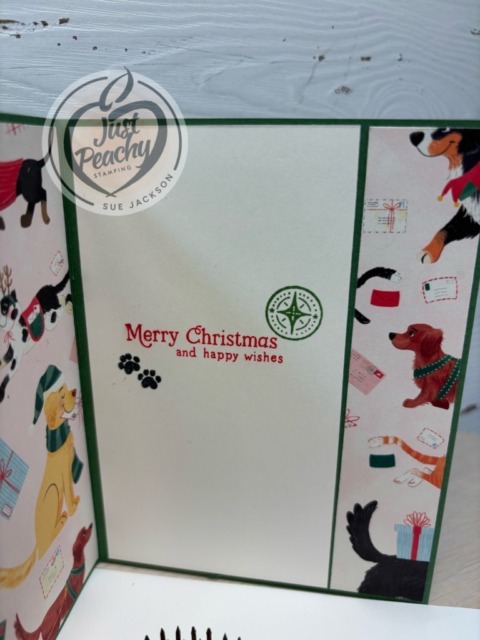
I used the Beary Christmas DSP and the punch from a few years ago. I needed to fussy cut the inside tree and baby polar bear. Both sentiments come from the Beary Christmas stamp set.
I’ve posted so many cards using this fold, and you can see some of them here, here, here, and here.
The Template and More:
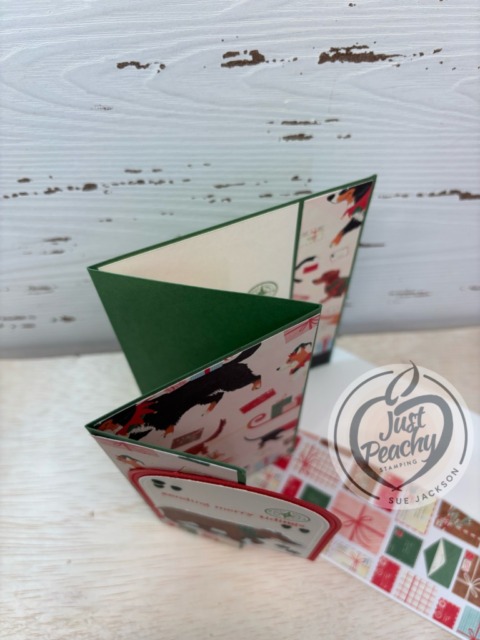
I know I had seen a video for a 4 panel accordion fold using a piece of DSP measuring 5-1/2 by 12 inches. I used it for this card, and for some strange and unknown reason, didn’t write down the source, even though I am fairly certain it was a video tutorial from the annual catalog DSP.
Since the base of this card is DSP, I added a piece of 4-1/4 by 5-1/2 inches piece of cardstock to the back of the last panel of the DSP
You will need a piece of DSP measuring 6 by 2-1/2 inches for the envelope flap
Punch a 1-inch circle from coordinating DSP and run it through the XYRON create-a-sticker for the envelope seal
For this card, I did adhere the front flap to the second flap after adding the ribbon
In order for the DSP to not bend after adding the ribbon, I adhered two pieces of cardstock measuring 1/2 by 5-1/2 inches long to either side of the first fold
This explains why I adhered the first fold closed
I used the Everyday Arches dies and to crop the white, Real Red, and the DSP layers
Then, I ran the outside Real Red arch through the Cut & Emboss machine using the Birch Wood embossing folder to add texture and interest
This card is bulky and will probably need extra postage, however it will still fit inside a Stampin’ Up! medium envelope
Because of the bulk, I only used dimensionals to adhere the sentiment on the front, which I cropped using the Stylish Shapes die
I used a mini-glue dot to secure the bow
Other than those two things, I used multipurpose liquid glue to adhere everything else together
With that, I’d finished this coordinated card, envelope, and envelope seal set.
It’s time for one of our favorite promotions—BONUS DAYS! Because do you know what’s a great deal? Getting rewarded for all the crafting supplies you’re already going to buy! When you shop between January 6 and February 2 and spend $50 USD | $60 CAD, you will earn a $5 USD | $6 CAD coupon! Make sure you save all your coupons because you can redeem them (and we mean ALL of them) between February 3 and 28. And don’t forget—each purchase earns you Stampin’ Rewards, so that’s even more bang for your buck!
There’s no limit to how many coupons you can earn! I already have a pretty substantial order in my cart, and knowing that I will earn Rewards and coupons on it makes me so happy!
Welcome to the October, 2025 edition of the Sparkles Christmas Challenge # 178! Thank you very much for all the participants for our October challenge! Our host for this month’s challenge, Kate, chose Festive Wear for the theme. When you get finished here, I hope you will visit the challenge site to view the creations from the very talented members of our design team. After you’ve created your own themed card, please don’t forget to upload it to our gallery.
Here’s my Jolly Delivery Festive Wear card:
This North Pole Delivery 12 x 12 inch Specialty DSP (designer series paper) is so stinking cute! This four panel card can be made with one 6″ x 12″ piece of the DSP.
It’s just a given that fun fold cards also post to the Creative Creases Challenge. Debbie Mageed at Secret Stamper coordinates both this hop and the challenge. Hopefully, you will be inspired to upload your own fun fold project to the challenge!
My Template & Hints:
While watching Connie’s video I wrote down the measurements, then created a template.
Here’s the template:
Hints:
I didn’t use the cardstock mats for this card, so I used those measurements to trim the DSP
Don’t forget to punch a 1-inch circle and run it through the XYRON create-a-sticker for the envelope seal
The base is Garden Green with a Very Vanilla piece on the last panel as well
I used Poppy Parade and Very Vanilla for the arches
BIG HINT: If you want your DSP patterns to line-up and match from the front to the back you need to trim with the reverse side up – trust me on that hint as I may or may not have had a problem when trimming
The inks are Poppy Parade, Garden Green and Tuxedo Black
I fussy cut the jolly bear for the front of the card
I need three Christmas cards for my two great-nieces and one for my great-nephew, and am planning to use this stamp and die set bundle with the DSP for those cards
I only used multipurpose liquid glue to adhere the pieces together since dimensionals would’ve made it much bulkier
This card will require extra postage, but will fit in a medium size SU! envelope
With that, I’d finished this coordinated card, envelope, and envelope seal set.
It doesn’t get much more southern than to say y’all. I still remember the look of astonishment on the faces of my many relatives on Long Island, where I was born and raised, the first time I’d said it in front of them. Of course, I’d lived here three or four years by then. Can you imagine saying y’all with a Long Island accent? Yes, it was that interesting, to say the least.
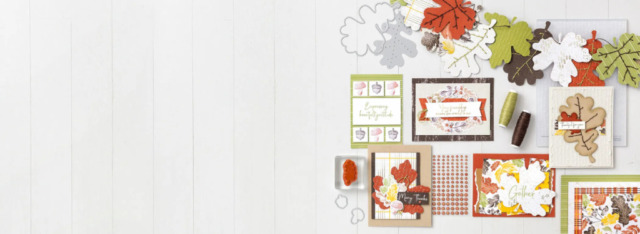
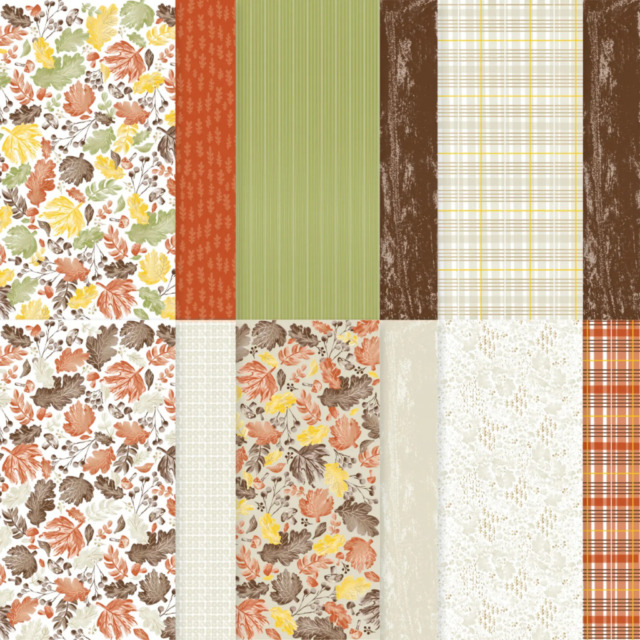
Stampin’ Up! has a fabulous suite for all your Happy Fall projects and cards. While the whole suite is a must-have, the DSP is stunning! I miss real falls, even raking leaves!
Here’s a close-up of the DSP:
I’ll be posting a slimline card using the plaid DSP pattern on the top row next week. Make sure you come back to see the beautiful gold foil, Basic Beige, and Crushed Curry plaid. Such pretty paper!
If you have any questions, or need a bit of a creative mojo boost, you can reach me at my justpeachystamping@gmail.com.
If you live in the U.S. and don’t already have a Stampin’ UP! demo from whom you order, I would be honored to work with you.
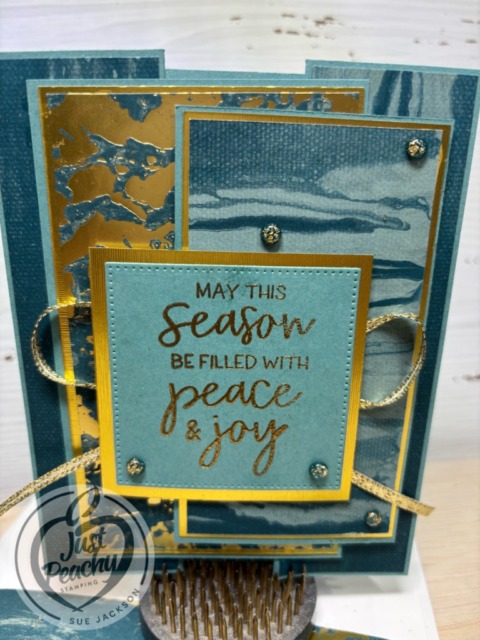
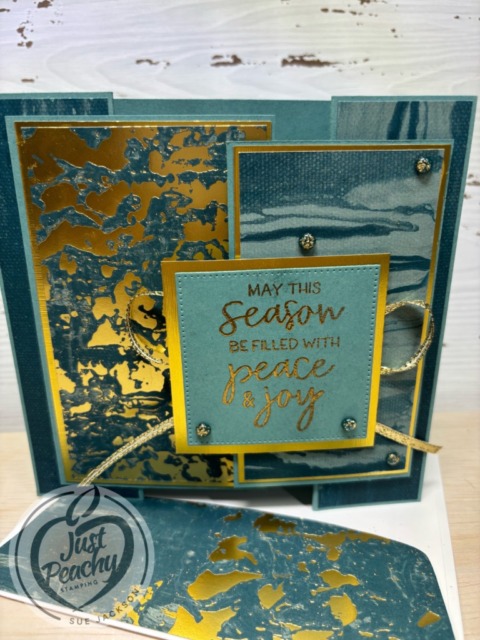
Welcome to the October, 2025 edition of the Sparkles Christmas Challenge # 177! Thank you very much for all the participants for our September challenge! Our host for this month’s challenge, Helen, chose Non-traditional Colors for the theme. When you get finished here, I hope you will visit the challenge site to view the creations from the very talented members of our design team. After you’ve created your own themed card, please don’t forget to upload it to our gallery.
Here’s my gold, Pretty Peacock, and Lost Lagoon card:
As always with a fun fold card, I will be adding this to the Creative Creases Challenge where the theme is always Anything Goes with a Fun Fold.
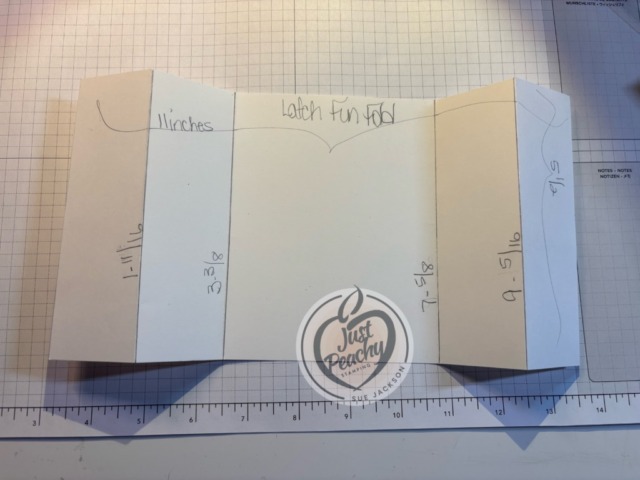
Yet another latch fold card:
As you probably already know, I love the latch fold card! Once you’ve created a couple of these cards, you can adjust the front to your heart’s content! You can see a couple of my other latch fold cards here, and here, and here. I’m also going to be posting another latch fold card on Friday as a guest designer for the Creative Creases Challenge. Please come back for that one as well.
Here’s the basic template I use for the latch fold card:
Heat-embossing HINTS:
One of the most important steps when using embossing powder is to wipe down the cardstock using your embossing buddy, which is available in the Embossing Additions Tool kit
Another important thing to remember is to use the sticky end of your Take Your Pick tool to remove stray flecks of embossing powder before heat embossing
Make sure to let your embossed sentiments dry completely before trying to crop the sentiments, otherwise you might smear your beautiful embossed sentiment
While my heat tool is warming up (especially helpful with metallic powders) I will warm the underside of the cardstock to help keep the warping to a minimum
The Loopy Loop Bow:
I was able to watch Mary Deatherage’s, from Stamps -n- Lingers, Perfectly Pears tutorial. In that video, she showed her loopy-loop bow. That’s what I used for the front of my card. I’m bow-challenged and this technique allows me to relatively easily add ribbon without adding the bulk of a tied bow. If you’ve never seen her videos, you owe it to yourself to watch them. I think she’s the Queen of the Collage. Gorgeous cards!!
This post is short, but hopefully sweet and helpful. As Robert Frost said in his poem Stopping By the Woods on a Snowy Evening, “ I have miles to go before I sleep. ” That poem, and especially that line, has lived rent-free in my brain since seventh grade English class.
Thank you for stopping by today!
Have a Peachy Day!
Sue
If you live in the U.S. and don’t already have a Stampin’ UP! demo from whom you order, I would be honored to work with you. You can reach me at my justpeachystamping@gmail.com.
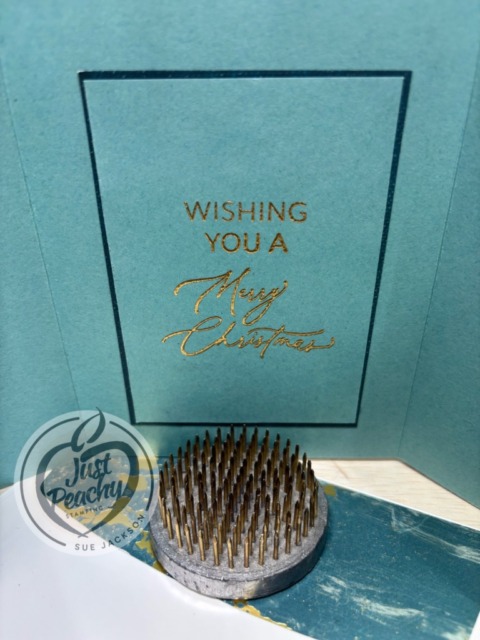
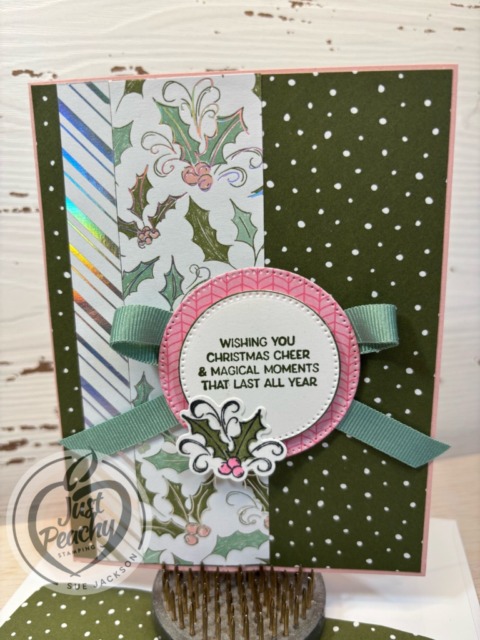
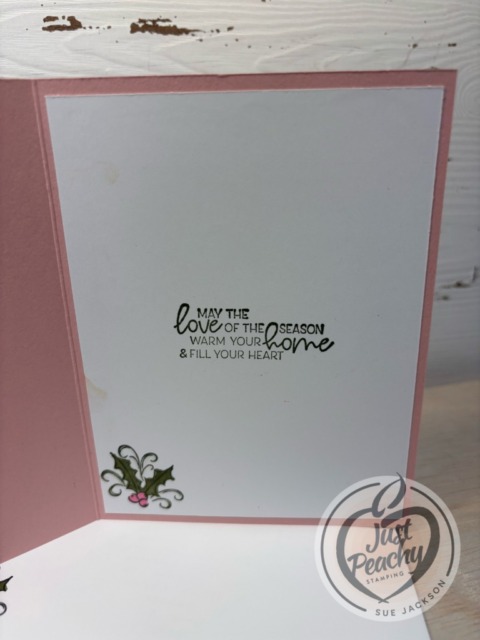
Welcome to the September, 2025 edition of the Sparkles Christmas Challenge # 176! Our host for this month’s challenge, Deb, chose Let’s See Some Holly for the theme. When you get finished here, I hope you will visit the challenge site to view the creations from the very talented members of our design team. After you’ve created your own themed card, please don’t forget to upload it to our gallery.
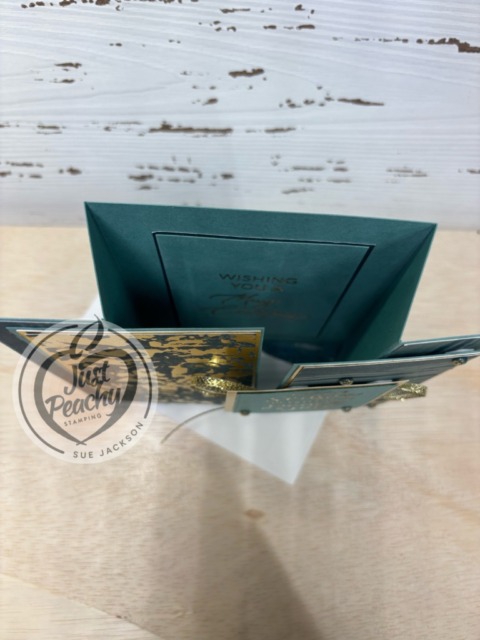
Here’s my holly card:
I am posting this a couple of days late. In the U.S. we just finished a three day holiday weekend to celebrate Labor Day for the workers who keep us going in so many, many different ways. You think I would’ve had something click because my birthday was Labor Day, September 1st. I always thought it was kind of ironic that I was born on Labor Day, so my birthday rolls around on the holiday weekend every 6 years or so. Anyway, I am 2 days late. This whole post is going to be short and sweet because I used retired products as they are the only things I had with holly. I am going to have to rectify that situation.
Measurements and More:
The card base measures 8-1/2 by 5-1/2 inches, scored at 4-1/4 inches
The Mossy Meadow DSP (designer series paper) for the background measures 4-1/8 by 5-3/8 inches
Trim a piece of the Mossy Meadow DSP to 6 by 2-1/2 inches for the envelope flap
I trimmed the diagonal silver and white DSP to 5-3/8 by 1/2 inch
The holly DSP measures 1-1/2 by 5-3/8 inches
I cropped the sentiment circle and the mat circle using the Stylish Shapes die set, the pink DSP is the reverse side of the holly DSP
Next, I punched a 1 -inch circle of the pink DSP for the envelope seal and ran it through my XYRON create-a-sticker
I stamped the holly leaves and berries using black ink on scraps of white cardstock for the front of the card
After trimming a piece of white cardstock to 5-1/4 by 4 inches for the inside, I stamped the sentiment in Mossy Meadow and the holly leaves & berries using black ink
I colored the leaves using the light Mossy Meadow blend and the berries with the light Polished Pink blend and a clear Wink of Stella brush
The loopy-loop Mint Macaron ribbon is retired, but I love using the loopy-loop so I couldn’t resist
I used glue dots for the loopy loop bow
Next, I added dimensionals to the back of the sentiment circle and the pink mat circle as well as the holly and berry piece
I used multipurpose liquid glue to adhere the rest of the pieces
With that, I’d finished this coordinated card, envelope, and envelope seal set.
Welcome to the August, 2025 edition of the Sparkles Christmas Challenge! Our host for this month’s challenge, Debbie, chose Add a Tree for the theme. When you get finished here, I hope you will visit the challenge site to view the creations from the very talented members of our design team. After you’ve created your own themed card, please don’t forget to upload it to our gallery.
I want to thank everyone who played along with my July theme. It was so difficult to choose just three winners and one special mention.
Once I started making a card for this month’s challenge, I couldn’t stop. I wound up with one card for the challenge blog today, and three others using different colors and front sentiment.
First, here’s the original card:
Here are the next three cards:
What I Did:
The bases all measure 8-1/2 by 5-1/2 inches, scored at 4-1/4 inches
For the envelope flaps, I trimmed DSP to 6 by 2-1/2 inches
Then I punched 1-inch circles from coordinating DSP for each envelope and ran them through the XYRON create-a-sticker for the envelope seal
After I ran the white cardstock through my Cut & Emboss using the Painted Trees 3D embossing folder (retired), I trimmed each to 4-1/8 by 5-3/8 inches
Then, I used the clear Wink of Stella brush and “painted” the raised part of the embossed trees
I used the retired Countryside Corners die set to crop the center from each of the embossed white cardstock, but using the Textured Notes dies or the arches dies would also work
Using a larger Countryside Corners die, I cropped the cardstock for the mat of the cropped white cardstock
I stamped each sentiment using the ink color to match the cardstock, and the three are cropped from Stylish Shapes banner die
I cropped the cropped Peace on Earth sentiment using a nested essential die
Each sentiment die was outlined with the coordinating Stampin’ Write markers
The sentiments for the three additional cards comes from the retired Whimsical Trees stamp set
The Christmas trees on the inside were from a retired Christmas set as well which I’ve purged so, sadly, I don’t know the name of the set
I adhered the loopy-loop bows, from Mary Deatherage, using glue dots
i used dimensionals to adhere the sentiments
Finally, I added the enamel dots
With that, I’d finished these 4 coordinated card, envelope, and envelope seal sets
HINT: When I am working on mass producing cards, I do each element of the cards together. For example, trim all the bases, emboss all the white cardstock, use the Wink of Stella on all the embossed trees, etc. Therefore, when it’s time to put each together, I just grab pieces and finish off the cards.
The Loopy Loop Bow:
I was able to watch Mary Deatherage’s, from Stamps -n- Lingers, Perfectly Pears tutorial. In that video, she showed her loopy-loop bow. That’s what I used for the front of my card. I’m bow-challenged and this technique allows me to relatively easily add ribbon without adding the bulk of a tied bow. If you’ve never seen her videos, you owe it to yourself to watch them. I think she’s the Queen of the Collage. Gorgeous cards!!
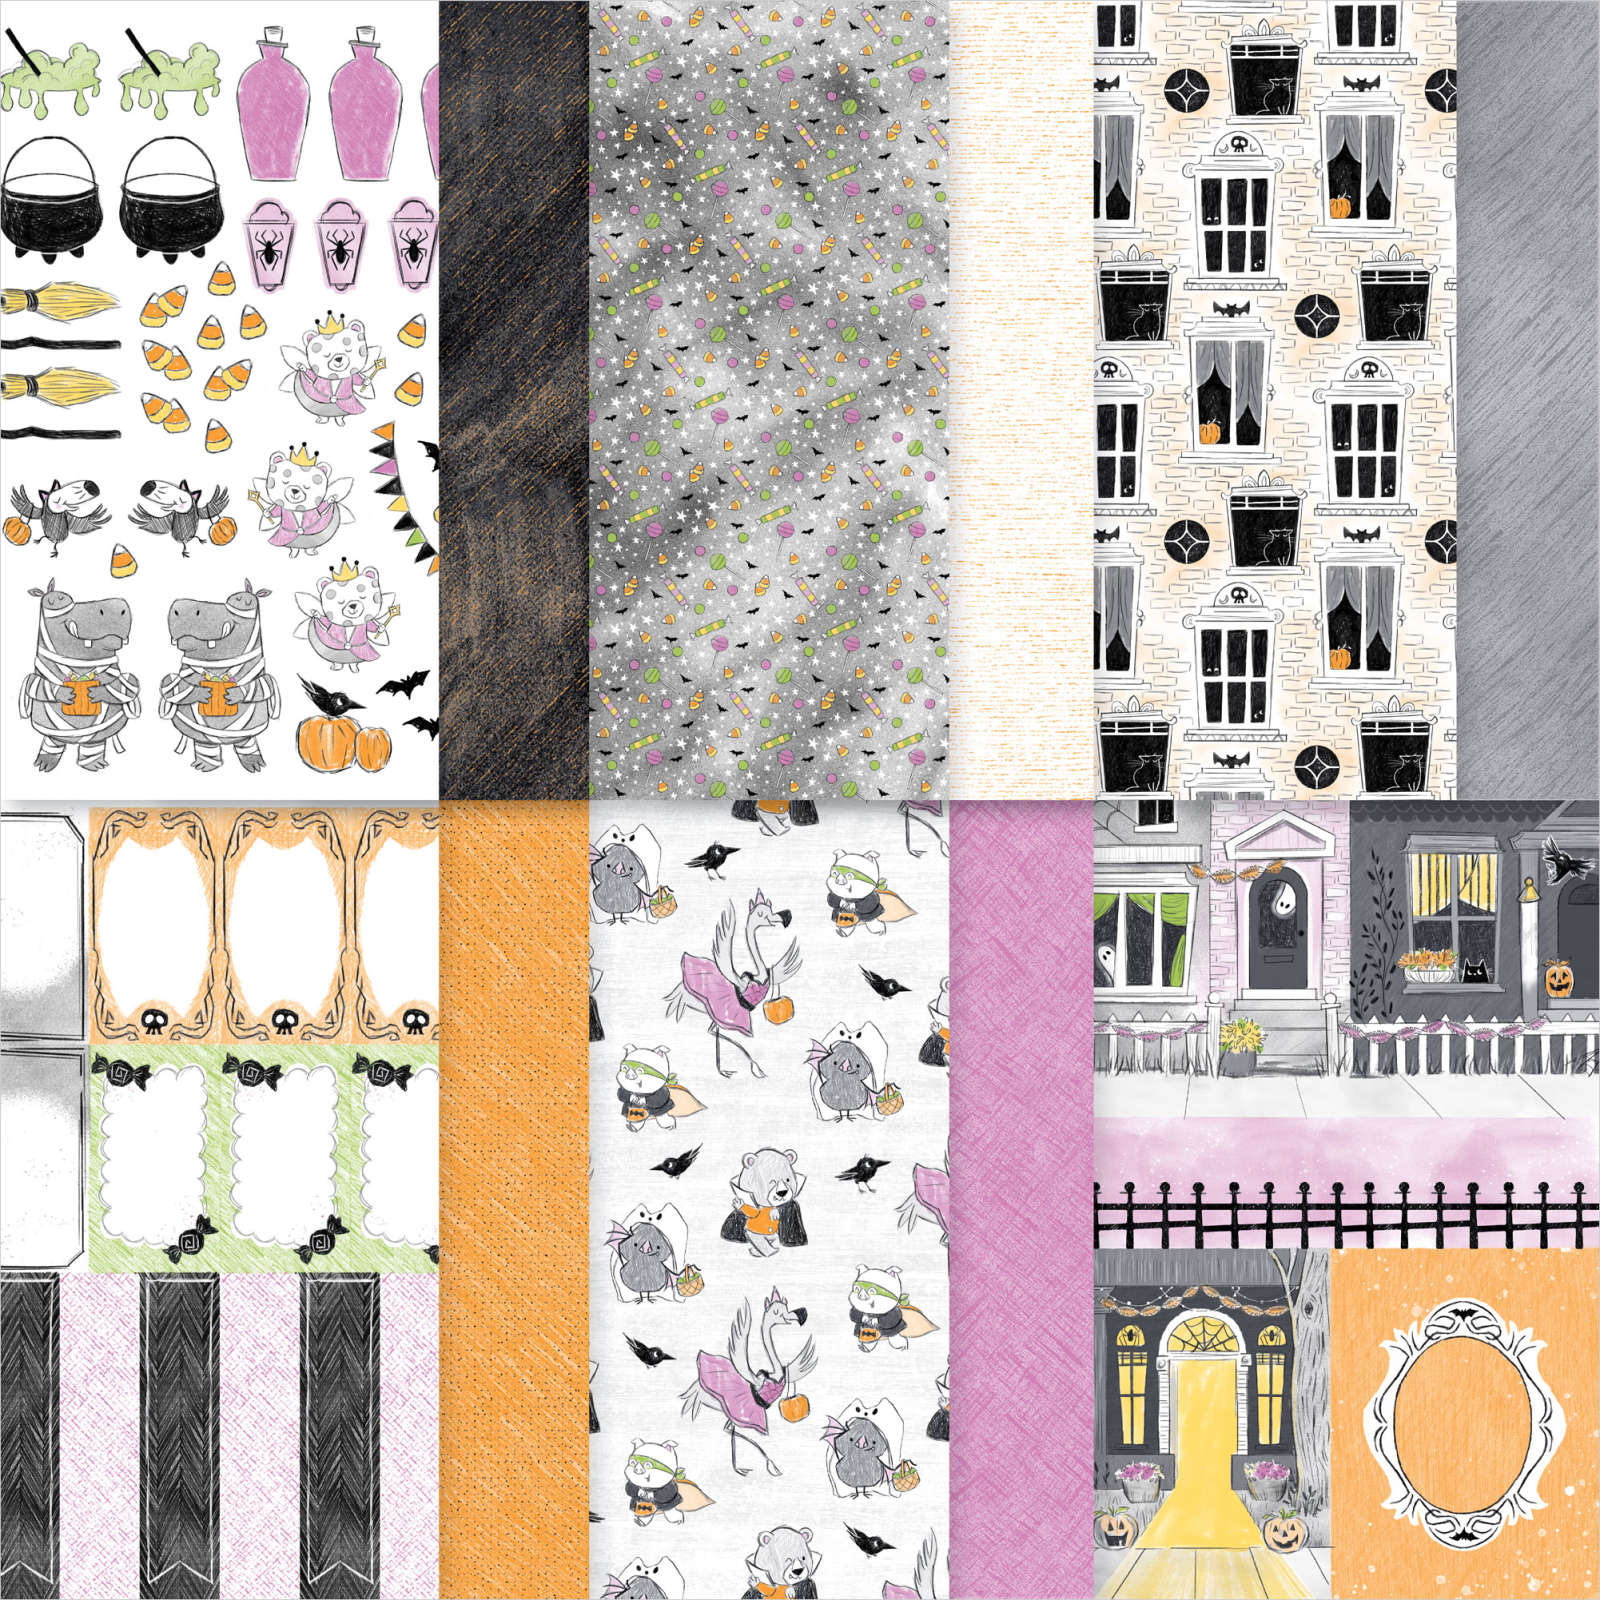
Halloween in July? My daughter certainly thinks so!
I normally do not need very much in the way of Halloween sets, but I just can’t help myself! I’ve already purchased this Spooky Sweet DSP pack, which includes patterned paper, precut images, and cut-apart scenes and elements. It’s perfect for creating tags and gift packaging for Halloween goodies, accents for scrapbooks, or other spooky-cute paper crafts.
Take a look at all this cuteness! The first page has all the precut images. So cute!
I could’ve stopped there, and would’ve had more than I needed for Halloween. However, I didn’t stop there. I got this Fright Night bundle as well.
If you live in the U.S. and don’t already have a Stampin’ UP! demo from whom you order, I would be honored to work with you.
Welcome to Just Peachy Stamping by Sue Jackson: an independent Stampin' Up demonstrator.
Through Stampin' Up!, I happily share my love of papercrafting through sales, classes, small stamping group meet-ups and workshops. I think that being a teacher in my "real life", I have a unique approach to sharing my fantastic hobby. I look forward to connecting with you!