Welcome back to the bi-weekly Cardz 4 Galz challenge.Billie A, our host for this #258 challenge, chose Stitching, Real or Faux for the theme. Since I am obsessed with all things fun fold I was so pleased to create a card with new products. When you finish here, please visit the challenge site to see what the rest of the very talented design team members created. Then, don’t forget to upload your creations to our gallery. We look forward to seeing your creations there!
Today is my last physical therapy session after my knee replacement surgery. I’ve had two absolutely wonderful therapists and am actually going to miss going, as strange as that sounds.
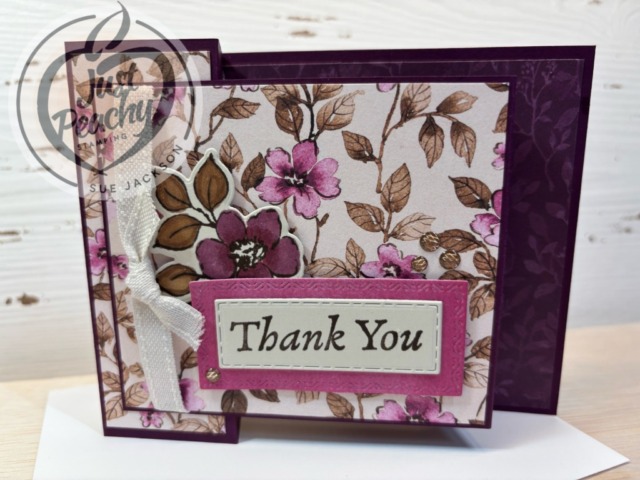
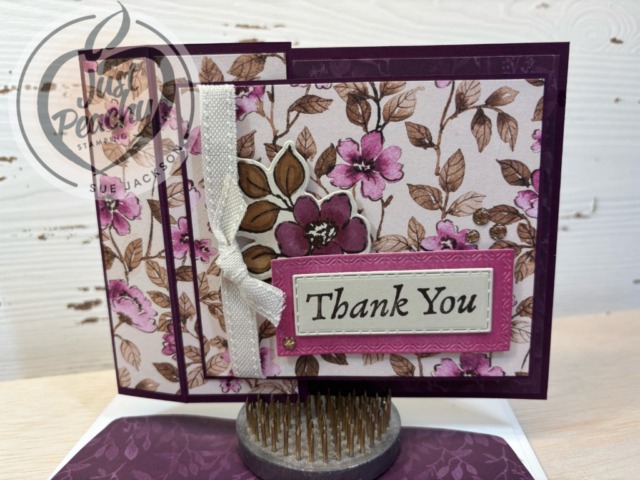
This is my thank you card for one of the therapists:
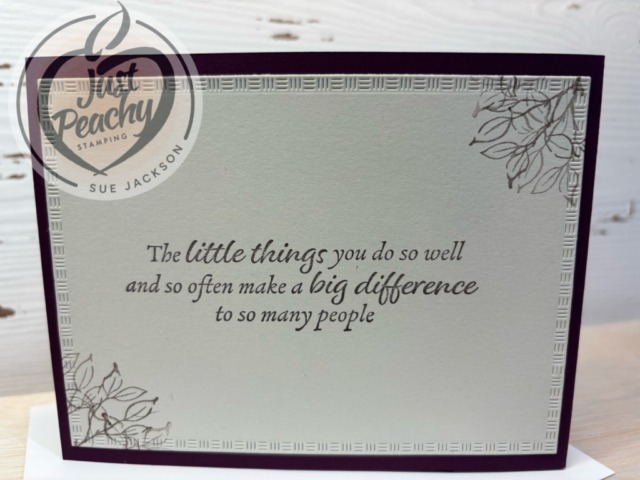
The faux stitching is on both layers of the sentiment on the front and around the panel on the back of the card. There’s real stitching along the sides of the Basic Beige ribbon. Real Stitching – check. Faux stitching – check. Theme met – check.
I’ve already posted cards using this same fold, and you can see them here and here.
I originally found this card on the Wandering Stamper’s YouTube channel. You can see that tutorial here.
As always with a fun fold card, I will be adding this to the Creative Creases Challenge where the theme is always Anything Goes with a Fun Fold.
Measurements:
Of course, I had to make a template for this fun fold, which you can see below:
Hints:
I find it much easier to watch a video than trying to follow written directions, so I highly recommend you watch the Wandering Stamper’s video after you use the above template to trim your papers
Another thing I find that works for me is to trim all my papers before starting anything else on the card
Once all the pieces are trimmed, I can add the DSP (designer series paper) to the envelope flap and put all the pieces in the envelope until I can finish it
Since this card will be hand-delivered, I didn’t need to worry too much about the bulkiness of the card
If you do need to mail the card, you very well might have to use extra postage even without using any dimensionals., ribbon, or enamel dots
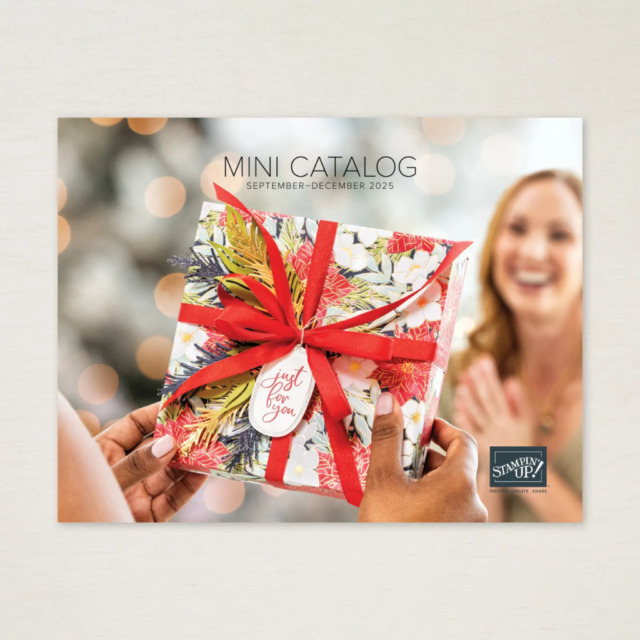
The September – December 2025 Mini-Catalog is now available!
As a demonstrator, I was able to pre-order some of these items. Take a look at the products I’ve already purchased:
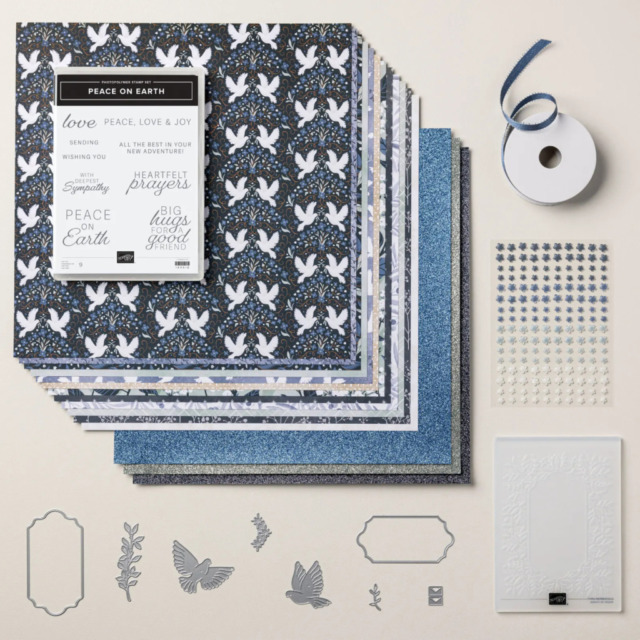
The first suite I purchased is this Peaceful Garden Suite Collection! You can see some cards using this suite here and here.
This DSP is stunning!
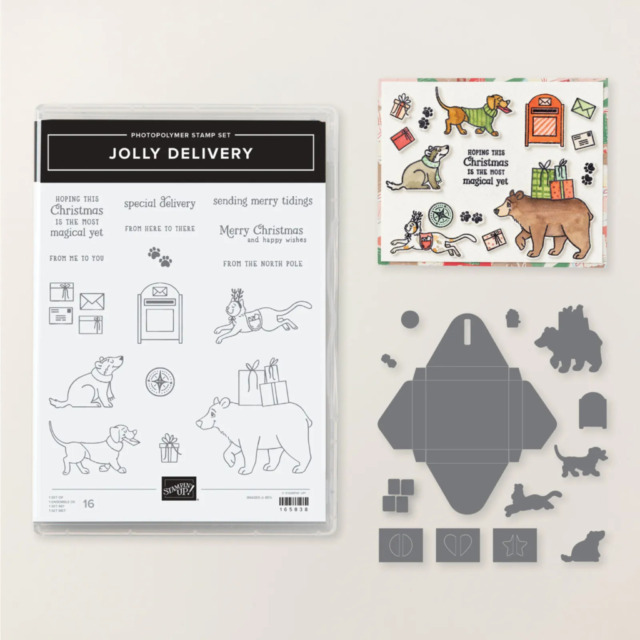
If you like Christmas Critters, this Jolly Delivery Bundle is for you!
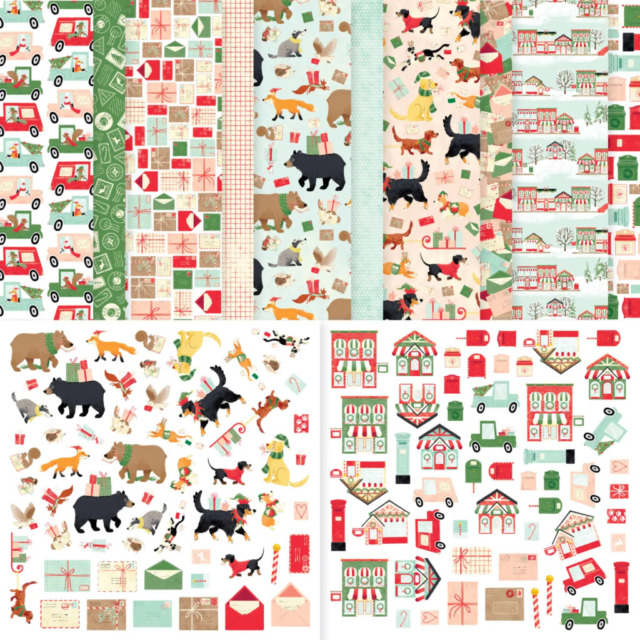
Don’t forget the matching 12 x 12 inch DSP:
If you live in the U.S. and don’t already have a Stampin’ UP! demo from whom you order, I would be honored to work with you. You can reach me at my [email protected].
Welcome back to the bi-weekly Cardz 4 Galz challenge. Diane, our host for this #256 challenge, chose Create a Scene for the theme. Since I am obsessed with all things fun fold I was so pleased to create a card with new products. When you finish here, please visit the challenge site to see what the rest of the very talented design team members created. Then, don’t forget to upload your creations to our gallery. We look forward to seeing your creations there!
I used the Spooky Sweet DSP (designer series paper) to create my scene. Here’s my card:
In addition to the Spooky Sweet DSP, I used the Fright Night bundle, both of which are available in the Online Exclusives. I’ve already posted a card using these products, and you can see that card here.
Take a look at this DSP pack:
The first two sheets of this pack are all punch-out images you can use on cards. I used the princess and the bat for my card.
The Fright Night bundle, is just as adorable.
As always with a fun fold card, I will be adding this to the Creative Creases Challenge where the theme is always Anything Goes with a Fun Fold.
Measurements:
Trim a piece of Petunia Pop cardstock to 8-1/2 by 5-1/2 inches, scored at 2-1/8 and 4-1/4 inches to create a z-fold card
Next, trim a piece of Basic Black cardstock to 4-1/8 by 5-3/8 inches for the mat on the front of the card
Trim a piece of white cardstock to 4-1/8 by 5-3/8 inches for the inside of the card
The Spooky Sweet scene DSP measures 4 by 5-1/4 inches
I trimmed the checked DSP for the inside to 1/2 inch by 4 inches
I trimmed a piece of Spooky Sweet DSP to 6 by 2-1/2 inches for the envelope flap
Finally, I punched a 1-inch circle of DSP and ran it through my XYRON create-a-sticker for the envelope seal
Stamping & Adhering:
Unless otherwise noted, I used multipurpose liquid glue to adhere pieces together
Adhere the scenic DSP to the black cardstock mat
Add liquid glue to the left side of the black cardstock mat and adhere it to the front flap of the base of the card
Make sure you only adhere the left half of the cardstock mat or you won’t be able to open the card
Using the Fright Night stamp set, stamp the front sentiment on a scrap of white cardstock
Crop it using the Fright Night banner die
Punch out the princess and bat from the sheet of pre-made images
Add dimensionals on the backside of the princess and the banner and adhere to the scene
Add one dimensional to the backside of the bat based on its position on the banner and adhere
Using the Fright Night stamp set, stamp the inside image on the trimmed white cardstock
Adhere the strip of DSP to the bottom of the white cardstock
Adhere the white cardstock to the base of the card
With that, I’d finished this easy-peasy not so spooky Halloween card
Who would love a sale on select In Color Merchandise?
We all would, right?
Here are the Promotion Details:
Sales Period: August 5–31
Ordering Deadlines
Phone: August 29, 2025, at 6:59 p.m. (MT)
Online: August 31, 2025, at 11:59 p.m. (MT)
Sale includes select inks, cardstock, Designer Series Paper, embellishments, and other products that include these new In Colors. Only products featured on the 2025–2027 In Colors page are included in this promotion.
Some products are excluded from the sale, including the Month by Month Album Retreat 2025 kit (167338).
Products are available only while supplies last.
If you live in the U.S. and don’t already have a Stampin’ UP! demo from whom you order, I would be honored to work with you. You can reach me at my [email protected].
Welcome back to the bi-weekly Cardz 4 Galz # 255. I’m hosting this challenge and chose Fun Fold for the theme. Since I am obsessed with all things fun fold I was so pleased to create a card with new products. When you finish here, please visit the challenge site to see what the rest of the very talented design team members created. Then, don’t forget to upload your creations to our gallery. We look forward to seeing your creations there!
Here’s my double box fun fold card:
I posted another card using this fun fold on Tuesday, and you can see that card here. This fold is just a matter of trimming and scoring paper using a set of given measurements. Before making this card, I did create a template for myself, which you can see below. If you click on each piece of the template, you will be able to zoom in to be able to read it easier.
I found the directions for this card on a Pinterest post by Jill Andress from the Wandering Stamper. She has a very easy to follow video tutorial. I am a visual learner and for me, following a tutorial is the way to go. Basically, once you make the two boxes, the rest falls into place.
Measurements:
The Night of Navy box #1 base measures 9-3/8 by 4-1/4 inches, scored at 3/8, 1-3/8, 2-7/8, and 3-7/8 inches
All of those score lines need to be burnished well into valley folds
DSP (designer series paper) panels for the box #1 base measure 5-1/4 by 4 inches, 1-1/4 by 4, and I added the optional panel of 7/8 by 4 inches
I used apiece of the Timid Tiger 6 x 6 inch DSP for the back base of the card
The rest of the panels come from the Floral Charm DSP
The Night of Navy box #2 base measures 5-1/8 by 3-1/2 inches, scored at 3/8 and 1-3/8 inches
Panels for box #2 measure 3-7/8 by 7/8 inches and 3-5/8 by 3-3/8 inches
The white cardstock panel for the back of the card measures 5-1/4 by 4 inches
I also trimmed a piece of the Floral Charm DSP to 6 by 2-1/2 inches for the envelope flap
Then, I punched a 1-inch circle from the roses DSP and ran it through my XYRON create-a-sticker for the envelope seal
I used a length of Timid Tiger ribbon for the box
Putting the Card Together:
I shared the things I learned the first time I made the card. Those hints are as follows:
I recommend using Jill’s video for putting this card together as she explains everything and it’s easy to follow along
If you need help with using eighths on your paper trimmer, Jill explains exactly how to do it
Things I did for this card
:
The Floral Charm DSP is beautiful on this card, especially when paired with the Timid Tiger 6×6 inch DSP
Add the ribbon before adhering the Timid Tiger DSP to the base of box #1
While you will be able to cover most of the ribbon using the white cardstock on the back, it’s just easier to adhere it before you get that far
Make sure you burnish your folds very well because it needs to be able to pop back into place when removed from the envelope
The optional piece of DSP on the side of box #1 really does need a piece of DSP or embossed cardstock since the card will fold flat
I like using a mat layer between the base and the DSP for cards, but that will make this card too bulky and it will require extra postage
Use multipurpose liquid glue to adhere the pieces together, with the exception of the sentiment
For this card, I stamped some leaves from the Impressional Blooms stamp set using Mossy Meadow ink, then cropped them with the coordinating dies
I used glue dots and dimensionals to add the leaves under the diagonal corners of the sentiment
Finally, I added three brass butterflies to the front of the card and one on the back of the card
With that, I’d finished this coordinated card, envelope, and envelope seal set
If you like fun folds, this one is for you! It looks very complicated, and the recipient will be completely impressed. It will be our little secret that it is much easier than it looks.
This is the best time to check your supply of cardstock! Can you imagine the savings on shipping? That’s what I will be ordering!
Here are the details:
All order types qualify for this promotion.
Free shipping is for three days only. Orders must be closed July 25.
Free shipping automatically applies to your cart after the qualifying amount has been met, which is $75 USD | $100 CAD (before tax).
Coupon codes and Stampin’ Rewards will lower your order’s retail amount. Orders must meet the qualifying amount to be eligible for free shipping.
The additional cost for expedited shipping is not covered by this promotion.
Prepaid 3-, 6-, and 12-month Paper Pumpkin subscriptions and month-to-month subscriptions do not qualify for free shipping. Refills, past kits and add-ons do qualify toward free shipping, but you must be a subscriber to purchase. Subscriptions billed and shipped this month will be charged for the normal amount ($27.00 USD | $36.75 CAD shipping included) + tax.
If you live in the U.S. and don’t already have a Stampin’ UP! demo from whom you order, I would be honored to work with you.
Welcome back to the bi-weekly Cardz 4 Galz bi-weekly challenge #254. Our fearless leader/admin for this challenge, Caz, chose Wedding or Anniversary for the theme. When you finish here, please visit the challenge site to see what the rest of the very talented design team members created. Then, don’t forget to upload your creations to our gallery. We look forward to seeing your creations there!
My wedding anniversary is coming up next week so I chose to create an anniversary fun fold card. My card uses current, last chance, and retired products.
Here’s my card:
I’ve already made at least 15 of the landscape criss-cross card using Terri Gaines’ tutorial. You can see a few of those posts here, here, and here (please ignore the typo in the title).. I knew I could figure out the measurements for the portrait version, but was so happy to find her video tutorial. Her measurements, with my papers, can be found below. Her video is wonderful for explaining how to put the card together. However, once you have the measurements and a picture for reference, you can pretty much put it together yourself.
I’m also going to be uploading this card to the Creative Creases Challenge, where the theme is always Anything Goes with a Fun Fold. I am honored to be a guest designer for the current edition of the challenge, and you can see that card here. I always find inspiration from the design team, and I’m sure you will as well. Please remember to upload your fun fold to the challenge.
Measurements:
Card base: 10-3/4 x 5-1/2 score at 1-5/8, 3-1/4, 7-1/2 & 9-1/8 (Pecan Pie cardstock)
Panel 1 Layer #1: 3 x 5 (Irresistible Designs DSP colored with Basic Gray ink and a blending brush)
Panel 1 Layer #2: 2-3/4 x 4-3/4 (Nature’s Sweetness DSP with the writing on it)
Panel 2 Layer #1: 2-1/2 x 4-1/2 ( another piece of the Irresistible Designs DSP colored with Basic Gray ink and a blending brush)
Inside Layer #1: 3 x 4-1/4 ( more of the Irresistible Designs DSP)
Inside Layer #2: 2-3/4 x 4 (white cardstock)
Optional: two panels for the sides of the front measuring 5-3/8 by 1-5/8 inches (mini-corrugated embossed Pecan Pie cardstock)
Trim a piece of DSP to 6 by 2-1/2 inches for the envelope flap
Punch a 1-inch circle of coordinating DSP for the envelope seal and run it through the XYRON create-a-sticker machine
Scraps of Pecan Pie for the sentiment banner
Pebbled Path cardstock for the floral spray
A length of white diagonal ribbon colored with the dark Pecan Pie dark blend
My Hints & Such:
Since I wanted the layers to really stand out, I outlined each piece with a Stamping Write Marker
The Irresistible Designs DSP comes already embossed and ready to be colored with a blending brush
I colored another piece of this DSP for this card using Secret Sea ink
After coloring ribbon using the blends it will be stiff, so you will need to do something to break down the stiff fibers
I used a bone folder and rubbed it back and forth on the ribbon so I could make it easier to use
I saw Mary Deatherage from Stamps-n-Lingers for a live video using the new Painterly Pears suite recently and she showed how to use a loop-d-loop bow, with which I fell in love
I linked the short video for the loop-d-loop bow
The sentiment on the front of the card comes from the Blooming Phrases stamp set, which I embossed using white powder and heat set it
The sentiment banner was cropped using a die from the Stylish Shapes die set
I used the retired Everyday Greetings stamp set for the inside sentiment
Finally, I added three Pecan Pie ribboned dots to help balance out the weight on the right side of the card
With that, I’d finished this coordinated card, envelope, and envelope seal set
Welcome to the Cardz 4 Guyz #374 challenge! Deb H., our host for this challenge, chose Seashells for the theme. When you finish here, please visit the challenge site to see what the rest of the talented design team members created. Then, don’t forget to upload your creations to our gallery. We look forward to seeing your creations there!
I used the recently retired Adventurous Sky suite of products for my card:
Measurements:
The Night of Navy base measures 8-1/2 by 5-1/2 inches, scored at 4-1/4 inches
I used a Copper Clay mat measuring 5-2/8 by 4-1/8 inches
The four different DSP (designer series paper) patterns all have checks or plaids and they all work together
The papers were trimmed to 1-1/2 by 2-1/8 inches , 1-1/2 by 3 inches, 2 by 1-7/8 inches, and 2 by 3-1/4 inches
Trim a piece of DSP to 6 by 2-1/2 inches for the envelope flap
Punch a 1-inch circle from a piece of DSP for the envelope seal
Run the seal through a XYRON create-a-sticker to create a permanent seal
I was able to get both planes and the sentiment for the front cropped from on piece of white cardstock measuring 4-1/4 by 5-1/2 inches
HINT: About once a year I take 3 packs of white cardstock to a local FedEx store and have them all cut down to 4-1/4 by 5-1/2 inches so I can just grab what I need and go
Just make sure you have some 8-1/2 by 11 cardstock left in your stash – trust me on that
Trim another piece of white cardstock to 4 by 5-1/4 inches for the inside of the card
What I Did:
Stamp the planes using Momento Tuxedo Black ink
Use the Basic Gray, Copper Clay, Boho Blue, and Night of Navy blends to color both planes
Stamp the sentiment for the front in Night of Navy ink and crop it using a die from Countryside Corners die set
Stamp the sentiment and the smallest plane on the inside white cardstock using Night of Navy ink
Use multipurpose liquid glue to adhere the DSP and cardstock mat pieces to the front of the base
Add dimensionals to the back of both planes and adhere to the front of the card
Use a piece of Copper Clay ribbon under the sentiment panel and adhere with glue dots
Add dimensionals on the back of the sentiment panel and adhere to the front of the card
With that, I’d finished this coordinated card, envelope, and envelope seal set
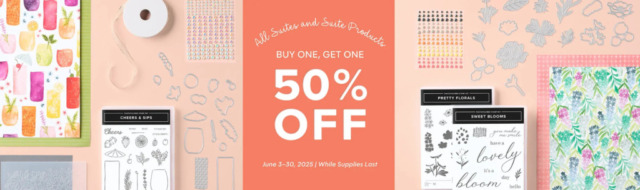
Our suite collections are known (and loved!) for their coordination, quality, and style. With stamps, tools, patterned paper, and embellishments in stunning colors and unique designs, suites make creativity simple and fun. Shop the individual products or buy as a full collection!
I have two orders making their way to me and I couldn’t be more excited! Some of the products are pre-orders for the upcoming additions to the Online Exclusives!
If you’d like some help getting the most out of your Buy One, Get One 50% OFF sale, please contact me for assistance.
Promotion Details
Sales Period: June 3–30, 2025
Ordering Deadlines
Phone: June 30, 2025, at 6:59 p.m. (MT)
Online: June 30, 2025, at 11:59 p.m. (MT)
All available suites and suite products from the 2025–2026 Annual Catalog and Online Exclusives are buy one, get one 50% off.
When you shop the sale, the 50% off discount will apply to the lower-priced item (for example, if you buy a suite collection and a stamp set from a suite, the suite would be full price, and the stamp set would be 50% off).
Suite collections are available if all items are in stock; if all items are not in stock, you can still shop the available suite products.
You don’t have to buy a suite and suite products all from the same suite collection for the discount to apply. You can buy any suite products from any suite.
The discount will appear in your cart once you’ve added two items within the sale parameters to your cart.
Products are available only while supplies last.
If you live in the U.S. and don’t already have a Stampin’ UP! demo from whom you order, I would be honored to work with you. If you’d like some help getting the most out of your Buy One, Get One 50% OFF sale, please contact me for assistance.
Welcome back to the bi-weekly Cardz 4 Galz # 252. Our host for this edition of the challenge, Debbie , chose Easel Card for the theme. Since I am obsessed with all things fun fold I was so pleased to create a card with new products. When you finish here, please visit the challenge site to see what the rest of the very talented design team members created. Then, don’t forget to upload your creations to our gallery. We look forward to seeing your creations there!
Here’s my Coneflower Celebrations easel card:
I’m also going to enter this card in the Creative Creases Challenge, where it’s always Anything Goes with a Fun Fold.
Measurements:
The Secret Sea base measures 11 by 4-1/4 inches, scored at 2-3/4 and 5-1/2 inches
Trim a piece of the Cloud Cover 6 x 6 inch DSP (designer series paper) to 5-3/8 by 4-1/8 inches
Trim a piece of white cardstock to 4-1/8 by 5-3/8 inches
I have scraps of all sizes of white cardstock and was able to use scraps to stamp all of the images on the front from scraps
Punch a 1-inch circle from Secret Sea 6 x 6 inch DSP and run it through the XYRON create-a-sticker for the envelope seal
Trim a piece of Secret Sea cardstock to 4-1/8 by 3/4 inch for the inside easel stop piece
What I Did:
Stamping, Coloring, & Cropping:
I used the Coneflower Celebration bundle for all of the stamped images
After stamping all of the coneflower pieces, I colored them using the blends combos in Darling Duckling, Old Olive, and Pecan Pie
Stamp the on a scrap of white cardstock for the front and on the white cardstock piece for the inside
Using Secret Sea ink, randomly stamp splotches using first and second generation stamping around both sentiments
Stamp splotches using first and second generation stamping on the envelope flap
Crop the sentiment using a Nested Essentials die
Crop the coneflower pieces for the front
Trim and add a piece of the adhesive foam strip to the back of the Secret Sea cardstock for the easel stopper
Crop the stopper piece using the circles die from the Coneflower Celebration die set
HINT: When you poke out the circles from the cardstock/adhesive foam piece, keep the circles because they form perfectly sized dimensionals for the flower pieces
Assembly:
Use multipurpose liquid glue to adhere the flower pieces together
Add dimensionals to the back of the flower pieces
Add Secret Sea faux linen ribbon to the card
HINT: to save on ribbon and bulk, use the images below to help you adhere the ribbon using tear-&-tape
Adhere the Cloud Cover DSP to the bottom half of the base of the card
HINT: Do not adhere the top half of the DSP or you won’t be able to create the easel
Adhere the coneflower to the front of the card making sure the dimensionals straddle the ribbon
Adhere the sentiment making sure to straddle the coneflower
Add three Secret Sea flat pearls to the front of the card
Adhere the white cardstock to the inside of the card using multipurpose liquid glue
The placement of the easel stopper depends on your desired steepness of the front easel part
HINT: I usually like to place the stopper about an inch from the crease of the base
With that, I’d finished this coordinated card, envelope, and envelope seal set
Our suite collections are known (and loved!) for their coordination, quality, and style. With stamps, tools, patterned paper, and embellishments in stunning colors and unique designs, suites make creativity simple and fun. Shop the individual products or buy as a full collection!
I already have my next order ready to go, and I’m definitely taking advantage of the sale!
Here are All the Details:
Sales Period: June 3–30, 2025
Ordering Deadlines
Phone: June 30, 2025, at 6:59 p.m. (MT)
Online: June 30, 2025, at 11:59 p.m. (MT)
All available suites and suite products from the 2025–2026 Annual Catalog and Online Exclusives are buy one, get one 50% off.
When you shop the sale, the 50% off discount will apply to the lower-priced item (for example, if you buy a suite collection and a stamp set from a suite, the suite would be full price, and the stamp set would be 50% off).
Suite collections are available if all items are in stock; if all items are not in stock, you can still shop the available suite products.
You don’t have to buy a suite and suite products all from the same suite collection for the discount to apply. You can buy any suite products from any suite.
The discount will appear in your cart once you’ve added two items within the sale parameters to your cart.
Products are available only while supplies last.
If you live in the U.S. and don’t already have a Stampin’ UP! demo from whom you order, I would be honored to work with you.
Welcome to Just Peachy Stamping by Sue Jackson: an independent Stampin' Up demonstrator.
Through Stampin' Up!, I happily share my love of papercrafting through sales, classes, small stamping group meet-ups and workshops. I think that being a teacher in my "real life", I have a unique approach to sharing my fantastic hobby. I look forward to connecting with you!