Welcome to Team B’s turn for the Atlantic Hearts Sketch Challenge #650! Starting the creative process with a sketch invites individual takes on the sketch, and this one is no different. This challenge is a weekly event, and we’d all love for you to play along with the sketches and then post your creations to the challenge gallery.
I needed a get well card that a group of people could sign, and I needed it fast. I used the Perfectly Pears bundle and DSP for my card.
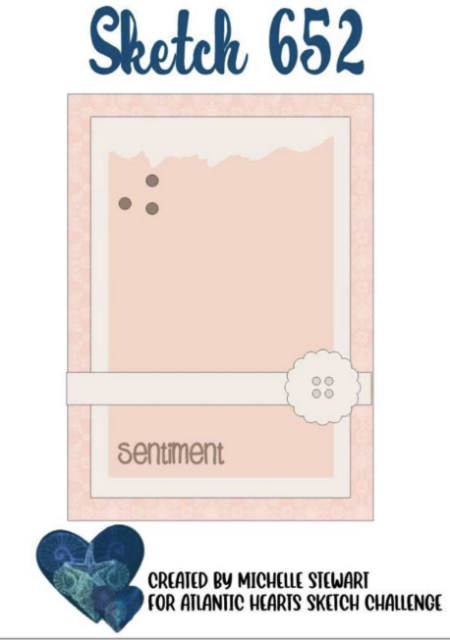
First, here’s the challenge sketch:
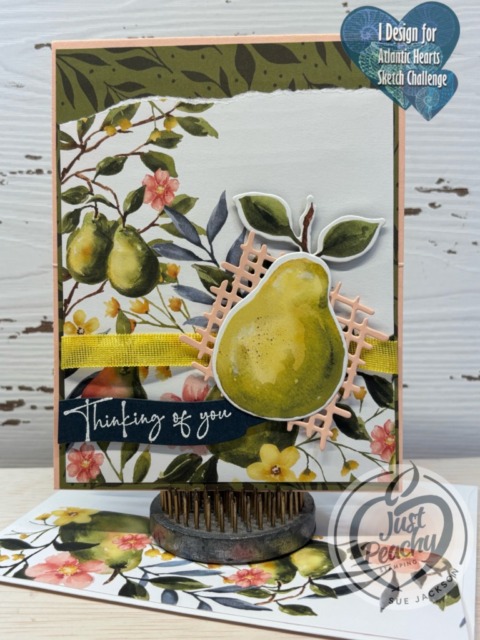
Here’s the card:

I did add another piece of white cardstock on the top of the inside of the card. However, since it’s blank, I didn’t take a picture of it.
At first, I wasn’t going to get this online exclusive product suite. Then I started seeing gorgeous cards and knew I absolutely needed to get it! I’m so glad I did!
Measurements:
- The Petal Pink base measures 11 by 4-1/4 inches, scored at 5-1/2 inches to create a tent card
- Trim a piece of the Mossy Meadow patterned DSP (designer series paper) to 4-1/8 by 5-3/8 inches
- I trimmed a piece of the pears pattern DSP to 4 by 5-1/4 inches, then tore across the top to follow the sketch
- Trim a piece of DSP to 6 by 2-1/2 inches for the envelope flap
- Punch a 1-inch circle of coordinating DSP and run it through a XYRON create-a-sticker for the envelope seal
- Since this card was used for a co-worker, a group of us needed to sign the card, so I used two pieces of white cardstock trimmed to 4 by 5-1/4 for the inside of the base
- I used scraps of Secret Sea and Petal Pink for the sentiment banner and checkerboard-ish square embellishment
- One of the fabulous things about this DSP is that the dies crop images from the DSP – love that feature
Letting the Suite Do the Work:
- Once I had all my papers trimmed to size, and the embellishments for the front cropped, putting the card together was a cinch
- Unless otherwise noted, I used multipurpose liquid glue to adhere pieces together
- After wiping down a scrap of Secret Sea cardstock using my embossing buddy, I stamped the sentiment using VersaMark ink
- Next, I covered the stamped sentiment using WOW! Basic White embossing powder and heat set it
- Then, I trimmed the sentiment to size
- After adhering the pears DSP to the Mossy Meadow patterned DSP, I wrapped a piece of Darling Duckling ribbon around the combined DSP and adhered it in the back using tear & tape
- I adhered the large pear and leaves together, then adhered that to the Petal Pink cropped piece
- I added dimensionals under the pear and under the sentiment banner and adhered them to the front of the card
- The inside sentiment was stamped with Secret Sea ink
- Then, I adhered the pair of pears to the bottom of the white cardstock, and adhered both white cardstock pieces to the inside of the card
- With that, I’d completed this coordinated card, envelope, and envelope seal set
Thank you for stopping by today!
Have a Peachy Day!
Sue
Colors Used:
Supplies Used:
https://mystampinblog.com/Showcase/Details/f6422a21-4215-4dde-8bc4-19eb960b491c?layout=Tiled&sortOrder=None&showSku=True&showPrice=True&showSalePrice=True&showAddToCart=False&showAddAllToCart=True&showDownload=True&transparent=False&bordered=True&hFontHeight=14&rFontHeight=13&imageHeight=120&middleContent=False&url=https://justpeachystamping.com/
Calling All Crafters!
Two Joining Promotion Options for the Month of October!

Join Our Community
Become a Stampin’ Up! demonstrator when you choose one of these amazing Starter Kit offers. (And did we mention your Starter Kit comes with FREE shipping, FREE business supplies, AND a bonus, FREE Paper Pumpkin kit?) Join from October 1 to 31 and experience all the amazing benefits that come with being a demonstrator.
Honestly, I saw this promotion banner and was stunned in a very good way! This deal is amazing, and what’s more there are no other purchase requirements!