Welcome back to the bi-weekly Cardz 4 Galz challenge. Lynda, our host for this #259 challenge, chose Dies or Punches for the theme. When you finish here, please visit the challenge site to see what the rest of the design team members created. Then, don’t forget to upload your creations to our gallery. We look forward to seeing your creations there!
I chose to use the Beautiful Butterfly bundle for my card. Here it is:

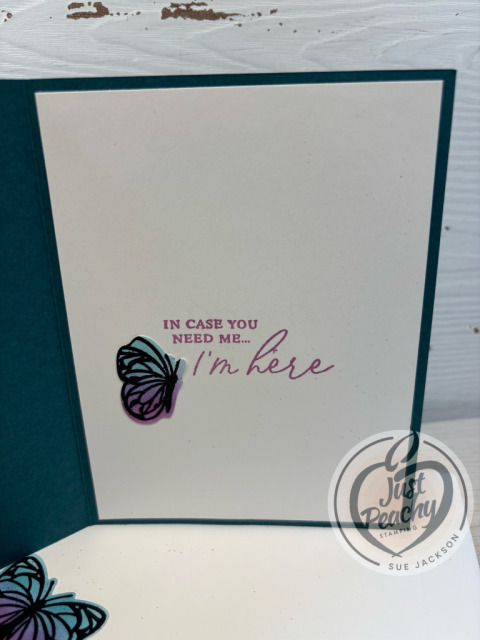
I recently saw a project with Petunia Pop and Pretty Peacock and that color combination quickly became on of my (new) favorite combos! I’m so glad I was inspired to use this color combination because I don’t think I would’ve put these colors together on my own.
I used die cuts for all three butterflies and the square sentiment panel on the front of the card.
Measurements:
- The Pretty Peacock base measures 8-1/2 by 5-1/2 inches, scored at 4-1/4 inches
- The Petunia Pop mat for the front measures 4-1/8 by 5-3/8 inches
- After running a piece of white cardstock through your Cut & Emboss machine using the hybrid butterfly 3D embossing folder, trim it to 4 by 5-1/4 inches
- You will also need a piece of white cardstock trimmed to 4 by 5-1/4 inches for the inside
- With some very careful planning, I was able to get all three butterflies cropped from a piece of 5-1/2 by 4-1/4 inches
- Both the sentiment white cardstock and the Pretty Peacock mat came from scraps
- I embossed the envelope flap using the butterflies embossing folder
- I used a scrap piece of Pretty Peacock DSP to punch a 1-inch circle, then ran through my XYRON create-a-sticker for the envelope seal
The Butterflies:
- After my careful planning, I figured out the approximate placement of the large butterfly on my white cardstock so I could blend the colors of ink
- I found that it was much easier to use blending brushes and Pretty Peacock and Petunia Pop ink to color spaces for all three butterflies before stamping the butterflies
- After I let the blended colors dry for a few minutes, I swiped the space for one butterfly at a time on the cardstock using my embossing buddy
- HINT: You really need to make sure that the ink is thoroughly dry before trying to swipe it with the embossing buddy and then stamping with the VersaMark
- It’s easier to stamp one butterfly with VersaMark ink, cover it with black embossing powder then heat set it using your heat tool
- HINT: I found that it was very beneficial to add ink to the VersaMark pad before trying to stamp and emboss the large butterfly
- Stamp your sentiment on a scrap piece of white cardstock using Petunia Pop ink and stamp the inside sentiment as well
- After all three butterflies have been stamped and heat embossed, crop them out using the Beautiful Butterflies dies
Finishing the Card:
- Unless otherwise noted, I used multipurpose liquid glue to adhere pieces together
- Use dimensionals to adhere the large butterfly to the front of the card
- Make a loopy-loop bow of Petunia Pop ribbon and adhere it using glue dots
- Next, adhere the two layers of the sentiment square and add dimensionals to the back of the mat, making sure to be able to straddle the ribbon
- I needed to also add a couple of drops of liquid glue to the top left corner of the sentiment squares so it would adhere to the butterfly
- Adhere the butterfly onto the cardstock for the inside of the card and adhere the cardstock to the base
- Adhere the third butterfly to the front bottom corner of your envelope
- Finally, add three flat Petunia Pop pearls to the front of the card
- With that, I’d finished this coordinated card, envelope, and envelope seal set
The Loopy Loop Bow:
I was able to watch Mary Deatherage’s, from Stamps -n- Lingers, Perfectly Pears tutorial. In that video, she showed her loopy-loop bow. That’s what I used for the front of my card. I’m bow-challenged and this technique allows me to relatively easily add ribbon without adding the bulk of a tied bow. If you’ve never seen her videos, you owe it to yourself to watch them. I think she’s the Queen of the Collage. Gorgeous cards!!
Thank you for stopping by today!
Have a Peachy Day!
Sue
Colors Used:
a
dding: 10px;”>tyle=”color: #000000; font-size: 16px; font-family: Arial; font-weight: bold;” href=”https://www.stampinup.com/categories/shop-products/shop-by/color/basics/basic-white?demoid=2155072″> target=”_blank” rel=”noopener noopener”>Basic White</div></div>
Supplies Used:
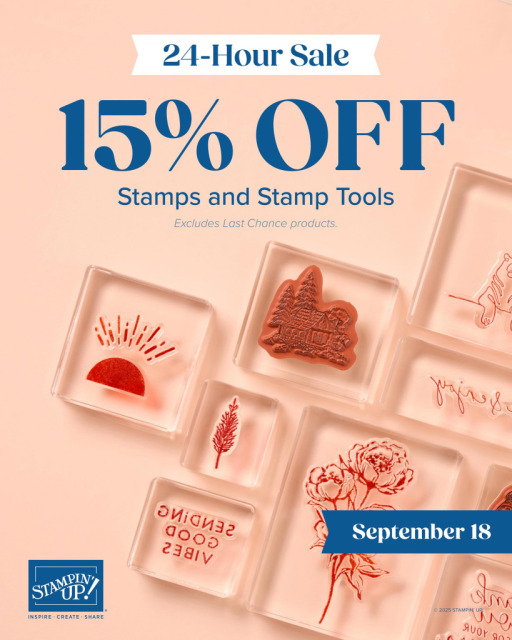
Today is your lucky day! For one day only, today, Stampin’ Up! is having a 15% off sale for stamp sets and stamping tools.