
Welcome to the newest Make My Monday bi-weekly challenge #258. Our host, Heather, chose Snow in August for the theme. When you finish here, please visit the challenge site to see what the rest of the very talented design team members created. Then, don’t forget to upload your creations to our gallery. We look forward to seeing your creations there!
Here’s my hidden flap fun fold card:
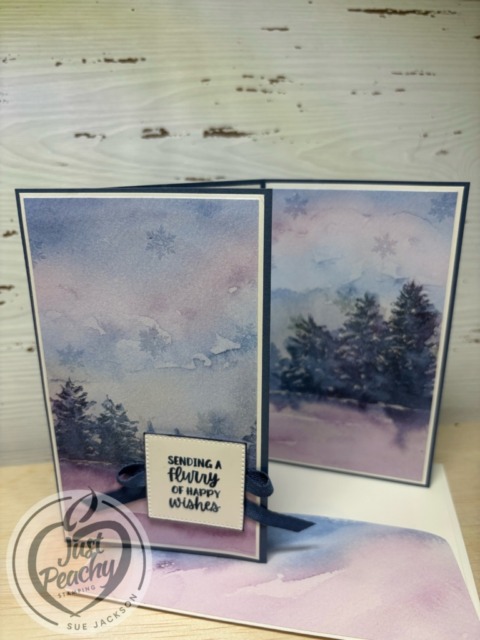
I’ve used this hidden flap card so many times because it lends itself perfectly to 6 x 6 inch DSP, in this case from Thoughtful Journey. You can see some of those cards here, here, and here.

As always with a fun fold card, I will be adding this to the Creative Creases Challenge where the theme is always Anything Goes with a Fun Fold.
Measurements:
I’ve created a template for this card, and all the measurements are on the template. It’s so easy to just get it out of my fun fold mini-binder of templates and create without having to find all the measurements.
Here’s the template:


- Trim a piece of 6 x 6 inch DSP to 5-1/4 inches by 6 inches
- Trim the DSP in half so you have 2 pieces measuring 3 inches by 5-1/4 inches
- You need two mats for the DSP, each measuring 3-1/8 by 5-3/8 inches
- The very inside piece of cardstock measures 3 by 5-3/8 inches
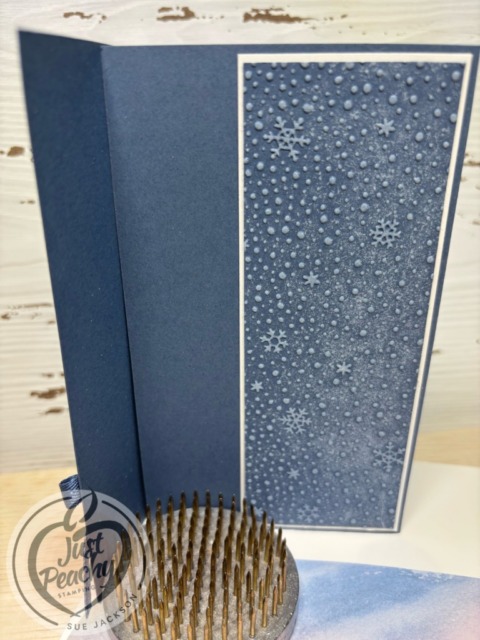
- I had a piece of the embossed Misty Moonlight cardstock and trimmed it to 5-1/4 by 1-7/8 inches
- The mat for the embossed cardstock measures 5-3/8 by 2 inches
- I used a scrap of white cardstock for the sentiment and cropped it using one of the square Stylish Shapes dies
- I trimmed a coordinating piece of DSP to 6 by 2-1/2 inches for the envelope flap
- Then, I punched a 1-inch circle from Misty Moonlight DSP and ran it through my XYRON create-a-sticker for the envelope seal
Putting it Together:
- Add dimensionals to the base as shown in the template to adhere the front flap
- The only other place I used dimensionals was under the sentiment because the rest of the card is already bulky
- This card will fit into a medium Stampin’ Up! envelope for mailing
- Use multipurpose liquid glue to adhere all the other elements of the card
- Since the only snow on the card was the embossed cardstock layer, I stamped some snowflakes from the One of a Kind stamp set using VersaMark ink and clear embossing powder on the winter DSP pieces
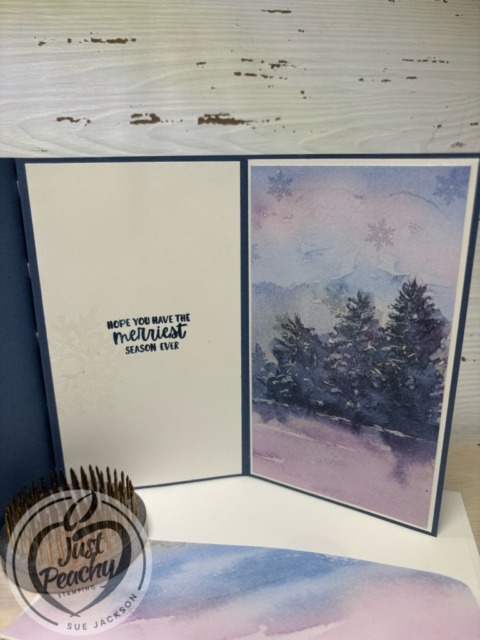
- I stamped a larger snowflake on the inside white cardstock next to the sentiment using VersaMark ink, clear embossing powder, and heat set it with my heat tool
- I stamped the sentiments using Misty Moonlight ink
- I added a loopy-loop bow, from Mary Deatherage, under the front sentiment, for which I will add the directions below
- With that, I’d finished this coordinated card, envelope, and envelope seal set
The Loopy Loop Bow:
I was able to watch Mary Deatherage’s, from Stamps -n- Lingers, Perfectly Pears tutorial. In that video, she showed her loopy-loop bow. That’s what I used for the front of my card. I’m bow-challenged and this technique allows me to relatively easily add ribbon without adding the bulk of a tied bow. If you’ve never seen her videos, you owe it to yourself to watch them. I think she’s the Queen of the Collage. Gorgeous cards!!
Thank you very much for stopping by today!
Have a Peachy Day!
Sue
Colors Used:
Supplies Used:

Who would love a sale on select In Color Merchandise?
We all would, right?
Here are the Promotion Details:
Sales Period: August 5–31
Ordering Deadlines
- Phone: August 29, 2025, at 6:59 p.m. (MT)
- Online: August 31, 2025, at 11:59 p.m. (MT)
- Sale includes select inks, cardstock, Designer Series Paper, embellishments, and other products that include these new In Colors. Only products featured on the 2025–2027 In Colors page are included in this promotion.
- Some products are excluded from the sale, including the Month by Month Album Retreat 2025 kit (167338).
- Products are available only while supplies last.


