
Welcome to the newest Make My Monday bi-weekly challenge #253. Our host for this challenge, Guylaine, chose Something Fishy for the theme. When you finish here, please visit the challenge site to see what the rest of the very talented design team members created. Then, don’t forget to upload your creations to our gallery. We look forward to seeing your creations there!
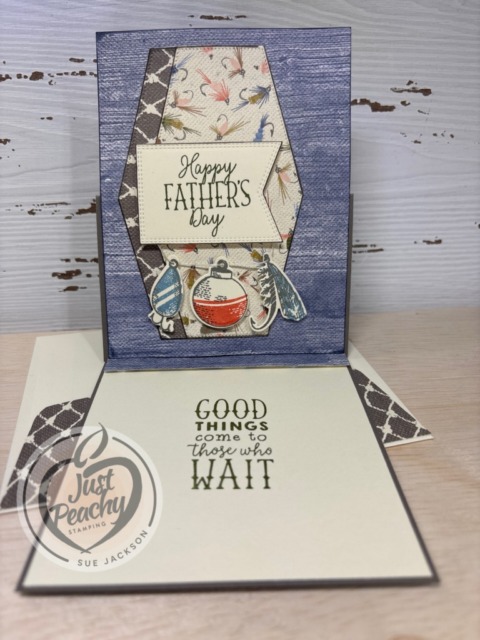
Here’s my fishy easel card:
Measurements:
- Trim a piece of Pebbled Path to 11 by 4-1/4 inches, scored at 2-3/4 and 5-1/2 inches
- Trim a piece of DSP (designer series paper) to 4-1/8 by 5-3/8 inches for the outside and 1/2 by 4-1/8 inches for the inside stopper piece
- Crop two patterns of Let’s Go Fishing DSP using the largest hexagon die from Nested Essentials die set
- Trim a piece of DSP to6 by 2-1/2 inches for the envelope flap
- Punch a 1-inch circle and run it through your XYRON create-a-sticker machine for the envelope seal
- Trim a piece of Very Vanilla cardstock to 4-1/8 by 5-3/8 inches for the inside of the card
- Use scraps of Very Vanilla for the sentiment banner and the hooks and bobber pieces
Putting the Card Together:
- Unless otherwise noted, I used multipurpose glue to adhere the pieces together
- Stamp the sentiment from the Gone Fishing stamp set using Mossy Meadow ink on a scrap of Very Vanilla
- Use Mossy Meadow ink to stamp the inside sentiment on the Very Vanilla cardstock and adhere to the inside of the card
- Stamp the three pieces for the bottom of the card on Very Vanilla using Pebbled Path ink
- Use Calypso Coral ink for the bottom part of the bobber
- Stamp the hook and lure using Boho Blue ink
- Crop the sentiment using a banner die from the Nested Essentials die set, and outline it using a Mossy Meadow marker
- Crop the three bottom pieces using the Gone Fishing die set
- Add dimensionals to the back of the sentiment banner, the three bottom pieces, and the stopper strip of DSP for the inside of the card
- Adhere the two hexagons to the front of the DSP
- Punch tiny holes in each of the three bottom pieces and thread some twine through the holes
- HINT: I wanted to mimic fishing line so I used the center thread of the gold Simply Elegant twine
- To get the center, twirl the end of a length of the gold (or silver) thread counter-clockwise to expose the clear center thread and pull it out
- Dry-fit the placement of the three bottom pieces and adhere the ends of the thread to the back of the sentiment banner
- Adhere the three bottom pieces and the sentiment to the front of the card
- Adhere the front DSP piece to the bottom half of the base of the front of the card
- HINT: Make sure you do not adhere the top half of the DSP to the cardstock base
- Adhere the stopped to the inside Very Vanilla cardstock
- HINT: I usually add the stopper about an inch from the top, which gives a very steep easel
- With that, I’d finished this coordinated card, envelope, and envelope seal set
Thank you for stopping by today!
Have a Peachy Day!
Sue
Colors Used:
Currently Available Supplies Used:
New Kits? Yes, Please!
There are two new kits available now!
First up – The Beautiful Blues Kit retailing for $23.00 USD, product # 165658.
Craft timeless handmade cards for sharing messages of friendship, support, and sympathy with the Beautiful Blues Kit. This all-inclusive crafting kit comes with everything you need to create nine lovely cards featuring hand-painted floral designs and a palette of soothing blues.
These colors, DSP, and die cuts are strikingly gorgeous!


Here’s the video for the Beautiful Blues Kit:
Second – the Share a Smile Kit, retailing for $14.00 USD, product # 165637.
Want to make a difference in someone’s day? Have an uplifting card ready to go at a moment’s notice with the Share a Smile Kit! This all-inclusive crafting kit offers fun, no-fuss crafting, with card bases, envelopes, and precut paper pieces for making bright and cheery designs. Store the completed cards in the included notecard box until you’re ready to give them out!
Check out these adorable cards which are sure to bring a smile to the recipient’s face!


Here’s the video with Sarah from Stampin’ Up!


