
Welcome back to the monthly Stampin’ UP! Demonstrators Fun Fold Blog Hop. If you love fun folds, you’ve come to a hop filled with really great projects by some very talented fellow demonstrators. When you finish here, I hope you will hop along with the rest of the demos using the links below.
It’s just a given that fun fold cards also post to the Creative Creases challenge. Debbie Mageed at Secret Stamper coordinates both this hop and the challenge. Hopefully, you will be inspired to upload your own fun fold project to the challenge!

Here’s my Otterly Amazing fun fold card:


Measurements:
- The Pretty Peacock base measures 7-1/2 by 5-1/2 inches, scored at 4-1/4 inches
- The DSP for the front measures 3 by 5-3/8 inches
- The inside DSP measures 1 by 5-3/8 inches
- I also trimmed a piece of the DSP to 2-1/2 by 6 inches for the envelope flap, which gets trimmed after adhering it
- Next I punched a 1-inch circle from the Balmy Blue DSP that I used on the tag for the envelope seal, which I ran through my XYRON create-a-sticker
- The flap piece measures 3 x 1 inch, scored at 1/2 inch
- Trim a piece of white cardstock to 4-1/8 by 5-3/8 inches
- I used scraps of Pretty Peacock, Lost Lagoon, and Old Olive cardstock for the plants and sentiment tag
Cropping, Tracing, and Stamping:
- Unless otherwise noted, I used multipurpose liquid glue to attach all the pieces together
- Crop the otters from the DSP using the Otterly Amazing dies
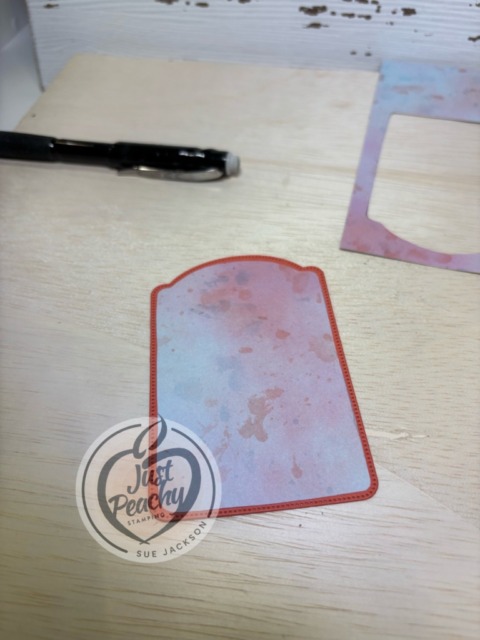
- Crop the tag from Pretty Peacock cardstock using the large tag die from the Greetings of the Season die set
- Pictures are worth 1,000 words, so I am sharing what I did to get the DSP layer for the tag:
- Use the inside edges of the tag die to trace your pattern

- After tracing the inside edges, fussy cut the tag

- Adhere DSP layer to the tag and punch a hole lining up with the hole in the cardstock and then admire your skill
- Crop the plants from the three colors of cardstock and use the coordinating marker to add the stem and leaf lines
- Adding the lines on the plants is optional, I just thought it added dimension
- Adhere the otters and plants to the tag
- Add Lost Lagoon soft cording to the tag
- Wipe down a piece of scrap Lost Lagoon with an embossing buddy
- Stamp the outside sentiment in VersaMark and Pretty Peacock ink, cover with clear embossing powder, and heat set
- HINT: To stamp and emboss in color, first stamp the sentiment in VersaMark ink and, without stamping off, load the sentiment with Pretty Peacock ink
- Stamp the sentiment and quickly add clear embossing powder
- Stamp the inside sentiment on the white piece of cardstock using Pretty Peacock ink
Assembly:
- Adhere the scored 1/2 inch part of the flap to the inside of the card
- Adhere the tag to the other end of the flap
- After adhering the white cardstock, adhere the DSP strip to the inside
- Adhere the front DSP to the base of the card
- Add mini-dimensionals to the right side of the sentiment and use liquid glue to adhere the part that overlaps the tag
- I added one of the Lost Lagoon riverside irregular pearls (from the product suite) to cover the hole in the sentiment tag
- Then, I added two more pearls to the corners of the inside strip of DSP
- With that, I’d finished this coordinated card, envelope, and envelope seal
Back to the SU! Demo Fun Fold Blog Hop:
We all hope you will follow the links below and hop along with us. There’s so much inspiration to be found here. We’d love to see what inspires you to create a fun fold as well. Don’t forget to upload it to the Creative Creases challenge!
Line-up:
- Karen Finkle
- Su Mohr
- Beth McCullough
- Debbie Mageed
- Rae Burnet
- Lisa Ann Bernard
- Tara Carpenter
- Sue Jackson <<<— YOU ARE HERE!
Thank you for stopping by today!
Have a Peachy Day!
Sue
Colors Used:
Supplies Used:
Just in case the card and product suite images didn’t convince you, here’s a short video regarding the Otterly Adorable product suite:


Too cute! I love these cute little guys! TFS
Such a cute card, Sue! I love those otters and haven’t used them enough. Great fun fold to show how sweet the papers are, too. Thank you for joining the blog hop this month and have a wonderful rest of your week.
This is so cute, Sue! Wonderful tip on framing the tag!